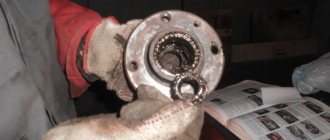
Removing and installing ceiling trim
Ceiling Panel Installation Components (Part 1)
1 - Front Seat Belt 2 - Side Upper Trim Panel 3 - Rear Strut Cover 4 - Rear Side Trim Panel 5 - Rear Door Seal 6 - Hooks 7 - Accessory Slot 8 - Lower Side Panel 9 - Rear Seat Side Trim 10 - Trim rear door sill 11 — Lower section of the B-pillar trim 12 — Front door sill trim 13 — Side segment of the instrument panel
14 - A-Pillar Trim 15 - Front Door Seal 16 - B-Pillar Upper Trim 17 - Side Handle 18 - Luggage Compartment Cover #1 19 - Rear Trunk Trim Panel 20 - Spare Tire Cover 21 - Trunk Storage Box 22 — Luggage compartment tray 23 — Luggage compartment panel #3 24 — Luggage compartment panel #2 25 — Luggage compartment floor 26 — Luggage compartment lid
Ceiling Panel Installation Components (Part 2)
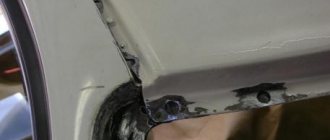
The safety ceiling lining on the classic is located in the front part of the cabin above the windshield. Sun visors are also attached to it. You may need to remove it to install wiring, soundproof the roof, or simply remove the ceiling.
This pad is attached at several points. Namely: handles above the front doors, sun visors and the interior rear view mirror bracket. Accordingly, in order to free the lining from the fasteners and remove it from the ceiling, it is necessary to dismantle the specified elements.
The best place to start is with the handles above the doors. In most VAZ classics, such a handle is only above the passenger door. There is no need to remove it completely, because the ceiling trim is only held in place by the bolt closest to it. We unscrew it and remove the fastening ear of the lining from engagement with the handle.
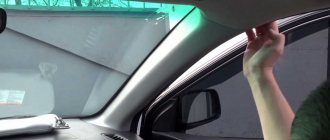
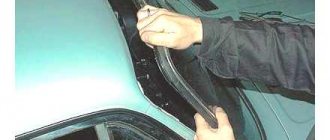
Next, remove the sun visors. To do this, use a Phillips screwdriver to unscrew three screws from the bases of their brackets. Now you need to remove the decorative trims from the A-pillars, otherwise they can be broken when removing the ceiling trim. The linings are secured using three self-tapping screws, screwed in all the way through - unscrew them.
VAZ 2106 roof lining replacement - we do it ourselves
Ceiling 2106 at the location where the front handle and front safety lining are attached
The ceiling of the VAZ 2106 is one of the important elements of the car body, which determines the interior of the car and performs, in addition to protective ones, some technological functions. During a visual inspection of the car’s interior, inspection of the ceiling shows the degree of maintenance of the interior, and dark smudges and stains indicate the need to replace it. Technologically, the ceiling is made of an all-metal sheet of special automotive steel, and is a rigid mount to which the body pillars of the car body are welded.
Ceiling installation VAZ 2106
The ceiling of the VAZ 2106 is supported by 6-7 metal arches, which are attached to the base of the car's roof by welding. It is a plastic rubberized fabric with a thin layer of glued insulation, which is evenly stretched and attached to the metal roof arches. An air space is created between the arches and the ceiling, which plays the role of an air insulating layer. On the ceiling, using special fasteners, auxiliary devices necessary for the comfort and control of the car are held. These include handles for maintaining balance while the vehicle is moving, lights for interior lighting, a rear-view mirror and a safety pad. Additionally, rear and side curtains for windows are mounted on the ceiling.
Assembling the ceiling handle after replacing the fabric layer
Replacing the ceiling trim of a VAZ 2106
Work such as replacing the ceiling trim of a VAZ 2106 is carried out in the following cases:
For a VAZ 2106 car, the ceiling lining is a part fixed in the car at the factory, so its dismantling requires compliance with certain rules when removing this part, so as not to damage the remaining elements of the VAZ 2106 ceiling. So, how to change the ceiling lining on a VAZ 2106 with your own hands, do not resorting to the help of specialists from an automotive technical service center? On our website, car enthusiasts can watch a video on this topic, and the messages of our correspondents are equipped with relevant photo materials. In addition, on our portal you can find the appropriate instructions for carrying out this work.
Removing the ceiling trim of a VAZ 2106
Old or damaged VAZ 2106 ceiling trim that needs to be replaced is removed as follows:
Removing the ceiling trim of a VAZ 2106
Installation of a new ceiling VAZ 2106
Replacing an outdated ceiling
Re-upholstery of a new VAZ 2106 ceiling
We purchase a new VAZ 2106 ceiling at an auto parts store, but you should know that the ceiling, which is sold in a roll, is usually factory-made, and the one folded like a piece of fabric is produced by other enterprises. The price for the ceiling of the VAZ 2106 varies, but it will not force car enthusiasts to spend money, and costs about 2000 rubles.
Dismantling and installation of factory-made VAZ 2106 ceiling
During the dismantling and installation of a factory-made VAZ 2106 ceiling, the following activities are carried out:
Source
Ceiling 2106 at the location where the front handle and front safety lining are attached
The ceiling of the VAZ 2106 is one of the important elements of the car body, which determines the interior of the car and performs, in addition to protective ones, some technological functions. During a visual inspection of the car’s interior, inspection of the ceiling shows the degree of maintenance of the interior, and dark smudges and stains indicate the need to replace it. Technologically, the ceiling is made of an all-metal sheet of special automotive steel, and is a rigid mount to which the body pillars of the car body are welded.
How to change the ceiling on a VAZ 2106
I purchased the headliner from AvtoAll back in 2021 and installed it only now I got around to the ceiling. My VAZ 2107 car had a soft ceiling installed from the factory, and since the old coating had lost its appearance, I decided to install a fresh ceiling. I took it from my family and saw this picture, see photo 1 below
For clarity, the original ceiling in photo 5 is new in photo 6.
The factory insulation, like glass wool, came off and rust appeared there. I cleaned off all the heavy rust with coarse sandpaper and painted it with primer-enamel for rust, see photo 2 above. I used up 1 bottle. This is the result, see photos 3 - 4 above. Instead of the factory ceiling insulation, I used a self-adhesive material that is not afraid of moisture (insulated) 6 mm thick. see photo 7 below.
The ceiling is held in place by 6 steel arches and plastic holders at the edges. First, you need to remove all the brackets that are located under the door seals, then remove the rear and windshield and also remove all the brackets that hold the ceiling at the edges. Next, turn the steel bars counterclockwise to the bottom position. You need to remove them sequentially one after another from the side of long fasteners; this is not difficult. The new ceiling is in the shape of a rectangle and therefore you need to cut the shape yourself. The old ceiling is laid on top of the new covering and cut to size. I advise you to trim the edges a little more; this will make it easier to install the new coating. Make holes for the arcs in the same places as on the original ceiling. Installing the ceiling is as follows. Start installing the arches from the rear window. First, insert the short holder into the hole in the body and then the long one from the opposite side and turn it clockwise. Pay attention to the tension of the ceiling when turning the arc so that the covering does not sag between the arcs. Make marks in advance with a pencil where the side handles and rear view mirror will be attached. After installing all the rods, carefully put on the brackets, stretching the ceiling along the edges. It is better to replace on a warm sunny day or in a warm garage. The ceiling material must be elastic, otherwise it may tear. After installing all the staples, use a sharp blade to trim the edges. See the result in photos 8-9 below.
I installed plastic side stands from the seven with a hard ceiling, which I also bought from Avto.all. I didn’t find any soft new ones. You can see how it looks on the car below in photos 10-11
A week after installation, almost all the wrinkles were gone. At the moment the ceiling looks great. Thank you for reading my review, maybe some of you will find my experience useful. I thank AvtoAll for the availability of such rare goods as a new ceiling for a classic.
Ceiling installation VAZ 2106
The ceiling of the VAZ 2106 is supported by 6-7 metal arches, which are attached to the base of the car's roof by welding. It is a plastic rubberized fabric with a thin layer of glued insulation, which is evenly stretched and attached to the metal roof arches. An air space is created between the arches and the ceiling, which plays the role of an air insulating layer. On the ceiling, using special fasteners, auxiliary devices necessary for the comfort and control of the car are held. These include handles for maintaining balance while the vehicle is moving, lights for interior lighting, a rear-view mirror and a safety pad. Additionally, rear and side curtains for windows are mounted on the ceiling.
Replacing the ceiling trim of a VAZ 2106
Work such as replacing the ceiling trim of a VAZ 2106 is carried out in the following cases:
For a VAZ 2106 car, the ceiling lining is a part fixed in the car at the factory, so its dismantling requires compliance with certain rules when removing this part, so as not to damage the remaining elements of the VAZ 2106 ceiling. So, how to change the ceiling lining on a VAZ 2106 with your own hands, do not resorting to the help of specialists from an automotive technical service center? On our website, car enthusiasts can watch a video on this topic, and the messages of our correspondents are equipped with relevant photo materials. In addition, on our portal you can find the appropriate instructions for carrying out this work.
Removing the ceiling trim of a VAZ 2106
Old or damaged VAZ 2106 ceiling trim that needs to be replaced is removed as follows:
Removing the ceiling trim of a VAZ 2106
Installation of a new ceiling VAZ 2106
Replacing an outdated ceiling
Re-upholstery of a new VAZ 2106 ceiling
We purchase a new VAZ 2106 ceiling at an auto parts store, but you should know that the ceiling, which is sold in a roll, is usually factory-made, and the one folded like a piece of fabric is produced by other enterprises. The price for the ceiling of the VAZ 2106 varies, but it will not force car enthusiasts to spend money, and costs about 2000 rubles.
Dismantling and installation of factory-made VAZ 2106 ceiling
During the dismantling and installation of a factory-made VAZ 2106 ceiling, the following activities are carried out:
Source
Stele on a VAZ 2106 car
In its current design, the VAZ 2106 has a ceiling with many functions, including:
Reasons for replacing or re-upholstering the ceiling of a VAZ 2106
The main reasons for replacing or re-upholstering the ceiling of a VAZ 2106 are:
In the first two cases of the VAZ 2106, the ceiling replacement is carried out with the installation of a standard factory-prepared ceiling. It comes, as a rule, in pastel tones, as well as white with shades and brown colors.
If there is no need for the third option - tuning the VAZ 2106 ceiling, then there is quite a color scheme that suits a real car enthusiast. As a rule, it is very noticeable and is associated with a tuned interior interior.
Installation of factory ceiling VAZ 2106
It is necessary to replace the ceiling of the VAZ 2106, both in factory workshops (at a car technical service station) and in garages where a special car is located . If in the first phase all work will be carried out by car mechanics, then in another case, to replace the ceiling of a VAZ 2106 with your own hands, you will need professional skills, knowledge of the basics of metalwork and practical use. She is handy with tools.
The standard ceiling of the VAZ 2106 is a soft plastic material of the same size. Like all spare parts for a car, there are original and non-original ones. Original ceilings are produced in rolled factory packaging, but are rarely sold out, such products are used to supply VAZ repair parts. Non-original ceilings are most often sold on sale, they are usually sold with a burnt look, in a piece that significantly folds their end surface, without bumps, stretching on the back of the car.
When it comes to choosing a ceiling color, you have to choose a stylish design line for the interior of the cabin, which is similar in tone to the upholstery, textile or dermatin upholstery of the seat and transport card. u.
The procedure for installing the factory ceiling of a VAZ 2106
To install the factory ceiling of the VAZ 2106, you need to carry out the following steps:
The assembly of the ceiling of the VAZ 2106 is carried out in a reverse order, in which the new ceiling is carefully placed on the arches, starting with 6 (7), in which you do not forget to carefully trim the edge of the ceiling, place them under the cracked glaze, lining and other accessories and put them on glue " Moment". On our website you can watch a video of replacing the ceiling of a VAZ 2106 where the work carried out is popular.
Diet is often to blame. How to change the ceiling on a VAZ 2106 when there is a factory-made component? It’s no secret that our car enthusiasts are trying to get the necessary spare parts for a car of a completely different type.
So in this type of a lot of Vlasniks “Zhiguli” will fit under the new ceiling of the VAZ 2106 screen protector.
How to change the ceiling on a VAZ 2106 using a screen protector
There are two routes to choose from a screen protector under the ceiling of a VAZ 2106:
For this purpose glue BF-88 is used, which is called “Shevka” glue. We are careful to make a visor from a curtained area according to the configuration of the ceiling, leaving small reserves of fabric at the back. Carefully coat the leather section with glue, carefully gluing the entire surface well. The skin area is smoothed, stretched, so that there are no humps or irregularities. After completing the work on the glued material, we allow the surface to dry for an hour, and cut off the seams of the screen protector;
Installation of a hard ceiling on a VAZ 2106
Hard ceiling on a VAZ 2106 Acting Russian car enthusiasts, in order to support a soft ceiling in a good situation, install a hard ceiling on a VAZ 2106 that fits the VAZ 2107 model. The ease of installing a “seven-shaped” ceiling is related because they avoid all technological open and you won’t have to work on any of the locker doors.
The advantage of installing a hard ceiling on a VAZ 2106 lies in the fact that it is a less laborious process ; in any case, the front seats are not removed, but the front seats are dismantled, which will significantly simplify installation. When such a ceiling is installed, the canvas itself is pushed to the side above the door handles, in front - with a trauma protection pad and looking in the rearview mirror.
In the center there is an opening for the lampshade, which also acts as a fastening point. Then you need to drill a hole in the ceiling and create a fastening level, covering them with decorative plugs.
Tuning the ceiling of VAZ 2106
Tuning the ceiling of a VAZ 2106 There are a lot of options for tuning the ceiling of a hammock "six"; on our website you can choose a car washer, similar to the photo of tuning a VAZ 2106 on the right for a little - pick up money for tuning cars
Some car owners install an LCD screen, which is mainly used for passengers in the rear seats.
You can also install a temperature sensor that shows the temperature in the cabin and outside, a radar detector and a rubber connection. It is important to decorate the ceiling of the VAZ 2106 with light-emitting diode lamps, which reinforce the contour of the ceiling.
Lada 2101 Family › Logbook › Ceiling installation
Hi all! I put off this moment for a long time, but in the end there was nowhere to retreat, the weather was pressing, autumn was ahead, and it would hardly have been possible to stretch the ceiling properly in the cold. There is practically no useful information on this topic on the Internet; rather, on the contrary, there is a lot of incomprehensible and confusing information. Having no experience, it was not easy for me to understand what, how and where to pull so that everything would turn out smoothly and without wrinkles. In this regard, my wife helped a lot, I took her with me to the garage as an assistant and moral support, after all, working with fabrics is closer to women, and it’s much easier to install together. The ceiling was bought new from the times of the USSR, it is different in color from those that are now sold in stores, beige, warm, “lamp”, I like this better, the handrails and all the fasteners are still original, I left the original plastic linings on the handrails that were intact, the rest new. And now about the installation itself.
We rearrange the arcs from the old ceiling to the new one, the main thing is not to confuse their places. On the new skin, you must first cut the transverse folds along the edges, into which the arcs are inserted, according to the intended templates.
Later, I had to cut even more in place, otherwise folds would form in the place where the arcs were rounded, which could not be stretched even if I wanted to.
Then, putting on the anti-creaking bushings, we install the sixth (rear) arch in place and then the fifth, fourth, etc., moving forward.
Then we turn the sixth arc up and hook it behind a special tongue that fixes the arc in the upper position, then we lift the remaining ones one by one.
I fixed the first arc with wire to the roof reinforcement, otherwise it always tries to turn back, which is why the upholstery sags. One good book recommends something similar.
Next, I straightened the ceiling a little in arcs from the center to the edges and then stretched it along the openings of the windows and doors, moving from the rear window forward. At first I fixed it by the edges with office clips; with them it is much easier to tighten the ceiling where it becomes necessary as the installation progresses.
After the back part from the middle pillars was stretched in this way, all the waves were removed and the handrails were installed, removing several clamps one by one, I glued the ceiling along the edges of the openings with 88 glue and left it to dry for a day. Only after this did I attach the metal brackets. In the same way, I stretched the front half of the ceiling, installed the right handrail and sun visor mounts. It took me 75 staples.
Lada 2101 White Liner › Logbook › Hard ceiling 2107 to 2101 part 2
Friends, the weekend has arrived and I finished the ceiling as planned. The first thing I did was pull it over
, painted the canopies and the fireplace chandelier black, the canopies with matte paint, the chandelier with glossy paint
then I tried the whole thing on
We are putting off the ceiling for now. To begin with, I pulled out the rear window and removed the old ceiling and was horrified
The ceiling was cleaned, degreased and glued as required
We install the ceiling through the rear window, as we installed it, we figured for convenience, I immediately installed the glass back. We start fixing the ceiling with the handles, then the rear view glass, then the pistons at the rear wall, and lastly the lampshade and visors. I took the caps from a gazelle, black
Friends, be careful when attaching the lamp frame and do not drill into the roof!
When we do the wiring for the ceiling, do not forget to carefully insulate everything. Hard ceiling 2107 to 2101 part 1
Good luck to everyone!
Source
Ceiling on a VAZ 2106 car
In its current design, the VAZ 2106 ceiling performs several functions, including:
Reasons for replacing or reupholstering the ceiling of a VAZ 2106
The main reasons for replacing or reupholstering the ceiling of a VAZ 2106 are:
In the first two cases with the VAZ 2106, the ceiling is replaced with the installation of a standard factory-colored ceiling. It comes, as a rule, in pastel colors, as well as white with shades and brown. As for the third option - VAZ 2106 ceiling tuning, here an arbitrary color is used, which the car enthusiast directly likes. As a rule, it can be very catchy and is associated with the tuned colors of the interior.
Tuning the ceiling of a VAZ 2106
Installation of factory ceiling VAZ 2106
The required replacement of the VAZ 2106 ceiling is carried out both in the factory (at a car service station) and in the garage where a personal car is parked . If in the first case all the work will be carried out by specialists - car mechanics, then in the other option, replacing the ceiling of a VAZ 2106 with your own hands requires certain professional skills, knowledge of the basics of plumbing and practical ability in handling tools. The standard ceiling of the VAZ 2106 is a soft plastic perforated material of the appropriate size. Like all spare parts for a car, they can be original and non-original. Original ceilings are produced in roll factory packaging, but they are extremely rarely sold on sale; such products are provided to VAZ repair bodies. Non-original ceilings are found on sale more often; they are usually sold rolled up in a bundle, which makes it much more difficult to install them evenly, without bumps, on the roof of the car. As for the choice of the shade of the ceiling, it must correspond to the general design line of the interior, be close in tone to the leather, fabric or leatherette upholstery of the seats and vehicle panels.
The procedure for installing the factory ceiling of a VAZ 2106
To install the factory ceiling of the VAZ 2106, the following steps are required:
How to change the ceiling on a VAZ 2106 to a leatherette product
There are two ways to use leatherette products under the VAZ 2106 ceiling:
Installing a hard ceiling on a VAZ 2106
Hard ceiling on VAZ 2106
Some Russian car enthusiasts, tired of maintaining the soft ceiling in good condition, install a hard ceiling on the VAZ 2106, which is suitable for the VAZ 2107 model. The convenience of installing the “seven-foot” ceiling is due to the fact that they have all the same technological holes and do not make any mechanical modifications has to. The advantage of installing a hard ceiling on a VAZ 2106 is that it is a less labor-intensive process in which the windows are not removed, but the front seats are dismantled, which greatly simplifies its installation. When installing such a ceiling, the product canvas itself is supported on the side by door handles, and on the front by a safety pad and a rearview mirror. A hole is made in the center for the lampshade, which also acts as an attachment point. At the back you need to drill a hole in the ceiling and make a flush mount, covering them with decorative plugs.
Tuning the ceiling of VAZ 2106
Tuning the ceiling of a VAZ 2106
How to reupholster the ceiling of a VAZ 2106 with your own hands video
Such a part of the interior of a car as the ceiling is decisive in determining the degree of car maintenance, therefore, constant attention must be paid to the issues of reupholstering the ceiling of the VAZ 2106.
Ceiling and safety pad for VAZ 2106
In its current design, the VAZ 2106 ceiling performs several functions, including:
- Classic. The classic function takes us back to the time when the presence of a ceiling (roof) formed the type of car body;
- Security. The security function of a car ceiling is that it serves to retain heat during the cold season;
- Decorative. The decorative function of the ceiling of the VAZ 2106 is that it is part of the interior of the car. It is by the condition of the interior ceiling that you can determine the degree of car maintenance.
The main reasons for replacing or reupholstering the ceiling of a VAZ 2106 are:
- Accidental damage to the ceiling due to careless work in the cabin
- Failure of the interior ceiling due to its long-term use and natural wear
- Tuning or pre-sale preparation of a car
In the first two cases with the VAZ 2106, the ceiling is replaced with the installation of a standard factory-colored ceiling. It comes, as a rule, in pastel colors, as well as white with shades and brown. As for the third option - VAZ 2106 ceiling tuning, here an arbitrary color is used, which the car enthusiast directly likes. As a rule, it can be very catchy and is associated with the tuned colors of the interior.
The required replacement of the VAZ 2106 ceiling is carried out both in the factory (at a car service station) and in the garage where a personal car is parked . If in the first case all the work will be carried out by specialists - car mechanics, then in the other option, replacing the ceiling of a VAZ 2106 with your own hands requires certain professional skills, knowledge of the basics of plumbing and practical ability in handling tools. The standard ceiling of the VAZ 2106 is a soft plastic perforated material of the appropriate size. Like all spare parts for a car, they can be original and non-original. Original ceilings are produced in roll factory packaging, but they are extremely rarely sold on sale; such products are provided to VAZ repair bodies. Non-original ceilings are found on sale more often; they are usually sold rolled up in a bundle, which makes it much more difficult to install them evenly, without bumps, on the roof of the car. As for the choice of the shade of the ceiling, it must correspond to the general design line of the interior, be close in tone to the leather, fabric or leatherette upholstery of the seats and vehicle panels.
To install the factory ceiling of the VAZ 2106, the following steps are required:
- Spread the ceiling on a flat place so that it takes on the required configuration, or, as they say, “rests” so that in the future it can be evenly attached to the surface;
- The temperature when reupholstering the VAZ 2106 ceiling in the salon and garage should be the same, ranging from + 10 to + 25 degrees Celsius;
- Carefully bend the so-called from the side of the rear window. “crocodiles” under the rubber glass seal, release the material of the old ceiling from under the seals, unbend the petal securing the first arc;
- Similarly, we remove all the arcs and collect all the “crocodiles” in a separate place;
- Before doing this, remove the front safety pad.
Assembling the ceiling of the VAZ 2106 is carried out in the reverse order, while carefully attaching the new ceiling to the arches, starting from 6 (7), and do not forget to carefully trim the edges of the ceiling, place them under the glass seal, trim, and other accessories and place them on glue "Moment". On our website you can watch a video of replacing the ceiling of a VAZ 2106, which outlines the work being carried out quite popularly. The question often comes up. how to change the ceiling on a VAZ 2106 in the absence of a factory-made product? It is no secret that our car enthusiasts know how to adapt a completely different product to the necessary spare part for a car. So in this case, many Zhiguli owners adapt leatherette to the new ceiling of the VAZ 2106.
There are two ways to use leatherette products under the VAZ 2106 ceiling:
- Sew the leatherette fabric in such a way as to create loops, i.e. copy the ceiling trim. This is quite painstaking work, but the ceiling will be of very high quality. The only drawback is that the firmware on the front side of the ceiling will be visible;
- Glue the leatherette fabric exactly onto the old trim. For this purpose, BF-88 glue is used, which is referred to as “shoe” glue. We make a cut out of leatherette according to the configuration of the ceiling, leaving small reserves of fabric for the folds. Gently coat each area with glue; it is important to glue the entire surface well. We smooth out each section and stretch it so that there are no bumps or irregularities. After finishing work on gluing the material, we give the product time to dry completely and cut off the excess pieces of leatherette;
- We install a new ceiling on the metal arches of the ceiling, attach the fabric under the windshield seal, then install a safety lining with sun visors and a rearview mirror;
- With an assistant, we tighten the entire structure so that there are no uneven spots or bumps, and secure it to the rear window seal.
Hard ceiling on VAZ 2106
Some Russian car enthusiasts, tired of maintaining the soft ceiling in good condition, install a hard ceiling on the VAZ 2106, which is suitable for the VAZ 2107 model. The convenience of installing the “seven-foot” ceiling is due to the fact that they have all the same technological holes and do not make any mechanical modifications has to. The advantage of installing a hard ceiling on a VAZ 2106 is that it is a less labor-intensive process in which the windows are not removed, but the front seats are dismantled, which greatly simplifies its installation. When installing such a ceiling, the product canvas itself is supported on the side by door handles, and on the front by a safety pad and a rearview mirror. A hole is made in the center for the lampshade, which also acts as an attachment point. At the back you need to drill a hole in the ceiling and make a flush mount, covering them with decorative plugs.
There are quite a lot of options for tuning the ceiling of the domestic “six”, on our website the car enthusiast can choose any photo of the VAZ 2106 tuning he likes, it will be a small matter - to collect financial resources for tuning the car. Some car owners install an LCD screen, which is used mainly for passengers in the rear seats.
Also, one of the options for updating the ceiling is to paint it in different colors, which makes the ceiling an element of a spaceship. But this is already for the coolest tuning fans. There are those who like to apply airbrushing to the ceiling, but this is out of the extreme desires of the car enthusiast.
The VAZ 2106 car of the Zhiguli family was produced back in the days of the Soviet Union. The first car of this model rolled off the assembly line of the Volzhsky Automobile Plant in 1976. The new model received a number of improvements and changes in the design and lining of the car body. The engineers also paid attention to the interior of the car - it became comfortable, ergonomic and reliable. It was the salon that became the subject of our attention. Over the 40 years of its existence, the good old “six” has become a retro car, while constant use in the harsh conditions of our reality has negatively affected the condition of the car in general and the interior in particular. While paying attention to car maintenance, owners forget about the interior or simply don’t find the time or finances for it. Over time, the interior of the car becomes obsolete morally and, of course, wears out physically.
Today there are a huge number of workshops on the service market that will help restore the interior of any car.
By placing your car in the hands of professionals, you will receive high-quality results for such types of services as:
- reupholstering the seat trim, while repairing the seat structure is possible;
- sewing covers to order;
- reupholstery or restoration of door cards (panels);
- restoration of paint and varnish coatings of wooden interior elements;
- restoration and tuning of the car dashboard;
- sound insulation;
- installation of an audio system;
- and etc.
You will, of course, be satisfied with the result, but the cost of these services is often high. Therefore, it is not advisable for owners of old domestically produced cars to shell out money from their pockets for interior repairs, which sometimes turns out to be more than the cost of the car itself. Only car restorers can afford such a luxury, but they pursue completely different goals.
But this does not mean that you can forget about the idea of restoring the salon of your faithful friend. The stores have a fairly wide range of inexpensive and high-quality materials that can be used for DIY repairs. Having examined the range of automotive, construction and furniture accessories stores, we can choose what is suitable for us to restore the interior.
Let's consider the list of interior elements of the VAZ 2106 car that can be improved, and those that are subject to maximum wear and tear during operation:
- seats;
- interior trim elements (linings on pillars and panels);
- door panel trim;
- ceiling;
- rear panel trim;
- floor covering;
- dashboard.
For almost 30 years of production of the car, the interior trim was made in many different colors: black, gray, beige, brown, blue, red and others.
Elements such as: seat upholstery - it included a combination of leatherette and velor; door panel trim - made of fiberboard and upholstered in leatherette; leatherette gear lever cover, as well as a textile carpet.
The perforated ceiling stretched on spokes was made in white or light gray.
These interior elements give the car comfort, sophistication and individuality.
Over time, seats trimmed with velor become unusable, lose their original appearance, and the upholstery breaks. It will be very difficult to restore the seat yourself; you need to have the skills of a tailor and have special sewing equipment. It is unlikely that you will be able to do this with just a desire. Therefore, in this case, there are two options: contact a seat reupholstery shop, install foreign-made seats in the car (more on this below), or change the upholstery yourself.
The choice of materials and colors offered by the studio is very large; by combining them, you can realize any of your ideas. You can also change the foam, change the shape of the seat and even install heating.
The cost of work in the studio will vary greatly depending on what materials you want to use. It can be fabric, Alcantara, velor, leatherette or genuine leather (the prices of which also vary depending on the quality and manufacturer).
For high-quality upholstery of seats you will have to pay a decent amount, on average from 8 thousand rubles for a set of seats covered with fabric; other materials will cost more. Experienced drivers know that it is quite possible to reupholster seats yourself.
Brief instructions for reupholstering seats yourself:
- The seats are removed from the car and installed on a table or other surface convenient for work.
- The factory seat trim is removed. It is advisable to do this carefully so as not to tear it. In order to remove the upholstery from the seat, you must first remove the headrest from the back of the seat:
- Use silicone grease like WD 40 to lubricate the headrest pillars so that the grease flows through the pillars into the headrest mounting;
- the headrest goes all the way down;
- With a sharp upward movement, the headrest is pulled out of the mount.
- The removed skin is ripped apart at the seams.
- The parts are laid on new material and their exact outline is outlined. Separately, it is necessary to outline the outline of the seam.
The basis of the door trim consists of fiberboard. Over time, this material, absorbing moisture, undergoes deformation. The trim begins to move away from the inner door panel, bend and tear the clips out of their seats. You can purchase new casing and install it on new clips, then the casing will last for a long time.
For those wishing to make the cladding in the same style as other interior elements, it is necessary to make a new cladding base. The base material can be the same fiberboard or plywood. It’s even better to use a less hygroscopic material, such as plastic or plexiglass, they will last longer and will not deform over time.
The procedure for making door trim:
- The door trim is removed.
- Using a knife, the factory leatherette is separated from the base of the skin and removed.
- The fiberboard base is placed on a new sheet of material, pressed tightly and the contour of the factory base is traced, taking into account the holes for the clips, bolts and window lifter handles.
- A new base is cut out using a jigsaw. All holes are drilled.
- The prepared material is cut out along the contour of the base, taking into account an allowance of 3–4 cm for turning.
- The material is stretched onto the base, the folded edges are glued, and can additionally be secured with staples.
- New clips are inserted.
The trim for the rear doors is manufactured in a similar manner.
The manufactured base can be covered with any suitable material. It can be car carpet, leatherette, Alcantara. To create a soft covering, a sheet of foam rubber 5–7 mm thick is first glued onto the base.
Door trim can be used to install sound system speakers. For these purposes, it is better to use a special acoustic podium. To install speakers in a door, it is recommended to first soundproof it.
The rear parcel shelf in a car is a very convenient place to install acoustic speakers. Most often, this is what VAZ 2106 owners do. To achieve better sound from the acoustic system, a new podium shelf is installed instead of the standard shelf. It is made mainly from chipboard or plywood (10–15 mm) and podiums with a diameter corresponding to the speakers are installed on it. The manufactured shelf is covered with the same material as the door trim.
- The factory panel is removed from the vehicle.
- Measurements are taken and a cardboard template is made. It is also possible to make a template using a factory panel.
- If the shelf is acoustic, then the placement of the speakers is marked on the template.
- A panel of chipboard (16 mm) or plywood (12–15 mm) is cut out using a jigsaw according to the shape of the template.
- The edges are processed. Taking into account the thickness of the shelf, the bevel of the side on which the panel is located to the glass is calculated. Holes are prepared for attaching the panel to the body with bolts or self-tapping screws.
- The material is cut according to the shape of the template, taking into account the twist.
- The material is stretched onto the panel, the fold is secured with glue or staples. If Carpet is used, it is glued to the entire covered area.
- The panel is installed in its original place and secured with self-tapping screws.
The floor covering is a textile carpet. It is most susceptible to wear and contamination from the feet of passengers and transported goods. It can be made from any suitable material: carpet, carpet, linoleum.
- The seats, plastic door sills and pillars, heating system frames, and seat belt fasteners are removed.
- The factory interior floor trim is removed.
- The sheathing, cut to the factory shape, is spread on the floor and carefully leveled.
- The removed interior parts are installed in the reverse order of removal.
High-quality sound insulation is a source of increased comfort. This statement is appropriate for any car, and even more so for domestic ones. The soundproofing process is not complicated, but very painstaking. You can do it yourself.
In order to avoid problems when working on soundproofing installation, I ask you to adhere to three basic rules:
- Carefully remember or write down the procedure for disassembling the interior. Sketch or mark on the wiring the places where the wires and connectors are connected. Place removed parts and fasteners in groups so as not to lose anything.
- Clean thoroughly from dirt and degrease the surface before applying sound insulation elements. Carefully measure the part before cutting the material and applying it to the surface of the body.
- Immediately take into account the thickness of the applied materials so as not to lose the necessary clearances for installing interior trim elements during assembly.
If you have little free time, the work of applying sound insulation can be divided into stages. For example, disassemble the door, apply sound insulation and put it back together. On your next free day you can make the next door, etc.
If you do soundproofing yourself, without outside help, you can easily do it in 5 days. We are talking about complete sound insulation of a domestically produced car in a hatchback body, taking into account sound insulation of the luggage compartment, complete disassembly of the interior and removal of the instrument panel.
Tools required for soundproofing work:
- a set of tools for disassembling the car interior;
- tool for removing trim clips;
- knife;
- scissors;
- roller for rolling vibration insulation;
- construction hair dryer for heating the bitumen layer of vibration insulation;
- gloves to protect hands.
Noise insulation of a car is carried out using two types of materials: vibration-absorbing and sound-absorbing. The choice of material on the market is huge - different thicknesses, absorption characteristics, different manufacturers. The cost is also very different; for any budget, it’s up to you to decide which material to choose. Naturally, expensive materials are more technologically advanced and have an advantage over cheap ones, and the results from their use will be better.
The total area of processed surfaces is 6.9 m2. It is recommended to take extra material. In addition, it is necessary to take 10–15% more sound-absorbing material, because it covers vibration insulation.
Before starting work on installing sound insulation, I recommend eliminating all sources of noise, especially those inherent in domestic cars. Such sources may include: unscrewed parts that make rattling sounds; wires dangling under the dashboard, worn door locks that do not hold the door closed well; loose door hinges; outdated rubber seals, etc.
The procedure for applying soundproofing materials:
- The surface is cleaned of dirt.
- The surface is degreased.
- Using scissors or a knife, a part of vibration-absorbing material of the desired shape is cut out.
- The workpiece is heated with a hair dryer to give it elasticity.
- Remove the protective paper from the sticky layer.
- The workpiece is applied to the surface with a sticky layer.
- It is carefully rolled with a roller to remove the air gap between the surface and the material.
- The surface of the vibration-absorbing material is degreased.
- Sound-absorbing material is applied.
- Presses down tightly with your hands.
The noisiest areas on the interior floor are the transmission area, the cardan tunnel, the sill area and the wheel arch area. These areas are subject to intensive processing of vibration-absorbing materials. The second layer is applied to the entire surface of the bottom. Do not forget that the technical holes and seat mounting brackets must not be covered with tape.
Using the same principle, we cover the front part of the cabin - the engine compartment. The material is applied right up to the windshield. The large number of installed units and wiring harnesses makes it difficult to operate here. However, this element is very important to achieve the overall effect of sound insulation. If you neglect it, the sound of a running engine against the background of a general reduction in noise will cause discomfort.
Recommendations for applying materials to the engine compartment and interior floor:
- When removing factory sound insulation, it is advisable to thoroughly clean the surface of its residues. Clean and degrease the surface thoroughly.
- The material begins to be applied first to the engine compartment, starting from the top, from the windshield rubber, then smoothly moves to the floor of the cabin.
- Large, flat surfaces that are subject to vibration are sealed. This can be checked by knocking on the surface; it will rattle.
- Open holes in the engine compartment are sealed to prevent cold air from entering in winter.
- The maximum area on the engine compartment is covered.
- The wheel arches and transmission tunnel are treated with an additional second layer or thicker material is used.
- It is not necessary to treat brackets and stiffeners with vibration isolation.
- It is necessary to cover the entire surface with sound insulation, avoiding any gaps.
Pay attention to the factory sound insulation. Don't rush to throw it away. In some areas, for example, there will be enough space under the feet of passengers and the driver to leave it together with the new sound insulation. It won’t hurt, on the contrary, it will be an excellent addition in the fight against noise from the engine and wheels. It can be placed on top of new materials.
Doors are processed in two stages. First, the internal part, i.e. the element that is painted on the outside of the car (panel), and then the door panel with technical openings. The openings are also sealed. The inner part can only be treated with vibration insulation, no more than 2 mm thick, this will be enough. But we carefully glue the panel, covering all the holes, this will also help keep the interior warm in winter.
- The door handle is removed, it is fastened with three bolts covered with plugs.
- The window lifter handle and the decorative cap from the door opening handle are removed.
- The clips are unfastened and the door trim is removed. Unscrew 4 self-tapping screws and remove the top trim.
The result of quality work done will be noticeable immediately. The noise level in the car will decrease by up to 30%, in fact, this is quite a lot.
You will not be able to achieve results comparable to modern foreign cars, no matter how hard you try. In them, the noise level emitted by the operation of components and assemblies is initially several times lower.
The instrument panel is most often subject to alterations, because it is not only a decorative element, but also the driver’s “working area”. It contains car control elements, an instrument panel, a control panel and elements of the heating system, and a glove box. The instrument panel is constantly in the driver's field of vision. What car enthusiasts come up with in the process of improving the instrument panel: they cover it with leather or Alcantara; covered with flock or rubber; install multimedia devices; additional sensors; They make illumination of the panel, controls, glove box, in general, what only your imagination can do.
In order to apply a new coating to the panel, it must be removed from the vehicle. This procedure is very labor-intensive, so it is recommended to do the work as a whole when you remove the panel to install soundproofing materials.
By the way, any owner of a VAZ 2106 knows that the heating system here is imperfect and, in severe frosts, problems with glass fogging may arise, and sometimes it’s just cold in the cabin. To improve the operation of the heater, the instrument panel often also has to be removed. Therefore, it is necessary to clearly understand in advance what type of work you are going to do before starting to disassemble the interior, so as not to do the work twice.
On the dashboard there are 5 round instruments, very characteristic of the VAZ 2106. To improve the instrument panel, it is proposed to cover it with material or apply a coating, just like the panel. To do this, the shield must be removed and all devices removed from it.
In the devices themselves, you can change the weak factory backlight to LED, choosing the color of the LED to your taste. You can also change the dial. You can choose a ready-made one or make it yourself.
The white dial of the device, combined with a good LED backlight, will be easy to read in any light.
The illumination of the glove box can be improved using an LED strip, which is attached to the top inside the box. The tape is powered from the factory end switch.
- 12 V LED strip is selected by color.
- The required length is measured and cut according to a special mark printed on the tape.
This is perhaps the most important element in the car interior. While driving on long trips, the driver should not experience discomfort from an uncomfortable seat. This can lead to increased fatigue, as a result of which the trip will turn into torture.
The factory seat of the VAZ 2106 is not particularly comfortable compared to modern cars. It is too soft and lacks lateral support. Over time, the foam rubber becomes obsolete and begins to fail, the springs weaken, and the casing breaks.
We talked above about re-tightening the seat trim, but there is a second option, which today is very often chosen by Zhiguli owners - this is installing seats from foreign-made cars into the car. The advantages of these seats are obvious: comfortable seating with lateral back support, high seat back, comfortable headrest, wide range of adjustments. It all depends on which model of seats you choose. It is worth noting that often only the front seats are subject to replacement, because choosing a rear sofa is very difficult.
As for choosing suitable seats for the VAZ 2106, any that fit the dimensions of this car will do, because the fastenings will still have to be redone during installation. To modify the fasteners suitable for installing new seats, you may need a welding machine, a metal angle, an angle grinder, or a drill. All this is necessary to form new supports on the interior floor that coincide with the seat slides, as well as for the manufacture of brackets. What kind of fastenings you make depends on the seats and your creativity.
List of car models whose seats are popular for installation in the VAZ 2106:
- Volkswagen Passat B3;
- Ford Scorpio;
- Renault 19;
- Ford Focus;
- BMW E34;
- Opel (produced in the 80s);
- Mazda 626.
It’s up to you to decide which seats to install in your car instead of the standard ones, which ones suit your liking and budget.
If we talk about the disadvantages associated with the installation of foreign seats, we can highlight the following: possibly a decrease in the free space between the seat and the door; you may have to stop moving the seat on the slide; there may be a slight displacement of the seat relative to the steering column.
There are also more serious difficulties associated with installing non-original seats. The seat back may be very high and the height of the seat will not fit. In this case, you can shorten the back of the seat itself. This is a labor-intensive process:
- The seat back can be disassembled down to the frame.
- Using a grinder, a part of the frame is cut to the required length.
It is preferable to immediately select seats that fit all dimensions.
Overall, you will gain more than you lose: a comfortable seating position is the most important aspect for a driver!
Additional lighting in the interior of the VAZ 2106 will not be superfluous; it has long been known that the factory light is far from ideal. It is proposed to use the ceiling lamp from cars of the Samara family (2108–21099). You can install an LED lamp in this lamp, the light from it is quite strong and white.
You can install it on the ceiling lining (if your car has one) between the sun visors:
- The ceiling trim is removed.
- Wires are pulled from the side interior lighting lamp under the trim to connect the lamp to the on-board network.
- A hole is made in the cover for the wire.
- The lampshade is disassembled and its back side is attached to the cover using self-tapping screws.
- The cover is installed in place.
- The wiring is soldered to the contacts of the lampshade.
- The lampshade is assembled in the reverse order of disassembly.
In conclusion, I would like to note that the classic of the domestic automobile industry is very conducive to modifications to the interior of the car. The simplicity of the interior and the extensive experience of car enthusiasts in tuning these models allows the use of all new technologies and techniques, and domestic engineers have made sure that you can do the entire range of work yourself. Experiment, good luck.