The bumper has now become an integral part of the body of any vehicle. It not only completes the appearance, but also performs a completely utilitarian function - it protects the car from minor damage. During a collision, it usually breaks, due to which the inertia of the impact is partially absorbed.
Older car models have metal bumpers. Consequently, this fact led to the fact that the car received much greater damage upon impact. This caused significant damage not only to the vehicle itself, but often to the people sitting in it. Modern bumpers are made of plastic or synthetic resins - they are softer and perform their role perfectly. There is, however, one significant drawback - after a collision, most likely, it will have to be replaced.
When does it become necessary to remove the bumper?
In reality, it is a rare car owner who can boast that he has never had to remove the bumper himself in his life. This is usually required in cases where:
- The power unit is being repaired;
- a new radiator is installed;
- a decorative grille is installed;
- The damaged front (or rear) bumper of a VAZ-2115 is being replaced.
It is worth noting that if this element of the car was damaged, the owner can either buy a new one or try to repair the old one.
We'll tell you more about the repair below.
How to choose the right new bumper
Nowadays, stores sell not only products produced directly by VAZ, but also many replicas manufactured by various companies.
Quite handicrafts are also often found. To avoid purchasing low-quality goods, you need to use the following recommendations:
- the thickness of the plastic should be the same as the old one, or better yet, even greater;
- It is important to guess the shade if it is sold already painted.
Of course, no one forces the car owner to replace a damaged bumper, but it significantly spoils the appearance of the car. Moreover, if another accident occurs, then he will no longer be able to protect anyone or anything.
Removing the bumper
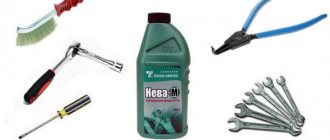
To do this you will need the following tools:
- Phillips screwdriver;
- socket wrench 10/8;
- end at 13.
Usually the procedure takes no more than an hour. To make the replacement more convenient, it is better to install the car in a pit.
To dismantle the bumper you will need to perform the following steps:
- move the protection away from both front wheels, having previously unscrewed the fixing screws;
- use a 10mm wrench to tighten the nuts located inside the bumper (there are 4 of them in total, 2 on each side);
- dismantle the license plate;
- unscrew the bolts hidden under it and located below, in special openings;
- Then the protective element itself is removed.
If it turns out that the amplifier has also become unusable, it will need to be replaced with a new one. It is held in place by two nuts, unscrew them using a 13mm wrench.
Now all that remains is to move both side brackets from the old to the new. They are secured with three screws each.
It is important not to forget to adjust the amplifier. There should be a gap between it, the headlights and the fenders. This is not difficult to do, since there are special slots on it.
Bumper replacement process
Front bumper diagram
The front bumper of the car performs a protective function, which is the first to absorb a possible impact. Recently, the trend among automakers is that it should have a decorative and aerodynamic function. In this case, what should take the hit?
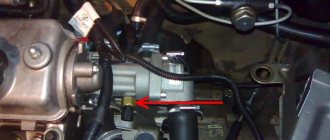
For this purpose, a special metal amplifier was developed, which performs exactly this role.
Before starting the replacement process, you need to decide on the tools. Which one will you need: a screwdriver with sets of attachments or a set of screwdrivers, open-end and socket wrenches for 8 and 10, a ratchet with a head for 13, a new bumper.
So, when the motorist has collected everything, you can proceed directly to the process.
Step by step process
Let's consider the step-by-step process of replacing the front bumper of a VAZ-2114:
- We install the car so that it is possible to freely approach from below to perform operations. A pit or lift is ideal.
- Unscrew the radiator grille mounting bolts.
Radiator grille bolt pattern
Dismantling the side mounts of the front bumper
Selecting a part for the VAZ-2114 (article)
General view of the original front bumper
2113-2803015 – original catalog number of the front bumper manufactured by AvtoVAZ. There are no analogues of this part, so there are no options other than factory purchase. The average cost of the product is 6000-7000 rubles.
Reasons for removing the front bumper
There are several reasons why the front bumper will require removal. So, let's look at the main ones:
- Deformation , destruction or damage due to an accident.
- Dismantling for the purpose of removing or repairing elements that are located under the protective element. This could be an amplifier, headlight, radiator frame or side member exhaust, as well as other reasons.
- Dismantling a part for painting or restoration work.
- Other reasons.
Tuning
One of the options for tuning the front bumper
It is often necessary to dismantle the front bumper to improve performance, in other words, tuning. This is a fairly common practice, especially in the CIS countries.
Thus, the protective element can be completely modernized, and sometimes completely changed. There are a lot of tuning options, and each car enthusiast independently chooses the design and modification option.
A small modification to the bumper - installing a lip. Looks stylish and fits on a standard bumper
But the only thing that remains unchanged in this case is the fastening elements. Therefore, no matter how you change the appearance, the installation of the element is carried out the same way it was removed, only in the reverse order.
How to repair a bumper
If the damage is minor, then there is no need to spend money on a new element. The following defects can be eliminated independently without problems:
- dents;
- scratches;
- small holes.
It would be advisable to repair only a bumper that has not lost its integrity. Now stores sell special kits that include everything you need.
Cracks and holes are fixed on the reverse side with fiberglass and liquid plastic. Next you need to sand the damaged areas with coarse sandpaper. This should be done without much fanaticism, so as not to damage the plastic. The defect is masked with universal putty. The surface is lightly sanded again, but with very fine-grained sandpaper. Afterwards you need to wipe with a damp cloth - this will remove dust.
The prepared surface is treated with an aerosol primer. It must be applied in two layers. Each will take half an hour to dry. Finally they are coated with paint. At least 3 coats will be required. It is important to choose it exactly by color. A single coat dries completely in about 30 minutes. In order for the composition to be sprayed evenly, the container must be kept at a distance of 20 centimeters.
The result is fixed with two layers of colorless varnish.
You can learn more about the process of dismantling the bumper using this video:
Standard front bumper VAZ 2113—2115
In accordance with the general trend, on Russian-made VAZ 2113–2115 cars, bumpers made of plastic and painted in the color of the car are installed. These are the most vulnerable body elements, located low above the road surface and taking on all kinds of mechanical loads. The front body kit suffers especially, where stones often fly from under the wheels of oncoming traffic, which is why parts have to be removed for repair or replacement. But thanks to the simplicity of the design, any motorist with the time and desire can handle the removal. Let's consider the task of removing the front and rear bumpers using the example of the VAZ 2114 and analogues.
conclusions
Removing and installing the front bumper on a VAZ-2114 is quite easy and even a novice motorist can handle this process, the main thing is that there is a desire and hands grow from the right place. Well, if the process described in the article seemed very complicated, then you need to contact a car service, where they will do everything for an immodest fee.
Independent replacement of front and rear bumpers on VAZ 2113, 2114, 2115
On VAZ 2113, 2114, 2115
plastic bumpers are installed.
How to remove and replace the front or rear bumper from VAZ 2113, 2114 and 2115 cars. Video and manual on removing and replacing rear shock absorbers and springs on VAZ 2113, 2114, 2115 - do-it-yourself car maintenance and repair. During use, this part may be damaged due to collision. In case of severe damage, the rear bumper
is easier
to remove
and replace than to repair, and this can be done without the help of others.
Why remove bumpers on VAZ 2113-2115
What kind of “blows of fate” do the front and rear body kits experience during operation? Either a stone will fly, then someone in the parking lot will catch it and scratch it, or even the driver himself will drive into a snowdrift where an iron pipe is hiding. Not to mention such little things as traces of insects crashing on the front. Some of the listed defects can be eliminated without removing parts from the car, but in case of serious damage, dismantling is inevitable.
Such damage cannot be repaired, the body kit is easier to change
A separate story is a collision during an accident, as a result of which the bumper often turns into outright trash, unsuitable for repair. Fortunately, spare parts for Russian cars are freely available and their prices are quite affordable.
Reference. The cost of the front and rear body kits is almost the same and starts from 2,600 rubles. for an unpainted part. Prices for products with color coating start from 3,250 rubles.
The main reasons why owners of the “thirteenth” and “fifteenth” VAZ models have to dismantle the bumpers are as follows:
- It is necessary to completely repaint the car and perform body repairs.
- To repair or replace a broken body kit.
- It is easier to install fog lights on the removed front element.
- You need to get to other body parts located under the bumper.
- It was decided to throw away the stock factory body kits and install beautiful elements of the original shape, that is, to do partial styling of the car.
This is what the VAZ 2115 styling front body kit looks like
Note. To this day you can find budget black bumpers on VAZ 13-15 series cars. The owners of these cars, as soon as possible, remove unsightly parts in order to paint them in the desired color or replace them with painted ones.
The first 2114 models came with black body kits
What is needed for disassembly
To remove body kits from a car, you will need the following tools:
- socket wrench or socket wrench size 8 mm;
- the same, size 10 mm;
- Phillips screwdriver;
- WD-40 aerosol lubricant, which facilitates the rotation of rusted threaded connections.
Minimum set of tools
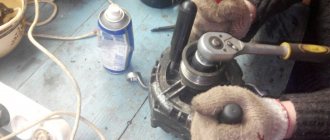
Additionally, you should prepare the usual set of plumbing tools. They are useful for unscrewing the lower fastening of the front bumper, consisting of nuts and studs. The problem stems from the unfortunate design of this unit, where it is stipulated that the studs stick out 2-3 cm under the front overhang of the car. As soon as the driver slightly catches a curb or drives into an ice snowdrift, the ends of the studs bend or even break off completely. You'll probably have to tinker with them when disassembling them.
Advice. A bent stud can be straightened by screwing a second nut onto the end of the stud to grasp with a tube wrench, and then bending the threaded portion by hand. Another way is to gently tap the screwed nut with a hammer.
For the same reasons, removing the front one will require an inspection ditch. It is extremely inconvenient to twist rusted lower and side fasteners while lying under the car.
What is important to know when purchasing new products for VAZ 2113, 2114 and 2115
Unlike foreign-made cars, it is easy to buy the necessary spare parts for the VAZ 2113, including new bumpers. In the retail chain, these parts are found in two forms:
- black, without painting;
- painted in any color of your choice.
Body kits of different colors and shapes
Advice. If you decide to change body kits because of their unpresentable appearance, then it is easier and cheaper to buy ready-made products painted in the color of the car. The difference in price is 700-900 rubles. will not allow you to save a significant amount on painting a black bumper.
Unpainted parts are usually taken during a major body repair with full painting or in the case of repainting the car in some individual color. It is also appropriate here to remember those owners whose cars were equipped from the factory with unpainted elements, which, if they break down, are easily replaced with similar ones.
Standard front bumper VAZ 2113—2115
When choosing a new bumper for VAZ 2113 (2114, 2115), consider several recommendations:
- There are several manufacturers on the market that use various raw materials, including recycled ones, to produce plastic body parts. Therefore, when purchasing, pay attention to the elasticity of the plastic. If it is initially rigid, then at negative temperatures it will become very brittle.
- Before purchasing a new product, remove the old body kit to check the condition of the amplifier underneath. If the disassembly was caused by the plastic breaking due to an impact, then the amplifier could also be damaged. In addition, it will be possible to compare the factory bumper with the part offered in the store.
- Check the element for minor paint defects. It happens that plastic parts are damaged during transportation.
- If you notice that the design of the new bumper is additionally reinforced from the inside, then buy it with confidence, since such products are more reliable in operation.
- Please note that there are openings for installing fog lights. There are products on sale for the VAZ 2114 that are not equipped with holes.
- When purchasing, make sure that the items fit your car in size. You should not purchase bumpers for a VAZ 2115 from a VAZ 2114 and vice versa, since they differ in dimensions, although they are mounted in the same way.
Factory bumper VAZ 2113—2115
Wanting to give their cars individuality, their owners often do partial styling, replacing the stock (factory) body kits with more original and attractive ones that differ in shape. As a rule, such elements can be easily installed on standard mounts and do not require modifications.
Reference. The prices of serial styling bumpers are not much higher than stock ones and start from 3,500 rubles. (for an unpainted product). Original works can cost significantly more.
The rear styling kit looks impressive
Reasons for withdrawal
In fact, there can be many reasons for removing the front end of your car. Everyone has their own views on this issue.
But let’s still name the main reasons why car owners most often turn to car services or decide to dismantle and even replace the front bumper on their own.
- The replacement was caused by damage to the element as a result of a collision or accident. The integrity of the structure is compromised, and driving with a broken front end is not particularly pleasant.
- Dismantling work with the subsequent return of elements to their place can be carried out due to engine repairs, when replacing the radiator and other components of the engine compartment.
- External modification in the form of tuning the front of the car.
- Replacement of headlights, installation of new optics.
- Installation of decorative overlays, mesh.
Article on the topic: About the reverse sensor for the VAZ 2114
Dismantling works
If the bumper is broken, then you have two ways to solve this issue - replace it with a new one or try to restore the old one. This largely depends on the desire and degree of breakdown of the previous element.
Design Features
The design and method of attaching body kits on Lada 13-15 series cars differs from other models of the “tenth” VAZ family. Design features are as follows:
- Additional metal brackets for fastening to the body are installed inside the plastic elements;
- the brackets are held on by threaded connections and screwed to the bumper with self-tapping screws;
- plastic latches appeared on the central part of the front bumper;
- the edges of the rear body kit are pulled to the body by nuts hidden behind the wheel arches;
- It is easier to remove the front and rear parts together with the amplifier, and then unscrew it if necessary.
Front bumper design
The listed features make it somewhat difficult to dismantle elements from the machine, since the threads located next to the wheels become covered with dirt and rust during operation. Over the years, corrosion also eats away at bare metal brackets that are not protected by any coating.
The rusted bracket needs to be replaced
Hence the advice: when disassembling, take your time and do not apply much force, otherwise you will break the bolts. It is better to replace rusty brackets with new ones, but they must first be coated with a primer and painted in any color.
Instructions for dismantling the front body kit with your own hands
To disassemble the bumper mounts you will need the following tool:
- Phillips screwdriver;
- 8 mm socket wrench;
- the same, size 10 mm.
Disassembly tool
Advice. Instead of separate keys during disassembly, it is more convenient to use heads with an extension and a wrench equipped with a ratchet.
It is more convenient to work with sockets and a ratchet wrench
Since most threaded joints are likely to be rusty, you will need to use WD-40 spray lubricant to rotate them. Apply it to all bolts and nuts before unscrewing.
It is more convenient to work with the lower mounts of the front body kit from the inspection ditch, from where they are clearly visible, although if necessary, you can dismantle the bumper without a pit. At the final stage, when the element is removed from the machine, it is worth having an assistant support the part by the second edge.
If the car is equipped with fog lights, the process begins by disconnecting the battery from the on-board network. Further work is performed in the following sequence:
- Open the hood and use a screwdriver to unscrew the 4 screws holding the upper part of the radiator grille. Remove it from the car.
- The lower part of the radiator grille is held in place by 4 self-tapping screws - a pair from the outside and two more from the engine compartment. Unscrew them and remove the grille part.
- Unscrew the 6 screws of the lower body kit mounting. They are located on the rounded parts of the element, 3 on each side.
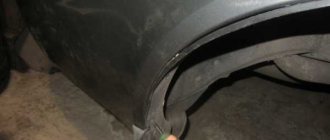
- Remove the plastic protection installed under the wheel arches by unscrewing the bolts and nuts with a 10 mm wrench. For greater convenience, you can remove the wheel. Unscrew the front part of the fender liner.
- Now you have access to the bracket, where you need to loosen and unscrew 2 10 mm nuts. Don't forget to treat the joints with WD-40.
- Remove the license plate, underneath it you will find 2 more front mounting bolts. Unscrew them, as well as the 2 screws located near the air intake opening.
After disassembly, you will see plastic latches on the horizontal plane of the body kit. Unlock them and, together with an assistant, remove the bumper from the car, pushing it forward and holding it on both sides. Before doing this, disconnect the power wires for the fog lights so that you don’t have to do it while hanging.
Note. After dismantling the element, access to the plastic amplifier mount will open. If it is damaged and needs to be replaced, you need to unscrew the 4 nuts with a 13 mm socket and remove the part from the studs.
If you need to install a new body kit instead of a broken one, then you need to twist the metal brackets from the latter. To do this, just unscrew the 3 fastening screws. The brackets themselves should be cleaned of rust and painted so that they do not rot prematurely. The bumper is installed in the same way, only in reverse order.
The order of work in the photo
3 screws for bottom fastening
This is what the side bracket looks like
The top panel above the radiator is held on by two screws
Video about disassembling the front part of the car
Front bumper
Replacing the front bumper of a VAZ 2114 with your own hands takes a little time. If it is necessary to replace the radiator or grille, the procedure takes longer. Removing the body kit for all VAZ 2113-2115 models is carried out in the same way.
Tool
To replace the body kit you will need the following tools:
- Screwdriver Set;
- open-end wrenches 8 and 10 mm;
- 13 mm ratchet head with crank.
Step-by-step removal
To remove the front bumper of a VAZ 2114, place the car on a viewing hole or a lift. The algorithm for dismantling the body kit is as follows:
- The electrical connections to the license plate and fog lights must be turned off before any work can be done.
- The fastening bolts and nuts are treated against rust, as well as for better loosening, with VD-40 aerosol.
- Unfasten the front wheel fenders.
- Unscrew the fender liner mounting plate with a 10 mm wrench.
- Remove the 3 screws that are attached to the body kit.
- Using a 8 key, remove the 6 screws securing the fender liner to the front fender.
- Pull back the fender liner.
- Remove the radiator and headlight trims.
- Using a 10 mm wrench, unscrew the 2 nuts securing the left side of the bumper.
- Pull it a little to the side so that the studs come out of the body bracket.
How to remove the rear bumper
To replace the rear body kit, an inspection ditch is not needed, since there is fairly easy access to the lower nuts and screws. But the set of necessary tools will have to be supplemented:
- 13 mm head;
- jack;
- wheel wrench;
- wooden stands for the rear wheel hubs.
Advice. It doesn’t hurt to stock up on a brush with metal bristles to clean the fasteners from dirt or anti-corrosion coating.
The problem is that with the wheels installed, it is difficult to get to the threaded connections located on the back side of the wheel arch. Therefore, before carrying out work, you need to secure the car at the front with wheel chocks and remove both rear wheels, resting the hubs on stands. The next procedure is as follows:
- Remove the plastic wheel arch protection by unscrewing the screws holding it. Perform the operation on both sides.
- Looking under the back of the arch, you will find 2 studs with tightened nuts. Treat them with a brush and WD-40, and then unscrew the socket 10 mm. Remove the plastic trim. Repeat on the other side.
- Loosen and unscrew the 4 13mm socket nuts that secure the bumper reinforcement to the steel body parts. They are located under the body kit in pairs.
- Together with an assistant, grasp the edges of the bumper, remove the side mounting studs from the holes and remove it by pushing it backwards.
Note. In this way, the part is removed along with the amplifier. If you want to dismantle only the body kit, you will have to lie under the car to unscrew the 4 mounting screws, which is inconvenient.
When the element is removed from the car, it is easy to dismantle the amplifier and brackets and move them to a new bumper. There are no electrical wiring or lampshades here, so you don’t have to disconnect the battery or disconnect the connectors.
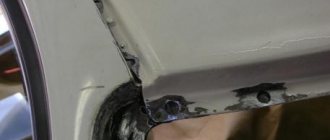
With the rear body kit removed, the condition of the steel body elements is clearly visible. If you find traces of corrosion, then there is no better time to remove it and touch up the paint. Pay attention to the condition of the side bumper mounting brackets; replace them if necessary. The element is placed back together with an assistant, the task is to simultaneously insert the studs into the holes of the arches. You can tighten the nuts and screws in any order; at the end, put the protection and wheels in place.
Photo instructions for dismantling
It's difficult to get to the mounts without removing the wheel.
Amplifier mounting screws, 4 in total
The body kit mount is hidden behind a plastic protection
How to change the rear aero without any problems - video
For car service specialists, replacing bumpers on VAZ 2113–2115 cars will take a maximum of an hour. The owner of the car will need twice as much time to disassemble it independently, but will be able to save at least 2,000 rubles on the cost of work. Hence the conclusion: it is not advisable to contact a car service center with such questions, unless you do not have the required amount of time.
How to replace the rear bumper on a VAZ 2113-VAZ 2115?
Note! Before you begin removal, be sure to remove the fender liners from the car! (For information on how to remove them, see the article entitled: “Replacing wheel arch liners on a VAZ”)
Removal: 1) First, be sure to disconnect the wires from the light that illuminates the car’s license plate, and after disconnecting the light, unscrew the screws that secure the license plate and remove it from the car’s bumper.
2) Next, using a wrench, unscrew the two nuts that secure the bumper trim to the car body. (These fastening nuts are located in the wheel arch, so after removing the wheel arch liner, look there and unscrew these nuts)
Note! There are three fastening bolts on a bumper with a metal reinforced beam, so unscrew all of them and then remove the rear bumper from the car!
3) Now, putting the wrench aside, take a screwdriver in your hands and use it to unscrew several screws that secure the same trim to the rear bumper.
4) After all this, carefully remove the trim from the side of the car bumper, but after this trim is removed from one side part, move to the other side and remove the same trim there in the same way.
5) Then pull the bumper to the rear and thereby completely remove it from the car.
Note! When the rear bumper is removed from the car, it will be removed together with the beam, because it comes assembled with it, so if you want to disconnect this beam and install it on the old bumper, then take a wrench in your hands and unscrew all the nuts that attach the beam to the car bumper!
Installation: Installing a new bumper on the rear of the car occurs in the reverse order of removal.
Note! When you install the bumper, be careful not to damage it, otherwise you will have to either change it, paint it, or leave everything as is!
Additional video clip: You can find out more about how to change the bumper on the rear of the car in the video clip located just below:
Home / Catalog / Lada / Lada / VAZ 2113 / VAZ 2114 / VAZ 2115 with 1.5i liter and 1.6i liter engines, repair book in color photos in electronic form / ...Show book contents
Content
Introduction
Emergency procedures
- Wheel replacement
- Actions in case of engine overheating
- Starting the engine from an additional power source
- Circuit breakers
- Emergency pressure drop in the engine lubrication system
- Turning on the low battery indicator
- Turning on the engine system malfunction indicator
- Turn on the brake warning light/parking brake warning light
Daily checks and troubleshooting
Operating a car in winter
A trip to the service station
Operation and Maintenance Instructions
- Technical information
- Controls, instrument panel and interior equipment
- Car care
- Vehicle maintenance
- Fuels and lubricants
Warnings and safety rules when working on a vehicle
Basic tools, measuring instruments and methods of working with them
- Basic set of necessary tools
- Methods of working with measuring instruments
Engine and its systems
- General information
- Servicing the engine without removing it from the car
- Engine disassembly and assembly
- Ignition and engine control system
- Supply system
- Lubrication system
- Cooling system
- Intake and exhaust system
- Chapter Appendix
Transmission
- General information
- Clutch
- Transmission
- Drive shafts
- Chapter Appendix
Chassis
- General information
- Front suspension
- Rear suspension
Steering
- General information
- Steering wheel
- Steering gear
- Steering rods
Brake system
- General information
- Car service
- Front wheel brakes
- Rear wheel brakes
- Parking brake
Body
- General information
- Front bumper
- Rear bumper
- Hood
- Front door
- Rear door (VAZ 2114/2115)
- Body dimensions
Gas equipment
Car electrical equipment
- General information
- Generator
- Starter
- Egnition lock
- Replacing steering column switches
- Replacing the power window switch
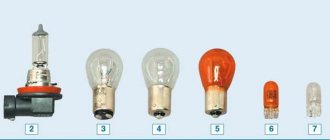
- Outdoor lighting devices
Fault codes
- Controller JANUARY-4
- GM Controller (IFSI-2S, ITMS-6F)
- OBDII protocol controllers
Electrical circuits
Dictionary
Useful tips for car owners
How to pay and download
How much does a bumper (rear and front) cost for a VAZ 2115
The cost of a VAZ 2115 bumper varies from 2,125 to 8,500 rubles . This price includes products made of plastic, fiberglass and ABS plastic, which can be installed on the front and rear of the car without making changes to the power structure.
The bumper on the VAZ 2115 is an energy-absorbing part of the power structure , which prevents damage to the engine compartment in minor collisions. All proposed bumpers are installed on standard mounting locations, without moving the mountings and mounting brackets. Thus, the entire installation process takes no more than 20 minutes.
In addition to positioning the VAZ 2115 bumper as part of the load-bearing structure, it is a hinged body element with thoughtful geometric proportions and internal reinforcements. This allows you to move among tall grass and small branches without any problems. The bumper provides comprehensive protection, both through the front overhang and central points, from damage to the head lighting equipment.
The rear bumper of the VAZ 2110 performs similar functions. It already has standard holes for installing a towbar, as well as a 12 V socket on its front panel. Given the limited size of the power structure of the rear of the car, the bumper is also small. This is also reflected in its cost, which is usually 20-25% lower than the front one.
How to remove the front bumper on a VAZ 2110 and models of this family
If your car has fog lights, they will be removed along with the body kit. Therefore, work must begin by disconnecting the negative terminal of the battery and turning off the headlights. For this purpose, special connectors must be provided in the engine compartment.
Advice. If for some reason the terminal blocks were not provided when installing the wiring to the headlights, install them during the process of replacing the body element.
Then proceed according to this scheme:
- Place the machine over the inspection ditch, go down and treat all lower threaded connections with WD-40. If this is not done, there is a risk of breaking the bolts when unscrewing. While it eats away the rust, begin dismantling the upper fasteners.
- Remove the decorative radiator grille installed above the bumper. To do this, open the hood and unscrew the two bolts located on the horizontal panel with a 10 mm wrench. The grate is released from the plastic clips if you carefully push it up.
- Using the same key, unscrew the 2 bolts fastening to the top panel, found under the grille.
- Using a Phillips screwdriver, unscrew the 2 screws located on the front side inside the wheel arch. They attach the body kit to the fender liner. Repeat the operation on the second wheel.
- 2 more screws are located on the sides of the element on the bottom side, unscrew them.
- Go down into the inspection hole and, using an 8 mm spanner, unscrew the 5 nuts holding the element in place at the front. They are located along the front overhang of the car. If necessary, align them as described above.
- All that remains is to loosen and unscrew the 2 bolts located at the edges of the bumper and pressing it to the metal brackets. The operation is also performed from the viewing ditch.
Advice. When unscrewing the screws securing the part to the fender liner, turn the wheels in different directions to make it more convenient to use the screwdriver.
When all connections are loosened, the bumper can be removed without any problems alone. Stand in front of the car, grab it in the center with both hands and pull it towards you with a sharp, confident movement. When the element disengages, remove it and, if necessary, remove the fog lights and plastic amplifier.
The new body kit is mounted in the reverse order: first the headlights are screwed on, then the part is inserted into place and secured with self-tapping screws and nuts. It is recommended to coat the threaded connections with a thick lubricant such as “Solidol” to prevent rusting.
Advice. Before installing a new element, inspect the joints of the metal body parts hidden behind it. If you find traces of corrosion, clean them, degrease them and apply 2 coats of paint, one coat of primer at a time.
Photo of the disassembly process
The radiator grille is attached with two bolts from above. After unscrewing the bolts, the grille is removed from the latches. This latch holds the radiator grille. From below, you need to unscrew 5 nuts. On the bottom sides of the bumper, the bumper is held on by self-tapping screws. These 2 self-tapping screws secure the body kit to the fender liner. Attachment to the side brackets - bottom view. 2 upper mounting bolts are hidden. under the radiator grille The last stage is removing the body kit
Video on removing the VAZ 2110 bumper
What affects the price?
In addition to the brand under which the front and rear bumpers on the VAZ 2115 are manufactured, the key pricing factors are:
- Material.
- Mode of production.
- Type of product (standard, modified, sports).
- The bumpers are equipped with nets, edgings/plugs for DRLs, and PTF.
- Type of spare part (original, analogue).
The price is also affected by the completeness. Thus, an increase in the retail price is noted as the following elements are included in the kit: a seal between the bumper and the power beam, new fastenings to the body, internal fasteners, hidden wiring elements (connectors, pins, etc.).
The cheapest sets of front and rear bumpers are considered to be those that
can be painted . Such bumpers are supplied in rough form or, if this is a sporty version for external car styling, in gray shipping primer for grinding. It is worth noting that painted elements may not match in shade and there is a possibility of damage during transportation.
When to install a new part
If the bumper is damaged, it is not always possible to return it. How to remove the front and rear bumper T5)))?? on the sides and one in the middle as well. If there are small cracks and scratches, the part can be repaired according to the car service criteria. If the bumper
If it just splits into several pieces, it won’t be possible to return it. In this case, there is only one way out - change the part. how to install the camera. rear view camera on the Granta REMOVING THE BUMPER on the Granta. Depending on the extent of the damage, bumper mounts may have to be repaired from time to time.
Original VAZ 2115 bumpers and how much do they cost?
There are more than 47 colors to choose from in which VAZ 2115 cars were produced, but the most popular items turned out to be the following:
- Front bumper according to catalog number 2115-2803015-00 (color 660 Altair) – RUB 3,900 .
- 2115-28084015-00 (281 Crystal) – 3,510 rub .
- 2115-2806015-00 (426 Muscariy) – 3,270 rub .
- Rear bumper, 2115-2804015-00 (regardless of color) – RUB 3,240 .
The price of the product may vary in the range of 400 rubles , since some colors were produced in limited quantities. The cheapest colors are gray and white. The appearance and design features are unchanged.
Analogs of VAZ 2115 bumpers and their price
Bumper analogues are designed for exterior car styling using a minimal set of tools. Among the certified analogues that do not affect the issuance of a technical inspection sheet or other documents are:
- I Robot (front, large radiator grille, increased lower overhang) – 8,500 rubles .
- AVR Cup (front, 32″, under a sports hood) – 8,500 rubles .
- Fan-2 (front, without changing other body elements, choice of car color) – RUB 6,190 .
- Nevada 239 (rear, with metal amplifier, painted) – RUB 4,316 .
- Cosmos 665 (rear, with molding for the socket platform) – 4,600 rubles .
- 2115-2804015-32 (rear, for AL amplifier) – RUB 3,423 .
Where can I buy?
Bumpers for the VAZ 2115 can be bought at any store, especially if we are talking about non-original versions. If this is a fiberglass bumper, then it is important to pay attention not only to the final priming, but also to the amount of putty used. The latter should contain particles of ceramics or aluminum shavings.
If the goal is to save money, then you can give preference to bumpers for painting yourself. Their price is 25% lower, but the quality remains the same.