The Lada Kalina sound signal is a really important element in a car, which in most cases helps prevent emergency situations on the road.
Agree that if the horn is faulty, it is very difficult to notify road users of your approach; it is impossible to honk at a pedestrian who has not noticed your car, who is also crossing the road in the wrong place right in front of you. Therefore, the state of the warning system should be given special attention.
Types and causes of malfunctions
Statistics show that 70 percent of Lada Kalina car owners, to one degree or another, encounter problems associated with incorrect operation or complete failure of the horn. The fact is that the horn itself is installed between the radiator and the car body, so it is exposed to increased negative effects of an aggressive environment (dampness, high temperature, cold, icing). The main, main reason for the failure of the unit is the oxidation of contacts and conductive elements.
The most common reasons affecting performance:
- failure of the viburnum horn relay;
- rust of the internal elements of the speaker, which appears as a result of condensation;
- lack of contact on the movable ring of the power button;
- faulty viburnum horn fuse.
Diagnosis of the causes of the malfunction
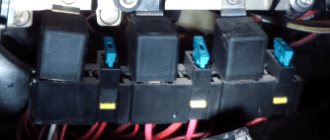
If your sound signal does not work on Kalina, it is best to start checking its functionality with the fuse and relay, which are located in the mounting block. After the functionality has been checked, it is necessary to inspect and test the contacts of the horn itself using a multimeter. Quite often, the device for sending sound signals has various oxidations and contaminations, and before replacing it with a new product, it makes sense to disassemble and thoroughly clean all the component parts of the unit, especially in the places where the contact wires are connected.
Replacing the horn on a viburnum
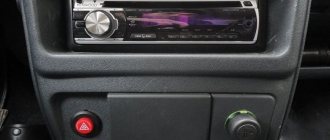
Everyone knows the problems of the standard viburnum horn, if you want to honk and there is a chance that you will not be heard at all) And you yourself may not hear it over loud music, in general there is no particular reaction to the signal, they say the signals are now specially made quiet so as not to scare pedestrians)
But in addition to the fact that the signal is practically inaudible, it often freezes, it is located so low that it is easily flooded with water after passing a small puddle, and the location itself is not good in that the wire can be easily cut and thereby neutralize the standard alarm system, which is This beep works.
These problems did not bypass me, after one replacement under warranty, the sound of the new signal became a slightly different tone, some even began to pay attention if they honked for a long time) But I decided that it was simply dangerous to drive with such a signal and in the nearest store I bought 2 original Volga signals - low and high tone (S302D and S303D)
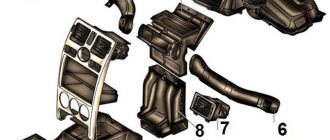
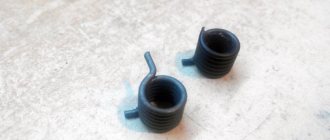
If someone is afraid of the complexity of the installation, then I can say that there is nothing complicated. You will need to buy or, as in my case, just find furniture corners and wire. To install the signals you need to remove the front bumper. Bend the corners in place.
Most drivers usually do not use the horn, sincerely believing that they do not need it at all. Or they use it maybe 1-2 times a year and hardly monitor its condition. But a well-functioning car horn is the key to avoiding terrible accidents on the road in the future, so this car sound device should always be in good working order. In the future we will talk about the signal of the Lada Kalina car.
What to do if the driver presses the desired button, but there is no signal? First you need to check the integrity of fuse F6 in the mounting block. This fuse transfers power to the signal device. If suddenly it burns out, then you need to replace it, and the signal will be in good condition.
But what if a completely different situation occurs - when the fuse is in good working order, but the signal does not work? So the reason is different. In this case, it is worth listening to the operation of the signal relay itself; when pressed, a click should occur. But you can only hear it when the engine is turned off. If the fuse, working relay and wiring in the car are working, then the reason may lie in the signal itself.
Replacing the sound signal on Kalina
For some reason, there is an opinion among car enthusiasts that to replace the sound signal, you will need to remove the front bumper of the car. In fact, it is possible to get by with a little “blood” without resorting to dismantling the bumper, but limiting yourself to removing just two radiator grilles. To carry out all the work you will need: a long screwdriver, a key “13”.
To make the whole process clearer, it can be divided into 5 steps:
- First, unscrew the radiator grille. To do this, you need to open the hood, unscrew the three upper mounting screws holding the grille. Then, using a long flat-head screwdriver, release 2 latches on the right side and 2 on the left. Pull the grill towards you and remove it from its fastening points.
- To carry out work safely, disconnect the negative terminal from the battery.
- To remove the lower grille, you only need to unscrew two screws, which are located at both corners of the upper part of the grille.
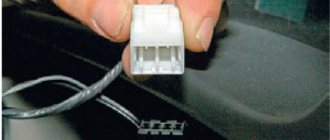
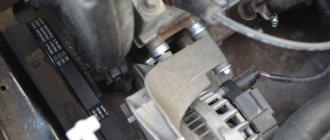
- Between the radiator and the body we find the horn itself. Using a “13” wrench, unscrew the fastening nut. Disconnect the contacts (pull out the contact plug) and remove the device.
- Installation of a new product is carried out in the reverse order of the removal process.
If you want to adjust the volume and tone of the sound signal of the horn itself, then on the back of its body there is a special adjustment bolt that must be turned using a Phillips screwdriver.
Lada Kalina hatchback Lux AT › Logbook › Installation of Volgov two-tone signals S302D / S303D
Good day to all! I endured for a long time, I planned for a long time, and in the end today I got rid of the standard Kalinov signal and installed the S302D / S303D snails. To install the signals, we need: - Signals S302D / S303D (don’t run into a Chinese counterfeit) - 3 meter wire - block for blade fuse - 15A fuse - split corrugation D6mm - four-pin relay with block - two male terminals 2.8 mm - two female terminals 6mm - terminal D6mm
The mechanical part of the process is completed, now the electrical part.
Standard alarm Lada Kalina
Lada Kalina is a range of Russian cars that have been produced by AvtoVAZ since November 18, 2004.
The Kalina family is one of the leaders of the Russian automotive industry. Lada Kalina are cars with positive technical and driving performance, the distinctive feature of which is a stylish design.
This is a real find for car enthusiasts who value original appearance, comfortable movement and high quality interiors.
Why do you need a relay?
The seller persistently sold me a relay for 40 rubles, saying that I couldn’t live without it. But in the end, it worked out without him.
What is the point of a relay?
First version (MYTH) The point is that the VAZ and Volgov circuits for connecting sound signals are not the same. Volgov's horns take ground from the body, while VAZ's horns take ground from the connected wire. According to the sellers, when we press the beep, we close the ground (-) and not (+). Therefore, if you connect without a relay, the horn will work constantly. But in reality, everything turned out quite the opposite, which made the work easier. Therefore, we proceed as follows.
Second Version (more real). Volga buzzers consume a current of 14A, and a standard buzzer consumes 5.5A. Due to excessive load, the fuse may melt, and if you set its rating higher, the tracks on the board will melt.
If you want to install a relay, install it, but I didn’t install it, because... The loads applied to the beep are not constant and short-term.
Alarm system "Lada-Kalina", part two. Password!
Alarm system "Lada-Kalina", part two. Password!
What should a motorist do if his anti-theft system suddenly fails - he is confused in determining the reasons, and he has been waiting for a long time for help or there is no one from anyone?
There is a reserve for this case. The developers have provided the ability to start the engine without reading the code key: you need to tell the controller a certain password. On Kalina it is asked by pressing the gas pedal. The algorithm is recorded in the non-volatile memory of the controller. Of course, initially this password is not activated: if the ignition is turned on and the engine is not running, then the “Check Engine” symbol on the instrument panel, without blinking, lights up. If the password is activated, then a minute after turning on the ignition the symbol will go out: enter the required numbers and start.
The procedure for recording a password is similar to training an APS.
1. Having inserted the training key into the lock, turn the ignition on and off, then remove it: the APS indicator flashes for 6 seconds - during this time you need to…
2. ...turn on the ignition with the working key. Three buzzer beeps sound, then two more - turn off the ignition and remove the key. The indicator blinks again for 6 seconds - you need to be in time...
3. ...turn on the ignition with the training key... Three beeps, then two - turn off the ignition, but do not remove the key. Soon, one beep will sound and the indicator will flash faster.
4. Turn on the ignition - the “Check Engine” symbol flashes. After about a minute it will go out - it’s time to enter the password. It must consist of six digits. The limits are 111111 and 999999. Choose to your taste. For this…
5. Press the gas pedal all the way. The "Check Engine" light will come on. Hold for no more than 3 s, release - the lamp will go out.
6. Enter the code numbers. Let's say the first one is "3". To do this, we do the following three times: we press the pedal - the “Check Engine” light is on, immediately (hold for no longer than 3 seconds!) we release the pedal, the lamp goes out - this is how we entered three units of three. For the fourth time, press the pedal, hold it for about 5 seconds until the lamp goes out on its own - now the first digit of the code (“3”) is recorded in the controller’s memory. It's up to the other five numbers.
If the password is activated and the immobilizer fails, we start the engine like this. Turn on the ignition with the working key and after about a minute the “Check Engine” light will go out. Enter our password. If after the sixth digit, when the pedal is pressed, the lamp does not go out after 5 seconds, the password has been entered correctly, the engine will start. If you make a mistake, the lamp will blink. You will have to re-enter your password. If the engine accidentally stalls, the system gives you 5 seconds to start, otherwise you will have to enter the password again.
In addition to the immobilizer function, the APS is responsible for several more: control of the inclusion of rear fog lights, a delay in turning off power to the power windows for 30 s after turning off the ignition, information (intermittent sound signal) about a key forgotten in the ignition switch, or about the side lights being turned on (two beeps when opening the driver's door), and finally - a delay in turning off the interior lighting.
Adjusting the brake pedal sensor Kalina
If the sensor is in good condition, and incorrect operation of the internal combustion engine continues to bother you, try adjusting the product yourself
Please pay attention to the following features:
- The sensor must be screwed in clockwise until the brake pedal begins to move down. Then you will need to slightly unscrew the product and secure its position using the fastening nut.
- The result should be such that when there is no action on the pedal, the sensor rod is recessed into the housing, and when the pedal is applied, on the contrary, it is completely released from the housing.
- As for the working gap, it is adjusted using two nuts (one at the top, the other at the bottom). The adjustment is carried out using the upper nut, which is tightened, and the lower one, on the contrary, is unscrewed. The entire process is carried out until the button is completely recessed into the body when the brake pedal is applied. However, you should not overdo the adjustment; in other words, you should leave a small gap or travel margin (approximately 2 to 5 millimeters).