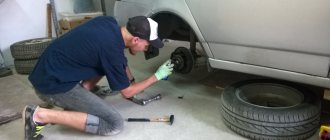
12.9. Replacing the front wheel bearing
The work can be carried out on a flat area, but it is more convenient to do it on an inspection ditch or a lift.
- Remove the hub cap.
- Using a narrow chisel, straighten the dented shoulder of the hub bearing nut in two places.
- Apply the handbrake, engage first gear and place shoes under the wheels.
- Use a 30mm socket to loosen the hub bearing nut. The nut is tightened with a large torque, so the head and knob must be strong enough to transmit the necessary force.
- Loosen the wheel mounting bolts.
- We hang up the front part of the car (namely both front wheels, because otherwise the anti-roll bar interferes with dismantling, pushing the suspension elements up).
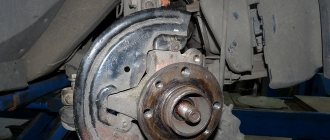
- We remove the wheel, the brake pad guide along with the caliper and the brake disc.
- We tie the guide of the brake pads with the caliper so that they do not hang on the brake hose.
- Unscrew the hub bearing nut completely and remove the washer.
- We pass bolts about 130 mm long with an M12 x 1.25 mm thread through two diametrically opposite holes in the brake disc.
- We screw the bolts into the holes of the hub to a depth equal to its thickness.
- By sharply hitting the bolt heads with the brake disc, we press out the hub.
- We unscrew the fastening of the ball joint to the steering knuckle (see Removing the ball joint) and remove the CV joint from the bearing hole.
- In another method of dismantling the hub, we first disconnect the ball joint and remove the CV joint from the hub.
- Rotating the hub, we knock it out of the steering knuckle through a soft metal drift.
- Using pliers, remove the retaining ring.
- Using a puller, we press the bearing into the cup located outside the steering knuckle, while the bolt presses on the inner ring of the bearing through the washer from inside the knuckle.
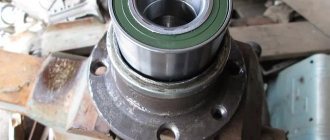
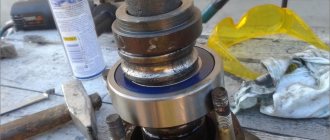
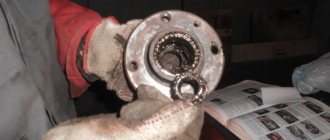
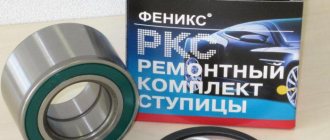
Bearing and puller
- Almost always, when pressing out the hub, a bearing ring remains on it, which is difficult to remove due to the tight fit on the hub. You can use a puller if its paws fit into two small grooves on the hub.
- If the puller does not provide the required force, then pry it up with a screwdriver and remove the dirt ring...
...and use a chisel to move the bearing ring.
- We remove the ring and, if necessary, use a file to clean out the nicks on the hub.
- We install the mud ring and seal it on the hub.
- Clean and lubricate the inner surface of the steering knuckle.
- Using a puller, we press the new bearing into the steering knuckle. In this case, the large washer of the puller rests on the steering knuckle from the inside so as not to damage its mud rings, and when pressing, the new bearing can be pressed through the old bearing, which will transmit force only through the outer ring.
- Install the retaining ring.
- Use a puller to press the hub into the bearing. Now the puller washers rest against the inner ring of the bearing and the hub.
We carry out further assembly in the reverse order, tighten the bearing nut to the prescribed torque and be sure to lock it by jamming the collar.
Types and features of support bearings
Currently, VAZ-2110 cars use several main types of bearings:
With an integrated ring (can be internal or external). In such products, the manufacturer provides special holes for installation. As follows, there is no need for comment on the use of additional flanges.
The peculiarity of such a bearing. ensuring the rotation of all units when using different rings (inner or outer).
With detachable ring (installed inside).
With detachable ring (installed externally). The peculiarity of this option is that the inner ring seems to “merge” with the body, and the outer ring can be separated if desired.
Single broken bearing. In principle, its features are not very different from the nodes outlined above. The only difference is the greater rigidity of the ring.
https://portal-mashin.ru/lada/zamena-stupicy-lada-21103-vaz-21103.html
Third way
It is carried out in the following order:
- In this case, it will be necessary to remove the entire rack one hundred percent;
- After all the components have been removed, the master will need special pressure;
- Under pressure, the wheel bearing will be replaced and all parts will be installed back.
This method is more complex and difficult, since in it the master will need to dismantle the entire rack. In addition, you will need to unpress the control tip, and you also need to unscrew the fastening nuts, they secure the upper support to the body base.
Specifically, the removal of this VAZ 2110 unit is carried out only after the entire rack has been removed from the car. And this process takes a lot of time.
Nuances
In the process of recycling collection of the entire assembly, you need to proceed as follows:
- Press in the bearings;
- Install retaining rings;
- Collect your fists;
- Mount on their new bearing components;
- Mount the assembly on the hub;
- Using a mandrel, you need to drive the hubs until they stop.
You can use a puller or press to press in bearing parts. But under no circumstances should you use a hammer, because in this case the component will inevitably crack. The forces should be directed to the outer rings.
It should also be noted that double-row ball bearings are installed in the hubs, which do not require lubrication or adjustment measures.
Due to the lack of such care, the VAZ 2110 bearings will certainly be destroyed when removed from the hub, therefore resorting to this measure should only be done for a complete replacement.
Second way
Consists of the following steps:
- To remove the bearing using the second method, you need to carefully dismantle the steering knuckle and completely remove the hub;
- After which the master will need to go to the workbench;
- Specifically, on the workbench, the wheel bearing of a VAZ 2110 is replaced;
- After which everything is installed back, just as it was removed earlier.
We remove the retaining ring. Leaning on the inner ring of the bearing, we knock out the bearing with a piece of pipe. Or we press it out with a puller. We press a new bearing into the cleaned and lubricated hub.
This method is certainly much easier than the first, but since it involves destruction, problems with adjustment cannot be avoided. Before you start unscrewing the knuckle mounting bolts from the rack, it is worth marking their position with chalk or a marker.
The first mark in this case will indicate the location of the adjusting bolt on the rack. The 2nd mark will indicate the previous position of the fists.
After the master begins assembly, he will focus precisely on these marks. Naturally, it will be difficult to achieve great accuracy and returning the parts to their place will NOT be possible. But with careful work, installation errors can be minimized.
There are certain stages of work that need to be carried out:
- The master puts marks;
- Knocks out the knuckle bolts;
- Removes the mounting bolts from the lower ball joint;
- The bearing should be knocked out of the hub;
- The retaining rings are dismantled;
- Using a vice, the bearings are pressed out.
Before carrying out reverse installation, the place in the fists must be thoroughly and generously lubricated.
This method is often used in the case of repairing not only one bearing of a component, but also the entire chassis. As a result of this method, it will also be possible to quietly change the ball joints, silent blocks of the levers and control tips.
Removing the old hub
To complete the work you will need the following tools:
- two wrenches “17”;
- a universal wrench designed to remove a wheel;
- set of heads;
- wrench “22”;
- ball joint remover;
- jack.
Front hub VAZ 2110
When starting work, first, a support is installed under the car. Boots are also installed under the wheels of the vehicle for stability. So:
- First, the front brake disc is removed.
- Using a punch or screwdriver, remove the protective cap, which is placed in the center of the wheel hub.
- Then, if there is a spring, it is removed from the hub axis.
Replacing the front wheel hub of a VAZ 2110
- After which the clamping bolt is loosened, which secures the hub fastening nut from unscrewing, and then the nut is unscrewed and removed from the hub axle. If there is a stubborn washer, it must also be removed.
- The front wheel hub is removed from the steering knuckle.
Front wheel hub VAZ 2110
- If the inner ring of the bearing remains on the steering knuckle, then it is removed from the hub axis using a puller, after which the hub sealing ring is removed.
- The condition of the steering knuckle axle is checked. If there is a need, then it must be changed.
Before installing the newest replacement part, you will need to carry out several procedures to ensure that the part lasts for a long time. For this:
- The inner ring of the outer bearing is removed from the hub.
- Then the o-ring is removed from the rear of the hub and the inner race of the inner bearing of the hub is removed.
VAZ 2110 front hub
- The hub is installed on a suitable mandrel and the inner ring of the outer bearing is knocked out using a drift and a hammer.
- After which the hub turns over and the outer ring of the inner bearing is knocked out.
VAZ 2112: when the bearing on the front hub needs to be replaced
General view of the front suspension
The front hub bearing is designed to allow free rotation of the wheel on the axle. The element is mounted inside the hub body, and is put on the axle using an internal race. Plastic plugs are fixed between the clips, which reliably protect the ball mechanism from moisture and dust getting into it. On the VAZ 2112, the front hub bearing ensures long-term operation of the unit under significant loads. This article offers instructions on how to replace the bearing on the front hub on a VAZ 2112 car with your own hands.
Necessary tool
Before you start work, you need to prepare all the tools and assemble them in one place:
- Special puller for bearing removal.
The most “ordinary” puller
The tool is assembled and ready to use
Preparatory work
Make sure that the workplace is well lit, and it is best if it is on a viewing hole or a lift. Because this is the only way to talk about high convenience when carrying out such work. It would also be a good idea to familiarize yourself with the detailed diagram of the location of the bearing on the front hub of the VAZ-2112.
Thanks to this illustration, the diagram becomes very clear.
Diagnosis of a knock that occurs in the front suspension of a VAZ 2112 car
The VAZ 2112 car is equipped with a telescopic, independent front suspension with coil springs (see: We do our own replacement of the front springs of the VAZ 2110), with hydraulic shock absorbers on the struts. In order to determine if there is a knock in the front suspension on a VAZ 2112, it is necessary to perform the following work:
- Make a trip by car, which will make it possible to identify the presence of a defect and determine the mode of its manifestation.
- Determine the tightening torque of the nuts that secure: the upper support of the strut to the body, the upper support of the strut to its rod.
- Make an exit by car.
- If the defect is not eliminated, you need to check the play of the ball joint on the front suspension.
- If necessary, adjust the gap between the steering rack and the stop.
- Departure by car again.
- The defect has not been eliminated, so the play of the bearing, which is located in the upper support and in the bearing of this strut support itself, is checked.
- If deviations are detected, the front wheel bearing of the VAZ 2112 or other damaged part is replaced.
- Check out the car, the knocking noise remains.
- The telescopic stand is being replaced. Depending on the malfunction, left or right.
- After all operations on the VAZ 2112, knocking in the front suspension will be eliminated, which is checked when driving the car.
How to replace the front wheel bearing on a VAZ 2112 car
The double-row ball bearing installed in the hub does not require adjustment or lubrication during operation. Pressing out the hub leads to destruction of the bearing, so only when replacing the bearing can the hub be pressed out of the steering knuckle.
Tip: when pressing in the hub bearing, you need to take a mandrel from a set of the appropriate size. If they are missing, you can use the old bearing rings.
- On a VAZ 2112, replacing the front wheel bearing begins with removing the protective cap.
- The hub nut is loosened. The hub nut and the bolts that secure the wheel to the car are loosened.
Tip: The nut is tightened with a large torque, so it is better to use a lever when unscrewing it, for example, a piece of pipe.
- The wheel and brake disc are removed.
- The nuts holding the bolts fastening to the steering knuckle stand are loosened.
- Unscrew the two bolts that secure the ball joint to the steering knuckle.
- Unscrew the nuts and remove the bolts holding the steering knuckle of the strut.
- The hub nut is unscrewed and the thrust washer is removed.
- The steering knuckle is removed from the strut bracket, as shown in the photo.
The fist is pulled out of the stand bracket
- The hub located in the inner ring of the bearing is pressed out using a drift.
Tip: A puller is used to compress the outer part of the ring located inside the bearing that remains on the bearing. Two special recesses on the hub serve for ease of dismantling.
- The retaining rings are removed from both sides of the steering knuckle.
- The bearing is pressed out of the steering knuckle, for which you need to use a mandrel.
- The outer retaining ring is installed.
Purpose of the front strut support bearing
Let's take a certain technique. car VAZ-2110. This model has an independent front suspension with hydraulic struts.
The main purpose of the rack. damping vibrations that appear when the spring moves.
How does this happen? For example, a wheel of your car falls into a hole. This, in turn, leads to rocking of one of the sides of the vehicle. In the absence of a stand, such vibrations could last for a long time.
The fastening is of particular importance. In the upper part the rack is fixed specifically to the body, and in the lower part. to the steering cam.
To ensure a movable connection between the body and the shock absorber, a special transition element is provided. support bearing.
The title “support” reveals the essence of this node and its location. at the junction with the car body.
Structurally, the device must withstand the greatest circular and axial loads.
Replacing the front wheel bearing on a VAZ 2110, VAZ 2111, VAZ 2112
Welcome! The front hub bearing is responsible for ensuring that the car’s wheel rotates, and if it becomes unusable, the wheel begins to rotate unevenly at first (Have you ever seen the figure eight on a bicycle wheel? So, if the bearing at the hub becomes unusable, then the wheel begins to almost rotate in the same way, but provided that the wheel is straight and not bent in any figure eight), over time this only gets worse and various sounds begin to be heard (mostly a hum is heard due to the fact that the bearing has become unusable), and the car also begins to move away from its the trajectory along which it moves and, in the end, if the bearing is not changed, then it may fall apart right on the road and therefore the wheel will stop spinning and thereby jam, so this bearing needs to be changed (the sooner the better) if it has become unusable .
Note! To replace the bearing with a new one, you will need to take with you some tools, namely: A puller with which you will install the new bearing in its original place, as well as a mandrel with which you will press out and press the hub onto the steering knuckle, in addition to this you will need wrenches (Set) and a large socket head (Approximately 30) and a wrench or extension for it, you will also need some details which you will become familiar with as you read the article!
Summary:
Where is the front wheel bearing located? From the words it is already clear that it is located in the front of the car, perhaps many also wondered: “Why exactly the front bearing, couldn’t it just be written as a hub bearing?”, the whole point is that there are only about four of these bearings ( In our cars, in foreign cars, there are sometimes two bearings installed in front) and they are located on one wheel each, but let’s return closer to the topic, we are analyzing information about the front bearing, in general it will be difficult for you to see it with the naked eye, because it is located inside the hub and in order to get to its inner part, you need to disassemble the car a little, namely, remove the wheel from it, then unscrew the central hub nut completely, then remove the brake disc and so gradually remove each part, you will get to the bearing itself (More details on how to do this, you will learn from this article after reading it completely, so for now we won’t dwell on the details but will immediately move on), for clarity, just below in the photo you can see the wheel hub itself (Indicated by a red arrow), as well as the steering knuckle (Indicated by a blue arrow) and the bearing itself (Indicated by a green arrow).
Note! While you won’t understand a lot if you don’t know much about the car, just continue reading the article delving into it and in the end you will already understand what is removed and what is where!
When do you need to change the front wheel bearing? As was already said a little earlier in the article, when a bearing becomes unusable it begins to hum, the higher the speed of the car, the stronger this hum will be heard, but when turning it will disappear because the wheel falls over and it no longer dangles as when driving in a straight line. trajectory, in addition, due to the fact that the wheel will dangle, it will thereby take the car away from the intended trajectory, by the way, this is very easy to check; for this, just release the steering wheel when you drive on a flat, straight road and if the car pulls to the side and all this If a hum is heard, then there is a high probability that the bearing has become unusable.
Note! And why does this bearing fail, we are often asked, firstly, it can fail prematurely by breaking (a bearing can break only if you run the wheel very hard into a hole), and it can also fail prematurely if was installed incorrectly, in addition, camber and toe also have a very strong influence on the bearing, and if you have a very strong camber set (Camber is when the wheels are tilted on their side vertically), then accordingly the bearing will constantly fail, and of course The quality of the bearing itself also greatly influences its premature failure, so take proven and high-quality bearings and do not buy defective ones from China!
How to replace the front wheel bearing on a VAZ 2110-VAZ 2112?
In this article we will not tell you and show you how the wheel bearing is changed on cars of the tenth family, we will simply give you a link to an article that is also on our website, but it is about replacing the wheel bearing on a car of the Samara family, essentially in both of these families cars, this bearing is replaced in the same way and therefore there is no point in writing the same article again, so follow the link called: “Replacing a wheel bearing on a VAZ” and in that article, look at everything in detail and study what is removed and what is installed back. .
Removing and replacing the front wheel bearing of VAZ 2110, 2111, 2112
Author: ides · Published 07/11/2016 · Updated 07/12/2016
Good afternoon. Today our guest is a VAZ 2110. He came to us with a problem. While driving, you can hear something in the wheel starting to howl. It was customary to remove the hub and see what it could be. Most likely the problem is with the front wheel bearing. Therefore, in this article we will tell and show you how to remove and replace the front wheel bearing on a VAZ 2110, 2111, 2112. Most often, this problem occurs with a mileage of 50-60 thousand kilometers.
Article: Hub bearing, retaining rings, wheel nut - 7203
Tools: To replace the front wheel bearing on a VAZ 2110, 2111, 2112, you will need a 30″ socket, a puller, and other tools
Removing and replacing the front wheel bearing VAZ 2110, 2111, 2112:
The first step is to remove the cap on the front wheel.
After this, loosen the nut on the hub.
After this, we put the car on the handbrake and loosen the hub nut.
After this, we hang the front wheels. Then remove the caliper and brake disc. Then unscrew the hub nut completely.
Then we tighten the studs and hang the brake disc on them.
With strong and precise blows we knock the hub out of the bearing.
Then remove the bearing from the CV joint.
After this, remove the retaining ring in front of the bearing.
After this, use a puller to press out the hub bearing.
Wheel puller and bearing.
Then press in the new wheel bearing.
Then we press the hub into the bearing.
After that, we assemble everything in reverse order. A test drive showed that the noise was gone. The whole process of replacing the wheel bearing on a VAZ 2110, 2111, 2112 took us about 60-70 minutes. Good luck on the roads!
Video on removing and replacing the front wheel bearing of VAZ 2110, 2111, 2112 (similar to the Muscovite 2141):
Determining the need to replace the bearing
To determine bearing failure, you need to perform simple steps yourself. I myself use the following diagnostics:
— after a long ride, carefully place your palm on the hub and check whether the metal part heats up; If so, this is the first sign of a breakdown;
— try accelerating to 40 km/h and listen to the sounds ahead with the windows open. Hear a whistle, hum, grinding or howling - another confirmation of the need to replace the part; - increase speed. As it increases, the howling will stop and then periodically appear with renewed vigor. Another bell rings; - Place your car on a jack and manually spin the wheel. The grinding and whistling will repeat. To be completely sure, rock the wheel perpendicular to the axle. If you find any play, the bearing definitely needs to be replaced.
VAZ 2110, VAZ 2112, replacing the front wheel bearing with your own hands. Video and photo instructions
We are repairing a VAZ 2110, manufactured in 2004, on which the front wheel bearing needs to be replaced, we will show you how to do it correctly with your own hands, as quickly as possible. The instructions are also suitable for VAZ 2112, VAZ 2111.
Raise the car and unscrew the wheel. We screw in two bolts so that the brake disc is held on the guides, insert a strong metal screwdriver into the disc ventilation, and unscrew the hub nut with a 30mm socket:
We remove the screwdriver and unscrew the two fixing bolts. Remove the brake hose. Unpin the bracket:
We unscrew the brake cylinder, two bolts at the top and bottom at 13:
Using a screwdriver, press the block out a little. Remove and move the brake cylinder to the side. We take out both pads. Using a 17mm socket, unscrew the two bolts at the top and bottom that hold the caliper bracket:
We remove the brake disc from its seat. Use a 19mm socket to unscrew the rack fastenings:
Unscrew the ball joint (two 17mm bolts):
We knock out the two rack mounting bolts. We remove the hub. Using a hardened head we knock out 22:
We deliver a couple of blows, after which it should come out along with the clip. We fix it in a vice, Zhiguli cars have grooves on both sides, insert a chisel and knock out:
We have a new wheel bearing from Samara, its number is 6256907. We remove both retaining rings, inside and outside. We will press it outwards and press it in from the inside. We install a spacer that is larger than the bearing and press it out using a press:
We put a stopper. We install the old hub bearing on top and press it through it, first spraying the contact points with silicone grease:
We install the retaining ring and press the hub, also use silicone-based lubricant:
The operation was successful, the bearing is in place. We begin the assembly in the reverse order, lubricate all the fasteners with copper grease, so that during the next repair we can unscrew the parts without any problems.
Video of replacing the front wheel bearing in a VAZ 2110, VAZ 2112:
Backup video on how to replace the front wheel bearing in a VAZ 2110, VAZ 2112:
Read times: 591; Today: 1
Bearing 256907
Its main area of application is the front wheel bearing of VAZ 2108, 2109, 2110, 2111, 2112 cars. It has the following design characteristics - ball, angular contact, double-row, closed type (seals on both sides). The double row ball bearing has the ability to be locked on both sides. Bearing 256707 is installed in the front hub of more modern VAZ models (Kalina, Granta).
Since most VAZ models are widely used not only in our country, but also abroad, the demand for front wheel bearings is very high - they are produced at once in four factories in our country:
- JSC "Saratov Bearing Plant" (labeled SPZ) - according to experts, produces the best front wheel bearings in our country, and they are not very expensive. Buy from official representatives in your region (only they have a guarantee of authenticity and at the same time minimal trade margins - the price for a wheel bearing will be about 350 rubles).
- 23 GPZ (or VBF, Vologda) - among motorists it is considered the best plant, however, the wheel bearings of the previous manufacturer are in no way inferior to them in durability, are less likely to be counterfeited and are a little cheaper.
- SPZ-4 (Samara) - produces products for those who are used to saving. But if you need a high-quality front wheel bearing, it is best to pay attention to the manufacturers presented above.
- 20 GPZ (Kursk) - currently not produced, but some companies still sell them; you will not receive a guarantee of their long-term performance.
Selection of bearings for the “ten”, 2111, 2112
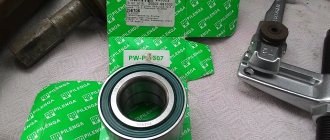
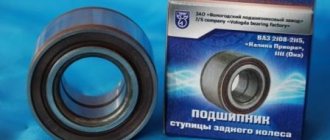
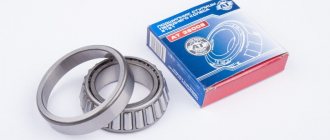
Now you need to decide on the choice of bearing. I advise you to buy parts only in a specialized automotive store.
If we turn to the manufacturer's catalog, we see that the original number for the front wheel bearing of the VAZ 2110 should be: No. 6-256907.
Orient by the dimensions of the part: - outer diameter - 64mm; — internal diameter – 34mm; — width 37mm.
Let's analyze which bearing manufacturers it is advisable to buy and use for repairs:
— the Vologda manufacturer of bearings is rightfully considered one of the best. Its distinctive feature is the low cost of the product. Not bad quality. It is almost never counterfeited. Popular among motorists.
This is the 23rd State Bearing Plant (23GPP);
— however, those who are professionally versed in spare parts for cars use the products of the Saratov Bearing Plant (SPZ);
- if you want to save money, you can purchase inexpensive, but not high-quality bearings from the Samara plant. They are almost half the price, and the mileage after replacing the part will be no more than 20,000 km.
The choice is of course yours, but I would recommend you a Saratov manufacturer.
When purchasing a product, make sure that it is in oiled paper and free of rust and dents. So, you have selected and purchased the part. Let's start replacing it.
How to change the wheel bearing on a VAZ 2110?
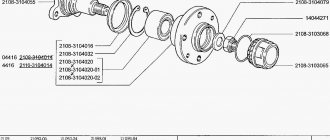
You need to familiarize yourself with the design of the hub (figure below). Disassembly of the unit is carried out strictly on a flat surface, a lift. It is necessary to engage first gear and put the wheels on the “shoes”. You will need a standard set of tools:
- needle file;
- socket head at “30”;
- narrow chisel;
- hammer;
- spanners for 17 and 19;
- mandrel for knocking out clips;
- torque wrench for tightening the hub nut.
First, we remove the bearing from the hub, to do this we do the following:
- Remove the hubcap from the wheel.
- Use a chisel to straighten the dented collar of the nut. This is done in 2 places at once.
- A key set to “30” is necessary to loosen the nut. The front wheel mounting bolts are loosened. If this is not done, the stability stabilizer will interfere with disassembly, as it will push the suspension elements upward.
We dismantle the caliper with a screwdriver, unscrewing the nuts with a 17mm wrench. To prevent the caliper from hanging on the brake hose, we attach it with wire, then unscrew the brake disc mounts.In addition, it may also be necessary to dismantle the trunnion assembly and the retaining ring.
Three ways to remove and replace a VAZ 2110 wheel bearing
Let's consider 3 options when replacing the front wheel bearings of a VAZ 2110 is required.
Method number 1. The idea is to replace the wheel bearing using a puller, without removing the steering knuckle (without removing the strut). The advantage of this replacement is that there is no need to loosen the camber fasteners. It is best to work on a lift or on a viewing hole. The inconvenience is knocking out the hub and then pressing it out. You risk damaging the bearing even before replacement.
The replacement process with this method, after performing steps 1-4 above:
- Use a puller to remove the bearing from the assembly
Method number 2. It is the most labor intensive. Suitable if it is impossible to replace using method No. 1, or if you want to carry out a full repair of the chassis.
- Remove the tie rod end and unscrew all the nuts necessary to attach it to the body.
Place the stand in a vise
Method number 3. It is much easier than method No. 2, since we do without a puller, but there is a difficulty in its implementation, namely, further problems with adjusting the camber during assembly (in the previous method the strut was not removed).
Before unscrewing the rotating mechanism, you need to set two marks. On one of them we mark with chalk the location of the adjusting bolt in relation to the hub strut. Using the second mark, fix the position of the steering knuckle in relation to the rack. When assembling the structure, follow the marks.
- Dismantle the fist and remove the hub completely
- We take out the locking ring
- We move on to a vice, where we press out the old p/sh
- Clean the inside of the hub from grease and dirt
- We mount the new bearing in a vice using a hammer and a mandrel or puller
- We assemble the unit in the reverse order (see points 1-4 at the beginning of the article)
Try to remove the bearing from the axle hub using a chisel and hammer using targeted blows. It is possible to dismantle the bearing using a puller with a central threaded rod and 2-3 legs. The legs are attached to the old hub race, and the rod rests against the axle.
bearing installation
You can perform the installation using several different methods. Firstly, you can heat up the bearing itself and cool the hub. But you should be careful with this, because you can destroy the rubber seal, under which the bearing lubricant is located. Secondly, you can carry out installation work using the same tool that was used for dismantling.
This is a universal tool that will help you both with disassembling and assembling the unit. Without it, it is impossible to replace the rear wheel bearing of a VAZ 2110. There is no need to use additional lubricant during operation. The only thing you will need. This is to apply lithol to the threaded connection of the outer CV joint. In addition, the nut used to secure the outer CV joint needs a new one.
All the work of replacing the bearing can be done independently within 2 hours, or even less. With all this, the Special tools you will need are a puller and a 30 mm wrench with a long lever.
Pay attention to the fact that the nut should be tightened with maximum force. This is the main difference from the front wheel hubs of cars of the traditional series, in which the bearing is conical and the tightening torque is small
In fact, removing and replacing the front wheel bearing of a VAZ 2110 will take you a little time. about half an hour on each side. In total, you will spend at least time, provided that you have all the necessary tools.
20 photos of cats taken at the right moment Cats. amazing creations, and perhaps everyone knows about this. They are also indescribably photogenic and can always turn up at the right time.
These 10 little things a man always notices in a lady Do you think your man does NOT understand anything about female psychology? This is wrong. Not a single little thing will be hidden from the gaze of your partner who loves you. And here are 10 things.
11 strange signs that indicate that you are not bad in bed Do you also want to believe that you give your romantic partner pleasure in bed? At the very least, you do NOT want to turn purple and I'm sorry.
What is it like to be a virgin at 30? What is it like, curious, for the ladies who did NOT actually have sex until middle age.
Defying all stereotypes, a woman with a rare genetic disorder is conquering the fashion world. This lady's name is Melanie Gaydos, and she burst into the fashion world quickly, shocking, inspiring and destroying stupid stereotypes.
7 Parts of the Body You Shouldn't Touch with Your Hands Think of your own body as in a temple: you can use it, but there are some sacred places that you shouldn't touch with your hands. demonstrate research.
A few tips for motorists
As you have already seen, DIY repairs are easy. Such repairs may have to be done every year, because the roads in the country leave much to be desired. But self-service will cost several times less than if you turn to a service station for the service. If you prepare in advance and do all the work sequentially, taking into account each step, the replacement will not take much time. You do not risk anything, the cost of the part is not that high. But such a simple job involves many nuances that are important to consider.
Signs of wheel bearing problems
An indicator of element failure is play or noise in the wheel when the vehicle is moving. The causes of problems may be:
- Bad roads.
- Sudden changes in air temperature.
- Shocks arising from the steering, drive, brakes.
Based on this, you need to promptly inspect and, if necessary, replace the rear wheel bearing on the VAZ 2112. The cost of repairs will be significantly lower than after an accident, which could result from a faulty part.
