Kalina heater diagram
The Lada Kalina heater device is designed for heating and cooling the car interior. If the car does not heat up, the windows fog up, or you feel discomfort, then you need to test the performance of the heating system. Understand the functioning of the stove on Kalina.
General layout of the Kalina stove
The location of the stove was designed for easy installation of an air conditioner. The system is simple, but at the same time quite reliable.
- Left side flow outlet.
- Left air duct.
- Heated side window.
- Air flow splitter.
- Stove.
- Right ventilation duct.
- Right side flow exit.
- Bottom heating duct.
- Interior heating duct.
- Central outlet of ventilation flows.
The supply and exhaust principle is used. The air masses inside the car are heated using a special liquid, which simultaneously cools the engine. The operating principle of the Kalina stove is based on the fact that the liquid warms up the radiator, where heat exchange occurs, and the heated air passes into the cabin through the air ducts.
If we analyze Kalina’s heater, the operating principle and the heater circuit will differ in configuration. The first option has a simple and reliable design. And in the other - full electronic control. The air passes through the filter into the air intake, and then the fan blows further through the system. The engine is running and warmed up. Antifreeze moves through the system in which the heater radiator is involved.
The amount of air that is heated by the stove radiator is regulated by a damper. Controls the operation of the fan and dampers by a unit located on the central panel.
Heating device control unit
- Temperature regulator. We change the heating of the air flow by turning the knob. The blue zone produces cold air, the red zone produces warm air.
- Fan speed switch. By turning the knob clockwise, the intensity of the air flow is adjusted. Choose one of 4 fan speeds.
- Air flow separation selector. Distributed in specific areas:
The flows pass through the upper part of the cabin.
The air is directed downwards.
Air flows are directed onto the windshield and down.
Air flows are concentrated in the area of the windshield, as well as the side ones.
- The handle that controls the recirculation of cabin air. We turn on the mode when driving off-road or in a traffic jam. Used for a short time, the glass fogs up.
- Rear window heating mode switch.
We regulate the direction and saturation of air flows through aerodynamic devices. We turn the guide blades and change the position of the dampers to achieve the desired air direction.
Interior ventilation of Lada Kalina
The outlet pipes are located in the car body under the trunk. The heater is located under the dashboard. The air flow enters the car interior through an intake, which is designed in front of the windshield in the engine compartment. The air enters through the filter and is accelerated throughout the cabin under pressure created by the fan.
1.Pipes for supplying air to the rear of the cabin.
2.Side ventilation nozzles.
3.Blowing the side windows.
- Windshield blower nozzle.
5-6-7. Central deflectors for flows entering the car interior.
We direct the supply air through the deflectors by turning the handwheel. If we turn it up, the flap opens and vice versa. You already understand how the stove on Kalina works.
ESP VAZ button pinout
There are 2 types of Kalinovsky ESP keys: low-current (multiplex) and power.
To install low-current ESP keys, you will need to install an electrical package control module/electric package controller (2170-3763040).
This will also allow you to close the doors and windows of the car with a key or key fob, there will be a two-stage door opening, and the ability to control electric mirrors and door locks from the glass lift module.
If you use ESP power keys, then everything is simpler; no additional control units are required. You just need to connect the keys correctly.
Remember the main thing: power keys are produced by Avar, and multiplex keys are produced by Itelma.
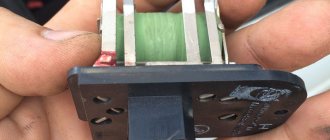
It is necessary to purchase an ESP key for a VAZ 1118, sample AVAR 1118-3709613-10 (921.3709). It has power contacts, the socket of which exactly fits the 10.
Their cost is about 30 - 50 hryvnia.
It will not be possible to install 1118-3763080 - a new module with 4 ESP keys, central locking (CL) and mirror adjustment, since they are all multiplex. And this is reasonable, since it is difficult to stretch such a mass of power wires through the door.
Checking ventilation and stove Lada Kalina
Car owners claim that Kalina’s heater heats much better than previous VAZ models. It sometimes breaks down and requires repair. Do a full system diagnostic to ensure it's working properly.
- We start the car engine.
- Turn the left handle counterclockwise and place it in the blue zone.
- We place the fan speed switch in each of the 4 positions one by one. If the fan does not rotate in one of the positions, then check the power supply circuit of the device.
- Turn the speed controller to maximum.
- Using the right handle (damper control) we check the redirection of air flows. If we notice that there is no change, then the damper drive needs to be repaired.
- Warm up the engine to 90°C. Turn the left handle to the extreme position of the red zone.
- The air that comes out of the panels should blow warm air.
- Return the left stick to the blue zone. Cold air will come out of the nozzles again.
- If the temperature of the air flow does not change due to a change in the position of the regulator, then the control of the central damper drive is faulty.
The car owner may not immediately understand that the Kalina interior heater, the circuit of which is simple, is damaged. You constantly add antifreeze in small quantities, and the carpet in the cabin is dry and there is no smell of antifreeze. A stove leak does not appear immediately, and the main thing is that the liquid can evaporate. The radiator on Kalina does not have pipes leading into the cabin that could leak.
Possible heater malfunctions
Your stove is not working or is not heating well. Look for the cause of the problem. The fan does not work or the heater radiator is leaking - obvious breakdowns that occur at any time.
Stove control unit:
- The engine was warmed up, but warm air did not enter the cabin.
- The damper drive cables may have come off. The only solution is to remove the console.
Dampers . Partially open or close. The rubber seal has come off in the air duct or foreign objects have gotten into it.
Antifreeze circulation . Start the engine and check the level in the expansion tank, and also check for any disturbances in the normal flow of antifreeze. Possible reasons:
- Pump. Cannot be repaired, only replaced.
- The cooling system is clogged. Clean or rinse.
Checking the thermostat . Warm up the engine to 75°C. If the upper pipe is cold, then the thermostat does not work correctly and does not allow coolant to move in a large circle. Replace the device.
Air lock . Remove the plug from the vehicle's engine cooling system.
Temperature sensor . Constantly blowing cold or hot air. If cleaning the contacts does not help, then replace the non-working temperature sensor.
Air filter . If the air flow is weak and there is no desired temperature, then replace the filter. Be sure to check the heater resistor, which controls the rotation of the fan and is located under the glove compartment.
Electric fan . The device does not turn on regardless of the selected mode. Check the fuse that controls operation. If the fan is turned on and its operation is accompanied by strange sounds, clean or replace it.
Dampers . It is difficult to determine the breakdown unless you replace the dampers themselves.
The cause of a heater malfunction may be a depressurization of the car's engine cooling system. The types of breakdowns described above cause malfunctions in the operation of the Lada Kalina car's stove. Such breakdowns do not require special knowledge; they are easy to understand and repair.
Window lifter.RF › Blog › Connecting the MAX-2 electric window controller on LADA Kalina
We continue to demonstrate the connection of the MAX-2 window lift module, which is not just a window closer, but a full-fledged window lift comfort unit.
In this video we will show the connection process on LADA Kalina I (VAZ-1117, -1118, -1119).
Brief content of the video: – How to prepare the MAX-2 controller for connection. – How to install in the door and connect the controller to the power windows and on-board network. – How to “train” the MAX-2 controller.
For more information about the functions of MAKS-2, see our other videos: - general overview - demonstration of functions
You can also see instructions for installing MAX-2 on other cars: - LADA 110 - LADA Samara
If you liked our video, click “like” and share with your friends. And also subscribe to our page - it will be even more interesting)
Buy the MAKS-2 module in the Steklopodem.RF online store
Comments 29
I don’t understand how where, how to connect the wires, you showed the final result of twisting the wires, when the wire is cut off, what to do with the plus minus and the white wire at the exit of the block, the input is clear plus and minus separately, you can be more detailed
The kit includes a connection diagram. I recommend doing your research before watching the video. Then it will be clearer what, why and why.
Hello! I installed this module. From the signaling I found a wire that is responsible specifically for the window closer, checked it with a tester, when the car is disarmed there is a “+” on this wire, when I arm the “+” it disappears, I connected this wire to the yellow wire, the closer does not work. I decided to experiment, connected it to the black wire, the door closer works but only works in reverse, when disarmed it raises the windows and blocks the buttons. Any thoughts on what could be wrong?
>From the signaling system I found a wire that is responsible specifically for the window closer, checked it with a tester, when the car is disarmed there is a “+” on this wire, when I arm the “+” it disappears, This means that the pulse at the alarm output is negative.
>connected this wire to the yellow wire, the closer does not work. I decided to experiment, connected it to the black wire, the closer works. This is how it should be: the negative control pulse is connected to the black wire of MAX-2.