The day before yesterday in the morning, I’m getting ready to go to work, I get into the Kalina, turn the ignition key... and the key turns past the “Starter” position. The engine started. Realizing that something wrong had happened, I tried to turn the key back, but no such luck, the key does not turn in any direction. I pulled the key out of the lock and the car continued to work. I inserted/took out the key several times, tried to turn it back and forth - all to no avail.
I understand that it’s not worth driving to work, in case the steering wheel bites on the road. And then how to start it? But first you need to turn it off. I didn’t immediately remember about fifth gear and the sharp clutch, so I reached under the hood and pulled the wires off the ignition coils. The engine stalled, but the ignition remained on. I removed the terminal from the battery and ran to work on foot...
I'm researching the Internet - I'm not the first to have this problem. The reason is a broken return spring. The springs are not on sale separately, but they can be taken from the new model VAZ-2108/2109 ignition switch, which costs much less than the Kalinovsky one. Replacing the lock will be accompanied by replacing the cylinders in the doors, because... Kalina has the same key for all the locks.
The next problem is removing the ignition switch. It is mounted on 4 bolts with shear heads. Those. you will have to unscrew it with the help of a chisel, a hammer and some mother...
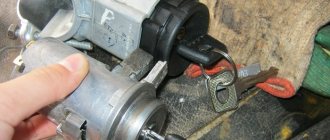
In practice, everything turned out to be somewhat simpler than it seemed; working with a chisel turned out to be not so difficult. A couple of hours and the lock is removed.
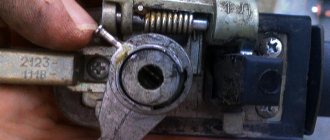
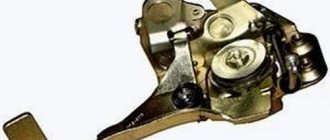
I disassembled the lock - everything turned out to be exactly as they write on the Internet. The return spring broke, the key turned further, and the locking ball fell into the groove of the steering shaft lock, blocking the key.
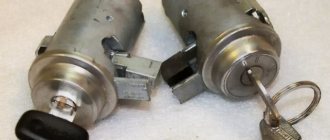
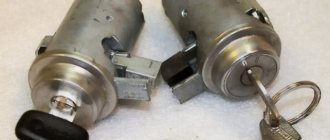
Second day. After work I go shopping in search of spare parts. It was impossible to walk further than the first store I came across, so I stopped there. There are no springs for sale. There is a lock from Kalina for 890 rubles (and on the Internet they wrote that in 2011 it cost 1200 rubles, apparently spare parts for Kalina do not increase in price, but fall, which is good news. But remembering that the same spring is in the VAZ lock - 2108, I also inquired about this lock. It turned out that it also exists and costs 360 rubles! Visually it looks exactly like the Kalinov lock, differing only in the plastic lining on the cylinder and the connectors. I decided to take the figure-eight one.
At home I disassemble the lock, and here it is! It's exactly the same spring! I moved it to the old lock, lubricated it and assembled it. I checked it with the key, it works fine. It's time to put it on the car.
Installation is already much easier than removal. I bought bolts with folding heads at the same store. Assembly took no more than an hour.
When assembling the lock, I sprayed silicone grease on the cylinder and poured lithol under the lid. The new lock had no lubrication at all! There was grease on the lock from the car, but I collected all of it with my hands when I disassembled the lock.
Conclusion: if the return spring of the Kalina ignition switch breaks, feel free to buy the 2108 lock, it costs 2.5 times cheaper than the Kalinovsky one! And take the spring out of it. In this case, there is no need to rearrange the door cylinders and immobilizer tags in the keys.
Almost all modern cars have an ignition switch. How to correctly use this unit in the Lada Kalina model? This important point will be discussed in our material. Many people are also interested in replacing the ignition switch.
Ignition switch malfunctions
Like any electronic device, the ignition switch of the Lada Kalina is subject to frequent breakdowns.
Malfunctions can occur for a variety of reasons, the most common of which are the following. Oxidation of contacts always leads to serious damage (usually due to moisture and dampness in the machine)
Contact burnout. what happens due to sudden voltage surges. Voltage drops usually occur when the power unit is started, during which the temperature inside the system rises sharply, causing the insulation to simply burn out
This is why it is so important to approach the launch issue wisely.
Mechanical damage. If, when you are about to turn the key, you notice that it has become more difficult to do so than usual, it means that something happened to the lock cylinder, perhaps it was simply clogged with dirt or dust, or maybe there was a defect at the factory that came to light only now.
If the problem lies in burnout or oxidation, then when you turn the key in the lock, you will not see any reaction from the ignition system. In this case, you just need to replace the contacts without changing the entire lock; if the defect in the wires is not severe, then you can get by with cleaning the contacts.
Damage to the lock cylinder also occurs when someone tries to steal a car. In any case, the lock needs to be changed completely. But how to do it yourself?
Possible causes of ignition switch malfunctions and ways to prevent them
Most often, the cause of a malfunction of the ignition switch is severe mechanical wear of its moving parts. Contacts fail a little less often as a result of burning and oxidation. To extend the service life of the lock, when the first signs of malfunction appear, it must be removed, disassembled and inspected, removing wear and tear products, applying lubricant to the moving parts and cleaning the contacts.
The fact that the lock may soon jam is indicated by periodic jamming of the key in one of the positions, problems with its removal and insertion, or lack of proper response to turning it. Most often, at first, the ignition switch continues to perform its functions when you carefully rock the key from side to side and search for the working position. However, you shouldn’t delay solving the problem - sooner or later it will break completely. If immediate repair is not possible, silicone lubricant or a liquid such as WD-40 applied to the key and directly to the lock cylinder through the key hole can sometimes temporarily solve the problem.
Thanks for subscribing!
Replacing the ignition switch – Lada Kalina Blog
Lada Kalina hatchback Sport Logbook Replacing handbrake cables on the Luca ZTD
I greet all readers of my blog, and this article will show the process of replacing the ignition switch on a Lada Kalina car. For a long time now I have had a similar review of other front-wheel drive cars, and I could have posted it on the website, but I decided to show everything specifically using Kalina as an example.
So, to perform this procedure we will need:
- Phillips screwdriver
- Sharp and narrow chisel
- Hammer
- Head for 10
- Ratchet with extension
Photo report on removing and installing the ignition switch on the Lada Kalina
The first step is to unscrew all the screws and screws securing the steering column casing. I won’t dwell on this point in detail; I think that there shouldn’t be any problems here.
There is no need to remove the steering wheel, although in my photo it is removed, since the process was carried out while disassembling the car. So, we set the chisel on the bolt heads, as shown in the photo below:
You can see this more clearly in close-up.
In this way, we remove all 4 bolts securing the ignition switch one by one. And after that we finally turn them off with long-nose pliers:
When they spin quite easily, you can even do everything by hand.
When the 3 bolts are unscrewed, the lock is almost completely released and must be held on the other side so that it does not fall. We unscrew the last one and remove the part, as well as the clamp.
All that remains is to disconnect the plugs with the power wires from the lock, as is clearly shown below.
The lock is now completely freed and ready to be replaced.
When installing a new one, please note that you need to buy special bolts with tear-off caps in order to install everything as required by the factory! The lock is installed on the shaft, and the bolts are tightened with a certain force until the caps of each of them break off
This photo is shown using the example of the tenth family, but the essence does not change.
The lock is installed on the shaft, and the bolts are tightened with a certain force until the caps of each of them break off. This photo is shown using the example of the tenth family, but the essence does not change.
We reconnect the plug, install the casing and you can check the functionality of the mechanism. If you have any questions, you can watch the video on this topic below.
Video review on replacing the ignition switch
This manual was demonstrated on a car of the tenth family, but, as mentioned above, there is practically no difference in performing this repair. There are a couple of things that will be different:
- There is one power plug on the ten, and there are two on Kalina
- The steering column cover is attached slightly differently
When the problem is spark plugs
The ignition switch is not always the reason the engine refuses to start. In such an unpleasant situation, you should start troubleshooting by checking the spark plugs. What kind of spark plugs should be equipped with the Lada Kalina engine? The manufacturer recommends “A17DVRM” elements. As an analogue, you can install “A15DVRM”. You can also resort to installing products from foreign manufacturers. The cost of the kit is small (does not exceed 500 rubles), so there is no point in saving, but it is recommended to purchase high-quality products.
The design of the candles may vary slightly. This concerns the number of electrodes. For LADA Kalina, it is recommended to use products with two electrodes: central and side. The service life directly depends on operating conditions and fuel quality. It is recommended to replace spark plugs after 30,000 miles. To perform the replacement procedure, you will need to stock up on a special spark plug wrench. How to remove and also how to replace spark plugs? The process itself is quite simple and looks like this (motor cooled):
- We wipe the adjacent areas around the spark plug wells with a rag to prevent debris from getting inside the combustion chambers.
- We remove the ends of the high-voltage wires from each spark plug.
- We unscrew each of the spark plugs one by one and inspect the electrodes (image No. 4).
- We screw in the new products using the appropriate tightening torque.
Key programming instructions for Lada Kalina, Priora, Granta, etc.
- Close all doors. Turn on the ignition with the training key and wait in the on state for at least 6 seconds.
- Turn off the ignition. The indicator light in the warning lamp unit should flash quickly (at a frequency of 5 times per second) while the learning procedure is being carried out correctly. If the lamp stops flashing quickly, it indicates an incorrect operation, an out-of-time interval, or a malfunction. Remove the training key from the ignition switch.
- While the warning lamp is flashing (about 6 seconds), insert the remote control and turn on the ignition. The immobilizer buzzer should emit three sound signals. If the buzzer does not sound and the flashing indicator stops, this means: - the time interval of 6 seconds has been exceeded and it is necessary to repeat the learning procedure, starting from step 1; - the immobilizer is faulty
- Wait 6 seconds for the buzzer to emit two more beeps and turn off the ignition.
- If it is necessary to train the second remote control, then you should perform steps 3...4 again, using the second learning remote control to turn on the ignition. If not, continue from step 6.
- After turning off the ignition for no more than 6 seconds, while the indicator is flashing, remove the remote control, insert the learning key and turn on the ignition. The buzzer should beep three times. Wait 6 seconds until the buzzer beeps two more times.
- Turn off the ignition without removing the training key, wait 6 seconds until the buzzer sounds a single sound signal. The indicator should flash twice as fast. If the sound signal does not sound and the flashing of the indicator stops, you should return to step 1 and repeat the learning procedure. If a repeated failure occurs when performing step 7, this means that the ECM was previously trained with a different key, in which case the controller should be replaced.
- After the buzzer gives a single sound signal, no later than 3 seconds, turn on the ignition for 2...3 seconds and then turn it off (after turning on the ignition, the buzzer will sound three times and the indicator will stop flashing). The hazard warning lights should flash and the car signal will “beep”.
- Remove the learning key. Wait with the ignition off for at least 10 seconds. Insert the working key and turn on the ignition. Wait 6 seconds, if the indicator does not flash, test start the engine, the engine should start. If the indicator flashes, turn off the ignition and wait at least 10 seconds. Turn on the ignition. The warning light should not blink, and the engine should start. If after turning on the ignition, after 6 seconds the warning light comes on with a constant light, then the learning procedure must be repeated, starting from step 1.
Replacing the ignition switch for a VAZ 2115 injector
How to use the lock?
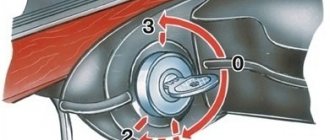
The standard Lada Kalina lock has three key positions.
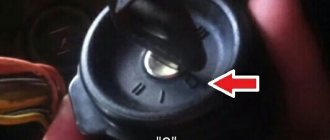
- Position “0” is fixed. From this position the key can be easily removed. In this key position, external lighting devices can operate. The functionality of the alarm and sound system is also available.
- Position “1” is also fixed. Here the key is locked inside the lock and cannot be removed. The ignition is turned on. Power from the on-board network is available to all consumers, excluding the starter. It is not recommended to leave the key in this position for a long time, as the battery may be discharged. Before starting the engine, it is advisable to hold the key in this position for about five seconds. During the specified period, the fuel supply pump will be able to create sufficient fuel pressure in the line for trouble-free starting of the engine.
- Position "2". This mode ensures that the starter unit is turned on. When the key is released, it returns to position “1”. If you completely remove the key and turn the LADA Kalina steering wheel to one side, the mechanism shaft will be blocked. This is necessary as an anti-theft measure. To “free” the steering wheel, you will need to set the key again to the “zero” position and rotate the steering wheel with rocking movements to achieve the ability to move the key to position “1”.
In the position corresponding to the starter activation mode, the key should not be held for more than 8-10 seconds. If an attempt to start the power plant is unsuccessful, you must pause for about 15-20 seconds and repeat the start. Also, do not hold the key in this position while the engine is running.
When driving, it is forbidden to remove the key from the lock cylinder. If this is neglected, the shaft will block, which will cause loss of controllability.
If the key is left in the lock and the driver's door is open, the audible warning signal will be activated. When the key is removed, but the parking lights are on, when the Lada Kalina door is opened, an audible warning will again sound in the form of short beeps.
The lock has a function to block the starter from turning on while the engine is running.
An immobilizer sensor is also integrated into the lock design. This is an anti-theft agent. Note that a lock with an immobilizer can function without problems in the following range of external temperatures: from minus 40 to plus 45 degrees Celsius.
The set usually consists of two keys. The first key integrates a remote control for the central locking of LADA Kalina, and the second has a red insert.
The main (first) key is responsible for the following functions:
- turning on the ignition;
- luggage compartment and door lock;
- possibility of remote control;
- activation of the APS-6 immobilizer.
A key with a red insert provides:
- possibility of turning on the ignition;
- unlocking doors and luggage compartment lid;
- ensuring the immobilizer learning process.
Removing and disassembling the ignition switch Lada KalinaVAZ 11173-11183-11193
Communities Lada Priora Lada Priora Club Blog Ignition switch wires
We remove the ignition switch to replace its assembly, as well as to replace the contact group of the switch or the APS coil. Disconnect the wire terminal from the negative terminal of the battery. We remove the steering column switches (see “Removing the steering column switches”). The heads of the ignition switch mounting bolts are cut off. That's why..
...unscrew them using a chisel. Loose bolts can be removed using pliers.
Remove the bracket from the steering column...
...and the ignition switch. Use a slotted screwdriver to pry up the clamp of the APS coil wire block...
...and disconnect the coil wiring block from the APS block wiring block.
By pressing the block latch... ..disconnect the ignition switch contact block from the wiring harness block.
Using a Phillips screwdriver, unscrew the three screws...
...and remove the ignition switch bracket.
We take out the locking rod of the anti-theft device. Turn the key in the ignition switch...
...and remove the locking rod drive. We remove the rod spring from the drive...
...and a stopper with a spring. We push the cylinder out of the switch body...
...and remove the locking ball.
Remove the cylinder from the switch body.
We remove the locking ball spring from the hole in the cylinder.
Using a screwdriver we pry off the two plastic latches of the wire block cover...
...and open the lid. We mark the wires located in the block.
Using a thin awl or stiff wire, bend the locking tendrils of the wire tips...
...and remove the wires from the block.
Remove the insulating tube from the wires.
Squeezing the three plastic latches with a screwdriver… ..remove the contact group from the body…
...and bring the wires out through the holes in the housing.
Using a screwdriver we pry off the three plastic latches...
...and disconnect the contact group.
Remove the moving part of the contact group.
By pressing the moving contact and turning it counterclockwise...
...remove it from the body.
Remove the contact spring.
Using a screwdriver...
...remove the APS coil. We assemble and install the ignition switch in the reverse order. We install the moving part of the contact group like this...
...so that the wide protrusion of the movable contact is located opposite the protrusion on the cover with the fixed contact... ...and the protrusion on the lock cylinder must fit...
...into the recess on the body of the moving part of the contact group.
..
220
221
223 ..
content .. 242 243 244 245 ..Lada Kalina 2. Ignition switch malfunctions
Main malfunctions of the ignition switch and their causes:
Ignition switch lock
You can’t call a blocking a malfunction, but many people are strangely afraid of it and really don’t know what to do. Steering column locking is present on every car as some kind of incomprehensible and unusually primitive protection against car theft that should create trouble for the thief.
What to do if the steering wheel is locked? You need to carefully scroll from side to side with one hand, and with the other hand, carefully and without sudden movements, try to turn the key; when you find the desired position, the key will turn.
Worn ignition switch contacts
For this reason, the ignition switch most often fails and the only solution to this problem is a contract lock or its repair.
Over time, gaps between parts in the ignition switch occur due to metal-on-metal friction, which naturally renders them unusable.
First, check the main key with the spare key, because if it is very worn, it is most likely the cause of the malfunction and try to start the engine with the spare key. If the key is in order, then all you have to do is make sure that the culprit is the ignition switch and buy a contract one.
Heavily worn parts make themselves known in advance by periodically jamming the lock. To avoid severe wear and tear, you should not hang heavy keychains and jewelry on the keys, yes, it’s beautiful and fashionable, but it breaks your lock at every bump, hole and turn.
Ignition switch frozen
This malfunction was included in the rating because With our frosts this happens often and often people pull the key in a frozen lock from side to side, eventually they break it and part of the key remains in the ignition, and then they have to buy a contract.
Solving this is quite simple, the main thing is not to rush, for this you will need: - a lighter or matches; -chemical defrost; -lungs full of air.
The first thing is to heat the key with a lighter or matches and insert it into the lock, carefully turning it several times.
The second method, a chemical defrost, will solve this problem very quickly, the main thing is not to overdo it with the liquid, just spray a little into the lock.
The third method is very effective, you take air into your lungs, lean against the lock and start blowing intensely into the ignition switch slot, don’t laugh because this technique is also suitable for locking doors, and everything is very simple, it’s winter outside and -20 degrees, and you exhale warm air that will melt the ice.
Dirty ignition switch
There are people who lubricate the ignition switch with engine oil in order to improve the operation of moving particles, but dust and other debris sticks to the oil and acts as sand, leading the parts to a deplorable state over time and, at best, the lock will simply jam and need cleaning.
First, disassemble and clean it with wd 40 or alcohol, you can do without disassembly by simply spraying liquid into the lock through a straw, if it helps, then rejoice.
Other faults:
The most important sign of a faulty lock contact group is the simultaneous failure of an entire group of electrical devices. This happens because within the group several electricity consumers are powered through each contact. For example, low and high beams, turn signals and reversing lights turn on only when the ignition is on. If the contact through which power is supplied to these consumers, say, burns out, then current will not be able to pass through it and the above-mentioned lighting devices will “fail.”
When several devices, seemingly unrelated to each other, stop working, the problem is almost always in the contact group of the ignition switch. Another “bottleneck” point is the fuse box, where several consumers can also be “suspended” to each socket. However, the same headlights are too powerful consumers, so even in the classics they are separated into separate fuses, and their failure together with the reversing lights clearly indicates a malfunction in the contact group of the ignition switch.
– A non-working starter, when neither the solenoid relay nor the control relay even clicks (they are simply not supplied with voltage through the contact group in the lock)
– Failure of electrical consumers, which, at first glance, are not connected in any way, but must work together in the same position of the ignition key.
– Restoring the functionality of devices when moving the key in the lock within one position (the contacts of the group are still in contact with undamaged areas and still pass current to consumers)
If there is at least one of the above symptoms, then with a high degree of probability we can talk about a malfunction of the ignition switch contact group. As a rule, the group cannot be repaired, so it is better to replace it.
content .. 242 243 244 245 ..
ignition switch Kalina connection
Egnition lock
In the power supply circuit for most of the vehicle's electrical equipment, except for the emergency, sound and light alarms, the canopy lighting, side lights, the brake signal, the security alarm and the electric door locks, voltage is supplied through the ignition switch. To increase the car's anti-theft properties, the switch is combined with a lock, which is why this device is more often called an ignition switch.
The lock body is attached to the steering column with four special bolts with break-away heads. At a certain tightening torque, the bolt heads come off, and after that it becomes impossible to unscrew the bolts with wrenches.
The ignition switch is additionally equipped with a steering shaft locking mechanism. Once the key is removed from the lock, the spring-loaded latch is released. When you try to turn the steering wheel, the latch locks the steering shaft from turning.
EXAMINATION
To do the job you will need a multimeter.
Execution Sequence
1. Prepare the car for work and disconnect the wire terminal from the negative terminal of the battery.
2. Remove the decorative linings of the steering column.
3. Disconnect the pair of connectors of the ignition switch (lock) wires.
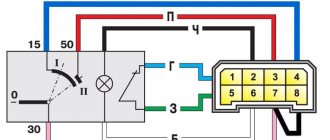
4. Using a multimeter (in ohmmeter mode) based on the color of the wires, we check the serviceability of the terminals in the block.
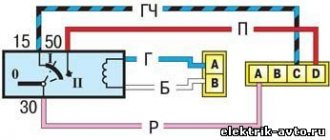
Perform the check when the key is in position O - “off”. Then check the contact closure in position I - “on” and II - “starter”. The order of contact closure and the colors of the wires at the terminals are shown in the car electrical diagram
We replace the ignition switch with a faulty contact group.
REMOVAL AND INSTALLATION
To complete the job you will need four special bolts with breakaway heads.
In the absence of special bolts, you can secure a new lock using MB threaded bolts 20 mm long, although the anti-theft security of the car will be significantly reduced.
Removal
1. Disconnect the ignition switch (lock) wiring harness connectors.
2. Having rested the chisel blade against the edge of the head of one of the bolts, lightly hit the chisel with a hammer to loosen the bolt. Similarly, loosen the three remaining bolts securing the switch.
The chisel should not cut the head of the bolt, it should turn the bolt counterclockwise to loosen it.
3. Using pliers with narrow jaws, remove the bolts. While unscrewing the last bolt, hold the ignition switch. Remove the lock mounting bracket and the ignition switch itself from the steering column.
Installation
1. Before installing the ignition switch, insert the key into it and turn it to position I (“on”) so that the latch of the steering shaft locking mechanism is pushed into the lock body.
2. Install the ignition switch with mounting bracket on the steering column and hand-tighten the new mounting bolts.
3. Having removed the key from the ignition switch, we check the operation of the steering shaft locking mechanism. If the steering shaft does not lock after a full turn of the steering wheel, the position of the ignition switch on the steering column must be adjusted so that the lock latch can engage the groove in the steering shaft.
4. After making sure that the locking mechanism works, use a 10 mm spanner to tighten the bolts evenly (crosswise, half a turn) until their heads come off.
5. Connect the ignition switch (lock) wire blocks and install the steering column pads.
Checking the operation of the ignition switch
To make sure that all contacts have been connected correctly, we need to reconnect the “-” terminal of the battery and insert the key into the ignition switch. When the ignition key is turned to position “0,” all system mechanisms must be turned off. When the key is moved to the “I” position, the engine is turned on and power is supplied to electrical appliances. In position “II”, starting the starter is added to this.
We also pay attention to the rod of the anti-theft mechanism. When moving the key from position “0” to position “I” and vice versa, it will extend and retract.
As you can see, there is nothing overly complicated about replacing a damaged ignition switch. With a little patience and desire, you can fix breakdowns yourself without resorting to the help of specialists. Most importantly, do not forget about precautions! Good luck on the roads!
Replacing the ignition switch yourself
Unfortunately, the Lada Kalina cannot please you with its reliability and durability; many systems, including the ignition switch, fail within a couple of years, so in order to save on repairs at expensive car repair shops, it is better to find out how to do it yourself. So, having come to the conclusion that the lock needs to be changed, we buy a new lock, which costs around a thousand rubles. In the kit we will receive three cylinders (on the doors and trunk) and 2 keys. You also need to purchase four shear bolts. since the old ones will no longer be suitable after dismantling.
In addition to the product itself, we will need the following tools:
- chisel;
- two screwdrivers, a flat one for removing the clamps and a cross for the bolts;
- 10mm wrench or 10mm ratchet;
- key to 8.
Let's get started
1. First you will need to disconnect the battery cable from the negative.
2. Armed with a cross-head screwdriver, unscrew the fasteners on the steering column. To make it more convenient for you, we immediately warn you: there are two bolts on the right and left sides (3), two at the bottom in the middle (2), and two at the very bottom (1). There is also a self-tapping screw located directly under the steering wheel (4).
3. We take out the clamps holding the steering column switches. We dismantle the switches.
4. Now we need the help of a chisel. It is necessary to apply blows of medium power and unscrew the bolts. Bolts, as a rule, become very sticky after several years of use, so you will have to work hard. As soon as you notice that the bolts begin to move out of place, you can pick up pliers and continue to work only with their help.
5. We need to get to the lock connectors, of which there are only two (main power and immobilizer antenna). The connectors are hidden under the console casing. To gain access to the connectors, you need to slightly pull the wiring harness away from the lock and pull them out.
6. Unplug the connectors, and then remove the ignition system switch.
Now we replace the old lock with a new one and reassemble it in the reverse order. But don’t forget that you need to do a little more magic on the doors and trunk, changing the lock cylinders.
Replacing door cylinders
To remove the old cylinders on the doors and trunk, you need to carry out a simple job consisting of several stages.
1. Take a 8mm wrench (or a 8mm socket with a ratchet) and a Phillips screwdriver. 2. Unscrew the screws from the door trim and remove it.
3. After removing the casing, you need to use a 8mm head to unscrew the iron figured holder (3 bolts).
4. We reach for the rods and, using a screwdriver, remove them.
5. We get to the bolts that secure the handle, the bolt is screwed in from the end, and if you look deep into the door there will be a nut number 8, unscrew that too.
6
Carefully pull out the door handle
7. We take out the larva, having first found the latch and pressed it with something very thin.
The tailgate lock can be removed a little easier:
1. Remove the door trim and see the lock system.
2. Unscrew the two nuts by 8 and tear off the system in which the larva “sits” from the rod.
3. We disassemble it and take out the cylinder (when disassembling it is better to remember where and how everything is attached, there are many small parts.
Ignition switch in viburnum: repair or replacement?
For locks of classic VAZ models, the contact group or cylinders were sold separately, which significantly reduced the cost of repairs if these parts failed. The ignition switch for Kalina can only be purchased assembled, so many people prefer to change it entirely at once, without having to worry about disassembling and reassembling. It must be remembered that in this case you will also have to change the cylinders in the door and trunk locks, since in Kalina they are all unlocked with one key. Otherwise you will have to take two keys with you.
Another nuance is that the car has a built-in immobilizer - an anti-theft system that prevents unauthorized starting of the engine. If it is activated, then when installing a new lock and using new keys, you will need to remove the chips from the keys for the old lock and install them in the new ones, otherwise you will not be able to start the car even with a working lock.
Complete failure of the ignition switch can be prevented by disassembling it, removing scuffs and wear debris, and restoring lubrication. If the damage is serious, it is better to replace the ignition switch assembly or replace worn parts by taking them from a new lock. In the latter case, you may not have to change other cylinders or carry two keys.
Training procedure
Carrying out the training procedure leads to the following consequences:
- the engine control controller activates the anti-theft function if it has not been activated;
- the system changes its password to a new one chosen at random;
- a new system password is written into the training key;
- all remote controls that were previously trained are erased from memory;
- The codes of those remote control units that were trained in this training procedure are stored in memory.
The training procedure is applied in the following cases:
- activating the anti-theft function in the controller (for example, in a new car or replacing a faulty controller);
- erasing old and training new remote controls if lost;
- changing the system password if the owner admits that his system password may have been read (for example, when selling a car from one owner to another)
- remote control training when replacing a faulty immobilizer with a new one.
Only new remote control units or those that were previously trained using the training key used in this training procedure can be trained. It is impossible to learn a remote control key from another car into your car.
Please note: Due to the importance of the training key, it is not recommended to use it for everyday use and should be kept in a safe place. Before starting the training procedure, fill the car with at least 10 liters of gasoline, so as not to get confused by squeaks
Before starting the training procedure, fill the car with at least 10 liters of gasoline so as not to get confused by the squeaks.
If the problem is the spark plugs
Engine with 8 cl. Engine with 16 cl. А17ДВРМ АУ17ДВРМ 14R-7DU 14FR-7DU RN9YC RC9YC BPR6ES BCPR6EC W20EPR Q20PR-U11 LR15YC DR15YC WR7DC FR7DCU. Spark plugs have different prices in different regions of the country. A set of them costs approximately from 200 to 500 rubles.
Spark plugs from some manufacturers may have a different number of electrodes. Along with standard single-electrode spark plugs, there are multi-electrode spark plugs. For cars manufactured by VAZ Kalina, standard single-electrode spark plugs are recommended. Their service life depends on the conditions in which the vehicle is operated.
It is recommended to change spark plugs every 30,000 km. Many owners of Lada Kalina cars identify the following spark plugs as the best brands: Brisk, Denso, NGK. A fairly significant group of car enthusiasts highlights the A17DVRM spark plugs produced in Engels. To replace spark plugs on Kalina you need a special spark plug wrench. The procedure is quite simple.
- The engine in the area where these products are located must be wiped clean so that debris cannot get inside the cylinders when the spark plugs are unscrewed.
- The tight-fitting wires are removed from each spark plug one by one.
- The candles are turned out and inspected (image No. 4).
- The candles are first screwed in by hand, then tightened with a wrench.
The ignition switch in a car is a reliable unit that can operate for a long time and without failure. But sometimes it has to be removed for repairs or for complete replacement. You can do this yourself. At the same time, you can check the functionality of parts that may fail.
Resynchronization of remote control codes
In cases where the remote control buttons are pressed outside the range of the radio channel, the “floating” code counter in the remote control goes out of synchronization with the counter in the system control unit. If the number of button presses outside the signal reception area of the system exceeds 1000, the system stops responding to remote control commands. In this case, the remote control training procedure should be repeated.
Updated August 01, 2013
Due to the increasing number of cases of lost training (master) keys for car owners of Kalina, Priora, Grant, Niva-Chevrolet, we are introducing a new type of service: registration of working keys in these cars, without a master key!
Usually in such cases, it is necessary to change a set of blocks: ECU (electronic engine control unit), APS unit, glass control unit, ignition switch complete with door cylinders and new keys, etc.
Now in our company you can register a working key with buttons without a training key, and for an additional fee you can receive a new training (red) key for your car. For this procedure, you need to come by car and leave it while the work is being carried out. The work includes dismantling the necessary units (ECU, APS, etc.) from the car, programmatically changing the data, installing the units on the car and registering the keys. We emphasize that a key registered in this way will cost more than registering the remote control yourself if you have a training key, but naturally cheaper than buying and replacing a set of blocks with new ones.
Update January 05, 2014
Attention! It is now possible to make a duplicate chip for autostart using a working key with remote control buttons! A master or training key is not required. The chip obtained in this way can be used both for installation in the immobilizer bypass unit to implement autostart, and for everyday use, starting the engine of Lada Kalina, Priora, Niva-Chevrolet cars
Such a duplicate is more expensive than a regular chip, which can be registered using a master key, but this is a real solution in cases where the master (training) key is lost
To create a duplicate, you need a car, a working key with remote control buttons (and it doesn’t even matter if it is partially faulty, for example, the buttons don’t work, etc., the main thing is that the ignition key starts the engine). The entire copying procedure takes 10-15 minutes.
Contact us by phone in contacts.
Repair of the ignition switch on Kalina
The ignition switch stopped working - the key was stuck in position “1” with the engine running. No matter how hard I tried, the key did not want to move to position “0” in order to turn off the engine. I had to take extreme measures - pull out the fuel pump fuse. I somehow didn’t immediately think about 5th gear and the sudden release of the clutch. So that the ignition is on, the battery does not shut down overnight, the “-” terminal is removed.
The next day, as usual, after reading a couple of articles from the Internet, I began to look for the cause of the breakdown and try to repair the ignition switch on my Kalina.
The first thing you need to do to understand what's going on is to remove the lock itself from the steering column. To get to its mounting bolts, it is necessary to dismantle the decorative trims. This is done quite simply - unscrew all the bolts and remove the linings themselves.
Great, now you need to find the wires going to the ignition switch and disconnect them. Before doing this, you must remove the “-” terminal from the battery, unless, of course, you have already done this.
There are 2 wire harnesses coming from the lock - one thin, the other thicker. The contact connector of the first is in plain sight, but to reach the second (thicker) you need to pull on the wires themselves.
The connector is hidden behind the panel.
How to remove the ignition switch? It is fastened with bolts with self-cutting heads. Therefore, to unscrew them you will need the help of a hammer and chisel. You can, of course, use an electric drill, but this is too much.
How did I do? With a light blow to the edge of the bolt, I punched the groove, then placed the same chisel in this groove at an angle (in the direction of unscrewing) and lightly knocked until the bolt turns. And so on until it turns easily enough to be twisted by hand.
In general, I tinkered with these bolts enough and the main goal was achieved - the ignition switch was removed for further repairs.
To get to the inside of the lock you need to unscrew 3 bolts.
And here is the cause of the breakdown: the spring that tilts the key from position “2” to position “1” has burst. Plus, the ball jumped out of its place, so the key refused to turn.
I put the ball in place, but there is a problem with the spring - it is not sold separately, only assembled with a lock, I didn’t really want to change the ignition switch itself, since I would need to relearn the key again, as well as change the cylinders in the doors. The same spring is in the lock from the VAZ 2108/2109.
You can buy it, remove the spring and put it in Kalinovsky, since it costs 2 times less. There is another option - to repair the old one.
This is the method I chose. In order to easily bend the new tendril on the spring, it needs to be heated to red. I warmed it over a gas stove. We bend the mustache, and if there is excess left, we bite it off. It is advisable to bend it in such a way that it fits into its groove slightly under tension, then the spring will work more clearly. The end result can be completely heated and thrown into oil to cool.
That, in principle, is the entire repair of the ignition switch on Kalina. The only other thing that can be done is to lubricate the rubbing parts with lithol.
Ignition switch Lada Kalina diagram, wires, how to connect, remove, replace
The voltage in all electrical equipment of the vehicle, excluding parking lights, brake lights, interior lighting and hazard warning lights, is controlled by the ignition switch. To increase the car's resistance to theft, the ignition switch is combined with a lock. The lock, in turn, is held on the steering column by special bolts with break-away heads.
It is impossible to remove such bolts with a wrench; you need to firmly tighten the bolt and tear off the head. The ignition switch is also equipped with a mechanism that locks the steering shaft. The shaft is fixed by means of a latch, which does not allow it to rotate when the steering wheel is turned.
You can check the operation of the ignition switch as follows. First of all, you will need to prepare the car for inspection; you will need a multimeter as part of the equipment. Disconnect the wire terminal from the battery negative. After this, you need to remove the decorative trims from the steering column.
The next step is to disconnect the ignition switch wiring harness connectors. Next, you should check whether the terminals in the block are properly connected using a multimeter. The key in the lock must be in the zero position (off).
Then you should do the same check procedure for key positions 1 and 2 - “on” and “starter”. If there are any problems with the ignition switch, it must be replaced with a new one.
Removal, installation and disassembly-assembly of the ignition switch.
Tools required: flat head screwdriver, chisel and hammer.
Procedure:
Disconnect the wire from the negative terminal from the battery. Disconnect the casing from the steering column. Release the lock.
Disconnect the ignition switch wiring harness from the instrument panel wiring.
Disconnect the same block from the wiring harness of the immobilizer control unit.
Using a hammer and chisel, remove the 4 breakaway bolts.
Separate the ignition switch from the steering column.
Bend the ignition switch wire block retainer.
Disconnect the terminals with wires from the block.
Squeeze the latches.
Remove the plastic cover from the ignition switch housing. Bend back the two plastic latches.
Remove the contact group from the lock cover. Inspect the contacts. If there are burnt or oxidized ones, you need to clean them with fine-grained sandpaper. If the damage is too great, the contact group or lock must be completely replaced.
Reassemble the ignition switch following the disassembly steps described in reverse order, paying attention to the location of the terminals with wires in the block. Install the ignition switch following the steps described for its removal.
Before installation, the locking rod of the anti-theft device should be recessed. To do this, you need to insert a key into the lock and change its position from zero to any other
Install the ignition switch following the steps described for removing it. Before installation, the locking rod of the anti-theft device should be recessed. To do this, you need to insert a key into the lock and change its position from zero to any other.
Working with a chisel
First you need to remove it so as to disconnect the ignition switch wiring harness blocks. In this case, the blade of the tool should rest against the edge of the bolt head, after which the bolt should be loosened by hitting the chisel with a hammer.
Next, you need to loosen the remaining bolts in exactly the same way.
It is very important not to cut the head of the bolt with a chisel. To loosen the tightening, the bolt must be turned counterclockwise
When the tension is loosened, you can remove the bolts with pliers.
When removing the last bolt, you must hold the ignition switch. This removes the fastening bracket and the lock itself.
Before installing the lock back, insert the key into it and move it to the first position. This slides the steering shaft lock latch into the lock.
Next, you need to install the ignition switch in place, remove the key from it and check whether the steering shaft lock works. After making sure that all mechanisms are in good working order, you need to connect the ignition switch wire blocks and attach the pads to the steering column.
How to replace the ignition switch on a VAZ 1117-VAZ 1119?
Note! Before you start changing the lock, disconnect the negative terminal from the battery, you still have to work with electronics! (For information on how to remove the terminal, see the article: “Replacing the battery on a VAZ”, in paragraph 1)
Removal: 1) At the beginning of the operation, you will need to remove the casing from the steering column, to do this, use a screwdriver and use it to remove the seven screws that secure the casing (see photo 1), after all the screws have been unscrewed, fully pull out the handle by which the steering wheel is adjusted (see photo 2, it is indicated by an arrow) and then remove the lower casing, and then lifting the upper one, also remove it from the steering column.
Note! When you remove the lower and upper casings, look at the side of them or look under the pedals for the rubber o-ring that is needed to seal the ignition switch from dust and dirt!
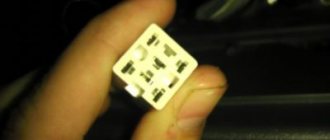
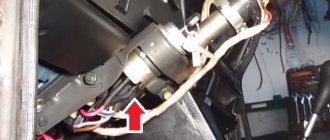
2) Then you will need to look at the lock itself and pay special attention to the wires that come from it, Kalina also has an immobilizer in addition, so there will be a lot of wires coming from the lock itself, and there will be only two wire connectors (One of the connectors will go to the starter is thus responsible for starting the car, and the second connector will go to the immobilizer and it is responsible for preventing the car from being stolen), so disconnect each connector from the pads (Each connector will be connected to the other two pads), to do this, grab your hand connector and simply disconnect it from the block using a little force (Do the same operation with the other connector).
Note! The photo above shows an example with an arrow where the wire connector coming from the ignition switch is connected to another block (This connector goes to the starter, the one that goes to the immobilizer looks a little smaller)!
3) Next, as shown in the photo below, using a hammer and chisel, remove the four bolts (They have no edges and are indicated by arrows) that secure the lock to the steering column, how do you remove them, you ask? Let's explain! Take a chisel and a hammer in your hands and place the chisel on the edge of a bolt, then hit it and thereby try to move the bolt out of place, etc., until the bolts are completely turned out.
