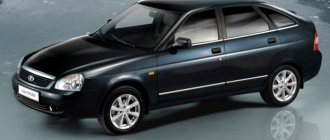
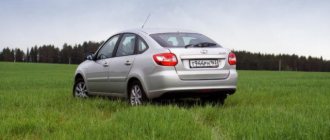
Owners of cars from the domestic automobile industry have a kind of hobby for repairing, minor modernization, and tuning their combat vehicle. Such work as: removing a headlight, replacing optics with a new one, failure of lighting devices - on Priora deserve a separate discussion.
The headlights on the Priora are equipped with bulbs that burn out once a season. Lada Priora cars also have a problem: sometimes the headlights sweat, which means you need to remove them and glue them. Adjusting the headlights is not the least important in traffic safety; for this purpose, an electronic and manual corrector is provided. The factory headlight of the Priora car (Bosch and Kirzhach) underwent changes during restyling; in addition, there are many Chinese analogues, for example, black headlights. Tuning is also problematic without removing them from the mount. The price of headlights varies - starts from 5,000 rubles for a factory headlight. Read the article to the end and find out the subtleties in this matter!
Bosch headlight from Priora - looks like this
Priora car headlight: Bosch and Kirzhach - what is the difference
Let's highlight two manufacturers (not taking into account the copies of Chinese origin) that have a number of differences. Popularly known as kirzhach, bosh. There is a significant difference between them: Kirzhach - a corrugated inner surface of the well, a cast low-beam lamp reflector without a cutout, glass (plastic) attached with a refractory sealant. The marker lamp is located at the bottom of the reflector well. Two separate plugs for the rear of the optical device. The device from the Bocsh brand has a smooth inner surface of the well, a low-beam lamp reflector with a cutout, and a low-melting sealant is used to fix the glass (plastic). The size lamp is placed in the upper part of the well; one plug from the rear of the lighting unit is used. Minor differences in design, quality of parts, presence of a chrome-plated rim of the signal amplifier of the rotary element. The number of taillight design variations available to the buyer is numerous.
Design features of the VAZ 2170 Priora
- Repair manuals
- Repair manual for VAZ 2170 (Priora) 2004+.
- Design Features
Headlights
.
Lada Priora cars use block headlights that combine low and high beam headlights (with single-filament lamps), as well as direction indicators. In addition, the headlights contain side light lamps. The low beam of the headlights is turned on by the external lighting switch, the high beam by the headlight switch using a relay located in the mounting block. Control voltage is supplied to the windings of the headlight high beam relay from the headlight switch if the exterior lighting switch is in the headlight on position. Regardless of the position of the exterior lighting switch, you can briefly turn on the high beam headlights by moving the headlight switch lever toward you.
The headlights of Lada Priora cars are equipped with an electric headlight leveler, which allows you to adjust the height of the headlight beams from the driver's seat depending on the degree of vehicle loading.
| . Headlight switching diagram: 1 – block headlights; 2 – control lamp for turning on the high beam headlights in the instrument cluster; 3 – mounting block; 4 – steering column headlight switch; 5 – lighting control module; 6 – ignition switch (lock); K7 – headlight high beam relay; A – to the main fuse block (F3); B – to the electrical package controller, pin “14” |
Shown is the headlight switching diagram,
– circuit diagram for switching on the electric headlight corrector.
| . Connection diagram for the headlight corrector: 1 – gear motors for the headlight corrector; 2 – mounting block; 3 – lighting control module; 4 – ignition switch (lock); A – to power supplies |
Rear fog light
.
The fog lamps in the rear lights are turned on by a switch in the control unit through the control unit of the automobile anti-theft system (APS-6) only if the headlights are on. When the side light is turned off, the rear fog light turns off automatically.
Fog lights
.
In a variant version, fog lights can be installed in the front bumper of cars. They can only be turned on if the exterior lighting switch is turned on.
Outdoor Lighting
.
The side light is turned on with the external lighting switch (in the side light on position).
Direction indicators
.
Right or left turn indicators are switched on using the steering column switch.
In hazard warning mode, the hazard warning switch turns on all direction indicators. The flashing of the lamps is ensured by a relay-breaker in the electrical package controller.
| Useful tips 1. If the headlights suddenly start to glow dimly, and when the turn signal is turned on, the side light lamp begins to blink, restore contact between the ground wire and the body. 2. Make it a habit to regularly change bulbs (especially headlights). Over time, the lamp bulb becomes cloudy and the brightness of the lamp decreases. Moreover, this process occurs quite slowly, so the driver does not notice the gradual deterioration in road illumination. 3. Recently, more and more cars have appeared whose headlights shine like a Christmas tree in various shades of blue. All this is called “xenon” and is considered very cool. There is no doubt, xenon headlights, installed as standard on the latest models of foreign cars, illuminate the road much better, and the car looks much more impressive with them. It is not surprising that many are also trying to improve their car, especially since now a lot of “xenon” lamps of various manufacturers (most often Chinese) have appeared on the shelves. Don't buy it cheap - these lamps have nothing in common with real xenon discharge lamps without filaments. These are ordinary lamps with painted glass. The light transmittance of such glass is significantly lower than that of standard lamps; the filaments of fakes, as a rule, are set out of focus, and a headlight with such a lamp, while outwardly effective, illuminates practically nothing, and additionally mercilessly blinds oncoming drivers. In addition, manufacturers of such lamps, in order to compensate for the decrease in luminous flux, increase their power beyond the norm. Often, installing fakes leads to melting of the insulation of wires and connecting blocks. And a fire is also possible. It’s better not to buy a “headache” with your money, but buy regular lamps of good quality. |
↓ Comments ↓
1. Car structure
1.0 Car structure 1.1 General information about the car 1.2 Passport data 1.3 Car keys 1.4. Controls 1.5. Heating and ventilation of the cabin 1.6 Ensuring a comfortable air temperature in the cabin 1.7. Doors 1.8. Passive safety equipment on the car 1.9. Seats
2. Recommendations for use
2.0 Recommendations for use 2.1. Safety rules and recommendations 2.2 Running in the car 2.3 Operating the car during the warranty period 2.4. Preparing the car for departure
3. Problems along the way
3.0 Malfunctions along the way 3.1. The engine does not start 3.2 Malfunctions of the fuel injection system 3.3 Idle speed has disappeared 3.4. Interruptions in the operation of the 3.5 engine. The car moves jerkily 3.6 The car accelerates poorly 3.7 The engine stalled while driving 3.8. Oil pressure dropped to 3.9. Engine overheating 3.10. The battery does not recharge 3.13. Knocks in the engine 3.16. Wheel puncture
4. Maintenance
4.0 Maintenance 4.1. General provisions 4.2. Inspection work 4.3. Lubrication and filling works 4.4. Diagnostic work 4.5. Repair and adjustment work
5. Engine
5.0 Engine 5.1 Design features 5.2 Possible engine malfunctions, their causes and solutions 5.3 Useful tips 5.4 Checking compression in the cylinders 5.5 Removing and installing the decorative engine casing 5.6 Removing and installing the engine splash guard 5.7 Installing the piston of the first cylinder to the TDC position of the compression stroke 5.8 Replacing the drive belt gas distribution mechanism and tension roller 5.9 Replacing the power unit supports 5.11. Replacing engine seals 5.13. Engine cylinder head 5.15. Engine repair 5.16. Lubrication system 5.17. Cooling system 5.18. Power supply system 5.19. Design Features
6. Transmission
6.0 Transmission 6.1. Clutch 6.2. Gearbox 6.3. Front wheel drives
7. Chassis
7.0 Chassis 7.1. Front suspension 7.2. Rear suspension
8. Steering
8.0 Steering 8.1 Design features 8.2 Possible steering malfunctions, their causes and solutions 8.3. Steering column 8.4. Steering linkage 8.5. Steering gear
9. Brake system
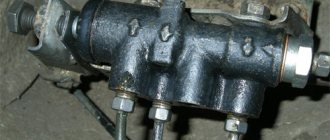
9.0 Brake system 9.1 Design features 9.2 Possible malfunctions of the brake system, their causes and solutions 9.3 Bleeding the brake system hydraulic drive 9.4 Removing and installing the vacuum brake booster 9.5 Replacing the brake pedal axle bushings 9.6. Main brake cylinder 9.7. Front wheel brakes 9.8. Braking mechanisms of the rear wheels 9.9. Pressure regulator 9.10. Brake hoses and tubes 9.11. Parking brake
10. Electrical equipment
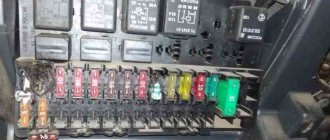
10.0 Electrical equipment 10.1 Design features 10.2. Battery 10.3. Mounting block (relays and fuses) 10.4. Generator 10.5. Starter 10.6. Ignition switch (lock) 10.7. Electronic engine control system (ECM) 10.8. Ignition system 10.9. Lighting, light and sound signaling 10.10. Windshield cleaner 10.11. Washer reservoir 10.12. Electric fan of the engine cooling system 10.13. Electric motor of the heating and ventilation system fan 10.15. Cigarette lighter 10.16. Instrument cluster 10.18. Electronic anti-theft remote control system 10.19. Immobilizer 10.21. Replacing sensors and switches
11. Body
11.0 Body 11.1 Design features 11.2 Possible body malfunctions, their causes and solutions 11.3 Removing and installing windshield frame lining 11.4 Removing and installing soundproofing upholstery in the engine compartment 11.5. Removing and installing bumpers 11.6 Removing and installing the fender liner and protective wing cover 11.7 Removing and installing the front fender 11.8 Removing and installing decorative sill trims 11.9. Hood 11.10. Trunk lid 11.11. Doors 11.12. Seats 11.13. Seat belts 11.14. Rear view mirrors 11.15. Interior fittings 11.16. Instrument panel 11.17. Heater 11.20. Body care
12. Applications
12.0 Appendix 12.1 Appendix 1. Tightening torques of threaded connections, Nm 12.2 Appendix 2. Fuels, lubricants and operating fluids 12.3 Appendix 3. Nominal filling volumes 12.4 Appendix 4. Basic data for adjustments and monitoring 12.5 Appendix 5. Spark plugs used on vehicles 12.6 Appendix 6. Lamps used on a car 12.7 Appendix 7. What you need to have in a car 12.8 Appendix 8. Tools used when repairing a car
13. Electrical diagrams
13.0 Electrical Diagrams 13.1 Diagram 1. Instrument Panel Harness Connections 13.2 Diagram 2. Vehicle Front Wire Harness Connections 13.3 Diagram 3. Engine Electronic Control System (ECM) Harness Connections 13.4 Diagram 4. Vehicle Rear Wire Harness Connections 13.5 Diagram 5. Light Harness Connections license plate light 13.6 Diagram 6. Left front door wiring harness connections 13.7 Diagram 7. Right front door wiring harness connections 13.8 Diagram 8. Rear door wiring harness connections
Why film
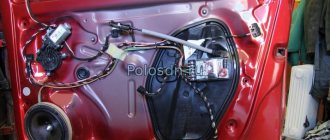
The main reason is failure, failure to perform the direct functions of the device. There may be a lot of reasons for replacing the headlights on a Prior. Broken outer glass, loss of tightness, fogging of lenses from the inside, deterioration of the reflector itself, breakdown of fixing elements. Replacement, repair of old contacts, installation of a new type of light bulbs. To solve them, you will have to unscrew the entire module from the car body, which will make it more convenient to repair and modernize optical devices. The block is not completely dismountable: to separate the glass from the body, it is better to heat the joint with a hair dryer until the sealant softens. Next, remove the melted sealant as much as possible using improvised means. We try to separate the glass with a screwdriver, clean all the separated parts from the old glue with a knife and sandpaper. The glass is seated back onto the sealant.
Polishing headlights on Priora
As their service life increases, sand, small stones, dirty water, and road chemicals negatively affect the light conductivity of the outer glass of lighting fixtures, and overall efficiency decreases. The solution will be restoration and polishing of the glass surface. When you decide to polish glass, thoroughly study the technical side of the process, materials, stages of work - everything affects the result. If you are not confident in your abilities, it is better to entrust the work to professionals, otherwise the result of the work done may be worse than the original result. If, nevertheless, you decide to polish the optical devices of your car, first remove the entire module, remove dirt, and protect surfaces that cannot be treated.
For polishing use:
- Abrasives;
- Sandpaper (1000 - 4000 units);
- Circles: felt, fabric, foam rubber;
- Polishing pastes.
First, a rough layer of plastic is removed with a depth equal to the depth of chips and scratches. As a result, the protective layer of varnish applied by the manufacturer will be erased, which must be restored after polishing. Applying a special varnish is a rather technically complex process. Another option is to stick a protective film, otherwise the result of your work will disappear in a couple of months. Change the sandpaper to finer sandpaper every 2 - 3 minutes. We monitor the removal of traces left by the previous number of abrasives. After each change of sandpaper, you must thoroughly wash the surface. The dried surface is ready for polishing.
Important: polish the tool used at low speeds to avoid overheating and clouding of the plastic; it will be impossible to restore this.
Using polishing wheels, we bring the glass surface to the desired shine. Polishing is often carried out due to varying degrees of wear on the vehicle's optical devices, for example, one headlight was damaged in an accident and was replaced with a new one.
Why do Priora headlights sweat?
The most common problem with the optics of domestic cars is moisture getting inside. The headlight sweats due to loss of sealing of the unit. The back cover has lost its tight fit relative to the surface of the case. To fix the problem, it is better to remove it entirely. Open all existing plugs and dry thoroughly in a warm, dry room. Seal the gaps between the covers and the body (use different types of seals, silicones, sealants). Some car enthusiasts advise spraying a small amount of alcohol inside. After drying, reassemble and install on board your car.
Instructions for replacing fog lamp glass
Replacing PTF glass can be done by a person who does not have special knowledge, skills and tools.
- To replace the fog lamp glass, you need to find out how the PTF is attached to the bumper or to the car body? As a rule, the headlight is attached to the bumper with screws or nuts. The most convenient way is to partially or completely remove the bumper from the car. There is nothing complicated about this; to make the process easier, use the instructions for repairing your car.
- Then disconnect the PTF terminals from the on-board network.
- Inspect the removed fog lamp, determine the integrity of the reflective surface of the headlight.
- Remove old glass. This can be done simply by breaking the glass, then using pliers and a screwdriver, remove the remaining sealant and glass carefully without damaging the PTF housing. Attention! Use safety glasses and gloves!
- Degrease the PTF glass and headlight rim. For better adhesion, acetone, solvent or the like is necessary. degrease the PTF glass and the headlight rim where the adhesive-sealant is applied. Let dry.
- Apply a sufficient amount of adhesive-sealant to the dry, grease-free rim of the headlight so that the layer of sealant fills the entire space between the glass and the headlight housing; you can use any water-heat-resistant adhesive-sealant that meets the operating conditions of the PTF: temperature from -45°C to +150 °C
- Press the glass firmly against the headlight body (you can use a clamp for a better result) until the sealant is completely dry. That's the whole procedure for replacing PTF glass.
- Now install the light bulb, attach the PTF to the bumper, connect the terminals and put the bumper back in the reverse order.
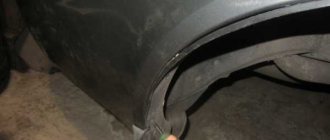
How to remove a taillight on a Priora and glue vinyl
Car enthusiasts often have a desire to highlight the uniqueness of the vehicle on the road in every possible way. To achieve the goal, the owners are upgrading the taillights on the Priora. They change the color of the vinyl film glued on top and install additional LEDs. Additional modifications to the design of the light signaling system must comply with safety standards.
It will be easier to work by removing the rear light. What is not difficult:
- You need to disconnect the wiring connector going to the light on the trunk side;
- unscrew the three plastic wing nuts;
- remove the lantern;
- pull out the wires along with the rubber seal through the mounting hole.
That's it, the lantern is removed, you can put the lantern in the reverse order. Before dismantling or installing the lamp, it is recommended to disconnect the wire from the terminal. Pasting vinyl is a procedure somewhat similar to the process of tinting car windows. You need to remove dirt, wash the glass of the lantern, remove greasy stains and stains using window cleaners. Cut a piece of vinyl of the required size (with a small margin), moisten the surface of the lantern with a soap solution (without fanaticism). Glue the prepared piece of vinyl, removing the protective layer, remove air bubbles, and remove excess moisture. The remaining vinyl around the edges of the tail light can be cut off with a sharp utility knife.
How to change the glass on a Priora headlight
One of the main disadvantages of the Lada Priora is the ill-conceived design of the headlights; they are inseparable, therefore, to replace glass in headlights or incandescent lamps, you need to take the latest headlight or turn off and disassemble the old one. “Come to our brother. not the first time,” as they say, there were more complex cases. But despite this question, how to disassemble a spotlight on a Priora is a big problem. The thing is, it takes a lot of time and effort, as well as some experience. The Priora has headlights from two manufacturers: Kirzhach and BOSCH. The first one is even more difficult to make out, but it can still be done. Now I'll tell you how to do it right so you don't have to buy new lights.
The headlight consists of 2 parts, which are held together with a very strong sealant or glue. To disassemble a Prior headlight, you will need a household hair dryer to heat the glue, after which the sealant melts and becomes watery, allowing you to separate the two parts of the headlight assembly.
How to disassemble a Lada Priora headlight. step by step guide
2. Take a hair dryer, heat it to 250° and heat the joint as in the photo. Heat the sealant around the headlight moderately until it melts.
READ 2021 Seat Arona Facelift Hides More Modern Mini-Ateca Design
Notes: Several "masters" when disassembling Priora headlights recommend cutting the plastic board that runs along the edge of the headlight. This will certainly simplify the process, but, as practice shows, this is not the last need, it can only be slightly bent. If the joint is completely warm, then the headlights can be "open" without damaging the headlight housing.
3. When the headlight assembly connection warms up, carefully separate the front section while continuing to warm up. BOSCH headlights also require four mounting brackets.
4. After disassembling the headlight, it is necessary to clean the surface of the sealant and other third-party components. To do this, I recommend using a utility knife and fine sandpaper.
5. After completing the repair work (replacing the headlight glass, replacing the lamp, reflector, etc.), assembly is performed in the reverse order.
6. Apply sealant to the joint and align the two parts of the headlight assembly.
7. Then secure the headlight in this position to seal the resin. For better effect, I recommend wrapping the headlight with adhesive film and then with adhesive tape, this will create a "push" effect, this connection will be more effective. If you just wrap it with duct tape, you'll have an obstacle when removing it, and then you'll need to wash off the adhesive from the tape left on the surface of the headlight. As for the film, it is simply cut, connected to the tape.
READ Google Maps now shows EV owners which charging stations are occupied
This is the essay on how to disassemble the headlights of a Lada Priora. ended. I hope everything works for you!
Source
How to remove a headlight on a Priora without unscrewing the bumper
When carrying out any kind of tuning, installation, or dismantling of the main lighting fixtures, you will inevitably have to remove the entire light fixtures. Before installing the front and rear lighting devices, be sure to disconnect the wire from the terminal and the wiring harness going to the lighting unit itself. Dismantling the front bumper completely is not necessary; it will be enough to disconnect the upper part of one side from the car body. Thus, installation of front optical modules will be simpler and less labor-intensive. What tools will you need?
The main reasons for replacing and adjusting headlights
- cracks and breaks in the body;
- breakdown in the electrical connectors of the headlight;
- damage to reflectors;
- defects in fasteners;
- clouding of the optics (the headlight sweats or becomes dirty).
Replacing a headlight is one of the activities after which it is impossible to do without adjusting the lighting fixtures, since the light must be properly dispersed. Headlight leveling plays a decisive role in improving driving safety. Therefore, knowing how to replace front or rear lights is only half of the whole replacement process, where an important role is also played by how to adjust new headlights correctly.
Adjusting Priora headlights using a corrector
Adjusting the light beam is extremely important for safe, comfortable driving. If you have a suitable place and desire, you can carry out the procedure yourself at home. You will need to place the car on a flat horizontal surface at a distance of five meters from the wall to the car. Check the operation of the manual corrector located directly on the back of the block (small movable wheel). At the level of the middle of the headlights, draw a horizontal line on the wall (L. 1), approximately 65-75mm. Below we draw a line (l. 2). Two vertical lines in the middle of each headlight (l. A) (l. B), another vertical line strictly in the middle between them. There should be 1 person in the car, the tire pressure should be within normal limits and be the same everywhere. The low beam turns on, we try to adjust the light. Close one headlight tightly. We turn the corrector wheel until the horizontal and oblique beams of light intersect at the point of intersection of lines A. and B. with line L. 2. Electronic adjustment in the car interior should be zero.
Features of headlight adjustment
It is advisable to place an assistant in the driver's seat or place a load weighing about 75 kg. The vehicle's tires should be well inflated and the tank at least half full to bring its weight closer to the weight at which it is driven daily.
The adjustment is carried out on a vertical wall or stand on which markings are applied. To correctly adjust the optics, it should be possible to move away from the wall at a distance of 5-10 meters. This makes it possible to create an imitation of lighting on the road.
Wall marking scheme
To apply markings, you need to place the machine closer to the wall and. Then you need to alternately mark the center of the trace from each headlight and the centers of their symmetry. By connecting these points, we get a horizontal line. Then, below, two more lines should be drawn in parallel. The second is at a distance of 5-12 cm, and the third is at a distance of 22 cm from the first. In addition, you need to draw vertical lines through the center points of the car and the lights.
After turning on the light, you need to ensure that the top point of the light is on the second line. The adjustment is made using an electric headlight adjuster. The adjusted light will illuminate the road well and will not blind oncoming drivers.