October 23, 2015 Lada.Online 199 681 37
It's hard to imagine a modern car without a rear view camera. If your car does not have this option from the factory, then you can install the camera yourself. The “Lux” configurations of Lada Granta, Kalina 2, Priora cars have similar multimedia systems (MMS), so the process of connecting and setting up the camera is identical. During installation of the camera, there may be differences depending on the type of body (hatchback, station wagon, sedan, liftback), but they are insignificant.
Installing a rear view camera on Lada Granta, Priora and Kalina
It's hard to imagine a modern car without a rear view camera. If your car does not have this option from the factory, then you can install the camera yourself. The “Lux” configurations of Lada Granta, Kalina 2, Priora cars have similar multimedia systems (MMS), so the process of connecting and setting up the camera is identical. During installation of the camera, there may be differences depending on the type of body (hatchback, station wagon, sedan, liftback), but they are insignificant.
Lada Kalina Hatchback clear › Logbook › Installing a rear view camera (almost a manual)
Hi all!
I wrote a lot to chew on the installation. Maybe someone will need it))) In general, since I became the proud owner of an MMC from a grant, the thought that I need to more actively use its functionality has not left me)) in general, these MMCs that are installed on viburnums and grants I’m simply surprised, because this is essentially a fairly high-class device (compared to many standard ones) and it is installed on almost the most inexpensive, domestic cars at that)) the same Solaris, Polo, and many others have nothing like it at all , for no extra charge))) To tell the truth, I quite often ride Golf 7, and the first thing that upsets me when I change back to Kalina is the insufficient level of comfort, first of all, the lack of a radio with a large touch screen and normal sound, no armrest, and of course no rear view camera)) MMS, and I already installed the armrest, now it’s the camera’s turn))) Initially, I’m not a supporter of any kind of collective farm on a car, sticking something from the series and more )) I believe that if something is to be done, then in order to at least somehow bring the car closer to the level of foreign cars, everything should be neat, and nothing superfluous, as functional as possible. The rear view camera is just such an improvement))) Now about the camera itself, since I am sure that there are many who want to install it, there is already a lot of material on the Internet, but personally I had to look for everything piece by piece, maybe my man will help someone))
1) Where and how much? Everyone figures this out on their own; in principle, almost any camera will do; if it’s more expensive, go to the store, but you don’t have to wait and there’s a large selection. You can order on the same Ali Express, there is even more choice, prices start from 500 rubles, minus the fact that you have to wait, and in general many people do not like shopping online). I found a third option for myself, found a person on Avito who sells cameras, and that same evening I took it from him for a pleasant 500 rubles)))
2) Type and installation of the camera itself: There are different types of cameras that are installed in different ways. But when you buy a camera for 500 rubles right away, you take “whatever I have”:
At the same time, I found that my trunk lock was rattling, I didn’t bother disassembling it, I decided to wrap the rod that goes to it in a collective farm style so that it would pull it back slightly and prevent it from rattling. It became quieter.
READ How to install a one-piece frill on a Renault Duster video
3) wiring: I decided to do this: I threw it through the left pillar of the rear window, then through the corrugation into the ceiling. I read many places that this moment causes difficulties for people, so, there is absolutely nothing complicated there, and if you are not the happy owner of a broach (which, as luck would have it, I didn’t take it at work), then a more or less tough one will help you thick wire. 1. First, remove the corrugation
and from that part of the trunk that is closer to the roof we pull the wire to where we removed the trim, when you catch it, then using electrical tape we fasten our wire from the camera to it, and carefully pull it down))) pull it out to the end (just don’t tear it out ), it will fit neatly along with the factory wires
unscrew the wire and insert it from the side of the roof into the corrugation, after which we tie it to the wire again and pull it out to the ceiling)) close the corrugation))) I pulled the power to the wires on the rear lamp, to do this you need to remove the lining on which the shelf lies (maybe not completely) it is on 3 screws and pistons, plus you need to unscrew the belt. I connected the plus to green (reverse), minus to black. There are no problems here, just as there are no problems with running a wire with a picture under an elastic band under the ceiling. Next we stretch it under parprise, there are no problems here either, we get to the back panel of the MMC, I just need to remove it. And here the most interesting part begins: 4) connection to the MMC: In the standard MMC, unlike the same incar and other similar radios known to me, the MMC is connected via a mini ISO connector, and this connector itself is in the standard wiring block on cars with The can tire is present, it consists of 3 parts: yellow (it doesn’t come from the factory), green (it has a can tire and a reverse alarm) and blue (it has a camera on it), only it is empty, i.e. There are no contacts inside, and here everyone (including me) starts to get nervous and look for an adapter on radio markets and the Internet, and in general it is not cheap (400-700 rubles on average). Personally, I didn’t find an adapter, and I started looking for what kind of terminals would fit there, as I found out, they are the same as on the mass flow sensor, but naturally there was no place to get them, I won’t cut the braid))) but then, on one of the forums , one smart person wrote that the terminals from the old power supply (computer) that goes to power the motherboard fit perfectly there
These terminals are slightly different, but they fit like family)))
solder a “female” type tulip to the wiring from these terminals, since a “male” is included with the camera, and in general, that’s all, if anyone doesn’t know, the terminals are inserted into connectors 16 and 19, there is a pinout on the Internet)) )) In order for the camera to work, you also need to enable this function on the MMS itself, for this you need the cam on off program, you just download it, I don’t remember the link, but Yandex finds it right away)) Exit to windows by long pressing the button settings, open the program on the MMS, after which a window pops up with buttons to allow or disable the camera, click allow, and then close the window yourself. This program is also available in alternative firmware.
READ How to install recaptcha on a php site
In general, that’s all, the camera, despite its ridiculous price tag, works very well, and even in the dark there is not much noise, the only thing is that the viewing angle is not very large))) In the photo the picture turned out much worse than in life) )
Source
Installation
Required:
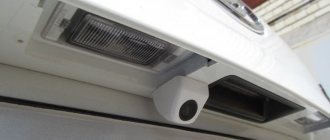
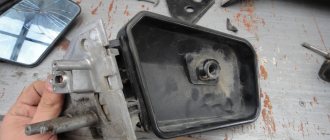
Most often, the rear view camera is placed above the license plate (on an overlay called “saber”). This location is the most favorable from a viewing point of view; the camera is not noticeable and there is no need to remove the bumper. First, remove the trunk lid trim, and then the saber, which is held on by 6 M8 screws.
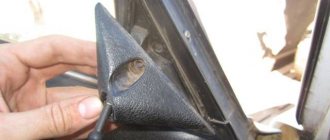
We determine the most suitable place for the camera and drill a hole there. We secure the accessory on the reverse side with a nut.
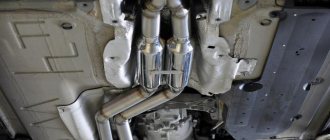
We route the wires from the camera into the trunk through standard corrugations.
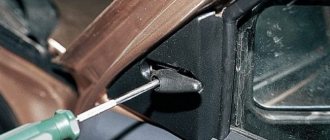
It is more convenient to route the wiring to the front of the car under the rubber seal of the headliner. Then we drag it under the dashboard to the back of the radio. To remove the MMC, you will first need to dismantle the panel cladding.
Connecting a rear view camera with your own hands Kalina - Altair and K
Forum: Rear view camera – Lada Kalina 2 – second generation Kalina car owners club
MMC 2190 and connecting a rear view camera – logbook Lada Granta F1 DRIVE2
Connecting a rear view camera to a viburnum
Connecting a rear view camera to a viburnum
How to connect a Priora DVR
Installing a rear view camera on a Granta fret – Online courses
About SUVs, crossovers, jeeps and pickups 2016-2017 » SUV tests
How to make a reverse camera yourself - News, reviews, repairs
Rear view cameras and non-standard monitors for them – Page 74 – Mitsubishi ASX Club
Connecting a tow bar, viburnum diagram
Do-it-yourself rear view camera for a car
Installing a rear view camera - Mazda Familia Logbook Red Japanese ? ? ? ? ? ? ? ? DRIVE2
Rear view camera DIY repair
I can’t connect the rear view camera to the barrel
Do-it-yourself rear view camera connection
Do-it-yourself rear view camera connection
Rear view camera connection diagram via relay
How to connect a rear view camera
Rear view camera connection diagram – Navigators with rear view camera – double
How to make a reverse camera yourself - News, reviews, repairs
I spent a lot of time finding a camera for Kalina 2 that was more or less similar to the standard device. I wanted the camera to be in the license plate light.
After searching on Aliexpress, I found a pleasant coincidence: a camera from a Tuareg fits our viburnum