How it's done
The disassembly procedure itself is not so complicated as it is troublesome. Indeed, you will have to spend a lot of time to get to the last bolt on the panel. Let's look at step-by-step instructions on how to properly disassemble the console on a Lada Priora:
Tighten the fasteners of the air deflector, and then remove it from the console. Next, you will need to unscrew the left heating nozzle, which is secured with 2 screws. Repeat the procedure for the right side. Next in line will be the rear window defogger activation button. To remove it, you just need to pry it with a minus screwdriver and pull it out. The button must be disabled immediately. After this, the ashtray is removed. The glove compartment lid is secured to the panel using special pins that must be removed from the gaps. The console cover is secured with 4 fasteners. They need to be twisted, after which the cover can be easily picked up with a screwdriver with a minus blade and removed. If your vehicle has a radio, it should be disconnected from the cable harness. The radio is dismantled by unscrewing two fasteners located on the sides of the slot. Next, you can remove the lining itself, which is fixed on special springs. The alarm button is removed, then it must also be turned off. Since you have already moved on to the harness, it would be a good idea to immediately turn off the clock, the heating button and the heating system control unit. Now all the above elements should be removed
The clock is simply carefully squeezed out of the panel, and the control unit is fixed with 4 screws. Let's move on to the ventilation system nozzle
It is held in place by eight latches that must be opened sequentially
First we remove the top ones, and then the bottom ones. Now it's the turn of the fuse box. It is held on by a single screw, so it won't take much time. It's time to turn off the glove compartment light, just pull out the block. Then twist and remove the switch. Let's move on to the glove box light
It is hooked and carefully removed. The lighting fixture is mounted on clips that need to be opened
The air ducts on the Lada Priora are secured with two screws. We unscrew and put them away, the order does not matter. Now let's move on to the air flow distributor gear motor. Unscrew the 2 screws and set the device aside. We proceed in the same way with the air duct for heating the feet and the distributor itself.
That's all, actually. Now the panel of your Lada Priora has been dismantled, and you can perform any manipulations. If any points remain unclear, we suggest watching the video instructions on our website. Assembly is carried out in reverse order.
How to remove the center console on a Lada Priora with your own hands, step-by-step instructions
Lada cars are gaining more and more popularity among the population. However, no matter how reliable the machine is, it requires timely maintenance and repair. Many car owners turn to auto repair shops and service stations to resolve these issues.
How to remove the center console on a Priora
The reasons for removing the console may be its damage in the form of cracks, the appearance of extraneous noise or knocking under the panel while driving. Or you may simply want to install a console of a different color.
Before getting started, it should be noted that on the Priora the console body and the instrument panel are one solid part. However, an independent decorative trim on the console itself can be removed for easy access to the cavity of the instrument panel. The decorative panel of the console itself, together with the gearbox tunnel, is also called the “beard”.
Since in the process of removing the console it will be necessary to disconnect various electrical contacts, in order to avoid a short circuit it is recommended to turn off the ignition or disconnect the negative terminal from the battery. To remove the console you will need a Phillips and flathead screwdriver. It would also be a good idea to pick up some small box for collecting unscrewed screws and other small items.
So let's get down to business. First of all, you need to remove the radio. If you have a car with a standard radio, then you should not try to pick it out with something sharp. To remove it, it’s time to use available materials. Stiffening plates from VAZ windshield wiper blades can help with this. Locking grooves are provided along the edges of the plates. There are narrow grooves on the radio under the Scan (on the left side) and Tab (on the right) buttons. We insert the plates from the windshield wiper blades into these grooves, move them slightly apart and carefully pull the radio towards you.
You should not pull it out far, since you only need to disconnect the power wires.
If a regular, non-factory radio is installed, then removing it is much simpler. It is enough to pry the radio frame with a small screwdriver, and the entire assembly can be easily removed. It happens that special keys are needed to remove the radio frame itself.
After removing the radio, remove the heated rear mirror button. The button is carefully pryed up with a screwdriver and pulled out, and the chip with wires is disconnected from it. Afterwards you need to remove the ashtray. The plastic insert is removed from it and, by slightly pulling outward, the ashtray body itself is removed. Then the glove compartment lid is removed from the pins.
Then four screws are unscrewed: two are located under the already removed ashtray and two are located just below the glove compartment. To get to the screws located under the ashtray, you must first remove the decorative panel with a cup holder located on the gear shift lever. To do this, use a thin screwdriver to pry up and remove the leatherette cover from the box lever, and unscrew the fastening of the panel itself, or, as it is also called, the tunnel cover. After this, access to the lower console mounting screws opens. For convenience, we put all the unscrewed screws into a pre-prepared box or jar.
When unscrewing the console mounting screws, it is recommended to use a magnetized screwdriver. This will prevent you from losing screws during disassembly and assembly of the panel. It happens that washers are placed under the mounting screws, which should also be carefully and carefully collected in a jar for small items.
Next, remove the top panel of buttons and disconnect the chips with wires. The chips are disconnected from the power window buttons, heated windows and the hazard warning light buttons. After disconnecting this panel of buttons, two more screws are unscrewed, located a little deeper in the vacated niche. It is recommended to mark all disconnected chips by sticking self-adhesive paper on them and sign which button or regulator the connection corresponds to.
After releasing all the mounting screws, carefully, without sudden movements, pull the console panel towards you. It should come off without much effort. After removing the console from it, you need to disconnect the interior heater control unit. It is detached by unscrewing the four screws on the back of the console. After this, you can consider the console removed.
As you can see, there is nothing complicated in this process. The main thing is to remain patient and carefully handle the console parts when prying them with a screwdriver, otherwise you may leave burrs on the edges of the plastic parts. If you are removing the console for the first time, then not everything will work out right away. Next time everything will be much easier.
how to remove the rear shelf of a Lada Priora hatchback | Topic author: Svetlana
Mikhail probably used a sledgehammer.
Alexandra Frankly takes out.
installation of an acoustic shelf on a Priora sedan. – YouTube
installation of a Free Air Oriole subwoofer in a Priora sedan shelf – Duration: 16:46. Dmitry Gruzdev 86,222 views · 16:46. Subwoofer in the back.
How to install a lock to open the trunk with a button on the Lada Kalina
Replacing the cabin filter on a Volkswagen Polo sedan video
What kind of oil to fill in the Volkswagen Golf 2 1.3 engine
How to remove the rear parcel shelf on a Priora sedan video: comments
Thanks for your help on this issue. I did not know it.
Of course, I apologize, but this doesn’t quite suit me. Who else can tell me what?
In my opinion, you are wrong. I'm sure. Let's discuss this. Write to me in PM, let's talk.
There's something to it. I see, thank you very much for your help in this matter.
You are making a mistake.
This message is incomparable))), I’m very interested
Lada Priora Hatchback › Logbook › Installation of an acoustic shelf with “regiontekhtorg” sidewalls
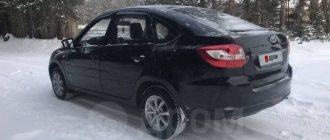
From the moment of purchase, when driving even at small speeds, my car behaved like a rattle, the sounds from the trunk were especially disturbing! I accidentally came across the regiontekhtorg website one day and saw that same shelf with sidewalls! My girlfriend and I ordered without hesitation! At the same time, what we really liked was that we could choose the following parameters: - size of holes for speakers - carpet: imported or domestic, color of carpet - installation of speakers hidden or open (we wanted open speakers, but with such a design we would have to always remove the seat belts, what didn’t suit us, we go to work every day through the traffic police post, we took the hidden ones and didn’t regret it one bit)! As a result, we ordered this shelf with sides (7.8 kg) for 1,600 rubles. + prepayment for postal services 800 rubles + 177 rubles commission!
And so she came to us from Tolyati to Gorodets in about five days! Brought in a white bag in perfect condition with a fresh paint smell!
I took a screwdriver and unscrewed the old shelf, the problem arose of how to get the belt out of it, the solution was this: unscrew the belt where it is attached to the side of the rear seat, and pulled the belt out of the hole in the shelf! I removed the second shelf in the same way! Then I screwed the speakers onto the new shelf and messed up in this place: I had to first prepare the clearing for the self-tapping screws with a drill using a 3.6 drill, but that’s how I drove it :-) Cracks started to spread, but it was still firmly fixed!
I started trying it on in the car and was stunned! Not a single hole, not a hole, to somehow screw it on, I thought everything would be simple there, but I didn’t expect this! Panic! I went to Google and found a video about shelves for two! And I got the main point! One side panel is attached with only 3 self-tapping screws: - two holes on the sides for the seat belt! For one screw in the piece of iron there is already a hole with a clamping plastic, but for the other there is not, so I took a drill + a 3.6 drill and drilled - one from the bottom up into the finished clamping plastic for a long self-tapping screw (only in the shelf design, for this screw there is air space, we had to make special wooden caps and build up the structure for fastening)
Features of opening the trunk of the Lada Kalina
Owners of the Lada Kalina car are almost unanimously surprised: with all the bias towards Europe, the trunk lock of the Kalina hatchback in the basic configuration for some reason can only be opened with a key. For many, the situation immediately became quite common: the driver gets into the car, starts the engine, and then remembers that he needs to put something from the passenger compartment into the trunk. Further actions are similar to a joke.
You need to turn off the engine, remove the key from the ignition, get out of the car, and so on. If you imagine all this in an environment of time shortage, one can only feel sorry for the owner. In addition, if someone happened to approach the trunk of a car with something heavy in their hands, the procedure for opening it with a key turned into something difficult. Another problem could have arisen: in regions where real frosts occur in winter, the lock cylinder would at times freeze tightly.
Then another interesting detail became clear: the craftsmen who climbed under the trunk trim to understand the internal structure realized that there was still a place for the lock activator and even a standard electrical connector for wires. And then the same craftsmen began to solve the problem of how to modify Kalina to increase the comfort of use. The complete trunk lock drive is not available for sale as a single set, so the parts will have to be obtained separately.
Features of creating shelves
Acoustic shelf in Priora sedan
You can create an acoustic shelf for a Priora at home in different ways. In general, there are several main methods used during such a process. Fans of loud music can even create an acoustic stage in their car. Most often, inexpensive materials (chipboard, plywood or MDF) are used to make shelves. Subsequently, it is covered with carpet. Working with such materials is not difficult, especially since the end result will please many. However, some choose expensive options to realize this goal - natural wood, leather, and the like.
Acoustic shelf for Priora sedan
Methods for installing the trunk lock activator
The first option is to saw off one “tongue” from Kalina’s lock. Particularly gifted craftsmen do this without any removal of the lock, right on the spot, using an angle grinder. You have to work very carefully. If you don’t have a grinder, the same steps can be done with a hacksaw. It just takes much longer, and one can only guess about the physical effort required for such a process. If you are not confident in the intricacies of your own work, it is better to remove the lock for modification. In this case, it will be easier to work with both a grinder and a hacksaw.
The second option is to replace the lock. Many car owners installed a trunk lock for their Lada Priora instead of the original one. This option is perfect for those Kalina owners who do not have the desire and/or ability to cut anything. All other steps for installing the Kalina station wagon trunk lock activator are extremely simple.
- A rotary washer is installed on the plastic activator pusher, then the entire system is secured with a locking ring.
- The complete activator is placed in a standard place.
- The activator wires are connected to the corresponding connectors. Naturally, all electrical work is carried out only with the battery disconnected. The point is not what can “knock” an electric current: 12 volts of direct current for a person is just nonsense. But capricious electronics, if something suddenly “shorts”, may suffer. In the best case, problems with functionality will begin, in the worst case, something will completely fail.
- The next stage is installing and adjusting the rods.
- A check is in progress. First, the lock itself, regardless of whether the original one was modified or another one was installed (from Priora). All detected problems are corrected. The activator is being tested.
Refinement of the factory version of the acoustic shelf
Of course, it is not always possible to invest, or simply not everyone has the ability to work with wood. But don't be upset. After all, it is quite possible to carry out minor modifications to a part installed at the factory. And although this is not the option of installing a shelf yourself, however, such a modification will significantly improve the sound. And you just need to treat the seats with regular foam and put a layer on the entire lower part of the part. This will allow you to secure the soundbar tightly enough and almost completely avoid vibration. This is, so to speak, a budget option.
Ways to open the trunk without a key
Volkswagen Passat Variant Red line Logbook Electric trunk drive Of course, the easiest way is to use an additional set of keys, but if a duplicate does not exist, contact special companies that provide such services. But the cost of such services cannot satisfy everyone, so we will consider the simplest methods that experienced drivers have already tried on themselves and achieved the desired result.
So, if the driver is sure that the keys are left in the trunk and you can freely get inside the cabin, then you can try to get to the keys in several ways:
- Dismantling the back of the rear seat. This method is very effective, and it is carried out in the following sequence:
- the backrest from the rear seat just needs to be removed;
- the plywood stand is also removable to gain access to the small space between the stiffeners and the rear seat back;
- into the gap, which is quite a decent size, you need to carefully insert your hand with a hook made of hard wire;
- a bunch of keys is hooked and pulled out.
If you cannot find the keys in normal lighting, you should try to insert a small flashlight into the gap to simplify the search process.
- Hit the mount that secures the license plate with your hand. This method, according to many, often gives the desired result, although it causes, albeit minor, pain to the driver. If the car owner decides to use this method, he will have to make a sharp blow with his fist in the area where the rear license plate of the car is recorded. Due to a sharp impact, the metal can be deformed, which will allow the inside of the lock to “play”, and the trunk lock will simply open.
- Craftsmen assure that you can open the trunk of a VAZ-2107 using various available means, for example:
- strong, but not very thick wire;
- a nail file for polishing nails, of course, if it is made of metal;
- with an ordinary awl. Using an awl, pierce the seal that is provided around the entire perimeter of the trunk. Next, you need to find by touch the location of the “tongue” of the lock and try to move it away. If this process is successful, the trunk lock will simply open.
- Use a screwdriver to open the trunk. This method is used only if other methods do not give the desired result, since the lock is most often opened with a screwdriver, but it has to be changed due to a broken cylinder. But, despite this, many car owners use a screwdriver to open the trunk without keys, convincing themselves that replacing the lock with a new one is a fairly simple and hassle-free task.
Which method to choose to open the trunk of a VAZ-2107, of course, every car owner must decide on his own, and the video instructions on the Internet resource will help you get any answers on this topic and clarify the most incomprehensible things, which you can watch at the most convenient time for yourself.
Making a shelf for a station wagon and hatchback
The acoustic shelf for the Lada Priora hatchback or station wagon is made of the same materials. The process of working on the design is also similar. It differs in that standard shelves in cars with a hatchback or station wagon body type consist of two elements. One part can be folded down to make it easier to load luggage.
Lada Priora hatchbackYou can create such a shelf model in two ways:
- Both parts are cut out according to the template of standard elements. One part is slightly shorter - 1-3 cm. Both parts are fastened with epoxy glue and self-tapping screws.
- To make the folding part of the shelf, plywood is taken that is thinner than the insert part. Some people make it simpler: they modify an old folding shelf, weighing it down with insulating material. You can also use old fixing parts.
Acoustic shelf for Lada Priora To install the structure in a hatchback or Priora station wagon with your own hands, proceed as follows:
- The rear seats are removed.
- The standard shelf is removed. A new template is made from it.
- The hatchback-type interior has an acoustic shelf with sidewalls. This is different from the sedan interior in the Priora car. Speakers are also installed on the sides. At the discretion of the owner, these speakers can be of different sizes and shapes.
- The sides are also dismantled. And based on them, a template for new ones is created. Some simply transfer the parameters onto the base material using a marker. All subsequent steps are similar to the previous installation option.
Acoustic shelf for Lada Priora hatchback
To raise or turn the podium in one direction or another, metal plates are used. They are attached to the base. If there is free space, you can carefully fill it with foam. When it hardens, cut off excess pieces. The inside of the structure is covered with insulating materials. The sides are upholstered, the speakers are mounted and the acoustic shelf is installed in its place.
Using these tips, you can easily make an acoustic shelf for your Lada Priora with your own hands. In any body type.
Making a shelf for a Lada Priora sedan
The acoustic shelf on a Priora sedan is made as follows:
- A layout is created using the old basis.
- To properly install the speakers, wooden blocks are attached between the mounting holes using self-tapping screws and sealant. The bars will act as stiffeners. This will prevent rattling when playing music.
- The podium templates are cut out separately. And they are fixed to the base using mounting foam. After the sealant has completely hardened, excess pieces are cut off with a sharp knife.
- Holes are cut for the safety straps.
- The base is processed with a knife until the material is smooth.
- The base is covered with finishing material. It is better to use epoxy resin glue for fixing.
- The finished shelf is mounted in a regular place in the sedan. The sidewalls are secured with strong bolts, if any.
Making an acoustic shelf
How to remove the rear door trim on a Priora
For the rear doors, the sequence of actions is approximately the same, and even easier, but it is worth considering the design features and location:
- use a Phillips screwdriver to unscrew the bolt from the recess for the door handle;
- Two bolts are also unscrewed in the recess of the armrest. If necessary, the entire pad is removed from the clips and removed;
- If the rear windows are manual and not automatic, then the handles are simply pryed off with a flat-head screwdriver and snapped off;
- the cap from the door lock is twisted off;
- Three bolts are unscrewed from the bottom of the casing;
- Using a special puller or a flat screwdriver, the trim is carefully removed from the clips. It is done!
Assembling the door will require the same steps, but in reverse order.
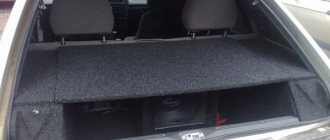
How to remove the rear parcel shelf of a Priora sedan
When studying the nuances of the removal process, all work should take no more than 20 minutes.
To remove it you will need a regular Phillips screwdriver.
- First of all, we need to disconnect the wires from the speakers located on the shelf. To do this, disconnect the connector from the brake light.
- Next, we move into the car interior and remove the elements of the rear seat. This must be done in order to ensure maximum convenience and ease of work.
- Now you need to release the armrest. As a result, two mounting screws for the trunk hatch will become available, which you will have to unscrew using a regular Phillips screwdriver.
- We find 4 special locking latches, which are located along the entire perimeter of the metal structure. To unfasten the shelf, you need to press on its protruding base, which is located inside the latch, and at the same time pull it upward. Similar manipulations are performed in relation to all four latches.
- Now that the element is not firmly fixed, you need to slightly lift the front part of the shelf and pull it towards you with a little force. This is required so that three special seals pop out from under the glass.
- This completes the dismantling.
Reinstallation is similar to the above removal process.
Priora 2 (2016) rear parcel shelf is rattling, what do you recommend, can I have a photo?
The original one on Priora costs 7-7
by Adminrive · Published 04/05/2013
Be careful on the roads
by Adminrive · Published 10/08/2015
Electrical connection diagram for the ignition system of a Lada-Priora car
The spark ignition system wiring diagram section contains graphical information about the supply of current to the main automated instruments and the vehicle's electronic engine control system. From them, the voltage is distributed to the main blocks, power plants, as well as control sensors and ECUs.
| Contact no. | Decoding |
| 1 | ECU power supply |
| 2 | Connecting the ignition system harness to the dashboard harness |
| 3 | Fuse box |
| 4 | Measuring device for determining the speed of movement |
| 5 | Road roughness detection sensor (located on the shock absorber support cup) |
| 6 | Oil pressure warning light indicator |
| 7 | TPS sensor |
| 8 | DTOZh sensor |
| 9 | Coolant temperature indicator |
| 10 | MAF sensor (MAF sensor) |
| 11 | Idle air valve (IAC) |
| 12 | Main fuel pump relay |
| 13 | Power fuse for the fuel pump |
| 14 | Starter relay |
| 15 | Starter relay fuse (15A) |
| 16 | ECU fusible link |
| 17 | Crankshaft position sensor (CPS) |
| 18 | Oxygen sensor |
| 19 | Camshaft phase sensor |
| 20 | Knock Level Sensor |
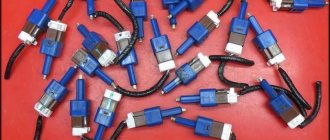
| 21 | Solenoid valve for filter purge and vapor recovery |
| 22 | Lambda probe |
| 23 | Electronic ignition module power supply |
| 24 | Supplying voltage to spark plugs |
| 25 | Fuel injector power |
| 26 | Harness block from ignition coil to ECM harness |
| 27 | Harness block from the ignition system to the ignition coil wiring harness |
| 28 | Engine computer connector to injection system |
| 29 | Injection system harness block to ignition system harness |
| A | To terminal (+) AB |
| B1, B2 | Places for attaching ground wires of the ignition system |
| C1 | Place of attachment of the ground wire coming from the ignition coils |
Ignition system electrical harness, 2170-3724026.
Ignition coil electrical harness, 1118-3724148.
Injector electrical harness, 11186-3724036.
Installation of the activator: preparatory work
Since there is space for a trunk lock activator in Kalina, it makes sense to use it. Absolutely any activator will do. Of course, for those who are interested in the quality and long service life of the entire device, it is better not to stop at extremely cheap options. Experienced car owners still advise choosing domestic Kalina electric lock drives, regardless of body type. They are somewhat more expensive than similar products made in China or Taiwan, but still more reliable. Main parameters of the activator:
- 12 volts;
- two-pin;
- lock-unlock functions.
In order for the system to open doors by pressing a button to work fully, one activator will not be enough. You will also need such a thing as a rotary washer. According to many car owners, the easiest way is to grind it yourself. You will need a steel plate and a machine. There are quite enough drawings with dimensions that will show what kind of rotary washer for the Kalina activator should be on various auto forums.
It is possible that after the washer is manufactured, it will have to be modified when installing the activator. The activator installation technique itself will require some tricks. For example, the first step is to remove the trunk trim. It is secured with pistons, which immediately became unusable for most car owners. Conclusion: pre-purchase of “hedgehogs” for subsequent installation of the trunk trim in place is mandatory.
Another nuance lies in the types of locks on the Lada Kalina. Firstly, locks on cars produced before 2010 and after differ in their design. Accordingly, the types of activators will differ slightly. This issue is resolved upon purchase. Secondly, most of those who independently installed the lock activator for Kalina station wagon either modified the lock itself or replaced it with another one. It remains to figure out why this is needed and how it is done.
The bottom line is that the trunk lock is equipped with two “tongues”. After modifying the lock to open it with a button on the key, the existing problems were partially solved, but a new one arose. If, when opening the trunk with the key button, someone did not support the trunk lid in time, it would lower, as a result the trunk would close again. And only on one “tongue”. And this meant that the key fob certainly became useless. Now it was possible to open the trunk again only with the key. This is where two options for solving the problem appeared.
Installation of the locking device drive
Removing the fifth door opening button is the easiest thing. It is more difficult to seal the remaining hole. This can be done using a special putty. One of the tricks is to process the hole cavity so that the surface becomes as rough as possible. This will create optimal adhesion to the putty. Next comes sanding, priming and painting. The work can be done independently without special training and practical skills. After that, you don't have to worry about aesthetics.
Of course, all dismantling work can be carried out only after the installation of the electric drive is completed, as well as the installation of the trunk opening button in the cabin. The trunk lock drive and how to install it are all relatively clear. Both the location and the connector of the wires in Kalina are determined in advance for this.
But where to install the button will have to be decided by the owner himself. The two most popular places are the dashboard in front of the gear shift and the driver's door. The first method is convenient because the button can be reached from almost anywhere in the cabin. The button on the driver's door is primarily a convenience for him.
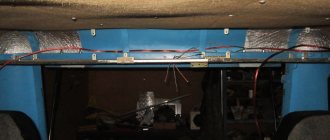
Once the location for installing the button has been selected, it is time to install the electrical wiring. About 4 m of wire will be required. The connection point is located under the rear seat. The connection is made to connector 13, it is signed, so searching will not cause any difficulties. The work can easily be done independently. Thus, it became clear how to make a trunk lock drive.
Overview of General Concepts
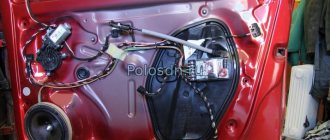
Installing rear power windows on a Priora is clearly not within the capabilities of every driver who decides to install it themselves or replace a failed device with their own hands. Before installing these devices in a car, you need to have at least approximate knowledge of the operating procedure and the principle of operation of the device itself. Without this, proper repair of the window regulator is impossible. The electric window mechanism is installed inside the doors. Priora's window regulators consist of an electric motor, a drive and an electronic control unit. According to the ESP design, it can be:
- cable (most common);
- plank;
- rack and pinion
In some configurations of the Lada Priora, factory rear ESPs are installed, which does not eliminate the need for knowledge about their design. Replacing a window regulator is a problem that comes up unexpectedly, so it's best to be prepared for it in advance.
As some car owners have found out, in order to install power windows, you need to be able to understand electrical wiring and have a lot of patience. In particular, in the 2008 Priora, it was discovered that the rear door wiring was not completely routed, which seriously complicates the work. In addition, the operation of standard ESPs with the ignition off is impossible, even if you insert a jumper into the desired relay.
There are many sets of rear lifts on sale that are compatible with the VAZ-2110, Granta and Priora. The cost of the kit can reach 3,500 rubles, depending on the type of design and manufacturer. Installation of equipment at the service will cost approximately the same amount. Many VAZ 2170 Priora owners sooner or later face the problem of failure of standard power windows. There are two common reasons:
- Broken cable.
- Electric drive failure.
Making a shelf
The standard shelf of the Priora Sedan can be used to make it easier to make a similar model with your own hands. It can be used as a layout. But to make the work easier, it is better to additionally make a layout from cardboard.
Acoustic shelf Priora sedan
To do this, remove the standard shelf. Then you need to take a sheet of thick cardboard or thin plywood and use a marker to transfer the dimensions of the standard shelf. Using a utility knife, cut out the layout. You should also use a marker to circle the places that are intended for seat belts. We should not forget about places for speakers (see How to choose speakers for a car radio on your own). Then everything happens as follows:
- Transfer the outline of the layout onto a sheet of plywood;
- Using an electric jigsaw, cut out the base for the future shelf;
- To increase the rigidity of the structure, it is necessary to strengthen it with supports made of wooden blocks, which are fixed using self-tapping screws. There is usually little space left between them, which is not recommended. To eliminate this problem, you should use a sealant;
Manufacturing process
You will need: 2 sheets of 10 mm plywood, a tool, a jigsaw, a drill, furniture corners, carpet, glue or a furniture stapler.
We cut out a shelf from plywood according to the drawing. The sides will be more accurate if you remove the plastic sides from the car and trace them in the place where the shelf will fit.
The side part of the shelf is an optional part of the acoustic shelf (if you buy a ready-made rear shelf, this element is not present). We fix it at an angle to the shelf using furniture corners. We bend them in place on the car.
We make another copy of the shelf template without a lid, only leaving small protrusions that will hold the lid. We fasten two sheets of plywood together with glue and screws. The lid is held in place by these hinges.
All that remains is to tighten the rear shelf with carpet using glue or a furniture stapler.
We install the resulting structure into the car, securing it around the perimeter in four places in the trunk.
The result is a non-removable, acoustic shelf with sidewalls. This drawback can be solved by using simpler fasteners, or by using a different design where the side parts will remain standard. Let us remind you that if you decide to leave the standard rear parcel shelf, but it creaks terribly, follow these recommendations.
How wonderful it is to listen to good music in the car. However, for this you also need to work hard first. The fact is that it provides for the installation of only two speakers. In car doors, at the bottom, and in the hinge area. However, modern music systems for cars sound much better in the quad configuration. That is, if there are 4 columns. And it’s best when two additional speakers (speakers) are located in the rear of the cabin.
Common faults
Malfunctions of the mechanism that raises the windows can be electrical or mechanical in nature. Regardless of the nature of the breakdown, you can do the repair yourself (video author: Xie Dan).
Mechanical failures can be detected without ignition.
The following are typical mechanical problems:
- wear of the teeth on the device gear;
- sunken shield;
- a defective cable mechanism can stretch or deteriorate, and later during operation it will come off the guide rollers;
- jamming of mechanisms due to oxidation of moving parts;
- gearbox bearing wear.
Among the electrical reasons why the power window on a Priora does not work are the following:
- If all four power windows do not work, the first thing you should check is fuse number F31. It is located in the power management mounting block. If the element burns out as a result of a short circuit, it should be replaced. In this case, it is advisable to check all wiring.
- Sticking or sticking of the brushes of the electric drive motor. This happens due to overheating of the graphite brushes, which melts the plastic nest in which they are located. Thus, the brushes stick to their nest and lose mobility.
- No voltage at the motor terminals. The cause may be an open circuit. The fault must be looked for in the relay or control unit. In addition, the contacts should be cleaned.
Ways to refine the product
Removing the shelf from the trunk of a Lada Priora takes no more than a minute. In hatchback and station wagon you need to pull it up and then remove it. In a sedan body the removal process is more complicated:
- you need to disconnect the wire block from the additional brake light and from the speakers (if any);
- pull the locking strap up and remove the back of the rear sofa;
- lower the armrest down and unscrew the fastening screws of the luggage compartment hatch;
- press the 4 locking elements;
- lift the front part a little and pull it towards you, overcoming the force of the seals until the latter come out from under the rear window.
To put the shelf in place, repeat all steps in reverse order.
The process of finalizing the shelf in a sedan
The standard design is not of good quality and most often begins to rattle and creak. If it is not possible to make a shelf yourself, modify the factory one.
To work you will need:
- polyurethane foam;
- scotch;
- noise and vibration insulation material;
- glue, preferably epoxy;
- silicone sealant.
The upgrade looks like this:
The standard shelf is removed from the car along with the speakers. All holes are sealed with tape - it is important to prevent polyurethane foam from getting into them. The bottom surface is moistened for better adhesion to the sealant. Polyurethane foam is applied to the lower part and after 40 minutes it is pressed down to increase rigidity. The sealant must be pierced in several places with a nail to expel excess air. You should wait until the foam has dried completely and treat all seams with silicone sealant. Noise-vibration insulation material is glued to the outside with epoxy glue. If desired, you can trim the product with textiles on top.. https://www.youtube.com/embed/c0cnnMVsYf0
This modification increases the rigidity of the structure, prevents squeaks, and improves sound quality.
To ensure that nothing interferes with the sound, no foreign objects are allowed on the acoustic shelf.
Improvement method without polyurethane foam
On Lada Priora hatchbacks and station wagons, using the method using polyurethane foam is undesirable. The thickness of the product is considerable, and for a large surface area this threatens sagging. For this reason, other materials are used for modification: modelin, anti-creak or vibroplast.
First you need to make the structure heavier. To do this, noise-vibration insulation material is glued to the bottom side. In this case, a construction hair dryer is used to heat the vibroplast and a tool for rolling out the insulation - any hard roller will do. Weighting will prevent rattling.
Then all surfaces that come into contact with each other are covered with modelin. This refers to the shelf holders on the sides and the contact points of the plastic linings with the luggage compartment pillars. Sealants for windows and doors, used in construction, may also be suitable for pasting. The purpose of this stage is to remove squeaks.
As additional measures, you can use components from foreign cars instead of standard rubber bumpers. They press the shelf more tightly to the trunk lid in the closed position and prevent it from moving and bouncing when driving on uneven roads.
The rear shelf of the Prior sedan rattles
Priora sedan, something creaks in the back, I thought the shelf was replaced with a wooden acoustic one. the creaking became even louder. when no one is sitting behind, there is almost no creaking, occasionally. and as people sit down, he appears again. I don’t know what to think anymore. Has anyone had this?
Comments 24
The handbrake cable squeaks. you need to lubricate its fastenings
the trouble also started when no one was there, very rarely a creaking sound, and when someone sat down, it started getting rough...
1 rubber band that fits into the hole in the seat (the top latch on the seat, then unfasten the seat and look at it from the trunk, there should be an elastic band there, 2 maybe the springs in the back are creaking?
try laying a rag under the seat or some kind of thread (under the entire other side for the entire width) and look... temporarily remove the plastic where the latch is (I don’t remember, you can glue it without it or with a model, and if it’s on the sides, then remove it in the same way time and travel and look, you will find the reason, you will do everything ok
I actually have an ensemble there. the seat creaks where there is a groove for the latch, plastic sides, headrests...
plastic sides are the worst! I put everything wooden in the back - I drive and couldn’t be happier
Exactly the same situation happened on the sedan! I put up a wooden shelf and a creaking sound appeared! When they sat down in the back, there was silence! One of the seats is not fastened with a hook (lock) at the top, try pulling the backrests! The wooden shelf is slightly wider than the factory one, and the seat does not fasten all the way, I used a file to file the metal hook, and everything was fastened! A year of silence)
Well, as I understand it, he has the opposite situation, just like me, there is a creak when someone is sitting behind him, and when there is no one, there is practically no noise.
well yes (I was reading something)
it happens)) I’ve already looked everywhere in the back, I can’t find anything, I press, I rock the back and the shelf - silence... the sound only appears when someone is sitting in the back and I’m driving on a bad road, well, I really have a hatchback
Check the additional brake light and also the seat belt attachment points.
By the way, it’s possible that the backrests are creaking, but it’s easy to check, I pressed the shelf with my hand and it creaked on the left side, you could feel that it wasn’t sitting tightly, but when you take off the backrests, they sit on a pin, that’s where the rubber band could be worn out or torn, or simply she's not there
It creaked too, is your shelf secured with self-tapping screws? I installed a shelf in the cabin, secured it with two self-tapping screws from above to the beam, drove for two months without any problems, then nasty squeaks began to appear, I removed the shelf, it turned out the shelf had moved from its intended position, from below where the shelf should go I glued the metal around the perimeter with anti-creaking, pressed the shelf tighter to the glass, secured it and there were no squeaks, I was happy, you can also buy angles, you lie down in the trunk and look at the area of the shelf where it is pressed against the glass, it lies on the beam, you can fasten it with corners on both sides and then it will generally fit tightly
Creaks in the area of the rear shelf of the Lada Priora are a fairly common phenomenon and are observed in cars starting from 15, 20 thousand mileage.
The rear shelf of the Priora (sedan) creaks because the actual installation site is a metal pipe, and the element is secured in the center and on the sides using plastic corners. In addition, the material of the rear acoustic element is plastic, and nothing good can be expected when interacting with a rigid base. However, there is a way out of this situation, which consists in carrying out certain modifications. They will be discussed in this article.
Do it yourself or buy ready-made
Those who appreciate the high-quality sound of the Priora’s built-in audio system unequivocally say that it’s only made with their own hands. A well-fixed acoustic shelf, processed with high-quality materials, will reveal the entire rich sound background of the player. And if there is an additional amplifier in the trunk, the Priora will become a magnificent mobile music center.
The process of manufacturing an acoustic shelf for a Priora sedan
This is a rather complex operation that requires certain skills in working with wood. To make a high-quality shelf you will need the following tools and materials:
- Board for the base (plywood).
- Covering (leather, fabric, leather substitute).
- Jigsaw.
- Varnish.
- Sheet of cardboard.
- Screwdrivers.
- Self-tapping screws.
- Glue (epoxy).
- Sandpaper.
- Beam.
First of all, the shelf installed at the factory is dismantled.
It is necessary to cut out a layout from cardboard. Then, on this layout, holes are drawn for the available speakers.
A layout is placed on the prepared sheet for making a shelf, and a silhouette is made with a pencil. A workpiece of a given shape is cut out with a jigsaw. When all the necessary cuts have been made, the edges are sanded to remove burrs.
After this, the shelf is varnished and dried. From below, you need to attach a beam with self-tapping screws to give it rigidity. Make sure that the ribs fit tightly to the surface.
When the product has dried properly, cover it with sheathing, placing it on glue and securing it at the joints with self-tapping screws. Attach the speakers to the shelf, and you can mount it in place. The main thing is to secure it well in the places of standard landing.
Refinement of standard acoustic shelf
A quick and cheap solution to the problem of instability of a standard shelf would be to modify it and increase the rigidity of the structure. This idea will cost a little less than making it yourself, but it will also be a little different.
Necessary materials:
- Polyurethane foam.
- Scotch.
- Soundproofing material.
- Epoxy adhesive.
- Sealant.
Stages of work on finalizing a standard acoustic shelf:
- Remove the standard acoustic shelf from the car.
- Remove the speakers.
- Tape all holes with tape to prevent foam from getting underneath them.
- Lightly moisten the bottom surface with water.
- Prepare the foam according to the manufacturer's instructions on the label and distribute it evenly along the entire perimeter of the bottom side.
- After about 40 minutes, when the polyurethane foam begins to dry, it should be slightly pressed down from the edges to increase the rigidity of the structure, after piercing it a little with a nail, since excess air has already accumulated in the surface.
- Leave the shelf until the foam is completely dry, according to the manufacturer's instructions.
- After complete drying, treat the seams of the structure with sealant.
- Secure the noise-absorbing material to the outside using epoxy glue.
- If desired, decorate the surface with other finishing materials.
- Install the improved model in its original place.
Treating a standard acoustic shelf with polyurethane foam will not only increase rigidity and prevent squeaks when playing music loudly, but will also improve the acoustic properties of the sound. If desired, you can additionally install wooden blocks between the speakers, and also, if necessary, change the dimensions of the speakers to the size of the new ones.
The simple steps mentioned above will help you turn a standard acoustic shelf into an element of interior decor with excellent sound properties.