Cars admin26.02.2020
A brake force regulator, or sorcerer in common parlance, is a mechanical device designed to relieve excess pressure in the rear drum brakes.
On VAZ-2109, VAZ-2108, VAZ-2114 and other front-wheel drive models produced in Togliatti, it was installed in the rear left part of the body, under the bottom, in front of the rear suspension beam. The brake pressure regulator on the VAZ-2107 model and other “classics” is located on the right in the direction of travel of the car.
New vehicles equipped with ABS and EBD do not use the sorcerer.
Why do you need a brake force regulator?
The function of the regulator is to temporarily reduce the braking force during heavy braking. The fact is that force evenly distributed on the rear and front axles can lead to a skid of the car. If the rear brakes start working a little later and weaker than the front ones, this does not happen.
Based on the above, we can conclude that the sorcerer is an element of the car’s safety system, partly preserving its stability on the road when the brake pedal is pressed in an emergency. On modern models, this function is performed by ABS. That is why there is no need today to use a technically outdated device in production.
Test results
The optimal adjustment of the “sorcerer” corresponds to the average factory settings, and a few percent can be gained only with individual correction for specific brake pads, tires, vehicle loading and road conditions. But it’s unlikely that anyone will start every trip with a test run.
It would seem that it is possible to reduce the braking distance by increasing the pressure in the rear brakes, but this threatens a loss of stability due to early blocking of the rear wheels. And today only ABS can provide maximum braking efficiency.
On a fully loaded car, depending on the position of the regulator, the spread of the braking distance is 8.3 m. The best results, as on the Niva, are with increasing pressure in the rear brakes. However, on a slippery road, even in smooth turns, early locking of the rear wheels is possible, leading to a skid. And at partial load, with the regulator position different from the base one, the braking distance only increases.
Setting up the brake force regulator: “The Sorcerer” carries the hero
How does a sorcerer work?
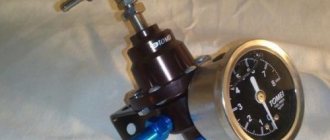
The regulator itself consists of a cylinder, valve, spring and rod. The latter is connected to the rear beam, which ensures the operation of the VAZ-2109 sorcerer. Also, brake fluid circuits pass through the rear brake pressure regulator. For their mounting on the device there are 4 threaded entries. » alt=»»> How does the sorcerer regulator work on a VAZ? During emergency braking, the front of the car is pressed to the ground, and the rear is raised. This causes the regulator rod to move, which blocks the flow of fluid to the rear cylinders. A spring located under the valve prevents it from closing completely. Therefore, the rear mechanisms still work, but later and weaker than the front ones.
Lada
“The sorcerer”, or, according to the catalogue, the pressure regulator in the brake drive, it was not for nothing that people received such an apt nickname: no one really knows how it works, but, they say, being faulty, it can present an unpleasant surprise - make the car dance in an emergency. braking. This is where the insidiousness of the “sorcerer” lies: during normal operation, without braking to the floor, its work or inaction is practically not felt, but when its help is especially needed, it may not come. The pistons have soured, the rod or drive lever has broken off, or you installed a new one instead of a faulty regulator, but for the time being you don’t know that the unit is defective or out of adjustment... How dangerous is this?
Let’s check in our experiment how “witchcraft” affects the effectiveness of the brakes at partial and full load of the Chevrolet Niva and Kalina and what the owner should be wary of if he does not monitor the condition of the regulator. We can simulate a malfunction, from excessive activity to complete inaction, with adjustments. Let us remind you that the regulator’s task is to reduce the braking force on the rear axle, reducing the likelihood of skidding when braking to skid. The regulator, mounted on the body and connected by an elastic lever to the axle beam, limits the pressure in the rear brake mechanisms depending on the position of the rear of the body relative to the road, that is, on the vehicle load.
Possible malfunctions of the regulator
In general, there are few malfunctions that can occur in the sorcerer. These include:
- Valve jamming;
- Misalignment of position;
- Brake fluid leaks.
A deregulated sorcerer can be adjusted. You can determine the need for adjustment by the behavior of the car when you press the brake. If the regulator is set incorrectly, the car starts to toss to the side.
If the valve jams or fluid leaks, the mechanism must be replaced. Theoretically, it can be repaired. However, the process of such repairs is complex and expensive, which makes it unprofitable.
Replacing the brake pressure regulator
The replacement of the sorcerer on VAZ-2110 cars and other vehicles equipped with an RTD is carried out on an overpass. You need a 13 mm spanner, a powerful screwdriver and a special 10 mm wrench designed for unscrewing brake pipes. Before starting work, the assembly must be cleaned of dirt and rust, doused with WD-40 or another penetrating compound, and then wait half an hour.
Work begins by unscrewing the bolt securing the bracket to the spring. Afterwards, the brake pipes are dismantled, the position of which is recommended to be pre-marked.
You can also unscrew the tube fittings with a regular wrench. However, using a special tool makes the job easier and reduces the likelihood of “licking” the edges. After the fittings, unscrew the two bolts securing the sorcerer to the body and remove the part. » alt=»»> It is necessary to install the new VAZ-2110 sorcerer in strict reverse order. After installing it and before adjusting the RTD, you should bleed the rear brake circuits. Next, the above-described procedure for setting up the sorcerer is performed.
Lada 2112 ᵀᴴᴱ ᴼᴿᴵᴳᴵᴺᴬᴸ › Logbook › We check and replace the sorcerer VAZ 2110-2112 with our own hands
The braking system of a car is an important safety element. Its good condition can save lives in case of road accidents. One of the most peculiar components is the rear brake pressure regulator, colloquially known as the sorcerer. This name appeared with the first Zhiguli cars because of its mystery and unknown operating principle. The VAZ 2110 sorcerer has a catalog number starting with 2108, and is used, in addition to the tenth family, on other VAZ cars: Samara, Kalina and Priora.
Check
Symptoms of a malfunction of the sorcerer on the VAZ 2110 appear when braking:
The car pulls to the side; Skidding; Insufficient brake performance. The VAZ 2110 has a sorcerer on a bracket under the bottom, slightly to the left, in the area of the rear wheels. It is better to work with it on a lift, overpass or inspection hole. The main defects are easily detected during external inspection. Brake fluid leaks indicate wear or damage to the seals.
If the sorcerer's piston has turned sour and does not move, then this is also determined visually when the assistant smoothly presses the brake pedal several times. In both cases, repair is impractical and replacement is necessary.
Everything is in order if the regulator is clean, the gap between the drive lever and the plate is 2 mm, the rod moves when the pedal is pressed.
A working sorcerer must ensure:
Uniformity of braking forces on the rear wheels; Rear brakes engage later than front brakes; Adjustment of this delay, depending on the vehicle load.
Removal and installation
To replace the sorcerer on a VAZ 2110, you need wrenches 13 and 10. Instead of 10, a special wrench for brake fittings is very desirable; it is more gentle than a regular open-end wrench when handling soft copper nuts due to the large contact area.
This type of wrench is similar to a socket wrench, but has a slot for inserting a tube into it and high jaws.
You need about half a liter of brake fluid and 4 rubber plugs for the brake hoses. AvtoVAZ cast iron and Belarusian aluminum regulators are sold in VAZ spare parts stores. Russian VIS is usually more reliable, Belarusian Fenox is lighter and cheaper. The conditions under the bottom are unfavorable for the sorcerer, so you first need to clean the dirt with a stiff brush and moisten the threaded connections with a penetrating lubricant such as WD-40. The fixing bracket is removed from the rear beam; if necessary, you can use a powerful screwdriver to loosen it. The brake pipes are carefully unscrewed, marked for reassembly, and closed with rubber plugs. To dismantle the regulator, it is more convenient to unscrew the two nuts securing the bracket to the bottom and remove the sorcerer assembly. During installation, the regulator fastening bolts (attention, the front bolt is longer than the rear), through elongated holes, are not fully tightened to the bracket to ensure movement during adjustment. Assembly is carried out in the reverse order; for reliability, the clamp-clamp on the beam must be crimped with pliers. To remove air from the system, it is necessary to bleed the brakes after work.
It’s easier to do this together, the process has been described many times, including for the VAZ 2110-2112. When replacing the sorcerer, it is enough to bleed only the rear brakes. Adjustment
The work of the sorcerer on VAZ cars depends on the position of the body. Therefore, adjustment must be performed not only during each maintenance, but also when replacing shock absorbers and springs, after repairing the rear beam and, of course, replacing the sorcerer itself. The car is placed on an overpass or inspection hole, to install the suspension in an equilibrium position, it swings a couple of times hands trunk. Use a 13mm wrench to loosen the fastening bolts to the bracket; the front bolt is not visible from below, you need to find it by touch.
Examination
The operation of the VAZ-2109, 2110 and other AvtoVAZ models is checked on the move, in closed areas. To do this, accelerate the car to a speed of 40 km/h and sharply press the brake. The rear wheels should lock 1/2 second later than the front wheels.
The wheels are monitored by an assistant located outside the car. If wheel locking occurs noticeably later or does not occur at all, and also if the rear axle is locked simultaneously with the front, the sorcerer adjustment procedure is repeated.
To increase the response time of the rear brakes, the gap between the adjuster and the bracket is increased; to shorten it, it is reduced accordingly.
All the best! I was tormented by the wobbly brakes on the car, although everything is new in a circle, pads, drums, cylinders, springs... I decided to check what it was, the result is that the ass brakes sluggishly, and the rear left one is not at all clear how it is. no way. I thought the problem was in the tubes, but experimentally they determined that the problem was in the sorcerer. We begin to pump the second circuit (rear left, front right) and on the rear left the pedal goes a centimeter and stands as if dug out, although it should be pressed to the floor. My father and I scratched our heads for a long time, and in the end, after looking at the sorcerer’s device, it was decided to bleed the rear left with the valve not fully pressed (actually that
Adjusting the pressure regulator drive of the VAZ 2170 Priora
- Repair manuals
- Repair manual for VAZ 2170 (Priora) 2004+.
- Adjusting the pressure regulator drive
Incorrect adjustment of the pressure regulator drive can cause the vehicle to skid or pull to the side when braking, reducing braking efficiency.
You will need: a “13” key, wire with a diameter of 2.0–2.1 mm.
1. Place the car on the inspection ditch and press the rear of the car several times with a force of about 400–500 N (40–50 kgf) to set the rear suspension to the middle position.
| 2. Loosen the front bolt securing the regulator to the bracket. | 3. Using a wire as a feeler gauge, adjust the bracket so that the gap between the drive lever and the lever spring is 2.0–2.1 mm. |
4. To do this, move the drive lever by the protrusion. In this position, tighten the bolt.
5. If the pressure regulator is correctly adjusted, when braking from a speed of about 40 km/h on a horizontal section of the road with a hard surface, the front wheels should lock slightly earlier than the rear (this can be determined by an observer outside the car). Otherwise, increase the gap (if the rear wheels lock earlier than the front ones) or decrease it (if the rear wheels lock much later than the front ones). After this, check the adjustment again by braking and repeat if necessary.
↓ Comments ↓
1. Car structure
1.0 Car structure 1.1 General information about the car 1.2 Passport data 1.3 Car keys 1.4. Controls 1.5. Heating and ventilation of the cabin 1.6 Ensuring a comfortable air temperature in the cabin 1.7. Doors 1.8. Passive safety equipment on the car 1.9. Seats
2. Recommendations for use
2.0 Recommendations for use 2.1. Safety rules and recommendations 2.2 Running in the car 2.3 Operating the car during the warranty period 2.4. Preparing the car for departure
3. Problems along the way
3.0 Malfunctions along the way 3.1. The engine does not start 3.2 Malfunctions of the fuel injection system 3.3 Idle speed has disappeared 3.4. Interruptions in the operation of the 3.5 engine. The car moves jerkily 3.6 The car accelerates poorly 3.7 The engine stalled while driving 3.8. Oil pressure dropped to 3.9. Engine overheating 3.10. The battery does not recharge 3.13. Knocks in the engine 3.16. Wheel puncture
4. Maintenance
4.0 Maintenance 4.1. General provisions 4.2. Inspection work 4.3. Lubrication and filling works 4.4. Diagnostic work 4.5. Repair and adjustment work
5. Engine
5.0 Engine 5.1 Design features 5.2 Possible engine malfunctions, their causes and solutions 5.3 Useful tips 5.4 Checking compression in the cylinders 5.5 Removing and installing the decorative engine casing 5.6 Removing and installing the engine splash guard 5.7 Installing the piston of the first cylinder to the TDC position of the compression stroke 5.8 Replacing the drive belt gas distribution mechanism and tension roller 5.9 Replacing the power unit supports 5.11. Replacing engine seals 5.13. Engine cylinder head 5.15. Engine repair 5.16. Lubrication system 5.17. Cooling system 5.18. Power supply system 5.19. Design Features
6. Transmission
6.0 Transmission 6.1. Clutch 6.2. Gearbox 6.3. Front wheel drives
7. Chassis
7.0 Chassis 7.1. Front suspension 7.2. Rear suspension
8. Steering
8.0 Steering 8.1 Design features 8.2 Possible steering malfunctions, their causes and solutions 8.3. Steering column 8.4. Steering linkage 8.5. Steering gear
9. Brake system
9.0 Brake system 9.1 Design features 9.2 Possible malfunctions of the brake system, their causes and solutions 9.3 Bleeding the brake system hydraulic drive 9.4 Removing and installing the vacuum brake booster 9.5 Replacing the brake pedal axle bushings 9.6. Main brake cylinder 9.7. Front wheel brakes 9.8. Braking mechanisms of the rear wheels 9.9. Pressure regulator 9.10. Brake hoses and tubes 9.11. Parking brake
10. Electrical equipment
10.0 Electrical equipment 10.1 Design features 10.2. Battery 10.3. Mounting block (relays and fuses) 10.4. Generator 10.5. Starter 10.6. Ignition switch (lock) 10.7. Electronic engine control system (ECM) 10.8. Ignition system 10.9. Lighting, light and sound signaling 10.10. Windshield cleaner 10.11. Washer reservoir 10.12. Electric fan of the engine cooling system 10.13. Electric motor of the heating and ventilation system fan 10.15. Cigarette lighter 10.16. Instrument cluster 10.18. Electronic anti-theft remote control system 10.19. Immobilizer 10.21. Replacing sensors and switches
11. Body
11.0 Body 11.1 Design features 11.2 Possible body malfunctions, their causes and solutions 11.3 Removing and installing windshield frame lining 11.4 Removing and installing soundproofing upholstery in the engine compartment 11.5. Removing and installing bumpers 11.6 Removing and installing the fender liner and protective wing cover 11.7 Removing and installing the front fender 11.8 Removing and installing decorative sill trims 11.9. Hood 11.10. Trunk lid 11.11. Doors 11.12. Seats 11.13. Seat belts 11.14. Rear view mirrors 11.15. Interior fittings 11.16. Instrument panel 11.17. Heater 11.20. Body care
12. Applications
12.0 Appendix 12.1 Appendix 1. Tightening torques of threaded connections, Nm 12.2 Appendix 2. Fuels, lubricants and operating fluids 12.3 Appendix 3. Nominal filling volumes 12.4 Appendix 4. Basic data for adjustments and monitoring 12.5 Appendix 5. Spark plugs used on vehicles 12.6 Appendix 6. Lamps used on a car 12.7 Appendix 7. What you need to have in a car 12.8 Appendix 8. Tools used when repairing a car
13. Electrical diagrams
13.0 Electrical Diagrams 13.1 Diagram 1. Instrument Panel Harness Connections 13.2 Diagram 2. Vehicle Front Wire Harness Connections 13.3 Diagram 3. Engine Electronic Control System (ECM) Harness Connections 13.4 Diagram 4. Vehicle Rear Wire Harness Connections 13.5 Diagram 5. Light Harness Connections license plate light 13.6 Diagram 6. Left front door wiring harness connections 13.7 Diagram 7. Right front door wiring harness connections 13.8 Diagram 8. Rear door wiring harness connections
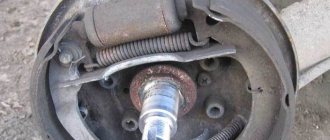
Checking the brake pressure regulator for souring:
Have a helper press the brake pedal while you watch the pressure regulator rod (1), which should extend from the regulator body and act on the spring plate (2), pressing it against the drive lever (3). If the following sequence of operation occurs when you press the pedal, then all that remains is to adjust the “sorcerer”. It is advisable to check the adjustment of the sorcerer during each technical inspection, as well as during the replacement of springs and struts, and repair work on the rear beam.
Signs of a working brake pressure regulator
A working regulator (3) should show no signs of brake fluid leakage, the rod should be movable, and the gap between the drive lever and the plate should be 2 mm.
Malfunctioning Sorcerer
If you find that the gap between the lever and the plate (3) does not match or the sorcerer is immobile, you should replace or adjust it.