Description and installation of the Alliance heater on a VAZ car
In search of means to ensure easy starting of the power plant in conditions of reduced temperatures, many car owners opt for antifreeze pre-heaters operating from a 220 V network. In such devices, powerful heating elements ensure fairly quick warm-up of the engine in winter.
At the same time, motorists often give preference to such domestically produced devices, including the Alliance pre-heater.
This decision is often due to the fact that domestic devices are cheaper than foreign ones, with decent build quality and acceptable performance of their functions.
This manufacturer has appeared on the market of equipment for heating power plants quite a long time ago, and its products are in demand.
Autonomous pre-heater
The main design elements of an autonomous heater for engine preheating are:
- Boiler equipped with a combustion chamber and radiator;
- Fuel supply system to the combustion chamber, consisting of a fuel pump and pipelines;
- Coolant pump;
- The control mechanisms are a temperature relay, an electronic unit for monitoring the operation of the heater and a device for starting it.
In devices of this type, the heat released when fuel is burned in the boiler chamber heats the coolant circulating in a small circle. The fuel is ignited by spark plugs powered by a car or tractor battery.
The battery also serves as a source of energy for the coolant pump. The device consumes about half a liter of fuel per hour.
Autonomous heaters are often used to increase the efficiency of the standard heating system of a car or tractor while driving in very low temperatures.
Types of heaters, features
The company offers a choice of a number of models with different designs and technical characteristics. In most cases, the devices are intended for use on domestic cars and trucks - VAZ, GAZ, UAZ, GAZelle, etc. But at the same time, installation of the Alliance heater is quite possible on foreign cars.
The catalog of preheaters from this company includes the following models:
"Alliance-2-PC"
The only tank-type model on the list, the design of which includes a pump that circulates coolant through the system while the heater is operating. Thanks to this, it ensures more uniform heating of the cylinder block. The equipment has a vertical design. The power of the heating element is 2 kW;
"Alliance"
This model comes in two types - 1.5 and 2.0 kW. Externally, it is identical to the model with a pump, but this version does not have a pump. Liquid circulation – gravity;
Horizontal flow-type model with perpendicular pins. Designed for installation on vehicles that use a shortened cooling system return pipe and an angled antifreeze supply to the thermostat housing (VAZ classic models and some front-wheel drive models). The power of the heating element is only 0.7 kW, so it is more suitable for maintaining temperature rather than heating coolant;
"Alliance-08" and "08 Universal"
Flow model with horizontal position of terminals. The first version is intended for installation on GAZ cars, while the second is universal and can be used on foreign cars. Heater power – 0.8 kW;
"Alliance 3"
Horizontal tank-type model with perpendicular outlets and a power of 3 kW. This heater is designed for use with truck engines;
The type of device affects the principle of operation. If everything is clear with a tank heater equipped with a pump - when turned on, the pump provides circulation, then gravity-fed ones should be considered in more detail, since the scheme of its operation is quite interesting.
Photo report Installation of Alliance preheater (on VW Golf 3, ABU engine)
SokolPro
Administrator
Hello everyone, it’s time for a report on the installation of the 220V Alliance pre-heater.
I’ll say right away that I use it all winter to pre-heat the car and start it in any frost while parked on the street. Of course, there are some operating nuances about them below. A little theory:
BY INSTALLING A HEATER, YOU WILL SAVE FUEL, INCREASE ENGINE LIFE AND REDUCE THE EMISSION OF TOXIC GASES INTO THE ATMOSPHERE!
The operation of preheaters is based on the principle of convection or natural circulation of liquid. When the liquid is heated in the heater, the density decreases and the liquid rises up, leaves the heater and goes into the engine, where, having given off heat, it falls down to the inlet of the heater. There is a constant movement of liquid in a closed cycle. To avoid overheating of the coolant, a thermal relay is installed in the heater housing, which, when the maximum temperature is reached in my case 80*C, turns off the heating element of the heater.
Before installation, it wouldn’t hurt to check the cooling system and thermostat. The heater is designed for antifreeze or antifreeze. The cooling system is not allowed to contain sediment or foreign matter, as well as any additives to eliminate radiator leaks.
The heater must be installed in a horizontal position. ——-The heater should be located at the lowest possible point. -The connection of the heater to the cooling system must be carried out in two places remote from each other (heater inlet and heater outlet).
The heater inlet must be connected to the lowest point of the cooling system; exit from the heater with the top point. The inlet to the heater must NOT be located above the point of connection to the engine. To comply with safety regulations, it is necessary to connect the heater to a three-wire single-phase power supply network of 220 Volts with a grounding contact through a circuit breaker with a protection current of 10 Amps (for 1.5 kW, 2.0 kV). In addition, you cannot turn on the heater while the engine is running. The heater must not be turned on without coolant.
And so the installation of the Alliance engine heater itself.
The heater that I installed was originally intended for a VAZ 2110 with a 16-valve engine, so the kit was supplied specifically for this engine. This is what the heater itself looks like. The kit includes a boiler, a pipe, two tees, clamps, a fastening element, and a fitting for taking in antifreeze.
It took a long time to choose the optimal place to install the boiler, I settled on the place where the intake pipe had the shortest length, we screwed the fastening element to the gearbox, it fit perfectly in this place, I had to order one tee from a turner for coolant intake, since the Vag concern did not provide a drain hole in a block like a VAZ 2110, I decided to make the fence in the lowest place. which I found, the lower radiator pipe of the stove. We screw the boiler to the fastening element, measure the length with the pipe a little with a margin.
The antifreeze outlet was made on the radiator pipe closer to the thermostat housing and I purchased a reinforced nylon hose with a diameter of 30mm. It is important to route the power cable carefully so that there is no contact with any heating elements; in principle, you can install a stationary Defa-type socket to avoid opening the hood every day, but I didn’t bother installing a stationary waterproof socket and made a simple adapter.
Let's move on to operation
:
So the first launch took place in the fall in order to check everything for leaks and perform the main task - heating the coolant, check the coolant level, plug it in, you can hear a little crackling noise, the process is completed, after a few minutes you need to touch the upper pipes into which the heated antifreeze is released, it should be warm. The car has an additional coolant thermometer, the sensor of which is attached to the head on the side of the thermostat housing
Design and operating principle
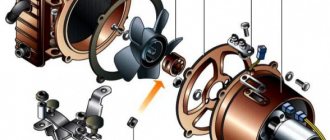
The design of the Alliance 1.5 device consists of a housing with two terminals - a side supply and a central outlet. This housing plays the role of a reservoir, so a heating element is placed inside it. The leads of the heating element pass through the bottom cover, where it is connected to the power cable. Additionally, the design uses a thermostat that turns the device on/off when a certain temperature is reached (the upper limit is 85 degrees C, and the lower limit is 50 degrees C).
To ensure gravity movement of the coolant, a ball valve is installed in the underwater outlet.
It all works like this: initially the valve is open, so the reservoir is filled with antifreeze from the system. As the coolant is heated by the heating element, it begins to expand, causing the valve to shut off the supply. Further expansion causes the already heated antifreeze to be pushed out through the central (waste) outlet. A pressure drop occurs inside the housing and the valve opens again, releasing the next portion of coolant.
As for flow-through models, they are a regular tube in which a heating element is installed. In such devices, gravity circulation is carried out due to temperature differences.
Connection diagrams
Each type of model has its own connection diagram, which must be followed, otherwise antifreeze circulation will not be ensured (applies to gravity-fed models).
There may be several options for inserting a heater into the system. For example, some cars use a classic connection scheme, in which the fluid is supplied from the hole for the drain plug (a fitting is installed instead), and the outlet leads to the upper pipe coming from the radiator (the insertion is made using a tee).
But more often a slightly different connection scheme is used. In it, antifreeze is supplied through the same drain plug, but the drain is made into the hole in the temperature sensor of the cylinder block. For such a connection, a tee fitting is included with the device. It is screwed in instead of the temperature sensor. The sensor itself is then screwed into the end of the fitting, and the pipe from the heater is put on the side outlet of the tee.
As for flow-through models, their installation is much easier, since they simply cut into the required pipe of the cooling system.
In general, installation work should not cause any difficulties, since there is no need to redo anything, you just need to make the insert correctly.
Finally, a little about the operation of the device. After connecting the heater to the cooling system, the device itself (tank type) must be mounted on the engine (a bracket is included in the kit for this purpose)
All pipes and wiring coming from the equipment should be laid so that they do not touch moving elements that become very hot during operation of the power plant.
All Alliance models are equipped with a thermostat, but you shouldn’t rely on it alone. Therefore, it is better to connect the device to power via an adapter with a timer.
Source
Installation of engine heating for VAZ 2114
We wrote above that there are several ways to connect a device, but we will leave the question of searching for technological devices to car enthusiasts - what he considers unnecessary is what he twists, so we will consider a stationary connection to the pipe.
It’s worth noting right away that if installing a heater on a VAZ 2114 is a question with many unknowns for you, it is better to entrust the procedure to a professional; if you know how the cooling system works, you can install it yourself.
Installation of pre-heater
- We study a small circle of your cooling system and choose a place closer to the pump.
- Drain the antifreeze (antifreeze) from the thermostat pipe.
- We buy special pipes or cut old ones so as to secure the heating elements to the cylinder block.
IMPORTANT! The cylinder block has special technological holes in the bracket for mounting heating elements.
- Carefully insert the heater into the pipes and connect them with clamps.
Connecting pipes to the heater
- Lubricate the connections with sealant.
In conclusion, it is worth noting that the length of the wire must be chosen so that it does not touch the rotating and heating elements, and as for the external or internal storage of the socket, decide for yourself what is worse: hooligans or the lack of need to open the hood.
Connection diagrams
Each type of model has its own connection diagram, which must be followed, otherwise antifreeze circulation will not be ensured (applies to gravity-fed models).
There may be several options for inserting a heater into the system. For example, some cars use a classic connection scheme, in which the fluid is supplied from the hole for the drain plug (a fitting is installed instead), and the outlet leads to the upper pipe coming from the radiator (the insertion is made using a tee).
Pre-launch small "Alliance-0.8"
GENERAL INSTRUCTIONS
This manual establishes the rules for installing the Alliance-08 electric heater on GAZ Gazelle, GAZ Sobol vehicles with ZMZ-402, ZMZ-406, UMZ-421 engines, as well as GAZ-3110 Volga vehicles. The electric heater is installed instead of the standard plastic tee between the radiator and the cooling system pump.
INSTALLATION KIT
Electric heater assembly with power cord and plug – 1 pc. Clamp S 20-40 – 2 pcs. Operation and installation manual – 1 pc. Packing box – 1 pc.
HEATER INSTALLATION
If you encounter difficulties during self-installation, contact a specialized service station (service station).
3.1. Drain the coolant from the engine cooling system. 3.2. Loosen the clamps and remove the plastic tee along with the corner rubber sleeve connecting the lower radiator hose to the cooling system pump. 3.3. Shorten the corner sleeve. The amount of shortening is determined based on the dimensions of the heater. 3.4. Insert the heater into the lower radiator sleeve and connect it to the cooling system pump with an angled rubber sleeve. Place the expansion tank sleeve onto the housing fitting. Seal the connections by tightening the clamps 3.5. Secure the electrical cord with plastic clamps so that it does not touch the moving and heated parts of the engine. 3.6 Fill the engine cooling system with coolant.
Other preheater comparisons
If this comparison does not satisfy your curiosity, then you can also find many others on PartReview.
For example, comparisons of Alliance preheaters with such companies as: Severs, Webasto, Binar, Defa, Lunfei, Eberspacher, Teplostar, Atlant.
Comparisons of Start-M preheaters with such companies as: Severs, Webasto, Binar, Defa, Lunfei, Eberspacher, Teplostar, Atlant are also available.
In addition, you can find out who is better among other manufacturers of preheaters: Severs or Webasto, Binar or Severs, Binar or Webasto, Defa or Severs, Defa or Webasto.
Which preheaters are more popular - Alliance or Start-M?
In May 2021, on PartReview, Start-M preheaters in general turned out to be more popular than Alliance.
In terms of the ratio of votes, the Start-M preheaters surpassed the Alliance:
- For the Alliance, the ratio of positive votes (50) to negative votes (10) was 40 votes.
- At Start-M, the ratio of positive votes (61) to negative (6) was 55 votes.
In terms of the number of reviews, Start-M preheaters surpassed the Alliance:
- There are 19 reviews written on Alliance preheaters: 15 positive, 2 neutral, 2 negative.
- There are 21 reviews written on Start-M preheaters: 18 positive, 3 neutral, 0 negative.
What is it intended for and how is it designed?
When the engine starts after a long stop, in the first seconds its parts come into contact with each other without lubrication. The viscosity of cold engine oil is higher than in the operating temperature range of the engine. Therefore, it takes some time for the lubricating fluid to penetrate through narrow oil lines to engine parts. Parts of the piston group especially suffer from cold starts. Thus, starting cold motors reduces their service life by up to 1.5 times. In order to avoid this, as well as to make it easier to start the engine in frosty weather, pre-start heaters are designed, powered by a 220 V network.
This device can heat up the engine in 30 minutes even in severe frost
Design and operation of the preheater
A modern heater is designed quite simply and is not much different from a boiler. The principle of its operation is to heat the coolant (antifreeze, antifreeze) to operating temperature, from 60 to 70 °C. When heated, the liquid begins to move through the pipes of the cooling system, heating the engine parts. To speed up heat transfer, many models are equipped with pumps that create pressure in the small circuit of the cooling system.
To create pressure due to temperature differences, heaters without a pump are connected to the cooling system at its lowest point. A device with a pump can be connected to the cooling system anywhere. When the temperature reaches the set value, the relay will simply turn off the heating element. If the temperature drops again, the relay will turn on the antifreeze heating again. Thus, you can connect the device in advance without fear of overheating the coolant.
In addition to heating the engine cooling jacket, heaters can parallel:
This way you can connect heaters with or without pumps
The power of the heating elements ranges from 500 Watt to 4 kW. The range of additional features depends on the model and complete set of each device. There are also quite simple heaters on sale that are screwed into plugs or drain plugs of engine cooling systems.
Scope of application and variety of models
A simple device and low cost are the main advantages of 220 volt preheaters over other varieties. These devices can be independently installed on any car. You just need to decide on how to mount the device in the engine compartment and follow the manufacturer’s installation instructions. The only condition limiting the scope of application is the mandatory presence of an electrical outlet nearby.
There are models with a remote control on which you can set the heating temperature of the liquid and the heating time of the timer
Such heaters are best suited for private homeowners or car owners living on the lower floors of high-rise buildings. Those who have a nearby garage with electricity will also be happy. After all, an electric heater can be controlled remotely, from a distance of up to 1 kilometer (with direct visibility). If there are obstacles in the signal path, the distance will be significantly reduced.
Today, motorists can purchase preheaters of both Russian and foreign production. Chinese Longfei devices, as well as Norwegian DEFA ones, are popular among motorists. German Webasto heaters are not very convenient due to installation difficulties, and they are also expensive. Among Russian-made products, one can note the Severs and Start trademarks, produced with sets of mounting spare parts for domestic and foreign car models. Each model comes with its own set of mounting parts, along with installation instructions.
Depending on the engine size, you can choose models with power from 1 to 3 kW
Video: efficiency and features of electric preheaters
How the stove works in Gazelle Business
For correct diagnostics and repairs, it is necessary to know the structure and operating principle of the heater in order to diagnose a breakdown or carry out repairs at the first sign of a malfunction, preventing failure of the entire unit as a whole. Most faults can be predicted by indirect signs and their progression can be prevented. To do this, you need to know and understand what each element is responsible for and what the principle of its operation is.
Car cooling system
In Gazelle Business the stove is an integral part of the engine cooling system. When the engine operates, a large amount of heat is generated that must be removed. Heat is released due to fuel combustion and from rubbing surfaces. If the heat is not removed, the engine will heat up very quickly and fail. The cooling system has two circuits (small and large circle), they are separated by a thermostat. When the liquid is cold, it circulates in a small circle, and when it warms up, it circulates in a large circle. This allows you to quickly reach operating temperature and not overheat. During the warm season, heat is released into the atmosphere, and when cold weather sets in, part of the heat is spent on heating the cabin.
Heating
After we have figured out how the cooling system works, we can move on to heating the interior. The heater circuit on a Gazelle car is identical to the heaters of other cars that have a liquid-cooled engine. Fluid can circulate through the heater core whether the thermostat is open or not. For better heating, the heater fluid comes from the hottest part of the engine (the cylinder head). Therefore, on an engine that has not yet reached operating temperature, warm air still comes out of the deflectors. The heater has a valve in its design that either allows liquid to flow into the radiator or dumps it back. And the temperature of the air leaving the deflectors depends on how much it is open. The valve position is adjusted from the heater control panel. The faucet is equipped with an electric drive that changes the position of the valve. It is also possible to change the blowing intensity and direction from the control panel. The intensity is controlled by a motor with an impeller, the rotation speed of which changes the intensity of the airflow.
Changing the position of the dampers changes the direction of the airflow (to the face, to the legs, to the chest, to the glass). The heated coolant from the engine enters the heater radiator through the highways, causing it to heat up. At this time, air blown by a fan passes through it. Then it passes through air ducts, the dampers of which are open. The hot air then enters the car interior and heats it. To repair or diagnose a malfunction of this equipment, there is an electrical diagram that shows all the components of the electrical devices. And in case of breakdowns or incorrect operation of devices, it is necessary to read it in detail in order to understand where it is powered from and how the failed device is regulated.
When you know the principle of operation and the device, it is much easier to navigate in case of breakdowns
After all, to successfully carry out repairs, it is important to understand the cause of the malfunction, otherwise the repair will not be completed successfully. For correct diagnosis, it is also important to understand the algorithm of operation of the entire mechanism as a whole.
Currently, a driver does not have to know how to repair a car; there are service stations that can handle repairs of any complexity. But it happens that a breakdown catches you on the road, and there is no opportunity to use the services of specialists. This is when knowledge of the structure of a car and its mechanisms comes in handy. When you know how the Gazelle stove works, then if a malfunction occurs on another car, it will be easier to navigate when repairing or diagnosing, since in all cars they are almost the same, with the exception of small nuances. And you can easily diagnose the problem.
Advantages of diesel fuel heaters
Experience in operating diesel equipment shows that its performance at low ambient temperatures is directly related to the properties of diesel fuel, in which paraffins precipitate during cooling. The fuel loses fluidity, paraffins clog filters, and fuel intake becomes impossible. Diesel fuel heaters allow not only easy engine starting , but also the use of summer diesel fuel instead of winter.
how to install the Alliance 99 electric preheater?
#1 mae
#2 FIN1112
#3 paf77
#4 fisherman pasha
But I didn’t bother myself: I threw out the plastic ball-valve from the heater and installed an electric pump. When I set it to warm up, I turn on both the heater and the pump at 220 via the power supply. The pump is connected to the fuse of the heater motor, now when I turn on the pump via the power supply, the heater motor also spins, so the interior also heats up, although there is one drawback - warming up takes longer. From the car network, the pump starts working when the generator starts working.
#5 paf77
I did the same thing this year, and installed the boiler last year, but without a pump it was kind of lousy and took a long time to heat. I installed a pump and it began to heat up faster and more evenly.
#6 fisherman pasha
Moreover, if the boiler is paired with a pump, it does not need to be tilted to the lowest point, which is quite problematic on the frontier. And then I put it where it’s convenient, as long as the air comes out of the boiler and that’s it - and there the pump will help the liquid move. I installed the pump immediately after the coolant left the block, from the pump the coolant goes under pressure to the original stove (excessive pressure prevents the stove from airing), from it to the additional stove in the cabin and then to the entrance to the block (the original pump)
#7 mae
to begin with, you remove the pipe going from the block to the stove, because on our engine there is a fitting with a tube on the block and there is a drain hole, then you go to a store for our brands and buy a set of pipes from the stove on the TAZ-01, 2 of them. one long with the letter G. the second short with the letter ZY. the one with the letter ZYU. you put it on the tube from the block and on the heater input, the one with the letter G on the heater output and to the stove. everything should fit perfectly, but only on the condition that the diameter of the pipes matches the heater, so try it right away on the original pipe.
#8 DB-3
#9 Nikon
#10 Driverrr
#11 romman
on our engine there is a fitting with a tube on the block and there is a drain hole,
#12 Denych
I didn’t install it last year, and I can’t adapt it this year either, maybe someone has it at 2.3, it’s too relevant
#13 banderas81
Antifreeze heater "Alliance" for UAZ-"HUNTER" vehicles with engine. ZMZ-409
Payment Methods
Payment by card
You can pay for any order by direct transfer to your card. (this is now the most popular payment method, since money is received instantly, and we have the opportunity to send you an order on the same day.
Another advantage is that, unlike cash on delivery, you will not have to overpay a commission (from 5-8%) of the total order amount for a money transfer.
To pay for your order using this method, when placing your order, select the “Payment by card” method.
(When paying by card you get a 5% discount on most items!*)
(*-Except for autonomous heaters)
Online payment through the electronic payment acceptance service:
YandexKassa allows you to quickly pay for goods using bank cards ( Visa, MasterCard, MIR, etc.
(When paying through the YandexKassa payment system, a commission of 5% of the cost of the goods is charged.)
Robokassa is a convenient service that allows you to pay for goods in one of many convenient ways for you:
— using electronic currency (WebMoney, RBK Money, EasyPay, Wallet One, etc.);
— through payment terminals (QIWI, Eleksnet, etc.);
(When paying through the YandexKassa payment system, a commission of 5% of the cost of the goods is charged.)
Cash payment.
Payment in cash is made in our off-line store in Tyumen or to Courier upon receipt of the order in any city where there is a branch of the Express Courier service (SDEK) Attention!!! In cities other than Tyumen, this type of payment is possible only if the cost of your order does not exceed 6,000 rubles, excluding delivery costs. Delivery cost will be: 500 rub.
(this is the average cost of delivering parcels weighing up to 2.5 kg across Russia by rail and road transport. For residents of particularly remote regions (e.g. Yakutia, Chukotka, Sakhalin Island, etc.), where delivery is possible only by air ( airplanes, helicopters), the cost of delivery must be additionally agreed with our managers based on the tariffs of air carriers. (We hope for your understanding) The maximum cost of an order sent by cash on delivery is 6,000 rubles, excluding delivery costs
Delivery cost will be: 500 rub. (this is the average cost of delivering parcels weighing up to 2.5 kg across Russia by rail and road transport. For residents of particularly remote regions (e.g. Yakutia, Chukotka, Sakhalin Island, etc.), where delivery is possible only by air ( airplanes, helicopters), the cost of delivery must be additionally agreed with our managers based on the tariffs of air carriers. (We hope for your understanding) The maximum cost of an order sent by cash on delivery is 6,000 rubles, excluding delivery costs.
Delivery
You can pick up your order at our pick-up point at the address Tyumen 30 Let Pobedy 113a k2 ground floor (entrance from the descent from the bridge).
Delivery in Tyumen 250 rub. (added to the order amount)
"Express Courier" (SDEK)
This type of delivery is possible to any city in Russia where there is a branch of the Express Courier courier service. The cost is 550 rubles
Delivery by mail - 500 rub.
Delivery by mail (cash on delivery).
Parcels are sent with cash on delivery every Monday, Wednesday and Friday! The cost is 500 rubles. (for particularly remote regions where only air delivery is possible, delivery costs may be increased according to carrier tariffs.)
Attention! Delivery of goods by transport companies is possible only after 100% payment. (when paying from card to card, for individuals, most products also receive a 5% discount) Additional information

