Once, after parking for a week, the car would not start - the battery was completely discharged...
The battery was removed for subsequent charging and the next day the search for the gluttonous culprit began; the current consumption of the armed car for 3 minutes was an indecent 150 mA.
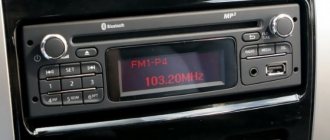
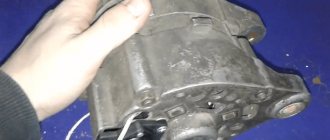
After suspicions from the signaling were removed, it was time to check the radio (Alpine CDE-170RM): 1. Turn on the radio - the current consumption increased to 530 mA; 2. Turn off the radio - the current consumption dropped to the same 150 mA; 3. We remove the radio socket - the current consumption has dropped to a remarkable 40 mA.
It turns out that the visually disabled radio does not turn off completely and consumes as much as 110 mA, which is too much for the settings memory, however.
Of course, you don’t have to bother and remove the panel every time, but it’s interesting to get to the bottom of the problem.
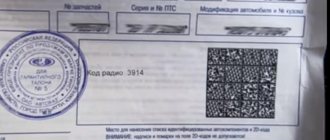
We check the connection of the power part of the radio to section A of the ISO connector - everything is in order, as per the instructions, although it was confusing that when the ignition is turned off, there is + 12V from the ignition switch on the connector contact, which should not be there, we take it out, look and are surprised:
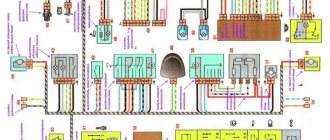
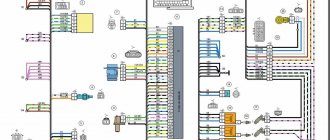
To figure out what’s what, let’s find the pinout of this connector on the Internet and compare it with the image of the connector:
It is worth noting that not all radios are susceptible to this “problem”; some of them can turn off completely even with this connection, so you need to check.
As always, the Internet helps out - after a short search, a simple and elegant solution was found based on two diodes:
To implement this scheme, we will need to run an additional wire to the radio connector. Since the main consumption of the radio comes through the constant + 12V contact from the battery (usually a thick yellow wire), and the 7th contact simply allows it to be turned on (usually a thin red wire), a wire with a cross-section of 0.5 mm2 was pulled from the fuse box, 31 th contact:
For those who are not familiar with the principle of operation of diodes, I made the following picture:
After all the modifications, the turned off radio no longer consumes current, and to listen to music in a turned off car, you just need to perform 3 steps: 1 - Turn on the ignition; 2 — Turn on the radio; 3 - Turn off the ignition.
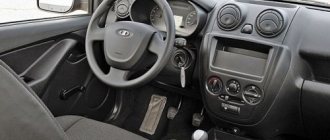
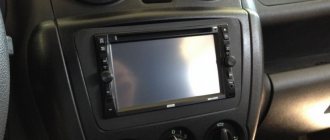
The Granta in Standard and Norma configurations comes from the factory without a radio. AvtoVAZ did everything to simplify the installation process: it ran the power and acoustic wires, installed the antenna and threw the wire into the cabin. All that remains is to plug in the speakers and head unit. Let's look at how the Lada Granta radio is installed.
Installation of 1 din radio in Grantu standard and norm
What is needed to install a radio in a VAZ 2190:
- The radio itself is also the head unit;
- flat screwdriver;
- Straight arms.
Abbreviations and symbols in the text:
- GU – head unit;
- MMS – multimedia system;
- DIN (din) – installation size for acoustics in a car.
Step-by-step instructions for installing the head unit
- a narrow flat screwdriver or plastic spatula for installing acoustics;
- 1-din radio with frame.
The seat in Grant is designed for 1 din.
To work with large 2-din sizes, you will need to cut out the partition and install a decorative frame. Step 1 . Using a flat-head screwdriver, remove the plastic plug for the radio. To do this, carefully pry it around the edges and pull it towards you.
The placeholder for the radio is installed from the factory.
Step 2 . On the back of the plug there is a mount for ISO connectors. There are two connectors: music power and wires for the speakers.
Step 3 . If necessary, connect an adapter for your radio to the ISO. Usually it comes included .
If an adapter is not needed , proceed to step 4.
If an adapter is needed for acoustics, it is included in the kit. Example in the picture.
Step 4 . We remove the glove compartment. Holding the glove compartment clamps in the upper position, forcefully lower the glove compartment down.
Overcoming resistance, we pull the lid towards ourselves - the glove compartment is removed.
Removing the glove box on a Grant is easy when you know where its latches are located.
Step 5 . We climb under the panel in the area of the front right passenger's feet with a flashlight. Behind the felt on top we find a thick black wire - at its end there is a plug for the factory antenna.
LADA Granta
And the plant promises to bring Granta to the market with a standard audio system in the middle of the year. Let's see! Let's listen!
Acoustics in Lada Granta
It's no secret that acoustics in a car are very necessary and perform various functions. Installing it is a bit of a concern for novice motorists: they find it difficult to choose the right speakers, they do not have enough money for high-quality installation, etc. This article was written solely to help everyone in this matter and we will find out how to install acoustics in a Lada Granta with our own hands. The Lada Granta and the acoustics, installed correctly in its interior, taken together, will create a completely different car, which even the owners of some foreign cars will look at with envy.
Removing the standard radio in Grant Lux
The difference between grants of the luxury configuration: the MMS (multimedia system) installed from the factory. This is a 2 din device.
To remove standard acoustic grants :
- take a knife or plastic spatula to dismantle the acoustics and disconnect the decorative trims to the right and left of the radio. It is not necessary to take pictures;
- in the gap between the cover and the panel we find the head unit lock. There are two of them on both sides. Press it out with a screwdriver;
- we take out the GU on ourselves.
Everything is described in detail in the video:
Replacing the standard MMC in Grant
The process - after removing the acoustics, we install a new system.
Difficulties : you may have to finish the fastenings of the new system for VAZ ones. Plus you need the right frame. The factory MMC frame may not fit.
Have you bought a new 2 din radio, but there is no frame for sale? You can do it yourself . Example at the link.
Lada Granta Standard › Logbook › We install inexpensive music in the Granta.
The standard configuration of the VAZ Grant car does not include such a thing as audio preparation from the factory, and the car was chosen precisely on the basis that it would not be present. In the process of working with the car, and I describe the process in hindsight, a lot of work was done, which helped to spend a lot of time pleasantly doing what you love