How to connect a radio in Largus
February 27, 2015 Lada.Online 110 920 6
On the Lada Largus, audio preparation is present on all modifications, but a radio and speakers are equipped only as options on the “norm” and luxury trim levels.” Next, let’s try to figure out what the manufacturer understands by the word “audio preparation” and what connectors the standard Lada Largus radio has.
- Audio preparation of the Lada Largus includes an antenna with a cable, an interference suppressor, a wiring harness for the radio, a wiring harness for connecting the front door speakers. AvtoVAZ awarded this list to all Lada Largus configurations.
- The wiring harness for connecting the rear speakers (doors) is found on all station wagons and is missing on the van.
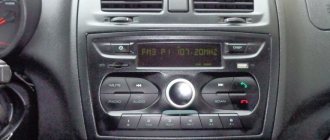
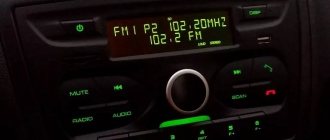
- The standard Lada Largus radio with CD-MP3+AUX+USB+Bluetooth+Hands Free functions is installed optionally on the “standard” and “luxury” trim levels.
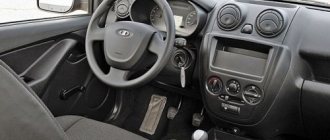
On versions without a radio, a shelf is installed instead. If you remove the shelf, the wires for connecting the radio will be inserted into its rear part. One plug is used to connect power to the radio, the other to connect two front and two rear speakers.
It is worth considering that the connectors for the audio system differ from the usual ISO standard. Therefore, to connect a non-standard radio, you will have to use adapters, which have the name: car radio socket/adapter Renault Duster/Sandero/Logan > 2012 - ISO (euro).
Adapters will also be needed to connect the speakers in the car doors and the antenna (by the way, the standard speakers are 13 cm in size). The connector for the rear speakers should be found in the pillar behind the driver's seat (near the passenger's feet).
If there are no adapters for connecting a radio or speakers, you can cut off the connectors and connect the wires according to the diagrams presented below. However, in this case you will have to think about maintaining the warranty on the radio and the car.
Radio malfunctions and methods for diagnosing them
As you know, the Lada Largus is equipped with an audio system with a set of speakers already from the factory (depending on the configuration). The amplifiers are located in the front and rear door panels. To connect non-original speakers, several wiring harnesses are provided (including for increasing power using an amplifier when connecting a subwoofer). Since the connector plugs do not comply with the current standard, to connect another head unit you will need to additionally purchase adapters.
A standard car radio sometimes brings not only the pleasure of listening to music, but also some problems. The device may not work or function incorrectly for various reasons. In general, the list of faults includes only those that an ordinary driver (without special knowledge of electrical engineering) can fix with his own hands, without the need to contact a specialized center.
When it comes to repairs, it can often be cheaper to replace the device. Especially considering the availability of alternative options in different price categories and with different capabilities. At a cost of no more than 6,000 rubles, repairs can cost half this amount.
Instructions
Storage Usually a user manual is included with the radio.
There are detailed characteristics of how it is used, what to press and when, and most importantly, why. According to the diagram in the instructions, two versions of the radio are indicated:
- double din (2 din);
- standard.
There is nothing complicated about the first category, it’s just the name that is incomprehensible. These two versions differ only in different buttons and what is written on them. The most useful and practical feature is the ability to pair with some wireless devices via Bluetooth, such as connecting to a mobile phone. In this case, the standard radio on the Lada Largus will provide you with the opportunity to talk on the phone even without using your hands, thereby not violating traffic rules. If you think that you will have to talk very loudly or shout so that the interlocutor can hear clearly, then nothing like that. A normal tone of voice will be sufficient.
To paraphrase a well-known saying, it should immediately be noted that in terms of taste and color characteristics you will not find two identical people. This also applies to the radio in the Lada Largus. Some owners will zealously prove its superiority, elevating it to the rank of ingenious devices, while others, on the contrary, will sarcastically criticize it, wanting to find more shortcomings. In general terms, we will say that the device harmoniously combines with the design of the panel and does not cause a feeling of rejection. Its functionality is convenient, and all elements (buttons) are located in optimal places, which allows you to make switches and other manipulations on an intuitive level. There are no backlashes, squeaks or other negative factors here. The fit is excellent.
A standard car radio in combination with dynamic speakers “reads” music programs equally well, “digesting” any genre without much difficulty. The manufacturer has addressed radio lovers with a powerful antenna device that allows them to pick up a signal of even minimal power. The radio allows you to memorize 6 stations in each frequency range.
Listening to music is available via CD drives or flash devices. Also for the same purposes, switching using Bluetooth is possible.
- "CD" and "MP3";
- "AAC" and "WMA", as well as "WAV".
With a wireless connection, it is possible to rewind not only between music programs, but also directly within a track.
The display clearly displays the charge level indication (if “Bluetooth”), as well as the “RDS” line. There is a Russified font in “IDTag”.
Other methods of connecting to this device are the “Jack” and “USB” sockets.
Device characteristics
It can't be called complicated. In addition, the instructions and user manual supplied with the system will help you understand the structure, functionality and characteristics of the device. Structurally, a car can be equipped with either a conventional 1 Din or 2 Din radio. The differences between them are minimal and lie in the location of the buttons and inscriptions.
To reproduce high-quality sound, the audio system provides four speakers:
- two in front;
- two at the back.
One of the main features and at the same time advantages of this device is the ability to connect to a smartphone via Bluetooth wireless channel. In addition to comfort and convenience, this function provides passive safety, since the Hands free system allows you to talk on the phone while driving without using your hands. The quality of communication is decent, communication with the interlocutor is not associated with difficulties, the driver does not need to raise his voice, and passengers hear him well.
The standard radio on Largus does not have much functionality and advanced capabilities, for some this is quite enough, but for others the characteristics of the radio are not enough. In terms of appearance, the device blends harmoniously with the standard car interior. All buttons and other controls are easy to use, and the inscriptions are easy to read and intuitive. The device is tightly fixed in the seat, there is no play or other defects.
Return to contents
Capabilities of standard audio device
Music in the car can be played both through removable media and via the Bluetooth wireless communication channel. At the same time, the genre of music does not matter, the sound quality remains at the proper level. To listen to radio stations, a standard antenna is provided, which can pick up even a weak and unstable signal. If necessary, you can save up to 6 radio stations in the device’s memory for quick playback, in each of the available bands.
In addition to the Bluetooth channel, you can listen to music via SD, USB media or CD, MP3 discs.
The radio supports most popular formats, for example:
- Connecting a car radio with your own hands
- MP3;
- WAV;
- WMA;
- AAC and some others.
Via the Bluetooth channel, you can control playback, i.e. pause the song or rewind to the desired segment. For convenience, it is possible to display the artist of the song and its title on the monochrome display. The radio can also recognize Russian fonts.
There are several connectors for connecting removable devices:
- Jack;
- USB;
- Bluetooth.
The unit is also equipped with several inputs for playing sound through third-party gadgets. The panel of the standard head unit is not removable, but this is no longer considered a disadvantage, since most car owners store the removable panel directly in the car rather than carry it with them. The purpose of each button, which is quite small, usually does not cause any difficulties. It would be much more informative to consider here other hidden features that are not mentioned in the detailed user instructions.
Return to contents
“Secret” menu of the Lada Largus radio
To go to the section with individual settings, use the SET button located on the front of the radio panel. Not every car owner knows that this button has hidden capabilities. Just press this key and hold for 6–7 seconds. The device will go to the engineering menu, where a number of special settings become available. The instructions included with the standard radio contain no information about such a tab.
The “secret” menu opens three sections (“Diagnostics”, “Configuration”, “Radio Monitor”). On the right is a rotating knob, which allows you to navigate up or down between these sections. To select the desired one, press the handle. To go to the previous level, press the “Back” key, which is located to the left of the rotary knob.
In the “Radio Monitor” section you can see the current frequency at which the received signal is located and some other data. In the “Diagnostics” section there is an additional subsection with the items “Autotest”, “Monitor” and “Errors”. The “Errors” block was created to inform the driver about existing problems in the BC (on-board computer). If there are no problems, the display will be blank. The “Autotest” item contains information about the current state of the equipment (OK on the screen means “functional equipment”).
The best option would look like this
| Inscriptions | What does it mean |
| FM, Am ant OK | The radio module is working properly. |
| Microphone OK | The microphone is working. |
| VT-Module OK | Bluetooth works fine. |
| CD OK | The disc player operates normally. |
| Fascia Button OK | The keys work properly. |
| Power IC OK | The on/off button works. |
The “Monitor” item provides information about the vehicle’s operating parameters. Simply put, the radio display displays information from the electronic control unit. In this menu, you can find out about the status of the current network, the functionality of the car’s backlight (to check the mode, just turn on or off the side lights - accordingly, the information about the backlight will change properly).
- Unlocking Ford 6000CD car radio, first and second generation.
It also displays data on battery charging and its current voltage, whether a removable device is connected or not, data on the correct decrease or, conversely, increase in volume when the vehicle speed changes (only if the wire required for this is connected to the appropriate connector).
In general, the engineering hidden menu on the Lada Largus radio was a good addition to the standard functionality. It won’t be difficult to figure out what’s here and how.
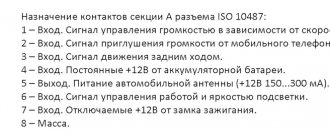
As for the electrical circuit and connection method, including pinout, this information can be clearly seen in the user manual or in the photo.
Return to contents
Sound via Bluetooth
A standard car radio in combination with dynamic speakers “reads” music programs equally well, “digesting” any genre without much difficulty. The manufacturer has addressed radio lovers with a powerful antenna device that allows them to pick up a signal of even minimal power. The radio allows you to memorize 6 stations in each frequency range.
Renault Sandero DIY repair
Renault Sandero wiper blades
Compare Renault Captur and Hyundai Creta
Listening to music is available via CD drives or flash devices. Also for the same purposes, switching using Bluetooth is possible.
- "CD" and "MP3";
- "AAC" and "WMA", as well as "WAV".
With a wireless connection, it is possible to rewind not only between music programs, but also directly within a track.
The display clearly displays the charge level indication (if “Bluetooth”), as well as the “RDS” line. There is a Russified font in “IDTag”.
Other methods of connecting to this device are the “Jack” and “USB” sockets.
Some owners are not satisfied with the lack of a removable decorative panel for the radio. We consider this point to be unimportant, since it is not able to protect against fraudsters.
How to install
Some cars come from the factory with a 1 DIN car radio with CD player. Basic versions are equipped only with audio preparation; a plastic plug is mounted instead of the head unit.
To install the radio on Largus with your own hands, you need to:
- After removing the plug, place guide slides with locks in the instrument panel.
- Secure the mounting assembly using the tabs located around the perimeter of the part. Bending is done with a screwdriver; the installed shaft should not vibrate or make any extraneous sounds.
- Connect the ISO connectors located on the standard wiring to the head unit.
- Connect the antenna plug to the socket on the radio. If the sizes and shapes of connectors and plugs do not match, appropriate adapters are used.
- Insert the audio device into the shaft and push it until it clicks, indicating that the latches engage.
- Install a decorative frame around the radio panel.
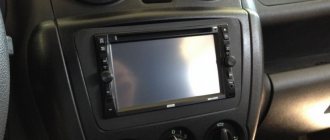
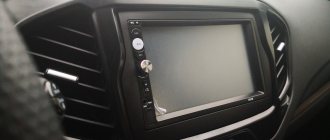
Some owners install 2 DIN size radios on their Lada Largus. To place the head unit, it is necessary to replace the front plastic trim on the instrument panel, since it is impossible to accurately modify the original one.
The original panel is secured with latches, which can be removed manually or with a plastic screwdriver inserted into the gap between the parts.
The front panel with an extended window requires modification - it is necessary to install control buttons for additional equipment on it, borrowed from the Renault Logan sedan; original elements from Largus cannot be placed. This is due to the fact that the panel is designed for oval-shaped keys, which were never used on Largus.
At the same time, the mounting sockets for installing mounting clips are being finalized.
In the instrument panel, it is necessary to remove the horizontal jumpers located near the socket of the standard radio and climate control controls. Dismantling is carried out with a hacksaw and wire cutters, the remaining elements are cut off with a construction knife. All manipulations are carried out with caution, since there is a risk of damage to the standard electrical wiring. Then you need to reinstall the center console to assess the contact density of the elements.
Since the original wiring has cables with colored insulation that does not comply with the ISO standard, it will be necessary to compare the assignments of each element on the car and the radio. An adapter is used for connection; wire switching is allowed by twisting the necessary cables. It is recommended to reinforce the joints with tin-lead solder or a metal connecting sleeve. The connection point is covered from above with a heat-shrinkable tube, which provides protection from moisture and short circuits.
Device installation
Some Lada Largus cars are initially equipped with a standard 1DIN device and a CD player. Basic models are equipped with audio only. It is a mounted plastic plug.
To install the Largus car radio with your own hands you need:
- remove the plastic blank and place special slides with fasteners in the dashboard;
- fix the mounting unit with tabs located around the perimeter;
- Unbend the clamp using a screwdriver so that the installed shaft does not vibrate;
- connect the ISO connectors located on the standard wires to the radio;
- connect the antenna socket to the device socket, and if the sizes and shapes of the sockets do not match, take suitable adapters;
- install the car radio in its seat and push it in until the latches engage, as indicated by a characteristic click;
- take care of the decorative frame located around the device panel.
How to remove the Lada Largus standard radio and enter the code
- Files
- Engine
When removing the battery or for other reasons, the Lada Largus head unit requires entering a 4-digit code.
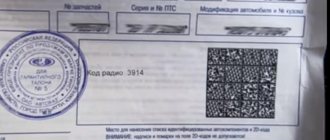
The code is usually written in the service book, but anything can happen - they lost the book, changed the radio, etc.
The radio code can be restored using our Renault and Lada Largus standard radio code generator
To do this, we need to find out the so-called PRE-CODE , which is contained in the information on the radio itself; to find it out, we remove the radio.
How to remove the standard radio of Lada Largus
The standard radio on the Lada Largus is removed in the same way as removing the standard radio on many Renault models, for example: Megane
For removal there is an original tool from Renault, code - 7711381821
But there is no need to buy it; 4 or even 2 regular ballpoint pen refills are suitable for removal.
Insert 4 rods into the holes around the perimeter to release the fixation (see photo below), you can pry it from below with a plastic card or a flat-head screwdriver. The rods can be inserted alternately, first 2 on the left, then 2 on the right.
To understand what you are clicking, here is a photo:
Reverse part of the Largus standard radio
How to find the PRE-CODE on the Lada Largus head unit
After removing the radio, we look for the barcode, we need the last 4 characters - 1 letter and 3 numbers
In this example it is: K068
We enter the resulting PRE-CODE into the code generator and get our code for the radio.
How to enter the code for the Lada Largus radio?
The code for the Lada Largus standard radio contains 4 digits.
To enter it, you need to dial it using the standard joystick of the radio or using the radio keys, after entering, press and hold the “6” button.
1. Press button 1 on the panel successively until the required value for the first digit of the code appears.
2. Press button 2, the second digit will start flashing.
3. Press button 2 on the panel successively until the required value for the second digit of the code appears.
4. Press button 3, the third digit will start flashing.
5. Press button 3 on the panel successively until the required value for the third digit of the code appears.
6. Press button 4, the fourth digit will start flashing.
7. Press button 4 on the panel successively until the required value for the fourth digit of the code appears. When the secret code is completely displayed on the screen, to save it in the radio's memory, press and hold button 6 on the panel until a confirmation sound sounds.
If you have anything to add to the article, or would like to share your experience on this topic, please leave a comment
If you are the author of a report on repairs, modifications of a Renault car, or recommend material for the Renault-Drive Knowledge Base , please let us know
Don't forget to share with other Lada Largus owners
Pinout of Lada head unit connector, 2 DIN 1 DIN diagram
Pinout of Lada head unit
Among Lada drivers there is a special type of driver who constantly improves and refines the car’s audio system. Changing, often in a circle, a bunch of head units, eventually arriving at the point where the standard radio is put in place. If you belong to this type, or simply, for some other reason, removed the radio from its original place, and now want to return it, then our material today is for you! The pinout of the standard Lada radio does not hide anything particularly complicated; anyone with growing hands can handle it. Well, at least from somewhere. To begin with, we will have to deal with the wires, namely their color. Which wire will be responsible for some component of the car's audio system, and it would be advisable not to confuse them. Although in this case there will be nothing terrible and it is not forbidden to search at random. But there’s no need for you and me to wander around; we’ll figure out the color marking of the Lada wires right away. So let's get started.
Firmware for Lada Largus radio
It was already mentioned a little higher that sometimes the radio needs new firmware. Why is it needed - you tell me. It's simple, at the factory setting our standard Lada Largus radio sometimes displays fonts clumsily, especially Cyrillic. Otherwise, she writes everything humanly, but in some options there are only hieroglyphs. This is where you will need to install updated firmware. How to make it? At one's own risk. If something goes wrong, all you have to do is remove and throw away the non-working device. It’s better to find out everything right away and find out before installing the firmware.
Step-by-step car radio firmware
First of all, it is worth remembering that updating the Lada Largus standard radio is a rather risky undertaking. After all, the manufacturer is not responsible for its possible outcome and excludes repairs under warranty in case of failure.
Step one
Before the actual flashing procedure, you can use the help of various resources, including the manufacturer’s website. Especially if this is a new version of the car radio model. In most cases, this procedure is provided free of charge, so offers for a certain cost should already alert car owners. After all, fraudulent actions will not only deprive you of money, but can also “reward” your device with malware.
Step two
In the instructions for the car radio you should find information about the version of the software currently installed. By the way, the same data can be displayed in the settings of the device itself.
Step three
Having found the necessary information, you can start installing the firmware. In this case, you should remove the radio from the dashboard and connect it to a personal computer. As you know, the latest models are equipped for this with a special connector called mini-USB. If you don't have one, an adapter wire is perfect.
Step four
After the radio is recognized by the computer, all the necessary software is downloaded to a separate folder and installed in the specified order. As a rule, this does not take much time - just a few minutes. This is due to the small amount of memory available, much less than that of standard computer applications.
Step five
When the flashing procedure comes to an end, the message “COMPLETE!” appears on the disk, which indicates automatic reinstallation after loading new data. If this does not happen, then turn off the ignition and remove the negative seal placed on the battery for 1 minute.
Step six
After turning on the car radio again, if the installation is successful, a prompt to enter a security code appears on the display. It comes in addition to newly installed files or is written in the instructions.
The only nuance that requires attention is the display of the caller's name when connecting a mobile phone to the car radio. Here the version of the number is simply changed to the international format, that is, the eight changes to a seven with a plus.
Some car owners use pre-downloaded programs, which are subsequently simply transferred to a disk or memory card. In this case, there is not even a need to remove the radio from the “socket” of the dashboard.
Firmware for audio device on Lada Largus
The standard head unit on cars of this model does not look very presentable, but at the same time the functionality is complemented by a large number of possibilities. Unfortunately, despite the decent quality of the technical part, the manufacturers did not pay enough attention to the software. It's no secret that modern audio systems have a full-fledged electronic control unit, which is a kind of computer. There is a processor, devices for reading removable media, various connectors and other functionality. In addition, the standard radio is combined with the on-board computer.
On the other hand, the more complex the audio system, the greater the likelihood of failures and malfunctions. The radio installed on the Lada Largus is no exception to the rule. The software has not been properly tested, so malfunctions are not uncommon. The most common problems are the inability to recognize the file format, reproduce high-quality sound, or identify the removable storage device. Also on Largus, incorrect display of Russian fonts on the display is often encountered. As a result, instead of the usual Cyrillic alphabet, the driver sees incomprehensible symbols. It is in these cases that updating the device firmware will help solve the problem.
Where to download and how to install
You can find out the firmware version directly on the device case, on the back side. The manufacturer regularly releases updated, i.e. improved firmware. You can find them either on the official website of the developer or on specialized thematic forums. If necessary, please contact your authorized dealer.
The firmware for the Largus radio is identical to the software from Duster or Sandero. At the factory, these cars are equipped with T2024 firmware (starting from 2014).
Preparation for the procedure
A firmware update may not be necessary if you try to reset the current settings to factory settings. The procedure is simple, but in most cases ineffective. If you update the firmware to a new version, you can expect a significant improvement in device performance. Typically, an official update is released rarely and always turns out better as testing is done and bugs are fixed.
The updated version V2030 was released in 2015. To install, you will need a flash drive or adapter with other removable media. Before you begin the procedure, you should prepare the media and find the appropriate firmware. You can download the firmware on the official AvtoVAZ website or on thematic official forums for Renault cars.
The file with the firmware is in the archive, so you need to first unpack it into a separate folder on your PC. The unpacked firmware provides a special archive that does not need to be unpacked further. The flash drive must be clean and formatted in FAT format. The unpacked CAB firmware archive is placed on it.
Update process
Now you can connect the media to the radio in your car.
- Before starting the procedure, be sure to turn on the ignition. Otherwise, the radio will automatically turn off and the firmware process will be interrupted, which may lead to device failure.
- When reading information on the media, the radio will determine that the contents on the drive are material for flashing. After analyzing the information, the device will offer to update the software. You should select "Yes" to refuse to click "No".
- Confirm the information by clicking the “OK” button.
Final operations
After confirmation, the firmware update procedure will begin. The display will show Upgrading. At this time, removing removable media or performing any manipulations with the radio is strictly prohibited. The completion of successful firmware will be accompanied by the inscription Complete on the screen. Next, you need to remove the drive, and the head unit should automatically turn off to reboot. If this is not observed, you should disconnect the terminals from the battery and wait a few minutes, then reconnect the terminals.
After rebooting, the radio will require you to enter a special service code for activation. The code can be found in the warranty card or on the back of the device. Use buttons 1 to 4 to enter the corresponding code, after which key 6 confirms the entry, and must be held down for several seconds. The system is unlocked, and you can enjoy the updated functionality and the absence of incorrect display of Cyrillic characters. When addressing this issue to specialists, you will have to pay at least 500 rubles. Inexpensive, but why pay for such a simple procedure that you can do yourself in a few minutes.
The standard radio on Largus is not rich in functionality. There is no touch screen or the ability to connect a rear view camera. On the other hand, it is a reliable device that, if handled properly, rarely causes problems for the owner. For listening to music and radio, as well as for talking on the phone, the available options are quite sufficient.
On the Lada Largus, audio preparation is present on all modifications, but a radio and speakers are equipped only as options on the “norm” and luxury trim levels.” Next, let’s try to figure out what the manufacturer understands by the word “audio preparation” and what connectors the standard Lada Largus radio has.
- Audio preparation of the Lada Largus includes an antenna with a cable, an interference suppressor, a wiring harness for the radio, a wiring harness for connecting the front door speakers. AvtoVAZ awarded this list to all Lada Largus configurations.
- The wiring harness for connecting the rear speakers (doors) is found on all station wagons and is missing on the van.
- The standard Lada Largus radio with CD-MP3+AUX+USB+Bluetooth+Hands Free functions is installed optionally on the “standard” and “luxury” trim levels.
On versions without a radio, a shelf is installed instead. If you remove the shelf, the wires for connecting the radio will be inserted into its rear part. One plug is used to connect power to the radio, the other to connect two front and two rear speakers.
It is worth considering that the connectors for the audio system differ from the usual ISO standard. Therefore, to connect a non-standard radio, you will have to use adapters, which have the name: car radio socket/adapter Renault Duster/Sandero/Logan > 2012 - ISO (euro).
Adapters will also be needed to connect the speakers in the car doors and the antenna (by the way, the standard speakers are 13 cm in size). The connector for the rear speakers should be found in the pillar behind the driver's seat (near the passenger's feet).
If there are no adapters for connecting a radio or speakers, you can cut off the connectors and connect the wires according to the diagrams presented below. However, in this case you will have to think about maintaining the warranty on the radio and the car.
