Headlight device
Traditionally, the lighting system of the car model in question is represented by blocks distributed into three sections, due to which the low, high and side beams are activated, and also indicate a turn.
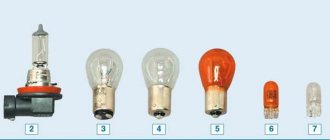
Activating the low beam requires the use of bulbs designed specifically for this purpose. Turning on the main beam ensures the simultaneous operation of the blocks that are responsible for low and high beam lighting, and the power of each is equal to 55 W. Special transparent diffusers are mounted on the front of each of the mentioned sections.
The power of the turn signals, in turn, is 20 W, their color is orange.
Using a special corrector allows you to adjust the headlights. The operation of the electric corrector is based on an electromechanical drive. Traditionally, the adjustment system has a device mounted on the instrument panel, as well as a special drive, due to which the electrical wires in the headlights are connected.
Setting up such an electrical corrector requires complete disassembly of the headlights. There are other reasons for dismantling the lighting system. This could be the installation of new lighting elements or tuning.
This manipulation can be performed in two ways - with and without removing the bumper.
How the work is carried out
Let's figure out how to replace the low beam light bulb on Kalina with your own hands, the process is quite simple and, by and large, does not require any special devices, you only need your hands. But still, the tool may be needed at the preparation stage.
Preparation
It is important to ensure a comfortable and safe working environment, so remember the following:
- The work can be done anywhere - even in the yard near the house, but it is advisable to go to the garage. There you can not be afraid of precipitation and, if necessary, find this or that tool.
- First of all, the hood is opened and the terminal is removed from the battery. We remind you of this in every review. Therefore, make it a habit to de-energize the system when working with electrical equipment to prevent short circuits and electric shock.
- Further preparation depends on what engine is installed in your car, you need to provide access to the rear of the headlight housing, and for this you need to disconnect the expansion tank on the left, and the options on the right may be different. Therefore, be guided by the situation and decide for yourself. What needs to be removed and what should not be touched.
Replacement Instructions
The procedure is performed in any convenient place - in an open street area or in a warm garage with good lighting, if we are talking about the cold season. No special tools or equipment are needed. To remove the low beam lamp, carry out a number of preparatory operations:
- Disconnect the battery from the on-board network by removing the terminal with the “—” (minus) sign.
- Clear access to the headlights from the engine compartment.
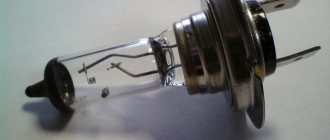
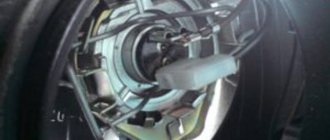
- Lighting devices are hidden in plastic headlight housings, covered with caps at the back. Once you reach the box, remove the round protective cover.
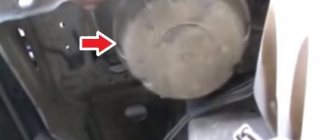
Usually, parts of the power unit - the air filter housing, pipes and coolant expansion tank, and various plastic linings - prevent you from reaching the light bulbs by hand. In some car models, access is blocked by the battery itself, so it will have to be removed.
- Replacing a low beam lamp on a viburnum
The engine compartment of a modern car is filled extremely tightly with blocks and assemblies. When you reach the back of the headlight with your hand, you will not be able to look into the hole at the same time - you need to work by touch. Hence the recommendation: take a photograph of the light bulb mounting assembly with a smartphone equipped with a camera.
Step-by-step instructions for replacing a light bulb in most passenger cars look like this:
- After removing the rubber plug, grab the terminal block where the power wires are connected with your hand. Gently shaking it left and right, remove the connector from the lamp contacts.
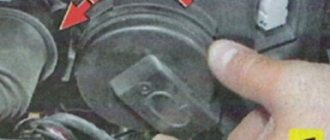
- The metal base of the light bulb is pressed into the socket by a wire retainer. Press the loop (or bracket) end of it and slide it down or up to disengage the spring from engaging the lugs.
- The other end of the latch is fixed to the bracket. Move the bracket to the side and pull out the lamp, remembering the position of the housing. There is no need to rotate the base during removal.
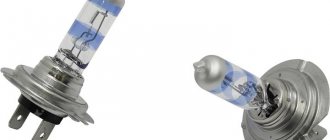
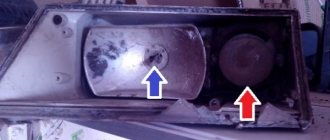
To change the low beam bulb, wipe the new element with a rag and carefully insert it into the socket, holding it by the base. You cannot touch the glass flask with your bare hands - grease marks will remain. It is better to wear a thin fabric glove. Then return the latch to its place and snap it into the eyes, after moving it in the desired direction.
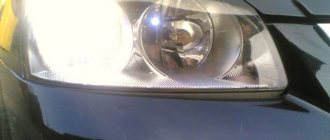
The last step is to connect the contact connector and install the plug. When finished, assemble the removed parts, connect the battery and check the functionality of the new low beam element. If it burns noticeably brighter than the other working headlight, it is worth changing the second lamp.
Video on removing and replacing the front light bulb on a Lada Kalina car
Replacing the front marker lamp in the left headlamp was simply not a real pleasure
!
It is no secret to Kalinovods that replacing any of the light bulbs will require iron patience and strong nerves
, but they change, and in principle, no longer than 5 minutes, but the size made you sweat, in the literal sense of the word.
It was not difficult to remove the rubber casing, but pulling out the socket with the light bulb was comparable to sheer hell. The cartridge simply doesn’t come out and that’s it!
How to solve the problem according to my version:
- remove the air filter housing from all the fasteners - remove both pipes and the plug to the sensor - remove the housing - remove the rubber housing of the headlamp - the cartridge rotates, so rest it with a screwdriver and turn it to the most convenient angle - remove the cartridge using thin pliers without squeezing it strongly - we take out the lamp, change it and reassemble it.
The removed filter housing will allow pliers to get through with ease!
pull the wires? as described in the instructions - risky, in my opinion. At least I tried to replace it in this way on a new car, it is extremely unpleasant and difficult.
The finger suffered, bleeding, and now there is a swollen callus