The VAZ 2105 model first appeared on city streets in 1980 and immediately became extremely popular. The fact is that the design of the car repeated the features of European models of those years: front and rear headlights, aluminum bumpers, and a modern instrument panel.
All this required the designers to rework the usual electrical circuit of the car.
Factory wiring diagram for VAZ 2105 included with the car
The original diagram published in the article will make it easier for car owners and service station technicians to find faults in the electrical system of a Zhiguli family car.
The VAZ 2105 wiring diagram together with a verification tester will allow you to:
- determine the causes of circuit failure;
- identify which sensor or relay has stopped performing its functions;
- establish a breakdown in the ignition system;
- identify the circuit whose fuse has blown;
- check the on-board voltage supplied by the generator;
- find the cause of failure of incandescent lamps, etc.
Wiring for a VAZ 2105 in the process of diagnosing
Historical reference
The VAZ 2101 platform was taken as the basis for production. At its core, it was the same rear-wheel drive five-seater sedan car. The VAZ 2105, with its design, practically copied the models of cars produced in Europe in the early 80s, and cost an order of magnitude lower, which predetermined its popularity in Western countries.
The price of the VAZ 2105 was the lowest among rear-wheel drive models
Abroad, the car was named Lada Riva and Lada Nova (depending on the country of sale). Under these names he was shown in video advertisements.
The car plant produced several modifications of the VAZ 2105:
- With the VAZ-2105 index, the car was equipped with a 4-speed gearbox. gearbox and 1290 cc carburetor engine. cm (63 hp);
- The VAZ-21050 was equipped with a 5-speed checkpoint;
- The VAZ-21051 was equipped with an engine from the VAZ 2101 (volume 1200 cc, power 58 hp) with a 4-speed. checkpoint;
- The VAZ-21053 was equipped with a VAZ-2103 carburetor engine (volume 1450 cc, power 71 hp);
- The VAZ-21053-20 was equipped with an injection engine from the VAZ-2104 (volume 1450 cc, power 71 hp), which met Euro-2 requirements. It also came with 5 tbsp. Transmission.
For reference: the electrical wiring of the VAZ 21053 was distinguished by a different form of terminals in the engine compartment. This was caused by the installation of an ECM - an electronic engine management system and additional sensors.
Difficulties in repairing electrical equipment
The biggest problem that can arise during repair work on a VAZ-2105 is a mismatch in the color of the wiring with that indicated in the diagram. If the car is many years old, then most likely the wiring has been replaced many times. The previous owner of the car was unlikely to be concerned that the wiring colors did not match the colors in the diagram. Most likely, if a car needed urgent repairs, the first wires that came to hand were installed on it. Therefore, a new car owner will have to face difficulties and figure out which wire is connected where. In this case, you can immediately make some adjustments for yourself in the future using felt-tip pens. During repairs, you can paint each wire in the desired color, this can save time for the next inspection or diagnosis.
Another difficulty that a car owner may encounter when repairing a VAZ-2105 is partial replacement of the wiring. The previous owner could only replace part of the wires, thereby causing the current owner a lot of trouble. This situation causes even more confusion, and in this case it would make more sense to simply replace all the wiring.
The most common reason for a VAZ-2105 breakdown is damaged wire insulation or lack of contact. In this situation, it is necessary to test all sections of the wiring using a special device. The non-working electrical wiring is replaced with a new one, or part of the non-working wire can be replaced. If the insulation is damaged, then use electrical tape to eliminate this problem.
Features of the electrical equipment of the VAZ 2105 car
The electrical equipment of the VAZ-2105 car is made according to the classic single-wire circuit for the Zhiguli family, in which:
- the metal body of the car plays the role of a second wire;
- the negative terminals of all electrical devices and components are connected to ground;
- electrical circuits are protected by fuses;
- the operation of the main systems is activated through the vehicle's ignition switch.
For reference: the ignition switch controls electrical networks by supplying power from the battery or generator. The contact group of the lock is designed in such a way that when the engine starts, the electrical wiring of the VAZ 2105 secondary circuits is turned off.
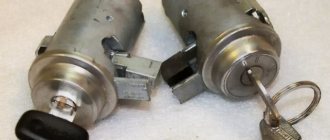
Egnition lock
The ignition switch was used as a control system for the vehicle's electrical systems, which had four main positions:
Wiring VAZ 2105 to the injector is controlled through the ignition switch
- Position “0” – everything is off.
- Position “1” – ignition is on. The key is locked in the lock. In this case, with the key inserted, external lighting circuits, control devices and alarm lamps (brake fluid level, engine oil pressure, fuel level in the gas tank) can be activated;
- Position “2” – turning on the starter. Auxiliary circuits and VAZ 21053 wiring that connects them do not work to facilitate engine starting;
- Position “3” – parking. All circuits are turned off, and after removing the key, the steering column is locked.
For reference: the factory instructions inform you that, regardless of the position of the key, the interior lighting lamps, brake light lamps (when the brake pedal is pressed), the horn and the connector for connecting a portable lamp remain energized.
See also: VAZ 2107 wiring diagram
Fuse and relay box
To protect electrical circuits and devices, a fuse circuit is used to break the electrical connection. This happens when the voltage increases - the fuse-link melts due to temperature and the circuit is disconnected.
The electrical wiring of the VAZ 21053 is protected by a fuse block
The photo shows:
- From 1 to 17 – fuses;
- Relay 18 is responsible for turning on the low beam headlights;
- Relay 19 is responsible for turning on the high beam headlights;
- Relay 21 activates the headlight cleaner and washer;
- Relay 22 is responsible for turning on the heated rear window.
For reference: under No. 20 the jumper is indicated. The wiring diagram of the VAZ 21053 in the export version is distinguished by the installation of a relay for turning on sound signals in this place.
See also: wiring - VAZ 2109
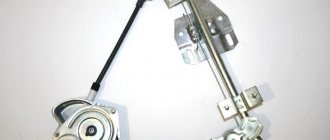
Headlight unit
The main and most noticeable difference from the classic Zhiguli models of the VAZ 2105 were the headlights. It was their massive appearance that gave the car a modern look. And the ability to remotely adjust the direction of the light beam was completely new.
Wiring diagram for VAZ 21053 head light and rear lights
For these purposes, several main and additional devices were used, among which a new product was the hydraulic headlight corrector.
His role was as follows:
- When the car was loaded, the rear part of the body lowered;
- The luminous flux of high and low beam headlights began to blind oncoming vehicles;
- With the help of a hydraulic corrector, the driver could lower (tilt) the headlights without leaving the car.
Thanks to this, the problem of driving safety in the dark was solved.
What does an electrical circuit consist of?
The main electrical diagram of the VAZ clearly indicates the location of all components of the electrical circuit:
- generator;
- battery;
- headlights;
- relay;
- warning lamps;
- instrument panel and more.
This diagram shows the entire location of the wires, how they run and what they power. Each wire is designated by a separate color to make the diagram easier to read.
All VAZ electrical circuits have digital indicators for each device, the name of which can be found in the proposed manual.
Replacement of electrical wiring of VAZ 2104
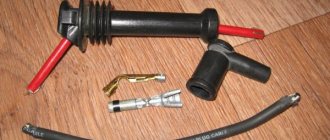
If there is a failure in the power supply to electrical equipment, you should first check the integrity of the electrical circuit. To do this you need:
- De-energize the area being tested by disconnecting the negative terminal of the battery or the corresponding fuse.
- Connect the contacts of the multimeter to the ends of the problem section of the circuit, and one of the probes to ground.
- If there are no readings on the multimeter display, there is a break in the circuit.
- The wiring is replaced with a new one.
Selection of wires and replacement of wiring is carried out according to the power supply diagram of the VAZ 2104. In this case, standard components or components from another model with suitable characteristics are used. To replace the wiring, the front part of the cabin is disassembled. Wires of insufficient length are extended, and connections are soldered and insulated. It is almost impossible to completely replace the electrical wiring of a VAZ 2104 with your own hands. If such a situation arises, it is better to contact a car service.
Video: replacing wiring, fuses and relays of classic VAZ models
To replace the wiring, the front part of the cabin is disassembled. Wires of insufficient length are extended, and connections are soldered and insulated.
Video: replacing electrical wiring in the cabin and under the hood
It is almost impossible to completely replace the electrical wiring of a VAZ 2104 with your own hands. If such a situation arises, it is better to contact a car service.
Electrical equipment of carburetor and injection VAZ 2104-21053
The VAZ 2104 with rear-wheel drive and a station wagon body was produced from 1982 to 2012. The model was constantly improved: electrical equipment was changed, a fuel injection system, a five-speed gearbox and semi-sports front seats appeared. The VAZ 21043 modification was supplemented with a system for cleaning and heating the rear door window. The power supply system for individual vehicle components is quite simple.
Diagnosis of failure
Imagine a situation where the car does not start.
What to do in such cases:
- First of all, make sure that there is gasoline in the tank. This is, of course, a trivial reason, but you must make sure that there is fuel.
- If when you turn the ignition key the starter does not turn at all, then most likely the reason has been found. You need to dismantle the starter mechanism and check its functionality. If the starter turns slowly, then most likely the reason lies in a discharged battery. We need to try to restore its charge.
- If the starter spins quickly, check the spark plugs, as well as the wires connected to them. There is a possibility that the reason lies in damage to the high-voltage insulation; in this case, the wires will have to be changed. The candles should be carefully checked for the presence of carbon deposits - if there is carbon deposits, the candles should be cleaned or replaced, depending on their service life.
- Next, check the condition of the wiring in the area from the generator unit to the ignition coil. Make sure that the contacts here are free of oxidation and that the wiring itself is intact. If there is oxidation, the contacts must be cleaned. Damaged wiring requires replacement.
- Next, check the operation of the coil and distributor, in particular, we are talking about spark diagnostics. Remove one high voltage and bring it to the car body or cylinder head. Then let the assistant try to start the engine - at the moment of starting, a spark should jump between the contact of the high-voltage wire and the car body. If it is absent, look for a problem in the ignition system.
What is included in the electrical circuit?
Every motorist should have a detailed diagram with a description, since it is included in the kit.
But since not everyone has it, we suggest that you familiarize yourself with the main components of the wiring diagram 2105 and 21053 with a carburetor or injector:
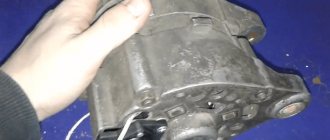
- Accumulator battery. As you know, the battery is designed to power equipment, as well as ensure normal engine starting. A faulty battery will lead to serious problems.
- Generator unit. With its help, all component devices of the electrical circuit are powered. The performance of this unit is no less important than the battery.
- Optical system. Optics in the “fives” include head lighting for low and high beams, PTF, rear lights with brake lights and dimensions.
- Mounting block with fuses. All the main electrical circuits are connected here.
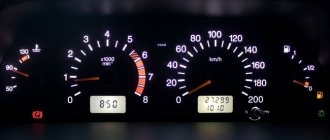
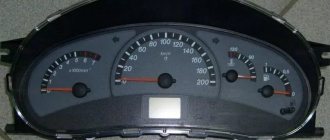
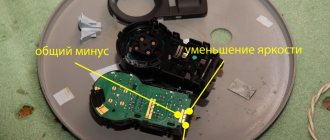
- Control panel. There are sensors on the dashboard that allow you to determine the basic parameters of the car. In particular, we are talking about driving speed, the presence of fuel in the gas tank, engine temperature, etc.
- Ignition system. It consists of many components, but the most basic of them are the distribution mechanism, spark plugs, and high-voltage wires. The latter ensure the transmission of an electrical discharge to the spark plugs, which is necessary to ignite the air-fuel mixture. If the insulation on high-voltage systems is damaged, this can cause poor starting of the engine, as well as its unstable operation in general.
All electrical circuits are marked with separate colors; in case of damage to the electrical wiring, this will allow the car owner to detect the damaged wire and replace it.