Removing the rear bumper of Lada Granta
Tools:
- Small flat screwdriver
- Medium Phillips screwdriver
- Ratchet wrench
- Torx T20 socket
- 8 mm head
- 10 mm head
- Pliers
Notes:
Carry out the work when repairing and replacing the rear bumper. Perform bumper removal operations with an assistant.
1. Remove the left and right rear wheel mud flaps as described in this article.
2. Remove the taillights as described here.
3. In the wheel arch of the left rear wheel, use a Phillips screwdriver to unscrew the self-tapping screw securing the bumper to the body.
4. Similarly, unscrew the self-tapping screw in the right wheel arch.
5. Having opened the trunk lid, use a 10 mm socket to unscrew eight self-tapping screws 1 for the upper fastening of the bumper to the body.
6. From the bottom of the car, using the same tool, unscrew the three screws 1 of the lower fastening of the bumper to the body, and also, using a Phillips screwdriver, unscrew the screws 2 securing the mudguard to the body.
7. Remove the left side of the bumper from the gap formed by the rear fender and the pressure pad welded to it.
8. Perform a similar operation on the other side of the car.
9. Remove the rear bumper.
10. Reinstall the rear bumper in reverse order.
The article is missing:
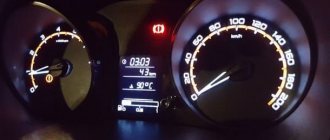
Photo of the instrument
Video - Result of replacing the bumper on Grant
Tools:
- Small flat screwdriver
- Medium Phillips screwdriver
- Ratchet wrench
- Torx T20 socket
- 8 mm head
- 10 mm head
- Pliers
Notes:
Carry out the work when repairing and replacing the rear bumper. Perform bumper removal operations with an assistant.
1. Remove the left and right rear wheel mud flaps as described in this article.
2. Remove the taillights as described here.
3. In the wheel arch of the left rear wheel, use a Phillips screwdriver to unscrew the self-tapping screw securing the bumper to the body.
4. Similarly, unscrew the self-tapping screw in the right wheel arch.
5. Having opened the trunk lid, use a 10 mm socket to unscrew eight screws 1 for the upper fastening of the bumper to the body.
6. From the bottom of the car, using the same tool, unscrew the three screws 1 of the lower fastening of the bumper to the body, and also, using a Phillips screwdriver, unscrew the screws 2 securing the mudguard to the body.
7. Remove the left side of the bumper from the gap formed by the rear fender and the pressure pad welded to it.
8. Perform a similar operation on the other side of the car.
9. Remove the rear bumper.
10. Reinstall the rear bumper in reverse order.
We remove the rear bumper on a Lada Granta with our own hands: video and photos
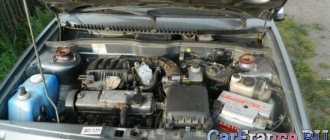
Russian cars have finally become truly modern vehicles, the quality of which meets all the most pressing standards. Still, breakdowns happen on modern cars too.
For example, you may need to remove the rear bumper because it eventually breaks. To avoid hitting curbs, you can increase the vehicle's ground clearance. To do this, you don’t necessarily have to go to a workshop; everything can be done independently in your garage.
Removing the front and rear bumper Grants
| If you decide to do external tuning of the Grant, for example, replace the standard bumper with an alternative one, or the goal is simply to repair it, then before starting all the work you should study the question “how to remove the bumper.” |
How to remove the front bumper of LADA Granta (VAZ 2190)
Necessary tools: screwdriver with a Phillips blade, keys “8”, TORX T20, socket head “10”.
- Remove the registration plate and unscrew the two bolts underneath it securing the bumper to the amplifier;
- Unscrew the 4 screws (two on each side) securing the front parts of the fender liners to the front bumper;
- Unscrew the 6 bolts of the upper bumper-to-body mounting.
- Unscrew 4 screws A and 3 bolts B of the lower fastening of the front bumper to the body and fender liners;
- Unclip the side latches securing the front bumper to the fender on both sides. If there are fog lights, disconnect the wiring harness blocks;
- Remove the front bumper by sliding it forward.
If necessary, you can remove the radiator trim. Install the front bumper in the reverse order.
How to remove the rear bumper of LADA Granta (VAZ 2190)
Necessary tools: TORX TZO and “10” keys, a screwdriver with a Phillips blade. Remove the rear wheel mudguards.
- Unscrew the 2 screws (one on each side) securing the rear bumper to the wheel arches;
- Unscrew the 3 bolts of the lower rear bumper mounting to the body. Remove the tail lights;
- Unscrew the 8 bolts that secure the rear bumper to the body.
- Unclip the latches securing the rear bumper to the fender on both sides;
- Move the bumper away from the body to the length of the connecting wires. Remove the wiring harness seal from the body opening using a screwdriver;
- Pull the wiring harness out of the body. Disconnect the connectors from the license plate light wires;
- Remove the rear bumper by sliding it backwards.
Installing the rear bumper is carried out in the reverse order. By the way, do you know how to install a tuning bumper? Keywords:
Removing the front bumper Grant
We will approach the process in detail with preparation and step-by-step illustrations.
Necessary tool
Cooking:
- Torx hexagon T-20;
- Phillips screwdriver;
- Wrenches 10: ring or open-end, ratchet with corresponding head;
- Pit or lift.
How to remove step by step
Let's get to work.
Step 1 : remove the license plate frame from the front bumper - there are 2 10mm bolts under it. Unscrew them.
For bolts, a socket wrench or ten-point socket is suitable. Photo from Drive2 website, Lada Granta MAGMA logbook
Step 2 : open the hood. We unscrew 6 bolts: 4 hold the radiator frame from above, one more to the right and left of the frame.
Use the same head to unscrew the bumper mount from above.
Step 3 : remove the star screws (Torx wrench required) that secure the fender liners. 2 on each side.
If the wheels are in the way, you can turn them one by one to their extreme positions for better access.
Step 4 : from below we find 2 screws (on the right and on the left) closer to the wings - we unscrew them.
We remove the screws either from the hole or by lying under the bumper.
Step 5 : remove the last three fastening bolts from the bottom closer to the protection. If the protection interferes, unscrew the edge that interferes with dismantling.
It is not necessary to remove all protection.
Step 6 : along the edges near the wings, carefully pull the bumper towards you until it comes off the latches.
Reassemble in reverse order .
Removing the front bumper of the Lada Granta liftback and sedan
How to choose and replace the front bumper on a Lada Granta car
Modern car tuning (external) involves replacing certain factory parts. So, car enthusiasts change the front bumper of the Lada Granta first of all. From a purely external perspective, the factory one looks good, but it lags behind automotive fashion trends. And any accessory does not withstand the asphalt surface for long: flying stones quickly render it unusable.
Selecting a part and the tools required for replacement
Before you buy a bumper for a Lada Granta, you should ask about its dimensions and location of attachment points. Their manufacturers are not very concerned about the problems of car enthusiasts and produce products according to their own patterns for certain brands of the most popular cars.
Alas, the front bumper of the Lada Granta does not fit every car model. Decide in advance on your wishes and go shopping.
They usually buy front bumpers for Lada of two types: “Robot” and STM. There are other models of accessories on sale that are perfect for your car.
However, the popularity of these accessories remains high, regardless of the appearance of certain new products. We will assume that you have made your choice and purchased the accessory you like. We arm ourselves with tools and begin the process of dismantling the old one. You need to have with you:
Removing and replacing parts
The bumper must be removed carefully without sudden movements or jerks.
The front bumper of the Lada Granta needs to be removed by two people. This way you will definitely not tear off the latches and damage the fastening points. This is especially true if you are dismantling the bumper on a Granta liftback (with special treatment of the metal from which the car body is made).
If you decide to remove the front bumper of the Lada Granta without outside help, you need to arrange stops under it at three points (not in one line). After removing part of the fastener, the accessory will lower slightly and the stops will keep it from sagging more and more - this way the latches will not break.
Before removing the front bumper on your car, first remove the license plate. Behind it you will see the heads of two “10” bolts; they must be unscrewed. Now we open the hood: in the upper part there are 6 bolts that secure the front bumper of the Lada to the car body. These bolts also need to be unscrewed.
The following fastening points connect the front bumper of the Lada with the fender liner. Getting to these points is not very convenient, as the wheel gets in the way. We turn the car's steering wheel until maximum ease of access to the bolts is achieved. There are two of them on each side. The bolts need to be unscrewed and lowered below, under the front bumper of the Lada Granta.
There are two more screws and three bolts that hold the part being removed. It is possible that additionally installed crankcase protection will interfere with final removal. It needs to be released (it is not necessary to remove it completely if the protection is not connected to the accessory by single attachment points).
And now the front bumper of the Lada just needs to be pulled on both sides in a horizontal plane in the direction of the intended movement of the car. The latches should come out of the holes without obstruction. If this does not happen, then you forgot about some of the attachment points where the Lada front bumper was fixed. You need to remove all screws and bolts.
The part is removed without jerking or changing the direction of movement.
The front bumper of the Lada Granta has been removed, and you can continue to carry out the planned tuning or repairs.
Optional equipment
Transforming a car is rarely complete without replacing the front bumper
As a rule, tuning the front part of a Lada car is not limited to replacing the described accessory with a more modern and durable option. That’s why car enthusiasts buy a Lada Granta bumper, which at first glance does not at all correspond to this car model. For the new model, you also need to buy the appropriate headlights, foglights, and direction indicators.
It will take longer to remake such a front bumper for a Lada Granta, since not only the mounting points may not fit the car (after all, it’s easy to do them yourself in the right places). Car enthusiasts are still trying to “finish up” even the latest new product that they managed to buy.
Frankly, such zeal and desire of car enthusiasts to remake the Lada externally only evokes a desire to create: the cars turn out to be very beautiful and unusual.
Look at or in the photo how car owners were able to remake their iron horses, and you will see for yourself.
How to remove a bumper on a grant
Lada Granta (2020). How to remove the front and rear bumper
How to remove the front bumper
The procedure for different brands of cars may differ slightly, but in general the procedure is always approximately the same. To remove the front bumper, you will need a 10mm socket wrench and a Phillips screwdriver. In general, the work will not take more than half an hour of your time if you do everything correctly.
First you need to park the car on a flat, well-lit area. Then you should open the hood and carefully examine the protective plastic trims - they are located under the radiator. In order to gain full access, you need to remove the protective cover, the main function of which is to hide the clamps and screws that hold the fastening. All these dismantled parts are preserved so that the element can be put back in its original place.
Removal begins with the screws that are located in the middle, and then you should move to the side fasteners. The screws are loosened and removed using a pre-supplied screwdriver - this procedure will have to be done at least 12 times. In some older car models, the bumper is attached to the frame with four bolts - these should also be found and disconnected.
When the fastenings are removed, it is necessary to examine the place where the element being dismantled adjoins the wings of the car. The part needs to be disconnected from the wings, as well as from the headlights. The edges of the bumper are pulled out very carefully, since the high density of the structure makes it quite likely that there is a risk of damage to other parts.
Now, the last thing that holds the removable part to the body is the clamps. Finding the right clamps is quite simple - there should be four of them. To gently open them, you will need a second assistant to hold the piece on one side while you work on the other. The clamps themselves can have a hooked design, or be made in the form of latches. To dismantle it in the first case, it will be enough to simply lift it. The second option involves bending the clamps using a screwdriver.
Then you should disconnect the wires that are connected to the headlights in the bumper and the part can be removed. If it still does not want to come off, then you have missed some kind of clamp or fastening.
Attaching the front bumper to its original place occurs in the same way as removing it, only in the reverse order.
How to remove the rear bumper
If your car has a sedan body, you just need to remove the luggage compartment mat, but a station wagon requires complete removal of the rear door trim. In addition, the luggage compartment may contain side trim, which must be removed from the fixing parts and pulled slightly to the side.
Next, a socket wrench with a 5-6 cm extension is placed between the rear wing and the trim. It is put on bolts, which we carefully unscrew.
Afterwards you need to disconnect the fasteners that are located on both sides. These are self-tapping screws connecting the rear bumper to the fender liner. Finally, you can press firmly on the element so that it separates from the brackets on the body. Then it lifts up and is carefully removed from the back of the car.
This completes the process. Attaching the rear bumper to its original place occurs in the same way as removing it, only in the reverse order.
In what cases may it be necessary to remove the rear bumper?
Replacing a bumper as a result of an accident
Considering the popularity of the Grant in our country, as well as in neighboring countries, you can notice that more and more copies of this car are appearing on the roads. This means that they injure their bumpers very often. So, it may be necessary to remove the bumper in order to replace it with a new one.
Removing the bumper is also appropriate when you want to replace it with another model, creating a new image for your car.
Tuning bumper models
Bumper I'm a robot on Granta
The I'm a robot type bumper is now popular, which takes into account many parameters, including increasing aerodynamic characteristics. However, such specifications are more typical for the front bumper, while the rear bumper exclusively improves the appearance of the car. In addition, such a bumper will be very easy to attach, since it is completely compatible with the factory mounts.
Custom rear bumper
The STM type bumper design will significantly improve the cooling efficiency of the brakes, which is preferred by practical car enthusiasts.
How to Remove the Rear Bumper of a Lada Granta Liftback
Content
Do it yourself to take off the rear bumper
Russian cars have finally become truly modern cars, the quality of which meets all the latest standards. However, breakdowns occur on modern cars.
For example, you may need to remove the rear bumper due to damage. To avoid hitting curbs, you can increase your vehicle's ground clearance. You don’t have to go to a workshop for this; everything can be done independently in your garage.
Disassembling tools
Naturally, in order for it to work for you, you will need to buy some tools. Most likely, you already have them, but preparing them in advance will not be superfluous even in this case.
The list of tools you need includes:
- Phillips screwdriver;
- a 10mm universal wrench. It can be replaced with a wrench of the same size;
- In addition, you will need a couple more keys, such as TORX T-20 and TORX T-30.
READ How to Open Key Ford Focus 2 Video
It would also be a good idea to take care of placing cardboard or fabric under the back so as not to get it dirty and catch a cold. If the car is installed on an elevator or overpass, such safety measures will not be required.
Rear bumper removal procedure
With all the tools selected and within easy reach of you, you can get to work. You will need a TORX T-30 10 head wrench as well as a Phillips screwdriver.
- Carefully remove any dirt caps if present.
- Then you come to the part where you can find a screw on both sides. They block the bumper. As you may have guessed, you need to remove the screws on both wheels.
Zhiguli will remove the rear bumper
Lada provides the ability to remove the rear bumper
.
Replacement of rear lifting bumper, Grant, liftback.
replacing bumpers
rear
Lada Granta lift
.
the killed guys are replaced with beaten bumpers
, register for the first time.
Rear bumper cover and mounting bolt diagram
Three bolts securing the headlights to the car body
The headlight is mounted on such valves
READ Installing the Front Bumper of a VAZ 2114
Two screws securing the bumper under the headlights
8 rear bumper mounting points (4 open positions, 2 left and 2 right)
The removed bumper lies neatly to the side
Naturally, installation of the Lada Grant bumper is carried out in the reverse order, all points are carefully observed.
In what cases can the rear bumper be removed?
Replacing a bumper due to an accident
Given the popularity of the Grant in our country, as well as in neighboring countries, you can see that more and more copies of this car are appearing on the roads. Therefore, they often injure their bumpers. Therefore, you may need to remove the bumper to replace it with a new one.
Removing the bumper is also advisable if you want to replace it with a different model, creating a new look for your car.
Customization of bumper models
Bumper. I'm Grant Robot
Currently popular is the type I bumper, which takes into account many parameters, including increased aerodynamic characteristics. However, these characteristics are more characteristic of the front bumper, while the rear bumper exclusively improves the appearance of the car. In addition, such a bumper will be very easy to repair, since it is fully compatible with the factory mounts.
READ Remove Generator Focus 2 1.8
Special rear bumper
The STM bumper design will significantly improve the cooling efficiency of the brakes, which is preferred by practical car enthusiasts.
Result
replacement rear bumper Lada Grant. pretty simple lesson. All you have to do is notice that the plastic the bumper is made of can be easily broken. The same is true for fasteners. The fact is that metal screws can put excessive pressure on the surface of the plastic, from which it simply breaks out. To avoid this, it is necessary to tighten the bolts with a certain force acting on the handle.
But in general, you shouldn't have any problems removing and reinstalling the bumper.
The most popular extras are the most profitable
Car dealership managers have a list of priorities, what to offer the buyer first and what to offer last. And although they sell rugs with great profit, they are in the middle of this list. The salon receives the most profit from the alarm system and additional processing of the car body.
The dream of many car owners is for the car not to rust ahead of time. And car dealerships know this; they offer to apply anti-corrosion coating to the body without leaving the showroom. The main argument: we will apply a coating to a clean body, this will give a greater percentage of protection than coating elsewhere on a body that has been exposed to external influences. They will also offer to provide protection from gravel and sound insulation, and they will apply the same anti-corrosion compound, because all these properties are listed on its labels. This is already some kind of scam.
The second priority is the sale of alarm systems. In order not to miss out on the client, managers argue for installing the alarm directly in the salon by the fact that installation in a third-party organization will lead to disruption of the fastening of the trim elements and, as a result, to damage to the wiring. Well, in order not to let the client cool down, immediately tell him about the advantages of autostart, which he will receive right in their salon when installing an alarm system.
How to remove the bumper on a Grant yourself: front-rear, sedan-liftback
Removing the front bumper Grant
We will approach the process in detail with preparation and step-by-step illustrations.
Necessary tool
Cooking:
- Torx hexagon T-20;
- Phillips screwdriver;
- Wrenches 10: ring or open-end, ratchet with corresponding head;
- Pit or lift.
How to remove step by step
Let's get to work.
Step 1: remove the license plate frame from the front bumper - there are 2 10mm bolts under it. Unscrew them.
Step 2: open the hood. We unscrew 6 bolts: 4 hold the radiator frame from above, one more to the right and left of the frame.
Step 3: Remove the star screws (you need a Torx wrench) that secure the fender liners. 2 on each side.
Step 4: from below we find 2 screws (on the right and on the left) closer to the wings - unscrew them.
Step 5: remove the last three fastening bolts from the bottom closer to the protection. If the protection interferes, unscrew the edge that interferes with dismantling.
Step 6: along the edges near the wings, carefully pull the bumper towards you until it comes off the latches.
Are fog lights installed? Disconnect them before work!
Reassemble in reverse order.
How to remove the rear bumper
We won’t break the article into different ones – we’ll talk about the rear bumper too. To remove you need:
- Crosshead screwdriver;
- Wrenches 10 – open-end or socket;
- Torx hexagons 20 and 30;
- Preferably a lift.
Let's see step by step how to remove the rear body kit on a Grant:
Stage 1. Remove the 5 mounting points of the bumper from below. You can lift the car on a lift - this will make the task easier.
Stage 2. We move on to mounting in the rear arches. Here we remove the clamp 3, screws 1 and 2.
Stage 3. Dismantle the rear lights - from the trunk side, remove the lamp chip and three fastening nuts.
How to remove rear lights in 5 steps - see here.
We look at the rear of the car with the lights removed - in front of us are the last 8 mounting points. Four in the place where the trunk lid comes.
2 more under each lamp.
Stage 4. The bumper is free. Do not rip it abruptly to the side! All that remains is to disconnect the wiring.
Be sure to unscrew the license plate light mount. If you have parking sensors installed, disconnect the sensors!
We put everything back together in reverse order.
General questions about body kit 2190
Let's answer a couple of basic questions about Granta bumpers.
Why you may need to replace the bumper
Possible reason for replacing the body kit on a VAZ 2190:
- Minor (or major) accident;
- Installation of a non-original body kit;
- Installation of additional devices: emergency parking sensors, rear view camera, etc.;
- Curiosity.
There are many options for non-standard body kits for Lada today.
Where to find the front bumper amplifier
Unlike pre-restyling Kalinas, Grant comes with a bumper reinforcement from the factory. Many people confuse it with a regular mount. You will gain access to the part only after dismantling the front body kit.
Video instructions on how to shoot
Here are videos with the work process:
Reminder
Let's summarize:
To remove the front/rear body kit, it is better to use a lift; You will need: a Phillips screwdriver, a 10mm socket wrench, a 20/30 Torx sprocket, a ratchet with a set of sockets; Simple, but important: wash the car before work, since we will be tinkering with the dirtiest part of the car; After dismantling all mounting points, check and disconnect all wiring, such as PTF, license plate lights or parking sensors. Do you like working with Granta? See other articles
For example, how to install acoustics yourself
Do you like working with Granta? See other articles. For example, how to install acoustics yourself.
Write comments
This is important - otherwise we will miss details or lose motivation
How to remove the front bumper on a Lada Granta
For a car enthusiast who has driven a Lada Grant, removing the front bumper is a common thing. After all, this is often required to repair or replace the front “whisker”, as well as to access what is behind it, install fog lights, a signal, etc. It is possible to replace the radiator grille or the entire bumper with an improved model that improves aerodynamic characteristics and modernizes the external type of car.
Before you begin dismantling, make sure that all tools are at hand and that access to the front of the underbody is sufficiently clear.
- It is necessary to remove the license plate, behind which there are 2 bolts. They should be unscrewed with a 10 mm wrench.
- Lifting the hood cover, use the same key to unscrew the 6 bolts located under it that secure the bumper and radiator.
- Unscrew the 2 bolts on the fender liners, at the top and bottom of the arch. To be more precise, these are not bolts, but self-tapping screws with an asterisk head. They are unscrewed with a TORX T-20 key. To access them, turn the wheels all the way to the left and unscrew the screws from the right fender liner. Turning the wheels to the right, unscrew the screws from the left fender liner.
- Another 4 self-tapping screws attach the bumper to the fender liners from below - 2 on the left and 2 on the right. They are also unscrewed with a TORX key.
- Using a 10mm wrench, you need to unscrew the 3 bolts securing the part from below. Depending on whether there is an engine guard and how it is installed, you may need to remove 2 more bolts that hold the crankcase cover in place at the front. When they are unscrewed, the cover should not hang on the rear bolts. To prevent the fastening from deteriorating, place an object under the crankcase protection.
- Now the bumper is free, only the latches hold it in place. But you should unhook them carefully, because the plastic can easily break. First unhook the latch on the left side, then also carefully on the right, or vice versa. If fog lights are already installed, be sure to disconnect the connector. Place the part aside to avoid accidental damage.
Installing the front bumper
Installation of the part occurs in the reverse order.
- If necessary, connect the fog lights.
- Carefully place the bumper in place and secure it with the latches using gentle pressure. If the latches do not engage, check the installation accuracy. Make sure that no foreign objects get into the connections.
- After fastening the latches, tighten all the bumper fasteners in sequence.
- Replace the license plate.
Reminder
To remove the front/rear body kit, it is better to use a lift; You will need: a Phillips screwdriver, a 10mm socket wrench, a 20/30 Torx sprocket, a ratchet with a set of sockets; Simple, but important: wash the car before work, since we will be tinkering with the dirtiest part of the car; After dismantling all mounting points, check and disconnect all wiring, such as PTF, license plate lights or parking sensors.
Do you like working with Granta? See other articles. For example, how to install acoustics yourself.
Write comments
This is important - otherwise we will miss details or lose motivation
Domestic cars have finally become truly modern vehicles, the quality of which meets all the latest standards. However, breakdowns also occur on modern cars.
How to quickly and easily remove the bumper on a Grant
There are many reasons to remove the body kit - a minor accident or tuning. There are many options for Grant - at a price of ten to twenty thousand you can buy a set of ABS plastic and transform your car. Yes, and minor rubbing in is not uncommon. This means that it is important to know how to remove the bumper on a Grant.
Removing the front bumper Grant
We will approach the process in detail with preparation and step-by-step illustrations.
Necessary tool
Cooking:
- Torx hexagon T-20;
- Phillips screwdriver;
- Wrenches 10: ring or open-end, ratchet with corresponding head;
- Pit or lift.
How to remove step by step
Let's get to work.
Step 1 : remove the license plate frame from the front bumper - there are 2 10mm bolts under it. Unscrew them.
For bolts, a socket wrench or ten-point socket is suitable. Photo from Drive2 website, Lada Granta MAGMA logbook
Step 2 : open the hood. We unscrew 6 bolts: 4 hold the radiator frame from above, one more to the right and left of the frame.
Use the same head to unscrew the bumper mount from above.
Step 3 : remove the star screws (Torx wrench required) that secure the fender liners. 2 on each side.
If the wheels are in the way, you can turn them one by one to their extreme positions for better access.
Step 4 : from below we find 2 screws (on the right and on the left) closer to the wings - we unscrew them.
We remove the screws either from the hole or by lying under the bumper.
Step 5 : remove the last three fastening bolts from the bottom closer to the protection. If the protection interferes, unscrew the edge that interferes with dismantling.
It is not necessary to remove all protection.
Step 6 : along the edges near the wings, carefully pull the bumper towards you until it comes off the latches.
Reassemble in reverse order .
How to remove the rear bumper
We won’t break the article into different ones – we’ll talk about the rear bumper too. To remove you need :
- Crosshead screwdriver;
- Wrenches 10 – open-end or socket;
- Torx hexagons 20 and 30;
- Preferably a lift.
Let's see step by step how to remove the rear body kit on a Grant:
Stage 1 . We dismantle the 5 mounting points of the bumper from below. You can lift the car on a lift - this will make the task easier.
Remove 3 bolts and 2 screws as shown in the photo. Source: lada.online
Stage 2 . Let's move on to the mounting in the rear arches. Here we remove the clamp 3, screws 1 and 2.
We carry out this stage on both sides.
Stage 3 . We dismantle the rear lights - from the trunk side, remove the lamp chip and three fastening nuts.
How to remove rear lights in 5 steps - see here.
We look at the rear of the car with the lights removed - in front of us are the last 8 mounting points. Four in the place where the trunk lid comes.
2 more under each lamp.
If you do not remove the lights, the body kit cannot be dismantled. No way.
Stage 4 . The bumper is free. Do not rip it abruptly to the side! All that remains is to disconnect the wiring.
We put everything back together in reverse order.
General questions about body kit 2190
Let's answer a couple of basic questions about Granta bumpers.
Differences between sedan and liftback bumpers
The principle of working with front and rear bumpers on a sedan and a liftback is the same! There are no fundamental differences.
Why you may need to replace the bumper
Possible reason for replacing the body kit on a VAZ 2190:
- Minor (or major) accident;
- Installation of a non-original body kit;
- Installation of additional devices: emergency parking sensors, rear view camera, etc.;
- Curiosity.
There are many options for non-standard body kits for Lada today.
Non-native body kits are made unofficially. This can lead to problems with joints and color mismatches.
Where to find the front bumper amplifier
Unlike pre-restyling Kalinas, Grant comes with a bumper reinforcement from the factory . Many people confuse it with a regular mount. You will gain access to the part only after dismantling the front body kit.
The amplifier on the Lada is rather symbolic, like the factory crankcase protection. But there is no such thing on Kalina.
Video instructions on how to shoot
Here are videos with the work process:
Reminder
- To remove the front/rear body kit, it is better to use a lift ;
- You will need: a Phillips screwdriver, a 10mm socket wrench, a 20/30 Torx sprocket, a ratchet with a set of sockets;
- Simple, but important: wash the car before work, since we will be tinkering with the dirtiest part of the car;
- After dismantling all mounting points, check and disconnect all wiring, such as PTF, license plate lights or parking sensors.
How to remove the rear bumper
We won’t break the article into different ones – we’ll talk about the rear bumper too. To remove you need:
- Crosshead screwdriver;
- Wrenches 10 – open-end or socket;
- Torx hexagons 20 and 30;
- Preferably a lift.
Let's see step by step how to remove the rear body kit on a Grant:
Stage 1. Remove the 5 mounting points of the bumper from below. You can lift the car on a lift - this will make the task easier.
Stage 2. We move on to mounting in the rear arches. Here we remove the clamp 3, screws 1 and 2.
We carry out this stage on both sides.
Stage 3. Dismantle the rear lights - from the trunk side, remove the lamp chip and three fastening nuts.
How to remove rear lights in 5 steps - see here.
We look at the rear of the car with the lights removed - in front of us are the last 8 mounting points. Four in the place where the trunk lid comes.
2 more under each lamp.
If you do not remove the lights, the body kit cannot be dismantled. No way.
Stage 4. The bumper is free. Do not rip it abruptly to the side! All that remains is to disconnect the wiring.
We put everything back together in reverse order.
Removing the rear bumper
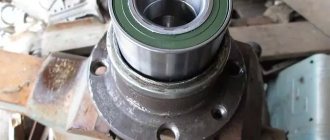
The rear bumper is dismantled using the same tools, only instead of a T20 key you will need a TORX T30 key. Before starting work, you must first remove the rear fender liners on both sides, and then unscrew the two screws that secure the bumper to the wheel arches. The bumper is secured on the underside of the body with three bolts; they are unscrewed using a key.
In order to detach the rear bumper from the fixing elements along the perimeter of the body, you need to remove the rear lights. Access to the lamp mounts opens after removing the car trunk door trim. Having unscrewed the eight bolts securing the part to the body, you need to remove the side latches from engagement with the brackets, slightly move the bumper to the side and, having disconnected the wire connectors, finally remove the rear bumper from the Lada Granta car.
Branded accessories
The choice of additional equipment and services at car dealerships is extensive. Branded accessories are divided into classic accessories and additional options (equipment).
Classic accessories can be called souvenirs; the car dealership even has a sales plan for these souvenirs. Among the accessories that have become widespread:
- Branded key rings
- T-shirts and baseball caps with the brand logo
- Mug with logo
- Flash drive with logo
- Soft toy or pillow
All this souvenir is not in demand among buyers of budget cars, if only key fobs.
And we know very well that all this in a regular store costs 2-3 times cheaper, but there are also lovers of this product. My wife's brother has his own auto parts store and ordered a windbreaker with the BMW logo from his supplier, and he didn't even know what it looked like, what material it was made of, but the fact that it was 50% cheaper than in the official store encouraged him to buy. As a result, he received a white sweatshirt with a small BMW logo on the chest for 3,800 rubles and is satisfied; for a premium BMW owner, this is not money.
The same goes for an amenity kit in a leather case for 15 thousand rubles with Porsche branded embossing. Is 15 thousand a lot of money for a Porsche buyer for several million rubles? This is his pocket money for “seeds”.
Remove the rear bumper of the Lada Granta. We remove the rear bumper on a Lada Granta with our own hands: video and photos
How to remove the rear bumper on a Lada Granta: photos and videos
Domestic cars have finally become truly modern vehicles, the quality of which meets all the latest standards. However, breakdowns also occur on modern cars.
For example, you may need to remove the rear bumper on a Lada Granta as a result of its breakdown. To avoid hitting curbs, you can increase the vehicle's ground clearance. To do this, you don’t have to go to a workshop; you can do everything yourself in your garage.
Dismantling tools
Hello, today we will look at the process of replacing the rear bumper on a Lada Granta. The rear bumper is most often removed for repairs if there are small cracks or chips, or to replace it with a new one after a minor accident.
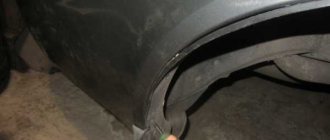
So, let's begin. First of all, unscrew and remove the mudguards
Removing the rear mudguards
Next, unscrew one bolt on each side that secures the bumper to the arches
Unscrew the rear bumper fastenings to the arches
Then unscrew the 3 bolts that secure the rear bumper from below
Unscrew the lower mountings of the rear bumper
Now unscrew the 8 bolts that secure the rear bumper to the body from above
Unscrew the upper mounts of the rear bumper
Next, carefully snap off the bumper along the edges (it is secured with plastic latches)
Unclip the rear bumper mounts
After this, remove the rubber seal from the body, take out the wires and disconnect the license plate light connector, remove the rear bumper
Remove the rubber seal from the body
Disconnect the license plate light connector
Installation of the rear bumper occurs in the reverse order.
Step-by-step DIY replacement of the rear bumper of a Lada Granta
Every modern car model, regardless of brand, has a rear bumper that absorbs energy. It helps to avoid deformation of the body in case of minor “injuries”, taking most of the impact force upon itself as a kind of buffer. That’s why he himself always suffers first. Usually, a special amplifier is hidden behind the rear bumper, which is made of directionally located metal, which programs the initially designed deformation of the body upon impact in order to protect passengers in severe collisions.
In addition to all of the above, the bumper also adds a unique aesthetic appeal to the car, no matter whether you have a sedan or a liftback. Completing the overall design idea of the vehicle, it is part of a complete picture, blending perfectly with the overall style.
Standards have been developed for the level of bumper placement on different car models. This is necessary so that in the event of an accident they fulfill their direct function - protect the body and divert damage when impacted to the desired side of the body. The shock-absorbing characteristics of the “timber” also meet its standards. If initially they were made capable of withstanding an impact at a speed of 5 miles per hour (about 8 km), then in 2009 it was decided to leave the standard at half that speed. Supposedly it is safer for pedestrians.
It doesn’t matter why, but you suddenly need to replace the rear bumper on your Lada Granta.
Maybe it’s not even necessary to replace it, but simply remove it to install parking sensors (APS - acoustic parking system), a rear view camera, detect hidden damage after an accident, etc. But you’re encountering this for the first time and don’t even know which way to approach it. him. We will help solve this problem.
How to remove the rear bumper of LADA Granta (VAZ 2190)
Necessary tools: TORX TZO and “10” keys, a screwdriver with a Phillips blade.
Remove the rear wheel mudguards.
- Unscrew the 2 screws (one on each side) securing the rear bumper to the wheel arches;
- Unscrew the 3 bolts of the lower rear bumper mounting to the body. Remove the tail lights;
- Unscrew the 8 bolts that secure the rear bumper to the body.
- Unclip the latches securing the rear bumper to the fender on both sides;
- Move the bumper away from the body to the length of the connecting wires. Remove the wiring harness seal from the body opening using a screwdriver;
- Pull the wiring harness out of the body. Disconnect the connectors from the license plate light wires;
- Remove the rear bumper by sliding it backwards.
Procedure for dismantling the rear bumper
Once all the tools have been selected and are in close proximity to you, you can begin to work. To do this, you will need to take a TORX T-30 wrench with a 10mm head, as well as a Phillips head screwdriver.
- Carefully remove the mudguards, if they are present.
- After which you will get to a part, on both sides of which you can find a screw. They fix the bumper on As you might guess, you need to unscrew the screws on both wheels.
Lada Granta rear bumper removal
Lada Granta remove rear bumper
.
DIY rear bumper repair of Lada Granta
The roads are full of surprises and in most cases unpleasant. Breakdowns occur every now and then at the most inopportune moments. However, the good news is that most of these unpleasant surprises are repairable and can be repaired without difficulty, even at home.
Today in the “Lada Granta Repair” section I want to talk about how to repair a bumper at home. You will learn how and with what you can glue a cracked bumper, using only available material and the simplest tool.
Lada Granta bumper repair requires:
- Set of keys (8, 10, 13);
- Soldering iron;
- Copper mesh and wire;
- Pliers, scissors, knife and tape measure;
- And of course, direct hands :).
As you can see in the photo, the bumper is cracked “not like a child”, in addition, the fasteners are broken off, so the work ahead is not easy. First you need to dismantle the bumper; I’ll tell you how to do it correctly now. The algorithm is approximately the following.
How to remove the rear bumper on a Lada Granta?
- The first thing to do is remove the tail lights.
This is done as follows. Remove the decorative cover under which the fasteners are located. Unscrew the three nuts with an “8” key. On the side, the flashlight is held on a rubber holder. Pull the lantern and remove it. We do the same in relation to the second lantern. - After removing the lantern, you will see two 10mm bolts, unscrew them.
- Next, use the same key to unscrew two more bolts located in the center of the bumper.
- Under the rubber stop of the cover there are two more key screws at “13”; we also unscrew them.
- Using a “10” wrench, unscrew the three bolts that are located under the bumper.
- Next, take a screwdriver and free the bumper from the mudguards, unscrew the screws that secure them.
We do the same with the screws that connect the bumper to the wing.
Now, in theory, nothing prevents us from removing the bumper...
Lada Granta rear bumper repair
Once the bumper is removed, we proceed directly to its repair.
- We clean the bumper, collect all the pieces and outline the scope of the upcoming work. You immediately need to cut small pieces of wiring that will act as staples. We cut depending on the size of the damage and the length of the “seam” itself. The pieces themselves should be approximately 15-20 mm.
- Next, we take our pieces and begin to put them together into one whole. To do this we use a soldering iron. You can, in principle, first grab the pieces with glue or simply use a soldering iron, and only then solder the cut pieces of copper. Here, as they say, whatever is more convenient for you, the main thing is that everything is as tight as possible and less noticeable from the outside.
The soldering of the bumper itself looks like this: we apply a piece of wire and heat it with a soldering iron already in place, that is, at the seam itself. We warm until he starts to drown
It is important here not to overdo it and not make a hole in the bumper. We do not place our staples very often, about 1-2 cm apart, depending on the situation.
- Now that the pieces are assembled and the bumper is more or less holding in place, it wouldn’t hurt to reinforce the seam with glass mat and epoxy resin, this will add strength to the seam.
- The broken “ear” (fastener) was soldered in a similar way, and for reliability, a copper mesh was used, which we laid and heat on both sides of the fastener using a soldering iron.
Next, you should perform a series of paint and varnish works that will completely restore the bumper. Read more about this in this article, where the painting process is described in detail.
And those who, for one reason or another, do not want to paint the bumper yet can begin assembly.
In principle, the bumper is intact, and the damage is practically invisible, although sooner or later it will still have to be painted.
That's all for me. As you can see, even at home, repairing the Lada Granta bumper is quite possible, and nothing is impossible. All you need is a soldering iron and the desire to do something yourself
Thank you for your attention, try it and you will succeed. Share the article with your loved ones using social buttons
networks, they are located just below.
Photo source: https://www.drive2.ru/l/6534042/
How to remove the rear bumper on a Lada Granta?
- The first thing to do is remove the tail lights. This is done as follows. Remove the decorative cover under which the fasteners are located. Unscrew the three nuts with an “8” key. On the side, the flashlight is held on a rubber holder. We pull the lantern and remove it. We do the same in relation to the second lantern.
- After removing the lantern, you will see two 10mm bolts, unscrew them.
- Next, use the same key to unscrew two more bolts located in the center of the bumper.
- Under the rubber stop of the cover there are two more key screws at “13”; we also unscrew them.
- Using a “10” wrench, unscrew the three bolts that are located under the bumper.
- Next, take a screwdriver and free the bumper from the mudguards, unscrew the screws that secure them. We do the same with the screws that connect the bumper to the wing.
Sources
- https://new-granta.ru/snyatie-bampera-na-lada-granta/
- https://car-fact.ru/marki-i-modeli/otechestvennye/lada-granta/granta-bampery.html
- https://InfoKuzov.ru/kuzov/zamena-bampera-lada-granta
- https://new-lada.ru/ustanovka-zadnego-bampera-lada-granta-sedan/
- https://ladaprofi.ru/lada-granta/kak-samostoyatelno-snyat-perednij-bamper-na-lada-granta.html
- https://carfrance.ru/snimaem-zadnij-bamper-na-lada-granta-svoimi-rukami-video-i-foto/
- https://carfrance.ru/snimaem-perednij-bamper-na-lada-granta-svoimi-rukami-video-i-foto/
Is native better?
But we could buy a non-original carpet for the trunk, we decided. The interior was original to the old owner and is in very good condition. The Chinese trunk litter we bought, there is no other way to call it, disappointed us. She warped immediately, although it was not winter. It was problematic to take it out for cleaning and put it back, we were afraid it would burst.
Car owners are right when they say that the original floor mats will not slip under the pedal at the most inopportune moment; the original ones fit like a glove, unlike the universal ones. Moreover, now the difference in price is not big; if you save on rugs, you will blame yourself later.
The same can be said about original covers, unlike universal ones, they fit great, and if we take a non-original one, at least not the cheapest one, this rag won’t last even a year.