Replacing the VAZ-2109 starter bushings becomes necessary when there is strong axial runout. This problem can be detected during startup - engine speed and power decrease.
To check the condition of the bushings, you will have to completely disassemble the starter, since it is not possible to determine their suitability in any other way. The work is not difficult, so you can easily do it yourself in your garage, without resorting to outside help and without the use of special tools. If the car has not been serviced for a long time, new bushings and brushes will be needed.
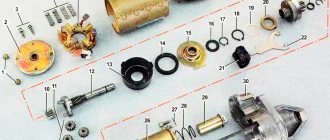
Starter device
How to replace starter bushings? Before getting to the heart of the matter, it is necessary to at least get acquainted with the structure of the unit in general terms. A car starter is essentially a miniature four-lane electric motor that initiates rotation of the crankshaft. It provides the initial rotation speed that is necessary for the internal combustion engine to start.
The starter is a DC electric motor that takes energy from the battery. Receiving electrical voltage from the battery, it increases power through the four brushes that are an integral part of it. There are different types of starters: Both the first and second ones have both their advantages and disadvantages.
Geared starters are good because they can provide the crankshaft rotation necessary to start the engine, even when the battery is very discharged.
gear starter
In addition, the strength of gear options is the presence of permanent magnets, due to which problems with the stator winding are minimized. Although, with prolonged use of such a starter, the rotating gear may fail. To be fair, it is worth noting that this is most often caused by poor production quality or defects.
Gearless starters have a direct effect on gear rotation.
These devices have a simpler design. It is easier to repair them yourself, without resorting to the help of specialists from a car service center. They are quite reliable, and the probability of their failure due to electrical influence tends to zero. However, at low temperatures, gearless starters can still operate unstably.
Starter brush problem
Another reason why the starter does not rotate well or sticks is faulty brushes. The voltage is transmitted to the starter rotor winding through a brush device that has contact with the rotor shaft commutator. If the contact is poor, voltage transmission may not be provided (the starter does not turn at all), or it may be provided in insufficient quantities (the starter does not rotate fast enough). The fact is that the brush apparatus works on the basis of graphite brushes, which tend to wear out with prolonged use. If the bushings are in good condition, and the starter still turns very slowly, then it’s time to replace the starter brushes.
In what cases is it necessary to replace bushings?
In the life of any motorist, there may be situations when, for various reasons, it is impossible to start the engine. One of the reasons may be worn bushings. Let's imagine this situation. During starting, the starter with noticeable difficulty tries to turn the crankshaft, every now and then sticking and stopping. At the same time, the uninitiated motorist is perplexed as to why this could be happening, because the battery is in good condition and fully charged. The reason in this case is the armature touching the stator. The gap between the first and second is only tenths of a millimeter, due to this, even the slightest misalignment of the armature shaft relative to the stator will certainly lead to the above problems. This misalignment appears due to the failure of the plain bearings in which the armature rotates. As a rule, the front bearing is more worn out, since the main load falls on it. The bearings in this case are bushings made of brass. The front one is built into a special hole, which is located in the clutch housing. The rear bearing is located on the starter cover.
Bushing replacement
Scheme for dismantling and disassembling the starter of the 12th VAZ model
Any owner of a V12 can independently disassemble and remove the device in question when it does not turn and requires repair. This process is best carried out on an overpass (car pit). Unscrewing the fasteners from the engine compartment is inconvenient. The dismantling sequence is as follows:
- to ensure the safety of the work, remove the negative wire from the battery;
- remove the control wire from the relay;
- unscrew the nuts (top and bottom) that secure the starter.
After this, we remove the middle part of the mechanism from the tie rods, the main gear from the armature shaft, and then remove the back cover with a Phillips screwdriver. Underneath there is a brush holder, which can be removed without the slightest difficulty. Now we can remove the armature from the stator and remove the support of the latter, which will allow us to use an ohmmeter to visually assess the condition of the armature winding.
If there are marks from bearings on the anchor shaft (they are called enveloping), they should, firstly, be cleaned with fine-grain sandpaper, and secondly, polished. Abrasive can also be used to clean out minor burnout phenomena of the collector. In situations where the brushes show severe wear, it is recommended to replace the entire brush holder.
After this, you can continue disassembling the starter in order to determine why it does not turn. To do this, we dismantle the gears of the planetary gearbox and especially carefully check the ring gear for cracks. If any, the gear needs to be changed:
- first we dismantle the bendix;
- on the drive shaft, using a hammer and a “13” wrench, remove the clip (outer) of the locking element in the form of a ring;
- remove the ring from the shaft using a screwdriver (you will have to try, since it is recessed on the shaft in a special recess);
- remove the drive and the cage, and then remove the retaining ring from the shaft (it must first be loosened).
After removing the washer and drive shaft support, we are presented with a gear that needs replacement.
Replacement technology
Bushings
If the replacement is not the first time, then the bushing can be inserted quite easily by hand. But during long-term operation, this can lead to it turning in the mounting hole. Over time, the mounting hole will break up, forming the so-called eccentricity, and the starter shaft may become misaligned. This means that the starter will stick and the engine will not be able to start. However, this is quite easy to fix. To do this, it is necessary to determine the size of the so-called eccentricity. Then you need to machine or order from a specialist a bushing with a larger outer diameter just to fit the eccentricity. You should solder some solder on the side of this bushing. After this, the bushing will fit in with a slight interference fit.
Replacement
Usually, repairing an old starter that has been used for a long time on a VAZ 2112 does not bring the expected results.
In any case, you need to try to disassemble and reassemble the starter. Moreover, only the solenoid relay may be damaged. Detailed dismantling instructions:
- disconnect the air filter to gain access to the starter;
- remove the terminals from the battery;
- unscrew the terminal with the control cable on the solenoid relay;
- unscrew the starter fixing bolts - you can use a ratchet with a 15mm head;
- pull the device up.
The new starter is installed in place after all terminals are connected. Then you need to check the operation - try to start the engine.
Summary
It is worth noting that a starter without a gearbox has a larger gap between the armature and the stator than a geared counterpart. For this reason, its permissible shaft misalignment is also greater.
And one more piece of advice. If the starter is still disassembled, then it would be a good idea to replace the brushes. The parts are cheap, so waiting for them to fail and then dealing with them separately is not worth it. Of course, for all the operations described above, at least a little experience is required. And, as you know, he is a profitable business. In the end, to get it you have to try. Go for it!
Source
How to disassemble the VAZ 2106 starter with your own hands
Using a 10 mm wrench or socket, unscrew the two nuts on the cover:
Then remove the cover from the studs, as shown in the photo:
After this, you can remove the winding along with the housing, since nothing else holds it:
As you can see above, the starter is disassembled into two parts: the winding with the housing and the rotor. To replace the winding, you will need an impact or power screwdriver to unscrew the bolts on four sides of the housing, as clearly demonstrated below:
After which the winding is removed without any problems:
To remove the anchor, you need to use a screwdriver to bend the plastic bracket that holds it in engagement:
After which it can be removed without any problems:
And to remove the drive coupling, you need to pry off the retaining ring with a thin screwdriver:
And easily remove the coupling:
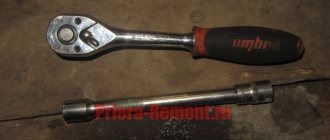
Here is the whole process that had to be done to disassemble the starter on a VAZ 2106 car. To do this, you needed a tool, which is shown in the photo below:
We assemble and replace all parts in the reverse order of removal.
External signs of wear on starter bushings
1. A grinding sound reminiscent of iron rubbing against iron.
2. Poor engine starting, for example, the engine starts 3-4 times when hot.
3. The stator turns the shaft with great difficulty, jams and stops, the iron of the armature touches the metal of the stator.
Description of the bushing wear problem
There is a small gap between the stator and the armature, only a tenth of a millimeter. The slightest misalignment leads to the stator poles touching the armature poles. The misalignment occurs from wear of metal-graphite or brass bushings, which are a plain bearing.
The heaviest wear is observed on the front bearing; it takes the main load.
Failure of the VAZ 2110 starter traction relay
- The first is to bring the Bendix starter gear to the flywheel ring gear.
- The second is its return to its original position after starting the engine.
A breakdown of the solenoid relay may result in the engine simply not starting. There are not many reasons for relay failure. In this material we will try to describe the signs and causes of failure, as well as diagnostic and repair methods.
The following signs may indicate a retractor failure:
- After starting the engine, the starter does not turn off; it rotates at high speed and has a characteristic buzzing sound.
- After turning the key in the ignition switch, a click occurs, indicating that the device is activated, but no rotation of the starter is observed. Sometimes, if there is a break in the coil, the armature is stuck in a certain position, or there is no power, there may be no click.
- After turning the key in the lock, the starter begins to idle without affecting the engine flywheel.
Consequences of using worn bushings
Bushing wear is a very serious malfunction, the consequences of which affect the operation of the entire mechanism. Operating a car with a starter with worn bushings leads to tragic consequences, which include:
· High heating of the armature and stator windings, as a result of which the starter refuses to work.
· Melting of the insulating bakelite due to high temperature causes an interturn short circuit in the winding wires or a short circuit.
· The increased load caused by worn bushings, which is present when the shaft rotates, causes wear of the brushes and the commutator plates in contact with them, which leads to premature wear of the brushes.
How does the starter of the VAZ “Ten” work?
Domestic “tens” are equipped with a starter unit with number 5702.3708, which is essentially a DC electric motor. One of the main components of such a device is a traction relay, as well as a planetary gearbox. The motor is excited by the action of permanent magnets installed inside the unit structure. The body of the mechanism itself is made of steel; it is connected using two pins to the covers of the device.
Designation of the component elements of the device
Also, the design of the starter unit implies the presence of an armature and a stator. The armature is designed to carry out rotation in metal-ceramic liners, as a result of which the rotation is transmitted through a gearbox to the device drive. When the driver turns the key in the ignition, voltage from the car's battery is transferred to the relay windings. As a result of the influence of the magnetic field, the armature is first retracted, causing the gearbox gear to mesh with the flywheel. Accordingly, this leads to the closure of the contact bolts inside the structure.
Then the armature itself remains in the same state, it is fixed in this way with the help of a holding winding. When you turn the key in the ignition switch, this winding is de-energized. Ultimately, this contributes to the fact that the armature returns to its original position (the author of the video is Avtoelectrica HF).
Replacing stator bushings
Let's look at replacing bushings using the example of a Mitsubishi Galant starter.
It is impossible to replace the bushings without dismantling the starter. Having removed the starter, it is disassembled, having previously drawn a control line on the body, which is considered a mark; they are guided by it during assembly.
The wear of the bushings is determined by checking the play and looseness of the shaft in the bushing. Wear can be seen from traces of the armature touching the stator winding.
In order to remove the bushing from the mounting socket, you can use a drift of the appropriate diameter or a bolt of suitable size.
A blind or no-go bushing with an internal diameter of 11 mm, which is located in the starter cover, is removed with a homemade puller. It is made from an M12 tap and a striker limiting the stroke, a nut welded at the end. The tap is wrapped inside the sleeve until it stops, and then, replacing it with a bolt of the required diameter, it is gradually knocked out.
The tap must be screwed in carefully so that there is no distortion and the steel does not break.
In a specialized auto repair shop, the master will have more than one method and more than one device with which you can easily get a no-go bushing.
Bendix replacement
If the reason is wear of the solenoid relay or bendix of the VAZ 2110, you can carry out this work yourself. In order to remove the solenoid relay, unscrew the fastening of the power wire from the starter housing with a 13 key. Using a 8 key, unscrew the two bolts securing the solenoid relay to the starter housing, be careful, when unscrewing the bolts, there is a spring in the solenoid relay, which can cushion when removing hold with your hand. Next, remove the retractor relay piston from the rocker arm hook on the Bendix and install a new retractor relay in reverse order.
How to fix a worn out socket for alternator bushings
After several replacements, the bushing can be easily removed, but care must be taken as there is a risk of breaking the seat. Eccentricity in the crankcase, which appears due to a broken socket, leads to shaft misalignment and jamming of the starter.
To combat eccentricity in a car repair shop, perform the following action:
2. We grind or buy a bushing with an outer diameter of the required size. If there is excess metal, remove it.
3. Solder is soldered to the size of the sleeve.
4. The bushing is inserted into the socket with interference.
It is recommended to change the bushings in pairs; when performing repairs in a car repair shop, an experienced technician will definitely advise you to replace the brushes, check the condition of the bendix and remove nicks that inevitably appear when working with faulty bushings.
Transmission oil is used to lubricate bronze bushings. Metal-graphite bushings or bronze-graphite bushings are self-lubricating. They are characterized by the following properties:
1. Capable of overload and high rotation speeds.
2. Simple design.
3. Long period of work.
4. No vibration.
The most professional replacement of bushings, compared to DIY repairs, will be performed by an experienced technician. In the arsenal of a car repair shop there are any devices with which the repair will be completed faster and will be completed with high quality.
Source
DIY connection instructions
Removing the starter in the engine compartment
So, if you decide to install a new mechanism, then first you will need to dismantle the old one.
How to properly remove and install a new device, what its connection diagram is, read below:
- To begin, turn off the engine and turn off the ignition. Then open the engine compartment and disconnect the battery. All repair work related to the electrical part must be carried out with the vehicle's electrical network de-energized. If the battery is not disconnected during removal, this may result in voltage surges in the system, which can lead to failure of the starter mechanism or other electrical equipment.
- When the battery is disconnected, you will need to dismantle the crankcase protection of the power unit. To do this, crawl under the bottom of the car and unscrew all the bolts that secure the protection, then remove it, and put the bolts nearby so as not to lose it.
- Now you can begin dismantling the element. To do this, first find where the device is located. First of all, you need to unscrew the nut of the upper mechanism lock. Unscrew it with a wrench and set it aside.
- The next step is best done under the bottom of the car. Reach under the vehicle and disconnect the cable that connects to the traction relay terminal. If the connection is bad, there are traces of rust or oxidation on it, then at the same stage, clean the contacts; for this you can use a construction iron brush.
- After these steps are completed, you need to unscrew the nut and disconnect the cable that is connected to the contact screw of the traction relay.
- Next, all you have to do is unscrew the nut, which is located on the lower mechanism lock. Now you can dismantle the starter device and replace it with a more functional and efficient one. Further installation is carried out in reverse order, do not forget to connect all the nuts and bolts. Before connecting wires, check the quality of the contacts to prevent possible problems in the future.
Replacing bushings on the starter with your own hands
The bushings on a car starter often wear out. The problem turns out to be widespread. Worn components no longer perform their functions properly. It turns out that bushings made of cermet and bronze turn out to be consumables. The functionality of the parts depends on the operating format and the quality of the starter design. Therefore, these products have to be serviced or replaced.
We will try to carry out this replacement without damaging the elements and landing positions. Let's find out the symptoms of such a breakdown. It happens that the starter on the car, which starts the engine, stops working. When the bushings are significantly worn out or destroyed, a beating occurs on the axis at the rotor. As a result, there is no contact on the ground of the rotor winding. The starter stops working. If you can’t start the car through the engine, then noise immediately appears.
To replace outdated bushings, you have to remove the starter from the car.
After removing the starter, we begin disassembling it. This will allow you to identify the actual cause of the breakdown. We immediately disconnect the solenoid relay and unscrew the bolts with a screwdriver. You have to pull out the rotor on the bendix plates. We take off the installation cover from behind and look at the rotor axis. Remove the retaining ring with a screwdriver. All that remains is to unscrew the nuts to separate the three components of the starter housing. This is how the knot is disassembled.
Having determined the wear of the starter bushings, we pull them out of the grooves. We install new bushing samples on the assembly.
We remove the cover, knock out the old copy, remove the remains. We press-fit the purchased bushing. The mounted sample does not always clearly fall into the landing site. It is necessary to reduce the component in outer diameter. If you push the part in with force, the lid will burst. We simply process the product with sandpaper.
After installing the new bushings, be sure to lubricate them with lithol and reassemble everything in the reverse order.
Not on all cars the front bushings are installed directly on the starter; if it has an open cone, then the broken bushing must be looked for on the gearbox itself and replaced on it using the same method.
We also advise you to read:
1 Comment
To be honest, changing these bushings is such a hassle, especially if you have never done it, for me it’s easier to send the starter for repairs, where they will select the bushings and make them better and faster, at the same time they will look at the performance of the entire starter along with the retractor
Source
Starter replacement
Replacing the starter in a VAZ 2110
To perform this repair and replacement procedure, the following operations should be performed:
- The car is being prepared for the job.
- The negative terminal of the battery must be disconnected.
- The air filter housing is removed.
- The wires from the traction relay are disconnected with a smooth movement.
- The tip of the power unit is secured with a nut that must be unscrewed.
- Using a wrench, remove the two starter mounting nuts.
- The starter is removed from the engine compartment of the car.
Replacing the starter on a VAZ 2110
The process of assembling the starter is carried out in reverse order according to the points indicated when disconnecting this mechanism.
Starter repair
Replacing the starter bushing for a VAZ 2110
The starter can be repaired. And to implement it, you need to disassemble the part. To carry out the process of disassembling and repairing the mechanism, the following steps should be taken:
Note: Part repair may vary depending on the cause of the failure.
- The output of the traction relay is connected to the tip of the wire with a small nut that must be unscrewed.
- The wire together with the tip is disconnected from the traction relay.
- The traction relay has two bolts that are attached to the starter. They need to be removed.
- The traction relay is disconnected from the starter.
Note: Each traction relay mechanism must be checked. Perhaps the cause of the malfunction lies in this device. If there is a malfunction, the relay is replaced.
- The tie rod nuts are unscrewed and removed.
- The stator is carefully disconnected from the cover. It must be removed from specific studs.
- A planetary gearbox has a set of gears. The central gear is removed.
- This should be followed by dismantling the remaining three gears.
Note: the condition of the gearbox itself and the gears is checked. In case of visible damage, the mechanism or its individual parts are replaced.
- The drive lever support is moved away from its location with a screwdriver.
- The entire drive with its components (shaft, lever, support, external gear) is disconnected.
Replacing starter bushings for VAZ 2110
Note: The drive is being checked for problems. If problems are detected, the drive mechanism is replaced with a new one.
- The ring that limits the starter drive stroke is removed.
- The retaining ring is disconnected from the shaft. It and the travel limiter ring are dismantled.
- The drive with all its parts is disconnected from the shaft.
- The drive lever clutch ring is removed.
- The washer, coupling and other parts are separated from the drive.
Note: If the starter drive needs to be replaced, further disassembly may not be necessary.
- The retaining ring of the drive shaft support is removed.
- The drive shaft has a washer, a support, a rubber sealing ring, and an external gear of the gearbox. These details are removed.
- The brush assembly has two mounting bolts. They must be unscrewed and removed from the mechanism.
- The back cover is detached.
- The brush assembly is removed from the armature commutator.
- The front armature shaft support is removed.
- The thrust washer is removed from the armature shaft.
- The armature is removed from the stator.
- An inspection is carried out for damage to the commutator and armature winding.
Note: if charred areas are visible on the winding, the armature can be replaced.
- The collector, if necessary, is sanded until clean. The paper can be wound on an electric drill. The anchor is washed with water and detergent diluted in it. Wiping with a dry cloth is carried out, the part is sprayed with air until all moisture is removed.
Replacing bushings on the starter with your own hands
Wear of starter bushings is a fairly common problem in cars that have been in use for a long time and require maintenance. Despite the fact that at the production stage a significant resource is put into these parts, over time they are still subject to critical wear and tear and become unable to perform their function. That is, metal-ceramic and bronze bushings, in fact, are consumables, the service life of which depends on the quality of manufacture and intensity of use. Therefore, sooner or later the car owner has to contact a car service for a replacement or resolve the issue independently. But to do this, you need to know how to change the bushings on the starter without damaging the parts themselves and their seats.
Starter repair procedure:
1. First, you need to remove the starter from the car. Now let's start disassembling the part.
2. You need to unscrew the nut.
3. Disconnect the busbar from the contact bolt of the traction relay.
4. Carefully remove the two bolts that hold the traction relay.
5. The traction relay must be removed from the starter.
6. Set aside the starter itself and remove the armature from the traction relay. To do this, lift it up and the armature loop is released from the lever.
7. Now we return to the starter itself. Unscrew the tie rod nuts.
8. The next step is to remove the cover from the drive side with the gearbox and the same part assembled.
9. The cover must also be removed from the side of the commutator with brushes and brush holders.
10. Then remove the gear from the anchor shaft.
11. Pull the armature itself out of the starter.
12. There is a washer installed on the anchor shaft on the drive side (pay special attention to this).
13. Using a screwdriver or other thin object, remove the anchor shaft support.
14. Then use a small screwdriver to remove the two tie rods from the starter cover. In general, it is not necessary to remove them; if you are in a hurry, you can leave them, but it is more convenient to remove the drive and gearbox without these pins.
15. After this, remove the three gears of the gearbox. A starter breakdown may be due to the fact that these gears have damaged, broken teeth or needle bearings embedded in the gears. If this deficiency is present, then replace the parts and the starter will work again.
16. But, if the gears are in order, then continue to disassemble and check the starter for damage further. You need to remove the gearbox with the drive from the cover by first pressing the starter drive gear.
17. The support with the seal must be removed from the lever.
18. Then pull the support out of the seal. Inspect the support. The plastic part must not be damaged or severely worn. If you see that the support is deformed or the rubber gasket has hardened, replace them.
19. Using a hammer, knock the restrictor ring off the retaining ring using a suitable mandrel.
20. Carefully remove the retaining ring first and then the restrictor ring.
21. Remove the drive assembly from the drive shaft.
22. Unscrew the lock ring of the lever.
23. Then remove the lever with the washer and driver.
24. Use a screwdriver to unscrew the lever spring.
25. Now you can remove the lever from the connection and separate the halves of the lever.
26. Remove the internal gear retaining ring.
27. Next, disassemble the internal gear and remove the drive shaft support from the shaft.
28. Carefully remove the O-ring from the pore. Examine it carefully. A damaged, deformed, hardened ring has a bad effect on the operation of the entire starter. It definitely needs to be replaced.
29. The next step is to remove the liner from the support.
30. On the commutator side, remove the two screws and remove the brush holder.
31. Using a screwdriver, pry up the brush clamps.
32. Then remove these retainers and their retainer springs. Again, replace deformed or damaged parts, heavily compressed or bent, or torn springs.
33. Remove the brushes themselves from the brush holder guides.
34. Non-insulated brushes must be removed.
35. Then remove the cardboard insulation pad. If it is damaged, compressed, torn, replace it with a new one.
36. Remove the insulated brushes with connecting bars.
38. Using a test lamp powered by 220 V alternating current, check the condition of the armature winding. Conduct the lamp voltage to the commutator plate and the armature core. If everything is in order, the lamp should not light. If it still lights up, it means that the armature winding has short-circuited. In this case, simply replace the starter armature with a new one.
39. Holding the overrunning clutch, turn the starter gear in both directions: clockwise the gear should move absolutely freely, and counterclockwise it should not rotate at all. If anything is broken, replace the drive.
40. Then place the starter drive on the drive shaft. If everything is in order, then it should move freely along the shaft splines without jamming or stopping.
41. If you see that the drive parts are badly worn, deformed, or damaged, replace the drive. If you find nicks on the crown of the gear teeth, sand them with a fine-grit sanding wheel. Choose a circle with a small diameter.
42. Inspect the bushings in which the shafts rotate. They are installed in the starter cover on the drive side, the commutator side, the armature shaft support and the drive. If the bushings are deformed or scored, replace the covers or supports with broken bushings. Cracked covers and supports should also be replaced.
43. Carefully inspect the starter itself, and if there are traces of anchor contact on it, replace the cover and intermediate support with a new one.
44. Worn brushes up to a size between the working surface and the terminal of less than 3.5 mm, replace.
45. Brushes should move freely towards the brush holder. And the brush holder should not have cracks, chips, or defects. Check if this is true. If everything is in order, then proceed to the next stage of repair. If there are any deficiencies, replace the parts.
46. Proceed to inspect the drive shaft. Its elements should not show signs of damage, significant wear or deformation. If there is plaque, remove it with fine glass sandpaper. Work carefully so as not to damage the parts.
47. Using an ohmmeter, check whether the contact plate of the traction relay is closed by the contact plate. If they do not close, replace the parts or simply repair the relay.
50. Install the brush holder into the starter separately from the cover on the commutator side. To assemble and install this part, use a bushing whose diameter (mark 1) is equal to the diameter of the collector (approximately 30 millimeters).
51. Install the assembled brush holder into the starter housing until it stops, then remove the bushing and install the cover on the starter from the commutator side. The renovation is complete.
And your VAZ starter is like new again!
Source
How to replace VAZ-2109 starter bushings
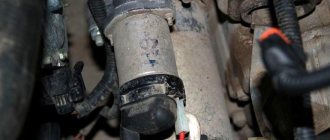
Before you change the bushings on the starter, you will have to dismantle it, but first remove the terminal from the battery. Then you need to disconnect two wires from the solenoid relay. If to disconnect the thin one (which powers the relay winding) you just need to pull it, then removing the thick conductor requires using a “13” wrench to unscrew the fixing nut. Next, using the same wrench set to “13”, unscrew the three nuts that secure the starter to the clutch block.
Disconnect the wires at the back of the relay
After removal, the device must be disassembled, which will allow us to determine whether the cause of the malfunction really lies in worn bushings. To do this, first disconnect the solenoid relay by unscrewing the two bolts using a screwdriver. Now you need to remove the rotor from the bendix plates. Using the key set to “10”, remove the rear cover of the starter, after which access to the rotor axis will open. The retaining ring on it must be removed using a flat-head screwdriver. At the last stage of disassembly, all that remains is to unscrew the nuts on the two studs so that all three parts that make up the starter housing are disconnected. This completes the disassembly process. You will learn further about how to replace the starter bushings without resorting to the help of a specialist.
Replacing the rear starter bushing
If, as a result of an external inspection, it was revealed that one or both bushings are worn out, they must be removed from their seats and functional analogues installed. Even in cases where only one part turns out to be unsuitable for further use, both the front and rear parts are usually replaced. First, let's look at how to correctly replace the bushing located in the rear cover of the VAZ-2109 starter.
The dismantling technology is not much different from how the rear starter bushing is replaced on all classic VAZ models. In other words, you just need to remove the back cover and knock out the old part and its remains. After this, the new bushing is pressed in, and the work is completed. True, very often the installed sample fits into the mounting socket too tightly. In this case, its outer diameter should be slightly reduced - you cannot push it in with great force, since the lid may burst. Therefore, simply sand the part with sandpaper. It is not recommended to use lubricants during installation, otherwise the bushing may rotate and break the seat.
Replacing the front starter bushing
The front starter bushing bears a larger portion of the load when starting the engine, and therefore wears out much faster. If the starter on your car has failed for the same reason and you are interested in how to replace the VAZ-2109 starter bushing located in its front part, just take into account the information below.
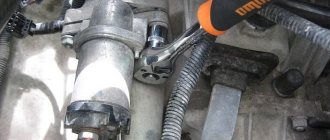
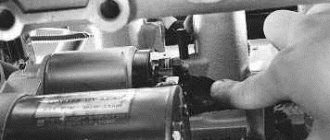
First, I would like to draw your attention to the fact that, unlike the classic VAZ, the front bushing of the Nine is not located in the starter housing - it is pressed into a special seat in the clutch housing. Therefore, to remove it, you do not need to disassemble the starter, but you will still have to dismantle the device to gain access to the mounting socket. You won't be able to remove the part with your bare hands - for this you will need a tap with a diameter of 14 mm with a welded handle. It is also advisable to put a heavy metal clip on the tool, which will facilitate the extraction process.
After screwing the tool in until it stops, try to pull it out along with the bushing
The tap must be inserted into the hole in the bushing and tightened until it rests against the crankcase. Next, try pulling the handle. If you can’t remove the product with your hands, then you can definitely knock it out of the holder by hitting the holder with a hammer. Before replacing the front bushing on the starter, thoroughly clean the seat of any dirt.
Do not rush to install the part in its place without making sure that it fits in size. Quite often, after pressing, the bronze bushing shrinks, its internal diameter decreases and the starter shaft does not fit into the hole. After installation, it will not be possible to increase the diameter in any way, so adjustments should be made in advance using a special tool - a reamer.
None of the operating and repair manuals supplied with the car indicate how to correctly rotate the starter bushings, which is why many car enthusiasts often find themselves in a difficult situation. This is actually a very simple operation that can be done easily with a vice and a suitable reamer. First you need to put the part on the starter shaft and, if it turns out that the part fits tightly, you need to clamp it in a vice and increase the internal diameter using the above tool. You need to unfold the product gradually so as not to overdo it. Check the diameter regularly by placing it on the starter shaft. If in the end the bushing fits freely and without unnecessary wobble, it can be installed in the seat in the clutch housing. The starter is installed on the vehicle in the reverse order of removal.
Removing the starter
Before removing the starter, you need to prepare two keys, 10 and 13, they will be needed in order to remove the terminal from the battery. To avoid short circuit, first remove the negative terminal. If your car has an injector, you will have to remove the air filter located above the starter.
The VAZ-2109 starter can be dismantled in two ways: through the top or through the bottom. If the second option is chosen, then you need to temporarily remove the crankcase protection so that it does not interfere. Next, you need to disconnect the solenoid relay from the two wires. First, we disconnect the power (thick) wire through which voltage is supplied to the starter, then the thin wire needed to power the relay winding.
The thin wire can simply be pulled out by hand. To turn off the power, you need to use a 13 key to unscrew the nut from the contact of the solenoid relay. After disconnecting the wires, move them aside.
Next, you need to unscrew the three nuts securing the starter to the clutch block. To do this, use the key number 13.
After unscrewing the nuts, you need to pull the body to the right and move it away from the studs. Now you can pull the starter out through the top or bottom and start repairing it.
Place the dismantled starter on a workbench and remove all dirt from it. Disconnect the solenoid relay, which is secured by two screwdriver-head bolts. Next, remove the anchor from the metal bendix plates. Take a 10mm wrench and unscrew the rear starter cover. After removing the cover, you will have a view of the starter axis, from which you need to remove the locking ring. It can be removed using a flathead screwdriver.
The starter housing on the “nine” consists of three parts, which is held in place by three studs that tighten it. In the process of unscrewing the nuts on the studs, all parts of the unit are disconnected, so disassembling the starter will not be accompanied by difficulties. There are two types of starters: with and without a planetary gearbox, the collectors of which are slightly different.
We recommend: How often should you change the air filter in your car?
If a planetary gearbox is installed in the VAZ-2109 starter, its brushes will be located parallel to the body, in the second option - perpendicular to the starter axis. The old bushing is securely pressed into the starter housing, so you will have to try hard to remove it. To get rid of the old bushing, take a hammer, a piece of pipe of suitable diameter, or
mandrel. Place it against the bushing and use sharp, short blows of a hammer to knock it out of its seat. The main thing is not to overdo it in the process, since the starter cover can burst at any moment, and there will be nothing to replace it with.
To avoid having to look for a similar starter from which you can remove the cover, be extremely careful. Before pressing in a new bushing, it is advisable to go over the installation site with fine-grained sandpaper. To press in a new bushing, it is best to use the old one, since it is made of soft metal and will soften the impact force during installation, this will prevent cracks from appearing on the cover body. While the starter is disassembled, inspect the brushes; they may need to be replaced. Reassembling the starter is done in reverse order.
To check the starter's operation, connect it to the battery. Smooth, quiet operation will confirm that the process of replacing the bushings and assembling the starter was completed correctly. Then you can install it in its place.
Replacing the starter bushing on an Oka car
Despite the fact that the design of the starter on the Oka is implemented on a principle similar to the VAZ-2109 (the front bushing is also located in the clutch housing), the execution of the engine starting mechanism turned out to be extremely unsuccessful, as were most other components of this car. The main reason for this is the desire of designers to reduce the cost of the production process as much as possible. It is for this reason that bushings are manufactured using technology taken from powder metallurgy, and a combination of graphite chips and bronze is used as the starting material. Because of this, these parts have a very small margin of safety, which negatively affects their service life.
For those car enthusiasts who are interested in how to replace the starter bushing on the Oka, you need to know about one more drawback of the engine of this car. We are talking about a seat in the clutch housing itself, which breaks down unevenly during long-term operation. Therefore, if you buy a standard size product (external diameter 13.03 mm) to replace it, then most likely it will fit into place too loosely and even begin to dangle. This should not be allowed, as the part will very soon become unusable. Knowing this feature, experts recommend using a repair size bushing (external diameter 14 mm), but it often turns out that its diameter does not correspond to the size and even shape of the seat.
In the case where the development of the socket is relatively the same around the entire circumference, the problem is solved by simply adjusting the outer diameter of the sleeve using sandpaper. If, during replacement, you find that the seat is unevenly divided (for example, in the form of an ellipse), in this case it will have to be leveled. At the same time, experts do not recommend trying to unscrew the front bushing socket yourself using hand tools, since in this case it will not be possible to maintain alignment with the starter shaft, which is fraught with problems in its operation. If you find yourself in such a situation, it is better to contact specialists who, using special equipment, will turn the hole in the right direction. By the way, many car service centers manufacture repair-size starter bushings from bronze.
You can make a part of the required diameter at specialized service stations
After reading this manual, you were able to see for yourself that replacing starter bushings on a “nine”, as on any other car, is not the easiest task. Difficulties can begin already at the stage of removing the starter due to the inconvenience of work and end with pressing in the bushings. Therefore, when performing this type of repair, be patient, take your time, and follow the instructions strictly.
Source
Design and operating principle
To understand the features of the repair, you must first study the design of the starter and understand how it works for the benefit of your car.
Let's start with the design. It includes four main nodes.
| Knot | Peculiarities |
| Electric motor | It transmits direct current through four brushes |
| Freewheel with gear | A clutch or bendix drives the flywheel of your car's engine. |
| Traction relay | Serves to extend the bendix with gear when turning on the electrical appliance |
| Bushings | Ensure easy rotation of the clutch, rotor, and gear. One bushing is located inside the starter, and the second is in the clutch housing. |
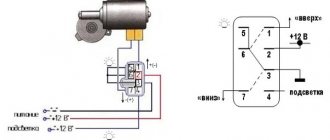
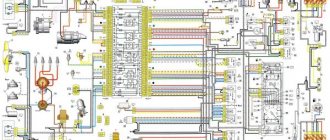
Device diagram
Having familiarized yourself with the starter diagram, you can discuss the principle of its operation.
The operating principle is to convert an electrical signal into the rotational movement of a drive gear. Current is transmitted through the brushes to the poles of the electric motor. At the same time, the clutch extends and the gear is connected to the flywheel ring. To start the engine you need a quick but easy rotation of the starter. When the engine starts, the clutch returns to its original position.
We recommend: Do-it-yourself illumination of car rims as a stylish type of tuning
Shaft misalignment
In most cases, this occurs due to failure of the plain bearings. Of all the bearings, it is the front one that receives the maximum load when the starter is operating, so it is replaced most often.
Despite the hard work of the front bearing (they are brass bushings), the shaft journals do not receive much load and cannot be replaced very often.
Replacing the front hub step by step
Step 1. Disconnect the wires from the battery and from the starter itself.
Step 2. Swap the lower mounting bolt (unscrew from one and screw in from the other). This step is done to fix the engine. Otherwise, it may simply fall out. If necessary, jack up the engine by resting the jack against the transmission.
Step 3: Remove the starter after removing the remaining mounting bolts.
The last step is considered the most difficult, so it should be described in more detail:
Eccentricity and how to fix it
Over time, after several bushing replacements, this procedure can be carried out by hand. However, the bushing has a tendency to rotate during operation. This causes the seat to break. This in turn leads to the formation of eccentricity (the starter shaft is warped). And this brings us back to the original problem, that is, everything starts to go in circles.
Fortunately, this problem is not new in the world of auto mechanics. There are a number of procedures: calculate the dimensions of the eccentricity; buy a bushing with a larger size than that obtained in the previous procedure. Remove excess; solder a few millimeters on the sides to the new bushing; install the bushing. The interference should be small;
In order for this problem to be forgotten for a long time, the rear bushings also need to be replaced. This is not difficult at all, the starter has already been disassembled and you do not need to disconnect it again. At the same time, you can check the condition of other starter parts and replace them if necessary.
Source
Typical faults
It is better to start diagnosing the starter even before you remove it.
After dismantling, some signs of failure, by which the source of the problems can be determined, can no longer be determined.
Signs of a faulty element include:
Checking the dismantled unit
Before blaming the starter for everything, take the time to look under the hood and check the condition of the terminal contacts and connectors. Also pay attention to whether everything is ok with the battery. Only after this can you start working on the starter.
Starter replacement price
The work of replacing the VAZ starter can be done either independently or entrusted to a car service center. Basically, such an operation is inexpensive, and also takes a little time, especially if experienced specialists take on this matter. The price of replacing a starter on VAZ cars depends on the region and on the complexity of the model itself. For example, in Moscow or St. Petersburg, work will cost more than in some regional center. Also, on a carburetor “nine”, the starter is somewhat easier to replace than on a Lada Grant with a 16-valve injection engine - it is more difficult to get to the engine starting device on a Grant.
Source
Node malfunctions
The most common starter breakdowns are divided into several types. These include:
- Damage to the electrical circuit. A sign of such problems is slow rotation or complete absence of it at the crankshaft when starting the internal combustion engine. The reasons for this phenomenon may be a discharge of the battery, rupture of the contacts of the ignition device, unreliable fixation, wear of the wires, or violation of the integrity of the wiring suitable for the relay contact group. If, when starting the internal combustion engine, the armature does not respond and the relay does not operate, then the cause of the failure is most likely due to a break in the solenoid relay wire. In the absence of the described “symptoms”, it is necessary to dismantle, check the plates for short circuits, and the presence of traces of “burning” in the collector system.
- Worn starter brushes. The presence of such problems may be indicated by difficulty starting the car, but not always. The reason for this phenomenon may be “hidden” in a battery failure. Complete wear of the brushes leads to the spring “resting” against the brush holder (contact is ensured only due to its mass). This can be easily checked by changing the position of the starter. The reason for premature wear is the misalignment of the brushes during the operation of the starter.
- Broken traction relay. This is indicated by a failure of the internal combustion engine, since it will not be possible to start the engine without a working relay. The “symptoms” of a malfunction of this starter element include its rapid rotation, even after starting the internal combustion engine, idling movement (without contact with the flywheel of the engine, which does not start), and a click after turning the key in the ignition device. It may not exist if there is a break in the coil, the armature is jammed, or there is no power for some reason.
- Lack of starter rotation with a characteristic “buzzing” sound. This phenomenon indicates the occurrence of a short circuit in the electrical circuit, in which power is supplied to the brushes of the electric motor. However, it is in working condition. In such a situation, the holding coil often does not work and the bendix does not move. Its gear cannot engage the flywheel gear, and the electric motor runs in idle mode. The reason may be that the force of the retracting element “enters” the bendix through a lever made of plastic (has the shape of a grip). If the movement resistance of the bendix is high, then the plastic elements break down. As a result, it is not moved to the working position and the starter rotates, but does not transmit torque to the flywheel. Another reason for the failure of the rotor can be severe wear of the teeth, which are located on the rotor shaft of the electric motor. Do not forget that complete destruction of the mentioned teeth can also cause failure. This type of malfunction is related to the breakdown of the motor and is not related to the functioning of the drive. The presence of such a breakdown is indicated by the activation of all starter mechanisms, that is, the rotation of the electric motor and the transition of the bendix to the working position. It can be locked by turning the key in the ignition.
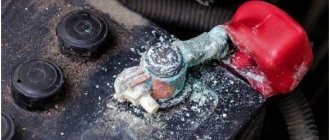
The main malfunctions of the unit include: the appearance of oxide on the wires and terminals, failure of the traction relay and traction winding, wear of the brushes, breakage of the armature
The listed faults can cause more serious problems if they are not corrected in time. Ignoring problems will most likely lead to vehicle failure at the most inopportune moment. The best solution is to contact a specialized service station when the first signs of the listed problems appear.
VAZ 2110 starter - which one to choose: with or without gearbox?
Having decided to replace the starter, many owners of domestically produced cars are faced with the fact that they cannot decide which device to choose: with or without a gearbox.
So, a gear starter is a starter with a small motor (it turns the gearbox), high speeds and lower current. What distinguishes it from the usual one is: large starting torque, high power, more than half the weight, improved starting ability, extended service life and ease of maintenance.
So the conclusion about which starter to choose for the VAZ 2110 suggests itself, although, of course, it’s always up to you to decide!