How to remove a mirror element on a Priora
Priora Lada (2013+).
Disassembling the outside rear view mirror We disassemble the outside rear view mirror to replace the heated reflective element, gear motor unit or side turn signal. The work is shown on the left mirror; we disassemble the right mirror in the same way. At low ambient temperatures, in order not to split the reflective element, we recommend removing the mirror and gradually warming it up with a household hairdryer or warming it up indoors.
To replace the heated reflective element, turn the reflective element all the way down.
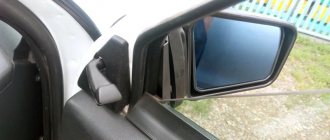
Pulling the reflective element towards you, press the upper latches of the element with your finger. . remove the element from the mirror body (arrows indicate the upper clamps of the element).
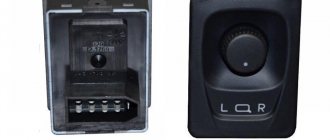
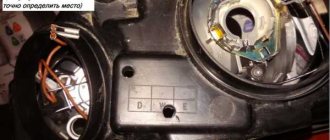
Disconnect the wire block from the pointer block. _
. and remove the turn signal.
The indicator is equipped with LEDs; if they fail, the turn indicator assembly must be replaced. Install the side turn signal in the reverse order.
I think many will find my photo report of how the mirror is disassembled useful. It all started with the sound of a clatter coming from these mirrors when the music was turned on - the door was taped with noise. And this rattle got to me. It turns out that without knowing, you can easily break the mirrors during disassembly.
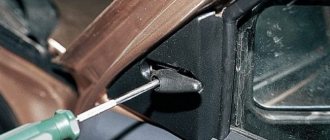
1. Using the handles, tilt the lower part of the mirror away from you until it stops. A gap appears at the top. You need to insert a screwdriver into it, see photo
2. There are latches inside that fasten the mirror to the electric drive.
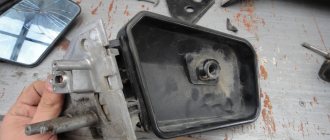
Having reached the mounting spring, I decided to tighten the nut tighter - the breakpoint probably appeared from its loosening.
And just in case, I laid a noise between the connection of the mirror and the mounting base.
Then I reassembled everything and installed it back. THE RATTLE DISAPPEARED.
There is an idea to add repeaters to these paws like the deluxes. I’ll post a separate report on how to do it.
For those who find it useful, click (like)
Issue price: 0 ₽ Mileage: 25,000 km
How to remove and install the outside rear view mirror on a Priora
To perform the work of removing the outside rear view mirror, you will need a set of screwdrivers.
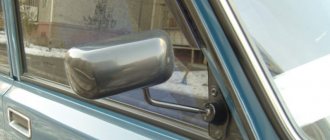
We pry it off with a screwdriver...- . .. and remove the decorative trim.
- Holding the mirror with your hand, unscrew the three mounting screws.
- We remove the mirror.
- Disconnect the heated mirror wiring harness connector.
- Disconnect the mirror adjustment wiring harness connector.
- Reinstall the mirror in reverse order. Adjust the position of the mirror using the oval holes.
Video on replacing a mirror:
The driver of a Lada Priora may encounter the problem of glass rattling, especially when the music is on. Despite all your efforts to eliminate this problem, the reason may be in the mirror design itself. As a result, you will have to disassemble it sooner or later, since the noise not only gets on your nerves, but also distracts you while driving.
Mirror elements of Lada Priora
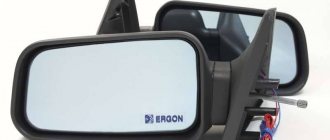
Set of old-style mirror elements (glasses) with neutral anti-reflection and heating for Lada Priora
Set of old-style mirror elements (glasses) with blue anti-glare and heating for Lada Priora
Old style mirror element (glass) with neutral anti-reflection and heating for Lada Priora
A set of mirror elements (glasses) of a new type with heating and blue anti-glare for Lada Priora 2
Mirror element (glass) of a new type with heating and neutral anti-glare for Lada Priora 2
Mirror element (glass) DAAZ with heating and neutral anti-glare for Lada Priora
Old-style mirror element (glass) with blue anti-glare and heating for Lada Priora
Heating element in the side mirror on Lada Priora
Set of DAAZ mirror elements (glasses) with heating and neutral anti-glare for Lada Priora
A set of mirror elements (glasses) of a new type with heating and neutral anti-glare for Lada Priora 2
Mirror element (glass) of a new type with heating and blue anti-glare for Lada Priora 2
Replacing mirror elements
To replace the mirror elements of the Priora side mirrors, you will need a flat-head and Phillips screwdriver. Use a Phillips screwdriver to unscrew the side mirror from the door. Next, press on the bottom side of the Priora mirror element, a gap will appear. Insert a straight screwdriver into the resulting gap and unclip the lock of the mirror element. Then, disconnect the block with wires from the heater of the mirror element of the Lada Priora. Finally, you can unscrew the side mirror adjustment mechanism. Another replacement option is to simply break the mirror element with a hammer. Installation is carried out in reverse order.
Owners of a Priora in an old body can install turn signal indicators on the mirrors. Of course, you'll have to tinker with the wiring. On mirrors with turn signals, in addition to the adjustment and heating pads, a third pad is mounted. Turn signal block. On the Internet you can find a wiring diagram for the kit for installing a turn signal in the Lada Priora mirrors.
After all the manipulations with replacing mirror elements and installing repeaters. Mirrors should be adjusted to minimize blind spots. There is a universal way to adjust the mirrors, taking into account the body structure of the Priora. All you need to do is ensure that all mirrors do not reflect the same objects. If a car is visible in the left mirror, then it should not be visible in the interior mirror. Thus, the car behind will move from one mirror to another until it overtakes.
Mirror elements of the Lada Priora are a fragile part of the car, without which driving becomes dangerous. Mirrors must be kept clean and tidy. Moreover, you can replace the mirror elements yourself, with just a couple of screwdrivers on hand.
Replacing side mirror glass using the example of Priora, 2110, Ford Focus and Honda Fit
You can solve the issue of replacing the side mirror glass without contacting car service specialists, who will require a tidy sum for such repairs.
Often, due to careless driving or ill-conceived construction of narrow lanes and driveways, the problem of damage to the side mirrors, as the most protruding elements of the car, arises. Sometimes you have to change the mirror completely, but there are times when you can limit yourself to replacing the mirror element of this block. There are also other reasons that can affect the disassembly of the side mirror.
This could be preparation for painting or a desire to repair this part of the car.
How difficult it is to carry out this operation on your own on cars of popular brands will be discussed in today’s article. So, number one of our patients today is Lada Priora. Replacing the side mirror glass
on a Lada Priora is not a particularly difficult process. This requires a flathead screwdriver. To remove the mirror element you need to:
- 1. Apply pressure on the lower part of the mirror until a gap forms on top;
- 2. Insert a screwdriver into the gap that has formed and, using lever pressure with a screwdriver, disconnect the fastening clamps;
- 3. Remove the mirror by disconnecting the electrical contacts;
- 4. Then, in strict reverse order to the previous one, install the mirror element in its place.
All. The operation is completed.
Dismantling the mirror element of the people's car VAZ 2110 can be done in two ways.
{banner_content}
The first of them is carried out in two stages:
- 1. Press down the lower part of the surface of the mirror element until a gap forms at the top between the glass and the side mirror housing;
- 2. Then, using a curved object, or if there is none, a screwdriver through the resulting gap, apply pressure to the center of the mirror from the inside. With this impact, its retaining clips should become detached. It is highly not recommended to press on the side with a screwdriver, as there is a possibility of damaging the mirror.
The second method
is carried out with the side mirror removed. You need to sharply hit the removed mirror body on a flat, non-hard surface (you can use a board or table surface, having previously covered it with a soft cloth); the mirror is disconnected from the locks by inertia.
Ford Focus
. You will need two hands (preferably at least one right one). Perform the actions in the following order.
- 1. Press on the side of the mirror surface closest to the car body. It should come off on the opposite side;
- 2. Grasping the protruding side of the mirror, pull it in a horizontal direction opposite to the location of the car. The latches should come loose. After these simple manipulations it should be in your hands.
You can reinstall the mirror in reverse order. Honda Fit and Honda Jazz
. Replacing the side view mirror glass on Honda – Fit Honda – Jazz cars is carried out as follows.
- 1. Gently press the upper part of the mirror surface with your hand, while the lower edge should stick out;
- 2. Grasping the lower part of the mirror, disconnect it from the clamps and hooks securing it to the drive;
- 3. Disconnect the electrical contact for the heated mirror.
As usual, reinstallation must be done in the reverse order of dismantling. Do not rush to contact a car service or change the entire side mirror. As you can see from the above material, replacing the side mirror glass is not a difficult task. It is quite accessible to perform on your own.
Life hack: side mirrors on Priora - removal and installation
Good visibility is important for safe driving. While driving, the driver always has to “keep his finger on the pulse” so as not to get into an unpleasant situation (accident). The side mirrors on the Priora are initially made quite well - the viewing angle is enough to sit still when reversing or changing lanes. This is not a joke, it’s really like a Kruzak review. After the Priorovskie cars I get into other cars and I miss my familiar overview. Mirrors on Priora come with turn signals (repeaters); this is the Special Edition version of Lada (luxury) Priora cars. The price of these is naturally more expensive, but not by much 900 rubles. They can be installed on a regular Priora. Turn signals in mirrors are a newfangled theme and they look beautiful and are also practical.
The side mirrors of the Priora 1 car have been improved along with the restyling of the car. In the SE luxury version, which is essentially the most expensive and complete package of the car, these devices have changed, the car has become even more convenient “for the driver”. Some people buy such SE mirrors on a Priora 2 and install them even if they originally bought a car with a more economical package.
All that remains is to properly disassemble the mirror and make friends with the wires. Indeed, to install the modernized version you will have to put a lot of effort into finding reasons. You can do simple tuning, if you want to change the appearance to a more curly one - just put covers on the mirrors. It seems like a small change, but the car looks more solid with them.
Who hasn’t felt the thrill of using a car after ten, or a classic, freezing the car in winter - heating seems to be a common thing, but this was not the case on the VAZ. The heated mirrors of the Priora car are implemented using spirals. Often turning on heating in wet weather, a mark forms on them. Despite this, after 6 years of use, they have not faded.
Standard side mirrors - article number and price
For the Lada Priora car, standard parts with electric drive have catalog number 2170-8201017. Price – about 3,100 rubles per set.
Compared to the SE version, they have one design disadvantage. The surface area does not completely cover the mirror, which can also be “usefully” occupied. This shortcoming was corrected with the SE, where the mirror elements were actually made larger.
Heated mirrors on the Priora received a larger mirror element. Thanks to this, the driver does not have to lower them when reversing – even this difficult-to-reach area is visible. For the SE version, repeaters were added to the mirrors. Priora with electric drive, repeater and heating (catalog number 2170-8201021, price - about 3,800 rubles per set) was much more expensive than conventional versions.
Basic faults
Additions to the conventional mirror element make driving even more comfortable. Just in case, the repeater makes it clear to inattentive traffic participants where the driver is going to go. Heating will promptly evaporate moisture - raindrops, and will not leave stains that distort the image. The following malfunctions may occur during operation of the machine:
- The fasteners have become loose. Each part is held in place by several fasteners at different points. They may become so loose that tightening them will be useless. Everything will depend on the severity of the damage. In some cases, replacing the fasteners will be sufficient.
- The heating does not work. Check the connection of the wire blocks. Perhaps it is enough to strengthen the wire connections so that they no longer come loose.
- The electric drive does not work. Adjusting the position of mirror devices while sitting in your seat is much more convenient than doing it manually. Check the wiring.
- Turn signal repeater. If the repeater does not work, it means the signal is not reaching it. The problem, again, is the wiring.
- Broken mirror element. It will be enough to replace it with a new part, but during the replacement you should be extremely careful. It is important to prevent splinters from getting under the cover.
How to disassemble a mirror (left and right) on a Priora car - removal and installation
Replacing a device that is installed on a car of the “Norma” or “Standard” trim levels with the SE version becomes a good way of tuning. In order to disassemble these devices, you will have to disassemble the interior trim. Carry out the work as follows:
- Remove the screws that secure the A-pillar trim.
- Pull part of the trim towards you.
- The part is held in place by three bolts. First, lower the glass, then slowly unscrew the bolts, taking the reflective element with your other hand.
- Do not jerk the device. First, disconnect the wires - there should be two terminals going through them. The first is for heating, the second is for position adjustment.
- Place the new part in place of the old one and secure it with bolts.
Connecting the mirrors of a Priora car should be done according to the following diagram:
- the green wire goes to the black-green one;
- red wire - to blue-red;
- connect the blue wire to the black-blue one;
- brown wire - to red-blue (second block);
- black to black wire (second block; This is the “minus” for repeaters and heating).
If you change this part in winter, when the outside air temperature drops below zero, you will have to be more careful with the mirror element. Once you remove it, you should warm it up using a hair dryer or heat gun. The surface may become chipped or “burst,” so that it remains useless. You will have to prepare for the replacement in advance by obtaining the necessary tools.
Why did it happen so?
Perhaps the automatic requests do not belong to you, but to another user accessing the network from the same IP address as you. You need to enter the characters into the form once, after which we will remember you and be able to distinguish you from other users exiting from this IP. In this case, the page with the captcha will not bother you for quite a long time.
You may have add-ons installed in your browser that can make automatic search requests. In this case, we recommend that you disable them.
It is also possible that your computer is infected with a virus program that is using it to collect information. Maybe you should check your system for viruses.
If you have any problems or would like our support team, please use the feedback form.
Upon arrival at the garage I saw the following picture:
When I bought it, the car had terrible mirrors, which had peeled off and turned yellow over 8 years of service. Also, the heating on the left mirror partially stopped working, and on the right mirror it stopped working completely.
I bought new heated mirror elements:
Changing the elements is very simple; to do this, you need to press the bottom part of the mirror all the way, which will cause a gap to appear on top. Through this gap you need to bend the latches with a flat screwdriver, they can be seen in photo No. 6, just bend 4 latches.
Priora Lada (2013+). Disassembling the outside rear view mirror
We disassemble the outside rear view mirror to replace the heated reflective element, gear motor unit or side turn signal. The work is shown on the left mirror; we disassemble the right mirror in the same way. At low ambient temperatures, in order not to split the reflective element, we recommend removing the mirror and gradually warming it up with a household hairdryer or warming it up indoors.
To replace the heated reflective element, turn the reflective element all the way down.
Pulling the reflective element towards you, press the upper latches of the element with your finger. . remove the element from the mirror body (arrows indicate the upper clamps of the element).
Disconnect the wire block from the pointer block. _
. and remove the turn signal.
The indicator is equipped with LEDs; if they fail, the turn indicator assembly must be replaced. Install the side turn signal in the reverse order.
How to remove a mirror element on a Priora
Priora Lada (2013+). Disassembling the outside rear view mirror
We disassemble the outside rear view mirror to replace the heated reflective element, gear motor unit or side turn signal. The work is shown on the left mirror; we disassemble the right mirror in the same way. At low ambient temperatures, in order not to split the reflective element, we recommend removing the mirror and gradually warming it up with a household hairdryer or warming it up indoors.
To replace the heated reflective element, turn the reflective element all the way down.
Pulling the reflective element towards you, press the upper latches of the element with your finger. . remove the element from the mirror body (arrows indicate the upper clamps of the element).
Disconnect the wire block from the pointer block. _
. and remove the turn signal.
The indicator is equipped with LEDs; if they fail, the turn indicator assembly must be replaced. Install the side turn signal in the reverse order.
I think many will find my photo report of how the mirror is disassembled useful. It all started with the sound of a clatter coming from these mirrors when the music was turned on - the door was taped with noise. And this rattle got to me. It turns out that without knowing, you can easily break the mirrors during disassembly.
1. Using the handles, tilt the lower part of the mirror away from you until it stops. A gap appears at the top. You need to insert a screwdriver into it, see photo
2. There are latches inside that fasten the mirror to the electric drive.
Having reached the mounting spring, I decided to tighten the nut tighter - the breakpoint probably appeared from its loosening.
And just in case, I laid a noise between the connection of the mirror and the mounting base.
Then I reassembled everything and installed it back. THE RATTLE DISAPPEARED.
There is an idea to add repeaters to these paws like the deluxes. I’ll post a separate report on how to do it.
For those who find it useful, click (like)
Issue price: 0 ₽ Mileage: 25,000 km
How to disassemble the rear view mirror on a Priora
Lada Priora hatchback Snowball ›Logbook› How to first disassemble a mirror (via email)
I think it will be useful for many to have my photo report on how the mirror is processed. It all started with the fact that these mirrors crackled when the music was turned on. The doors were glued together with noise. And I got that bounce. It turns out that without knowing it, you can easily break the mirrors when disassembling them.
1. The handles are deflected from the bottom of the mirror A space appears at the top. You need to insert a screwdriver into it, see photo
2. Inside there are latches with which the mirror is attached to the electric drive.
They should be carefully bent with a screwdriver, then the mirror will separate from the base of the drive.
Then I unscrewed all visible bolts and completely disassembled the mirror
to get to the blocking spring, he decided to tighten it with a nut - probably the breakdown arose from its weakening.
And just in case, I put a noise between the mirror connection and the mounting base.
Removal and complete disassembly of LADA Priora mirrors
Detailed description of disassembling the mirror
motorized and heated, how to remove mirror element and overlay.
how to disassemble the Lada Prior mirror
Video review of self-service mirror element on the exterior mirror rear view
such cars
Everything was then reassembled and placed back into the water.
The idea is to add repeaters to these circles, like in the kits
