02/23/2021 3,024 Light and sound devices
Author: Ivan Baranov
The turn signal on the mirror is a rather interesting decoration for the car and an original tuning step. Read below to find out what this device is, its characteristics, operating principle, as well as installation instructions.
[Hide]
Where to start?
It looks much better with a turn signal, you will see that for yourself. You need to understand that there are several ways to implement your plan:
- installing LEDs directly on the mirror;
- installing a repeater in the rear view mirror housing.
The first option is simple, but quite effective. The second one is suitable for those who want to install a turn signal on the mirror of a specific car. Let's consider both options. But first, I would like to say that such tuning is needed not only for beauty, but also for increased safety while driving the car. A striking example is rearranging from row to row. A neighboring car, which is half a car away from you, may not see the rear turn signal, and this increases the accident rate. The repeater on the mirror is clearly visible.
We install turn signals on mirrors with our own hands
LED turn signals mounted in side-view mirrors are a unique type of tuning that, due to their versatility, can be mounted on any car. The turn signal is a solid textolite base with bright LED lights.
Installation of turn signals on mirrors is carried out on the side and connected to the factory repeaters. When any turn signal is turned on, the LED indicator will repeat the signal of the main turn signal.
This additional signal duplicates the main one and gives an unusual style to your car.
Why install turn signals on mirrors?
Many car owners have probably already seen turn signals installed on mirrors that duplicate the main signal, and will agree that it looks stylish and very impressive! And someone was lucky to become the owner of such tuning on their vehicle.
The main thing is that it is very informative! For example, when driving half a length apart with another car, it is not always possible to see the turn signal located on the fender, while the mirror is clearly visible.
Such turn signals will help avoid near-emergency situations or common misunderstandings.
To turn your side rear view mirrors into devices that will provide additional traffic safety, you should simply purchase and install such turn signals on the mirrors. Such LED tuning of side mirrors will increase traffic safety for drivers and other road users, and also give a unique and stylish look.
What is needed to install turn signals on mirrors?
In order to make and install turn signals on mirrors yourself, you will need several elements. So, what do you need to install turn signals on your mirrors? Let's list:
– SMD LEDs in the amount of 18 pieces;
– 2 resistance elements of 0.5 W and 180 Ohm;
– transparent tape;
– thin wire 20 cm long;
– black marker for marking (preferably the thinnest one you can find);
– blade for cutting metal;
– diamond drill with a diameter of 2 mm;
– soldering iron and all accessories;
– technical hair dryer.
Device base
Installing such equipment is an original way of tuning and a worthy decoration for a car. Due to its versatility, the repeater can be attached to any vehicle. The turning device is a small plate-shaped device. This textile base is quite durable and equipped with LEDs. There are some model options: mounting in a reflective surface or installing a flexible “signal” on the corners of the mirror. They are inexpensive, but you can make them yourself.
Jatco automatic transmission will be useful: automatic transmission and variator
Principle of operation
The repeater is attached to the side mirror, which is responsible for the rear view. They connect to the original turn signals to produce similar information. When the driver turns on the turn signal, the factory and installed devices will display the same data. Signal duplication will also add originality to the appearance of the car.
There are ready-made models on the market that require only manual installation. But you can make turn signals in the mirrors yourself - this is a fairly easy process that will require:
- LEDs or ready-made “turns”;
- scotch;
- 2 elements causing a resistance of 180 Ohms and 0.5 W;
- wire 20 cm long;
- marker for marking;
- hair dryer;
- soldering iron
Installation
To install the turn signal in the mirror housing, you will need the repeater itself, an overlay for the mirror, some tools and some free time.
I decided to go with the turn signal from the Volga-Siber car.
To begin, mark on the mirror housing trim the space for the cutout for the repeater. Then, using a hacksaw blade and a knife, cut out the excess.
This work requires some painstakingness, because the overall appearance of the structure will depend on the accuracy of the fit. At the same time, it is necessary to disassemble the turn signal itself...
... and put it aside for now.
Next, we begin preparing the body lining. I note that the material of the lining is easy to process and paint - which is what we proceed to. We protect the repeater glass with insulating tape...
... insert into the cut hole...
and use a hot glue gun to attach the “glass” in several places.
Important: Just fix it - no need to glue it completely! We apply the prepared plastic putty to the trim, especially carefully pressing it with a spatula in the places where the turn signal glass abuts
We wait for complete drying, about 5-6 hours, and then, cutting off the glue in the previously stuck places, we remove the “glass” from the cover...
... the end of the edge should be perfect, exactly repeating the shape of the turn signal. Next comes the sanding procedure...
...primers...
and painting followed by application of varnish.
Here you go. The pads are ready! Now it’s time to refine the repeaters themselves.
It is better to carry out processing using electric emery...
... in such a way as to reduce the protrusion of the turn signal into the trim because the space in the mirror housing does not have sufficient capacity.
Together with the glass, the reflector is processed and driven. Let's look at it in more detail! Since the reflector amalgam is quite fragile, special care is required when cutting it and removing excess material.
Having finally made sure that the “glass” and the reflector fit exactly, we proceed to assembling the repeater. To do this, I used the same hot melt glue, simply pouring it onto the board with LEDs as a compound.
After drying (quite quickly) I trimmed off the excess layer...
...inserted the assembled repeater into the cover...
... and finally filled it around the entire perimeter.
We carry out a mandatory procedure for checking the functionality of the assembled turn signal. To do this, I simply connected it to the battery.
Let me remind you that LEDs require strict adherence to polarity - otherwise they will not glow!
Next, we remove the mirrors from the doors and install our overlays with repeaters instead of the standard ones.
To do this, you will need to make some fun of the inner wall of the mirror housing. In order for the overlay to sit clearly in place, it is necessary to make a cutout, almost the same as in the overlay itself.
This will not affect the reliability of the fastening of the rotating mechanism and the electric drive.
We drag the wires from the repeater through the tube in the rotating mechanism...
... and take us outside.
Installing mirrors on the door
Communities › Lada Priora Club › Blog › Repeaters in rear view mirrors
Finally posting a post about mirrors. I've always liked repeaters in mirrors.
It just so happened that the mirrors on my Priora were already prepared from the factory for repeaters. I just needed to cut it out... okay, I’ll start from the beginning =) I like to periodically look at the well-known ad site, maybe they’ll post something interesting. So I grabbed the device. I see turn signals, price 500 rubles
.
Not much different from the market price, about 700 rubles, I decided to take it. A beautiful girl gave them to me.
I understood that I would need to solder
, because
Before starting work, I looked through the drive
.
I went to a store where everything was the same price and bought a soldering iron for 51 rubles
.
I hoped that it would at least be working.
I took off the mirrors. Everything is elementary. Removing the door trim → disconnecting the heating and adjustment chips → unscrew the 3 bolts → remove the mirror.
The hardest part was to remove the chips without scratching the door.
Solder the wires to the repeaters:
Analysis of mirrors. I was guided by a video from a well-known site:
You need to cut off the already marked part from the mirror cover, but do not follow the mark all the way. Closer to the curve you need to cut lower!
We install repeaters. They fit tightly, everything is already provided for them.
Reverse side of the mirror:
Let's put everything back together. We carry it to the car. We install the mirrors in place. Many people here make chips and so on, but I never had to remove the mirrors, I didn’t see the need for more chips ( if necessary, I can always make
), so I have a solid sheathed wire.
You need to put it through the rubber band between the door and the body ( it’s still a pleasure
).
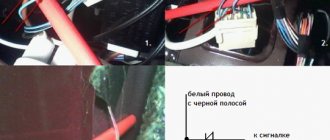
Then I did what those who are going to install plugs in the wings should not do. There are 2 wires going to the repeater: blue and black. I crashed into them, but it’s better to do it completely differently: cut off the repeater chip in the wing → pull the wire inside from the passenger compartment → connect directly to it → profit.
Repeaters from the wings to the trash. At the time of connection, I did not have plugs, so I crashed into the wires on both sides. On the driver's side, they still need to be picked out from the harness.
Device characteristics
Repeaters can be attached to absolutely any vehicle. This is a fairly universal device, which is a plate equipped with LEDs.
Purpose and principle of operation
The repeater is installed on the side windows, which are responsible for moving backwards. They can be said to exchange information with the original turn signals. This is done in such a way that when the driver turns on the turn signal, both devices - both the standard one and the repeater - will show similar data. Seeing duplicated values on the car will also add some flair.
On the automotive market you can easily find ready-made models that require manual installation, however, by the way, the device can be made with your own hands. It is not difficult to make turn signals for mirrors with your own hands; it will require only minimal skills and desire on the part of the driver or mechanic (author - Tver Garage).
Lada Priora mirrors
The installation process is similar to the VAZ 1118 mirrors. Only the LED arrow wires do not need to be pulled into the car interior; they can be connected to the standard turn signal in the mirror.
We buy everything you need for tuning
The number of elements that we will install is not that large, and therefore they will cost you little. The main thing is not to forget anything and buy everything you might need. This list includes:
- 18 SMD LEDs;
- transparent high-quality tape;
- resistance elements (180 Ohm and 0.5 W);
- technical hair dryer;
- small soldering iron;
- 20 centimeters of wire and a thin marker.
Having the above tools is essential, so buy them all. For example, it is not necessary to purchase a soldering iron. Most car enthusiasts already have it. You can also ask a neighbor for a hairdryer or rent it for a couple of days. Everything else isn't that expensive. Well, now let's move on directly to the installation process.
Putting it back together
Many people notice that installing turn signals in mirrors creates a loose fit for the LEDs. To do this, you need to warm up the back panel in the places where the light bulbs are located with a hairdryer. But under no circumstances should you heat the fasteners! After sufficient heating, press the structure against the glass - it will bend a little and connect tightly. After a couple of minutes, you can move on to the last stage.
Wiring
In this process, it is enough to transfer the “minus” to the body, and the “plus” needs to be taken out from the door and connected to the on-board network. After this, the device will be the same as the rear turn signals.
Such manipulations are available to every motorist. By spending a small amount of time, you can get high-quality mirrors with repeaters. This method is completely safe and only requires attention to the stages of work. This way, you will be able to increase your safety on the road yourself, because it is not always possible to notice rear turns. In the case of mirrors, they will always be clearly visible to drivers from behind.
From personal experience, I would like to say that a repeater is a useful trick. It is unusual for our places, so it is always noticeable, and, therefore, effective.
Lada XRAY mirrors
Installing LED arrows in standard mirrors will be problematic. However, they will fit well into the Salina mirror elements, because... the frame has a side and a gap.
The installation process is similar to the VAZ 1118 mirrors. Only the LED arrow wires do not need to be pulled into the car interior; they can be connected to the standard turn signal in the mirror.
The refinement process is also shown in the video:
Installation instructions
Installing turn signals in mirrors requires some tools and skills. Read more about this case below.
Tools and materials
To install the device you will need:
- repeaters;
- file;
- 10mm wrench and Phillips screwdriver;
- glue;
- steel wire.
Stages
Repeaters are installed in mirrors as follows step by step:
First you need to dismantle the car mirror, that is, disconnect the fasteners and remove the mirror surface. Next, detach the plate from the plastic fastening. If the mirror is in a plastic frame, you can remove it with a hairdryer if you heat the surface of the desired point for a while. If it is glued hermetically, then to remove the mirror surface it is necessary to simultaneously heat it on both sides for about 5 minutes. Afterwards it can be removed. If it is attached with double-sided tape, then you also need a mounting frame. If the mirror has automatic heating, then you need to carefully separate it to make some space for the repeater LEDs. Next, you need to create arrows where the LEDs will be attached. For marking, a regular notebook sheet is used, where the future figure is drawn with dots. About nine LEDs can be installed on one mirror. After marking, you need to duplicate the design on the tape with a marker. And stick the LEDs on the tape, taking into account the polarity. The LEDs are attached to the sticky side of the tape. After this, you need to take the wire, strip it and separate the five wires, which must be twisted together and soldered between the soldered LEDs and thin wires. The resistance when soldering the negative wire should be 180 Ohms. Next, you should remove the mirror for mounting the LEDs, immediately after the previous point has been checked for serviceability when power is applied. Now you need to make a hole in the amalgam so that the LEDs that match the markings are better visible through the mirror element. You need to take a hacksaw and remove sharp holes from the mirror surface. This is done to clean the glass. If the mirror is made of plastic, you can lower the resistance to 140 ohms. Thus, the LEDs will break through the plastic and there will be no difference as such. At this stage you can begin assembly. Due to the LEDs installed on the mirrors, difficulties may arise with the tightness of the rear panel. To solve this problem, it is enough to heat the problem area where the LEDs come into contact with a technical hairdryer
Important: fasteners and latches must not be heated to avoid deformation.
As soon as the plastic is heated to the desired temperature, it must be pressed firmly to the surface of the glass. In this form, you need to hold the mirror a little so that it “sits.” The final step is to connect the wires
The negative wire must be connected to the car body, and the positive wire to the vehicle. After this, the useful device will work properly, duplicating the meaning of the turn signals, and your car will become even more interesting and individual.
In recent years, tuning of various types has been flourishing, despite the authorities’ ban on installing certain lighting devices. Today LED lighting is very popular. It is installed both inside and outside the car.
We will look at how to install a turn signal on a mirror yourself. There is nothing complicated about it, but it looks quite interesting. This type of tuning makes maneuvers much easier, as you become more visible to road users.
Installing turn signals in mirrors
Hi all! I had this operation done a long time ago, but I only got around to it now. It was decided to move closer to the “Lux” and move the turn signal repeaters from the wings to the mirrors. I purchased LED turn signals worth 600 rubles per pair.
Well, accordingly, to replace the old turn signals in the wings, I bought SE plugs, costing 300 rubles per pair.
I also didn’t forget to take two female connectors, identical to those located in the turn signals in the wings. We disassemble the mirrors, or rather, for convenience, I removed them from the car. We remove the plastic plug from the mirror, and this picture opens before us.
Using an ordinary mounting knife, I carefully cut off the plastic strip, in place of which the turn signal will soon appear. This plastic is very easy to cut, the main thing is to be careful and not bend the line. Basically, there is a strip along which you need to make a cut. And by the way! I forgot about the most important thing that you need to pay attention to when disassembling the mirror housing!
I installed the turn signals in the mirrors, they installed very easily, they are held on by latches. You need to insert repeaters until a certain click is heard. Not finding the necessary connector that should fit onto the cable coming out of the mirror, I soldered the wires and heat-shrink them. Will!) The mirrors are collected.
Next, I put the mirrors in their rightful places and started wiring. I decided to hook up the now extra wires from the repeaters in the wings. I brought the wires out through the holes in the doors, ran them down the door, and threaded them through the rubber corrugation from the door into the salon.
Next we need to get to the wiring to the repeaters in the wings. To do this, we twist our way from bottom to top on both sides. On the left, the plug is located behind the hood opening handle, or rather above it - further in the photo.
And it’s purely mirror-like on the passenger side - further in the photo.
We also extract the wires from these rubber seals into the interior. We install chips on the repeater wires leading out of the doors. We connect the necessary wires with male and female connectors to each other, and everything works))) For those who are too lazy to pull out the wires, there is another option, make an insert into the wiring of the rear turn signals. But you need to know the colors of the wires. I'm telling you, the wires go along the thresholds in the cabin. Black wire is ground. But the turn signal wire is blue. But I would recommend doing everything using chips, as it’s somehow more reliable and beautiful. Well, here’s a photo of the installed mirrors)) thanks to everyone) and good luck on the roads!)
We buy everything you need for tuning
The number of elements that we will install is not that large, and therefore they will cost you little. The main thing is not to forget anything and buy everything you might need. This list includes:
- 18 SMD LEDs;
- transparent high-quality tape;
- resistance elements (180 Ohm and 0.5 W);
- technical hair dryer;
- small soldering iron;
- 20 centimeters of wire and a thin marker.
Having the above tools is essential, so buy them all. For example, it is not necessary to purchase a soldering iron. Most car enthusiasts already have it. You can also ask a neighbor for a hairdryer or rent it for a couple of days. Everything else isn't that expensive. Well, now let's move on directly to the installation process.
Installation process: detaching
If you are interested in how to install turn signals in mirrors, first you need to dismantle the reflection elements
To detach the reflective surface from the mirror, carefully snap off the fasteners. After this, you need to disassemble this element and the plastic base
Usually the mirror is inserted into a special frame and secured with glue or tape. To do this, you need to heat the surface with a technical hairdryer for five minutes, then the elements should be freely removed.
Marking and power supply
When assembling the device yourself, it is important to correctly indicate the mounting locations for the LEDs. Installation of repeaters in mirrors is done using a marker, which is used to draw a figure of nine circles on the back side of the reflective surface
This number of light bulbs is quite enough to ensure comfortable visibility. After this, the shape is glued to the mirror with tape, and the LEDs are installed. It is important that they are matched in polarity. They need to be attached with the luminous side.
The next step is to solder the wires. To begin with, they are stripped and divided into five veins. Then they need to be twisted together. A resistance of 180 m is soldered one by one to the negative wire. Now it is checked whether there is power.
Cleaning the mirror
In order for the arrow to be visible through the reflective surface, it must be cleaned of excess material. When the entire structure has been checked for functionality, and the markings coincide with the location of the light bulbs, you need to make small holes in the amalgam. LEDs must be clearly visible through the reflective surface. Next you need to clean the holes with a hacksaw to remove sharp edges
It is important to remember that not all mirrors are made of glass. If the model is made of plastic, it will be enough to lower the resistance to 140 Ohms
In this case, the brightness of the bulbs will be able to pass through the plastic.
Communities › VAZ: Repair and Improvement › Blog › Priora. Installing turn signals in mirrors.
Hello everyone!) I had this operation a long time ago, but I only got around to doing it now. It was decided to move closer to the Lux and move the turn signal repeaters from the wings to the mirrors. I purchased LED turn signals worth 600 rubles per pair. Thanks for the missing photos Mikkeee
Well, accordingly, to replace the old turn signals in the wings, I bought SE plugs, costing 300 rubles per pair.
I also didn’t forget to take two female connectors, identical to those found in the turn signals in the wings. We disassemble the mirrors, or rather, for convenience, I removed them from the car. We remove the plastic plug from the mirror, and this picture opens before us.
Using an ordinary mounting knife, I carefully cut off the plastic strip, in place of which the turn signal will soon appear. This plastic is very easy to cut, the main thing is to be careful and not bend the line. Basically, there is a strip along which you need to make a cut. And by the way! I forgot about the most important thing that you need to pay attention to when disassembling the mirror housing!
I installed the turn signals in the mirrors, they installed very easily, they are held on by latches. You need to insert repeaters until a certain click is heard. Not finding the necessary connector that should fit onto the cable coming out of the mirror, I soldered the wires and heat-shrink them. Will!) The mirrors are collected.
Next, I put the mirrors in their rightful places and started wiring. I decided to hook up the now extra wires from the repeaters in the wings. I brought the wires out through the holes in the doors, ran them down the door, and threaded them through the rubber corrugation from the door into the salon.
Installation process: detaching
If you are interested in how to install turn signals in mirrors, first you need to dismantle the reflection elements
To detach the reflective surface from the mirror, carefully snap off the fasteners. After this, you need to disassemble this element and the plastic base
Usually the mirror is inserted into a special frame and secured with glue or tape. To do this, you need to heat the surface with a technical hairdryer for five minutes, then the elements should be freely removed.
Marking and power supply
When assembling the device yourself, it is important to correctly indicate the mounting locations for the LEDs. Installation of repeaters in mirrors is done using a marker, which is used to draw a figure of nine circles on the back side of the reflective surface
This number of light bulbs is quite enough to ensure comfortable visibility. After this, the shape is glued to the mirror with tape, and the LEDs are installed. It is important that they are matched in polarity. They need to be attached with the luminous side.
The next step is to solder the wires. To begin with, they are stripped and divided into five veins. Then they need to be twisted together. A resistance of 180 m is soldered one by one to the negative wire. Now it is checked whether there is power.
Cleaning the mirror
In order for the arrow to be visible through the reflective surface, it must be cleaned of excess material. When the entire structure has been checked for functionality, and the markings coincide with the location of the light bulbs, you need to make small holes in the amalgam. LEDs must be clearly visible through the reflective surface. Next you need to clean the holes with a hacksaw to remove sharp edges
It is important to remember that not all mirrors are made of glass. If the model is made of plastic, it will be enough to lower the resistance to 140 Ohms
In this case, the brightness of the bulbs will be able to pass through the plastic.
Adjusting the side mirrors
Some cars are not designed to provide interior mirrors. The side elements are designed to create a panoramic view and reduce the blind spot. Today, two types of models are used.
- With a spherical surface that visually distances objects and distorts their real perception.
- With flat glass, American, covering the side of the road as much as possible.
A poorly adjusted mirror - when the rear wing of your car is completely visible through the side reflector. The main area near the car is practically invisible, which creates an emergency situation.
The driver's mirror is adjusted while driving, in the seat.
- You should lean to the side, almost touching your head to the glass. Position the reflector so that the rear wing is visible.
- Return the body to its normal position. In the mirror the car should be visible a little, 5%.
A correctly configured element reflects the horizon line at a ratio of 60% earth, 40% sky. The door handles on the left side of the car should be visible in the mirror.
Now the right mirror.
- Lean to the right so that your head is in the middle of the car windshield. The rear fender should be visible in the side reflector.
- Return to starting position. Look in the right mirror - the wing is visible at 5%.
The reflection panorama in the right reflector should cover 70% of the ground and 30% of the sky. The distance to a car moving on the right in the adjacent lane is clearly visible.
Some drivers are accustomed to lowering the side mirrors so that they have a better view when parking in the rear. This is convenient, but then the elements must be readjusted. Premium class car models are equipped with a function for automatically changing the position of the reflectors.
Soldering and assembling the structure
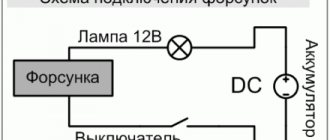
Next, we take the pre-prepared wire and separate 5 cores from it. They need to be twisted and tinned. After this, we connect the LEDs in parallel and solder thin wires. We solder a 180 ohm resistance to the negative wire. Connect the power and check operation. If everything is functioning, then the side mirrors with turn signal are almost ready. If not, we look for a fault in the circuit.
In order for the LEDs to be visible through the mirror, it is necessary to make corresponding holes in the amalgam. Remember also that not all products are glass, there are also plastic ones. In the latter case, you can try to reduce the resistance to 140 Ohms. The brightness of the LEDs will increase and they will be visible through the plastic. To install the mirror back, the body needs to be heated with a hairdryer. It is not recommended to heat latches and fasteners, as they may become deformed. As for the wiring, we hook the negative wire to the body, and lead the plus wire to the car’s electrical system through the door.
Mazda 3 Black'n'White › Logbook › Installing LED turn signals in the mirrors
I have long wanted to install LED turn signals in the mirrors, and finally the ordered boards with LEDs arrived.
What: - boards with SMD LEDs - red color
(you can buy a mirror in a casing with already built-in repeaters, but that’s not interesting =))
I also considered the option of buying boards with 3 rows of LEDs that turn on one after another (wave effect). but I decided that this was too much (they might interfere with the driver).
The color choice was between red and orange. red is brighter, and orange would suit the style better - the turn signals on the wings blink orange, and on the back too, it makes more sense. But there were doubts about the light transmission of the mirror element and fears that the orange might not be visible at all. it was decided to take red. and did not regret it.
It will be useful: Replacing the air conditioner radiator Opel Astra H
Then we go to the parking lot and pick out the mirror element along with the casing. The main thing here is not to be afraid. but don't overdo it either. Some effort is required to remove the casing. I fiddled with the first mirror for about 10 minutes, I was afraid of breaking it. I took the second one off right away. I’ll tell you using the example of the one on the right
mirrors We recess the left and top sides of the mirror inward. We put our fingers under the mirror from below, begin to push the mirror up a little and a little counterclockwise, while pulling towards ourselves. The fastenings of 2 mirror drive motors snap out. All that remains is to pull the mirror towards you, snapping off the last central fastener. for the left one, reflect everything horizontally.
Next you need to remove the mirror from the casing. Some people use a hair dryer for this, others even put the casing with the mirror in hot (boiling?) water so that the plastic softens and it is easier to remove the casing from the mirror. C students are lucky here)) I was able to remove the casing without any problems right in the parking lot with just my hands and using a thin flat-head screwdriver to pry the casing off. here again the main thing is without fanaticism, carefully and with arrangement)) slowly. and here, as I understand, you need to worry more not about the plastic casing, but about the mirror itself. it just doesn’t bend.
from the back the mirror looks exactly the same as from the front... only dirty and covered in some kind of glue and paper. O! I forgot to clarify - I don’t have heated mirrors. so it’s easier for me)) although the procedure is the same. bend the heating element and push the board with LEDs under it. In short, we tear off the paper, I quickly washed off the glue using wd40.
We try on where the board will be and glue it with miracle tape on the back of the mirror. when I had already thoroughly “sealed” everything with tape and checked it again, it turned out that the contours of the board were very brightly illuminated and could be seen from the outside. not in order. 5 minutes of thinking and a way out of the situation was found - sketch everything around the board with a black marker. light transmission will deteriorate and contours will not be visible. and so it turned out.
Do you need to rush before the exam starts?
This issue is rarely given due attention, but in practice it makes sense to hurry to the race track. And the point is this:
As a rule, the examiner (traffic police inspector) arrives at the site after the driver candidates. Those. You have to wait for a police officer and the wait for the exam to begin can last for half an hour or more. This time can be spent usefully.
In this case, you need to agree with the instructor so that he will allow you to drive a circuit around the race track before the exam. Competent instructors themselves offer driver candidates to practice. If they don’t offer it, then don’t be shy and ask. If your instructor is not available, ask anyone else. Immediately before the exam, it can be useful to “refresh” your knowledge and skills.
Installation instructions
Installing turn signals in mirrors requires some tools and skills. Read more about this case below.
Tools and materials
To install the device you will need:
- repeaters;
- file;
- 10mm wrench and Phillips screwdriver;
- glue;
- steel wire.
Stages
Repeaters are installed in mirrors as follows step by step:
First you need to dismantle the car mirror, that is, disconnect the fasteners and remove the mirror surface. Next, detach the plate from the plastic fastening. If the mirror is in a plastic frame, you can remove it with a hairdryer if you heat the surface of the desired point for a while. If it is glued hermetically, then to remove the mirror surface it is necessary to simultaneously heat it on both sides for about 5 minutes. Afterwards it can be removed. If it is attached with double-sided tape, then you also need a mounting frame. If the mirror has automatic heating, then you need to carefully separate it to make some space for the repeater LEDs. Next, you need to create arrows where the LEDs will be attached. For marking, a regular notebook sheet is used, where the future figure is drawn with dots. About nine LEDs can be installed on one mirror. After marking, you need to duplicate the design on the tape with a marker. And stick the LEDs on the tape, taking into account the polarity. The LEDs are attached to the sticky side of the tape. After this, you need to take the wire, strip it and separate the five wires, which must be twisted together and soldered between the soldered LEDs and thin wires. The resistance when soldering the negative wire should be 180 Ohms. Next, you should remove the mirror for mounting the LEDs, immediately after the previous point has been checked for serviceability when power is applied. Now you need to make a hole in the amalgam so that the LEDs that match the markings are better visible through the mirror element. You need to take a hacksaw and remove sharp holes from the mirror surface. This is done to clean the glass. If the mirror is made of plastic, you can lower the resistance to 140 ohms. Thus, the LEDs will break through the plastic and there will be no difference as such. At this stage you can begin assembly. Due to the LEDs installed on the mirrors, difficulties may arise with the tightness of the rear panel. To solve this problem, it is enough to heat the problem area where the LEDs come into contact with a technical hairdryer
Important: fasteners and latches must not be heated to avoid deformation.
As soon as the plastic is heated to the desired temperature, it must be pressed firmly to the surface of the glass. In this form, you need to hold the mirror a little so that it “sits.” The final step is to connect the wires
The negative wire must be connected to the car body, and the positive wire to the vehicle. After this, the useful device will work properly, duplicating the meaning of the turn signals, and your car will become even more interesting and individual.
Car mirrors are important safety features. They are characterized by a simple design and compact size. Installed in any production car, regardless of the make and model of the car, body type and equipment level. They differ in shape and appearance. Combines with body design and overall interior design.
They improve visibility for the driver and allow them to assess the situation on the road. They simplify the process of reversing and prevent accidents. They contribute to safer performance of various maneuvers on the road (changing lanes, overtaking, avoiding obstacles, etc.). Car mirrors, depending on the installation location, are divided into 2 types - interior and side.
Lada 2108 hatch › Logbook › DIY turn signals in mirrors
Good night everyone!
It will be useful Zero resistance air filter: feasibility of installation and disadvantages
From the title I think it’s clear what we’re going to talk about.
The idea crept into my head of how to add turn signal indicators to the outside mirrors. I had a couple of broken mirrors lying around. One was damaged when I decided to reverse into the garage and didn’t calculate the dimensions. hop knock and it was already hanging on the mirror adjustment mechanism, I didn’t have time to react to move forward and move into the garage, but it was too late. That’s how it was. The second one was broken by a minor on a scooter in an accident.
Well, I took the broken mirror, unscrewed the nut securing the mirror element and took the mirror itself out of the plastic case. I was wondering how I could make turn signal indicators myself. First I decided to cut a piece of plastic from the case from the corner
I cut it with a knife, heated the knife with a gas burner and cut it out, everything was cut easily. I wanted to make a homemade LED board and was looking for plexiglass to install it in place of the cut piece. But after asking around where to find plexiglass, no one knows, and you have to bother with the boards.
But then the other day, as usual, the elections for the DRIVE 2 Site were held, and, as usual, I looked at who was nominated, I went to one person, the owner of a Chevy Niva, who was a candidate for the car of the day and saw that he also had a blog post about turn signals in the mirrors, part one and part two, I decided to also use his idea.
I went to an auto parts store and bought a couple of 25 cm LED strips, the shortest ones were
In order not to spoil the mirrors that are on my car, I took and dismantled the second broken outside mirror. Since it was in the garage and got a little dusty, it is very good for marking where to drill holes for LEDs. But I still made a little mistake and drilled in the wrong place; a couple of LEDs did not match the holes.
Figuring that it seemed normal, he took hold of the mirror standing on the car. I took it from the right side, it’s almost useless, I can’t look into it, and it’s not adjusted, so I decided to start with it.
I took it off and disassembled it again, then I took regular white chalk and rubbed the LEDs with chalk so that traces of the LEDs remained, where exactly I need to drill for them, I marked on the inside of the mirror housing.
I had to go over the inside a little with sandpaper to remove the plastic nicks from the drill.
I also had to cut the LED strip a little because it was too long, somewhere from 25 cm to 17 cm. Having cut it, I decided to check whether it would light up, I connected it to check and probably didn’t cut it correctly, two LEDs at the end where I cut it didn’t light up , well, we can screw her, I’ll decide what to do next.
Moreover, when I bought the tape, only tapes glowing with white moon and red light are available for sale, I bought both tapes, also bought orange nail polish and painted the LEDs with varnish on top. Of course, in the city there may be ribbons with orange light, but we are not a city, so what do we have)).
I borrowed a soldering iron from a neighbor to solder the wires, because the tape has very thin wires and you can’t wrap them with electrical tape. My father and I are soldering the wires together, but more on that in the next bulletin board, but that’s all.
I paid 480 rubles for the tape and 25 rubles for the varnish.
It seems like everything I wanted to share.
Thank you to everyone who looks and subscribes
Setting the interior and side mirrors
- Salon. Everything is very simple. Find the center point of the rearview mirror. Align it with the center line of the rear window.
- Lateral. Adjust the driver's seat to suit you. Lean to the left, almost touching the side window. Place the left mirror in such a position that you can see the rear fender of the car. When sitting normally, it should disappear from your field of vision. Lean to the right so that your head is in the central part of the cabin (between the driver's seat and the front passenger seat). The rear fender should also be visible in the right mirror. To check the correct adjustment of the 3 car mirrors as a single rearview system, enlist the help of a passenger. Ask them to walk around the car slowly. At this moment, it is necessary to monitor his movements in the rearview mirrors. If a person disappears from one car mirror and immediately appears in another (with short pauses), then the number of “blind spots” is minimal. The side mirror is adjusted correctly.
