Instrument panel - removal and installation
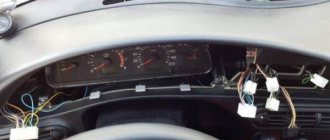
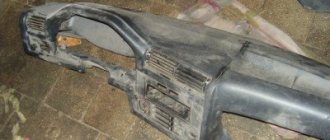
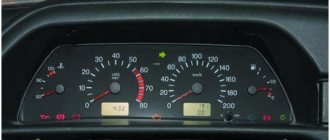
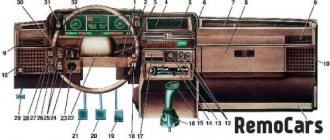
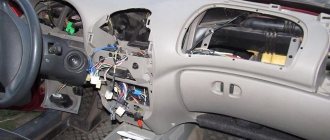
The repair manuals for the Lada 112 car indicate that to remove the instrument panel it is necessary to almost completely disassemble it.
This is not always convenient, so this section discusses removing the instrument panel without disassembling it. 1. Prepare the car for work (see “Preparing the car for maintenance and repair”).
2. Remove the decorative linings of the steering column (see “Decorative linings of the steering column - removal and installation”).
3. Remove the steering wheel (see “Steering wheel - removal and installation”) without removing the horn contact plate.
4. Remove the steering column switches (see “Steering column switches - removal and installation”) without removing their connector.
5. Disconnect the ends of the two wires from the connector of the steering column switches (see “Steering column switches - removal and installation”).
6. Using a slotted screwdriver, remove the headlight hydraulic adjustment control knob.
21mm deep socket wrench
unscrew the nut securing the headlight hydraulic corrector and recess its rod into the hole in the instrument panel.
8. Open the cover of the mounting block (see “Mounting block - replacing fuses and relays”).
9. In the niche of the relay and fuse block, use a Phillips screwdriver to unscrew the self-tapping screw securing the left inner bracket of the instrument panel.
10. Disconnect the ignition switch wiring harness block (1) and use a Phillips screwdriver to unscrew the self-tapping screw securing the diagnostic connector bracket (2).
11. Disconnect the ends of the two wires from the brake signal switch (located on the brake pedal bracket).
12. Using a Phillips screwdriver, unscrew the two self-tapping screws securing the left console trim. By sliding the cover back, we remove its front part from engagement with the bracket and remove the cover.
10 mm socket wrench
unscrew the nut securing the panel to the console bracket (under the nut there are lugs of three ground wires).
14. Using a Phillips screwdriver, unscrew the screw securing the instrument panel and air duct, if necessary, holding the screw nut with an 8 mm wrench.
When performing the next part of the work, it is necessary to disconnect the wiring harness connectors located under the instrument panel. And although these blocks have different shapes, different colors and different numbers of pins, to simplify assembly, mark the paired blocks with a marker before separating them.
15. By pulling out the fixing bracket, we disconnect the block of the instrument panel wiring harness.
16. Using a thin slotted screwdriver, press the latch and disconnect the two connecting blocks of the wires coming from the immobilizer sensor.
17. Using a slotted screwdriver, unscrew the three self-tapping screws securing the right console trim.
10 mm socket wrench
Unscrew the right nut securing the instrument panel to the console bracket.
19. Disconnect two pairs of cigarette lighter wire connectors.
20. Disconnect the wiring harness block from the fog light relay.
21. In the niche of the glove box, use a Phillips screwdriver to unscrew the self-tapping screw securing the right inner bracket of the instrument panel.
22. Use a Phillips screwdriver to unscrew the right one.
. and left screws for the lower fastening of the instrument panel.
23. Remove the seal from the flange of the front left pillar.
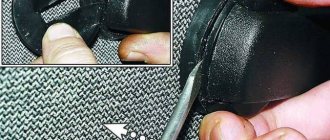
24. Using a wide slotted screwdriver, pry up and remove the plastic trim holders from the holes in the stand and remove the trim from the stand.
25. Similarly, remove the trim of the right windshield pillar.
26. Using a thin slotted screwdriver, pry off both sides of the instrument panel and remove the ventilation
front door window vents.
10 mm socket wrench
unscrew the two nuts of the upper fastening of the instrument panel, located under the ventilation grilles.
28. Move the instrument panel 15-20 cm into the interior.
29. Behind the instrument panel, we disconnect the nine connecting blocks of the wiring harnesses (seven connectors (1) at the left door pillar and two connectors (2) near the steering column).
30. After making sure that all the connectors of the instrument panel wiring harness are disconnected from the on-board power supply connectors, remove the instrument panel from the car interior through the opening of the left front door.
Install the instrument panel in reverse order.
dashboard.
I’m wondering if the instrument panel from a Priora is suitable for a VAZ 2112.
Alexey (Hela) if the panel is suitable
Svetlana (Ryland) Hello everyone! Tell me, for God's sake, what could happen. I was driving at a speed of 120, everything suddenly stalled and the car would not start again.
Mark (Florius) Svetlana, the crankshaft sensor may be
Vlad (Filek) tell me how to remove the instrument panel on a VAZ 21124 Europanel, one light bulb burned out. I found 2 screws on top
Nikolay (Kleopatra) you unscrew them and lift the shield, it just sits on the 2 hooks at the bottom on the sides!
Alexey (Hela) Tell me where to get a plus for new wiring for the second pair of fog lights? I want to run the wires and the button separately. I have a two-piece, Europanel.
Alexander (Hanns) Alexey, unplug and power it up! In the general bundle on the panel on the left there is a button specifically for fog lights! )
Igor (Antares) Such a question, VAZ 2112 I want to change the old torpedo to the euro, will there be a lot of hemorrhoids? not counting the wiring and the stove?
Sergey (General) It’s a shame if you haven’t done it before, it’s a lot, take the door trims for one, otherwise the Euro torpedo is bigger on the sides, the doors won’t close
Svetlana (Ryland) Vlad, another screw under the plug on the left and a nut on the panel backlight adjustment.
Ilya (Kaimalie) Sergey, they’ll close Igor, there’s a lot of hemorrhoids, it’s hard to fix the lining itself, wiring takes a couple of hours
Artyom (Rani) Tell me, VAZ 21124 europanel, the screen itself does not light up, everything else lights up. What is the reason?
Ilya (Kaimalie) Artyom, if the number is on, then the light is on, if not, then it means Khan’s screen
Ilya (Kaimalie) Artyom, remove the tidy and change the light bulb. It’s better to plug in diodes right away and they last longer and shine better)
Artyom (Rani) Ilya, I’ve never figured it out. Is this troublesome?
Ilya (Kaimalie) Artyom, about 15 minutes, even if it’s the first time. two bolts on top of the shield and one bolt under the leftmost button cover. You remove the shield and turn away the Priora itself, everything is intuitive there. You disconnect the device from the connector (but this is a bummer, the connector can be broken off). There will be a cartridge at the back, directly opposite the screen, you take it out after first turning it. You remove the old light bulb from the socket and insert a new one (either a light bulb or a diode).
AutoNews / Reviews / Tests
Removing and installing a torpedo on a VAZ 2110 with your own hands
The need to remove and replace the dashboard on a VAZ 2110 car may arise when repairing devices and parts located under its surface. In particular, it is with the removal of the dashboard that the car’s air intakes are inspected. Sometimes they can become clogged and prevent your heating or air conditioning systems from working properly. The process of removing and replacing the dashboard on a VAZ 2110 is not particularly simple. To carry it out, you will need to be patient and master the skills of masterly working with instruments.
In today's article we will tell you how to remove, replace, install, modify and improve the dashboard on a VAZ 2110 with your own hands. In addition to all this, we will give you a photo report of the work done and show you an interesting thematic video.
Removing the instrument cluster VAZ 2110
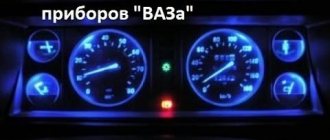
It is sometimes necessary to remove the instrument cluster unit on a VAZ 2110, 2111 or 2112 car in case of its repair - replacing burnt-out indicator lamps or replacing the instruments themselves (speedometer needles, tachometer or gasoline level in the gas tank) and other parts. Some fans tune it (adding bright lighting, etc.), which turns out very nicely, here is an example:
The display unit of the vehicle's on-board system is actually not difficult to install, so there will be no difficulties in dismantling it. Below is an electrical diagram of the connections of control devices for its repair:
What should be considered when replacing a torpedo on a VAZ 2110
Replacing the torpedo on a VAZ 2110 will not only add some charm to the car, but can greatly improve the ride comfort not only for the passenger, but also for the driver. After all, you can replace the dashboard with a torpedo. When replacing it, the following points should be taken into account:
- What exactly does the car owner want to achieve with a replacement? This could be an increase in space in the cabin in front of the front seat.
- Just to give, so to speak, an expensive look to the car.
- Organize a place to install additional devices - radios, screens, and so on.
In any case, you can get the most beneficial effect from such an undertaking.
The first thing to consider when selecting a torpedo for a VAZ 2110 is its size and the shape of the car’s interior.
It is also worth considering the category of people, passengers, who will be in the car. This will sometimes improve the safety of the vehicle.
Once the type of torpedo is determined, it is worth thinking about what additional functions it should perform. This could be the installation of additional equipment, space for mobile phones, space for a car audio system - speakers, or a radio.
The next stage is choosing a coating. It is best to get it as universal as possible and try to install torpedoes with the following coatings:
- Plastic. The torpedo is made entirely of plastic without unnecessary inserts.
- Plastic with wooden or leather inserts.
These are the two most popular types of torpedoes for the VAZ 2110, which are the most practical to use and will best suit almost any type of interior.
Installation and repair instructions
Replacing the panel, especially if you are installing it on an old VAZ 2112, is a certain difficulty. Older machines do not have some of the functions for which the panel has buttons. The wiring may need to be worked on.
Algorithm of actions
First you need to remove the old panel. This is done in the same way as on other models of VAZ cars.
When installing, you need to replace the ignition switch with a decimal or Kalinovsky one, depending on how many terminals there are on the block to the lock. You can leave the old one and rearrange the wires, but the new one will work and look better.
The instrument panel wiring needs to be replaced. Also, connect the dimensions with additional two wires in Ш4/13 and Ш3/13 on the mounting block. This applies to older units with 11 relay spaces.
Depending on whether it is an injector or a carburetor, the connection has its own nuances. If you bought a solid factory panel, then instructions should be included with it. Briefly, it can be noted that the injector is not equipped with a speed sensor, please take this into account when installing.
The car's electrical circuit can be of great help. If it is not there, you can find it on the Internet. There are some differences between the VAZ 21124, 2111 and other car variants, so find yours.
If the instrument panel does not work after turning it on, check that the wiring is connected correctly - this is usually the error.
Tools and materials
But a certain amount of additional materials is needed:
- you will need plugs for extra buttons that are not needed on an old car;
- air duct;
- various inserts, buttons (5 pieces) and pads;
- a new wiring harness suitable for the wiring diagram;
- brackets for mounting the instrument panel;
How to remove the dashboard on a VAZ 2110 with your own hands - step-by-step instructions + photo report
In order to remove a torpedo on a VAZ 2110, you must perform the following procedure:
- Unscrew 2 screws on the right and 2 on the left on the central tunnel.
- Next, remove the covers on both sides.
- Remove the plug near the handbrake.
- Unscrew the screws on the left and right of the central tunnel.
- Unscrew the screws at the back of the central tunnel.
- Removing the plastic of the central tunnel.
- Disconnecting the cigarette lighter wires. Mark so as not to get confused when connecting to the assembly.
- Remove the gearshift knob cover.
- Using a wrench, unscrew the interior heating air duct.
- Removing the air duct.
- Unscrew the fastenings of the central panel from the front.
- Unscrew the fastenings of the central panel at the back.
- We finally remove the panel.
- We unscrew the screws of the glove compartment.
- We remove the glove compartment.
- Disconnect the glove box light wires.
- We unscrew the screws inside the space in place of the glove compartment.
- Unscrew the remaining screws on the sides of the torpedo.
- Unscrew the torpedo bolts as follows as in the photo.
- Removing the air duct.
- Unscrew the nut on the dashboard under the air duct.
- We lower the torpedo from the pins.
- We disconnect the wires from the front panel and mark them so as not to get confused during assembly.
As you noticed, if you follow our instructions, the process becomes much easier. You can remove the VAZ 2110, 2111, 2112 torpedo with your own hands, but it is better to do it with an assistant.
How to remove the Europanel on a VAZ 2112 video
The average owner of a VAZ 2112 rarely faces the need to remove the instrument panel of his car. The main reason why you have to dismantle the Europanel is body repair, electrical repair or repair of devices installed directly behind the instrument panel. Since it can be very difficult or even impossible to get to such devices without removing the instrument panel, in such cases you have to remove the entire europanel.
Removing the instrument panel is also required when eliminating squeaks and other noises that occur while driving a car, or when installing additional sound insulation for the interior. In addition, even with careful handling of the car, over time the instrument panel may lose its appearance and require replacement with a new one.
In this article we will try to cover the main stages of removing the europanel from a VAZ 2112 car. The panel can be found on cars of the VAZ 2110, VAZ 2111 and VAZ 2112 line. Therefore, everything that will be said below about dismantling the VAZ 2112 europanel is also true for the rest models. In addition, it should be noted that the fastenings of the Europanel are identical to the fastenings of a conventional instrument panel, so this step-by-step instructions can also be used when dismantling a conventional panel.
So, when removing the Europanel from a VAZ 2112 car, the sequence of actions should be as follows:
For safety reasons, it is necessary to turn off the power to the vehicle's on-board network. To do this, you need to disconnect the negative terminal from the battery.
The steering wheel needs to be removed. To do this, use a flat screwdriver to pry up and remove the decorative trim with the inscription “LADA” from the steering wheel. Next, using a Phillips screwdriver (PH2), unscrew the two screws that are located in the recesses under the removed cover. After this, remove the horn switch cover.
READ How to remove the Lacetti heater control unit
Now you need to fix the steering wheel. This can be done in two ways: turn the steering wheel all the way to the left or remove the key from the ignition switch and turn the steering wheel in any direction until it clicks when it locks. After this, you should unscrew the central nut holding the steering wheel. To do this, you will need a socket wrench with a 24mm head (for convenience, it is advisable to use a socket wrench with a ratchet).
For safety reasons, there is no need to immediately remove the central nut - it should be left on the last 3-4 turns of the thread. After this, set the steering wheel to the middle position (the front wheels should be parallel to the longitudinal axis of the car). In order not to waste time finding the correct position of the steering wheel when installing it, before removing the steering wheel, you can apply coaxial marks on the steering wheel itself and the upper plastic cover of the steering column.
Next, you need to use medium-force blows on the rear of the steering wheel from the left - right and from above - from below to knock it off the splines of the steering shaft. After this, you can completely unscrew the central nut and remove the steering wheel.
The process of removing the steering wheel from VAZ 2110-2112 cars is shown in detail in the following
Now you need to remove the side panels on the left and right sides of the center console. Each shield is secured at the rear with two screws, which must be removed using a Phillips screwdriver (PH2).
Next, use a Phillips screwdriver (PH2) to unscrew the screws securing the glove compartment, located underneath the glove compartment at the front wall of the car interior. Having removed the glove compartment from its place, it is necessary to disconnect the wires going to the glove compartment illumination lamp. After this, the glove compartment can be completely removed.
The next step is to use a Phillips screwdriver to unscrew the screws securing the instrument panel. One of the screws is located in the glove compartment niche, the rest are along the edges at the bottom of the instrument panel.
Now you need to use an 8-mm open-end wrench and a Phillips screwdriver to unscrew the screws securing the instrument panel in the area of the center console.
After this, remove the protective grilles of the air ducts located along the edges of the instrument panel. To do this, just pry them off with a flat-head screwdriver.
Next, use a socket wrench to unscrew the nuts located under the removed air duct grilles.
Remove the instrument panel from the studs by lifting it up and pulling it towards you. After this, you need to disconnect all the connectors on the wiring harnesses going to the instrument panel, having previously marked them for subsequent assembly. Now the instrument panel can be completely removed.
The process of removing the instrument panel from a VAZ 2112 is shown in the following
We hope our instructions will be useful for you!
Installing a torpedo on a VAZ 2110 - step-by-step instructions
In order to install the instrument panel of a VAZ 2110 (torpedo), you must perform the following steps:
- Install the instrument panel so that the guide pins fit into the holes on the instrument panel.
- At the same time, move the steering column adjustment knob into the hole on the instrument panel.
- Using a screwdriver, drive the threaded rods into the holes on both sides of the panel.
- Install the foot warmer air duct so that the air duct fits into the hole in the air distributor housing.
- Connect all terminals to wires in reverse order. Secure the panel and reinstall all components that were removed during disassembly. After completing the work, check the operation of all devices.
What to do with the wires?
You will probably be amazed at the number of wires located in the panel space, intended to power various devices in your VAZ 2110. It would be more convenient to remove everything together with a lump of wires. But take your time. It is unlikely that you are going to change anything on a completely new car, so in the future you will spend a long time figuring out which wire comes from what, and how to connect it. So that it turns out that disassembly went quite smoothly, but reassembly led to a slight stupor.
Disassembled instrument panel of VAZ 2110
So try to disconnect all the connectors and wires that you can. Now you can finally remove the panel and remove it from the car. For fresh traces, do not forget to separate (you can tie in a pile) the entire wiring harness that belongs directly to the instrument panel, and mark the rest with self-adhesives. This will help you a lot when you start installing new equipment.
Improvement and tuning of the dashboard on the VAZ 2110
One of the most popular ways to improve the dashboard on a VAZ 2110 is its sound insulation. In order to do this, you must perform the following steps:
- We remove the tidy, I already told you how to do this earlier
- Next we foam, but under no circumstances should you pile up a huge pile of foam at once, it won’t dry out in a week.
- Don’t forget to try it on so that later it doesn’t turn out that your steering wheel touches it, or it’s just too high.
- In principle, all the work consists of two things, you cut, foam, cut again and so on many times.
- Next, we apply the cheapest putty we could find.
- Next we cover the dashboard with Shumka.
- We install the torpedo back.
You can modify the dashboard of a VAZ 2110 in different ways, someone covers it with leather, someone inserts an LCD monitor into it, in tuning a car it all depends on you and your fantasies and desires.
How to remove a torpedo on a VAZ 2110 with your own hands
VAZ 2110 owners pay attention not only to timely maintenance and vehicle serviceability. Appearance, interior trim, and instrument panel play an important role. Sometimes it becomes necessary to disassemble the front inner lining of the car. The article will help car enthusiasts independently remove, replace individual elements, change the interior, torpedoes of a VAZ 2110 car, and perform the necessary repair and maintenance work.
Types of torpedoes on the VAZ 2110
The VAZ automobile plant produces a number of different modifications of the VAZ 2110. The differences concern not only the power unit, transmission, systems, and mechanisms. The surroundings of the cars are undergoing changes. The main options for completing the front panels are known.
Basic old sample. Simple strict design. The instruments are located opposite the steering wheel.
Export solutions Euro-1, Euro-2, Euro-3. Management and control bodies have been changed.
Overlay panels "Chestnut":
- with a standard layout (reminiscent of the first issue);
- The dashboard is in the center, to the right of the steering wheel.
Home craftsmen contribute to the decoration and replace the cladding using spare parts from other car models. The landing mounts of the released panels and torpedoes match. It remains to pay close attention to the wiring and establish the correspondence of the signals.
Soundproofing panel VAZ 2110
To soundproof the “tens” dashboard, they mainly use bitoplast, modelin, sealant and even polyurethane foam. Bitoplast and modelin are used to cover plastic panels on a disassembled dashboard, which eliminates squeaks and improves sound insulation. Something like this in the photo below -
Bitoplast is glued with a special glue; when installed in place in the right places, this material is compressed where necessary. It is recommended to paste over the panel naturally from the inside.
Some craftsmen turn the front panel into an impregnable fortress for vibrations and squeaks using ordinary mounting foam. However, it is not recommended to use such a radical method without some experience. As a result, this is what sticks out from under the torpedo -
In addition to soundproofing the VAZ 2110 panel, it is necessary to carry out a similar procedure with the floor, roof, and doors. Such comprehensive sound insulation will ensure maximum acoustic comfort in the cabin.
In conclusion, I would like to say that there are two panels installed on the “ten”, old and new models. Photos of the old version can be found at the beginning of our article. A photo of the new version of the panel is attached below.
The most interesting thing is that a new-style panel or a Europanel for the “ten” can be installed instead of the old-style panel. In principle, they are interchangeable, but it is worth considering that along with the installation of a new panel, you will have to install a new instrument panel assembly, another ACS unit (automatic control system for interior heating) and add an electric heater damper drive. The mounting points of the old and new panels themselves are the same, so there are no problems with installation.
Preparing to remove the torpedo on a VAZ 2110
To work you will need:
- standard set of wrenches (open-end, socket, ratchet wrench with a set of heads),
- flat blade screwdriver, Phillips head,
- mount,
- marking tags (sign connectors),
- attentiveness, patience (there is delicate, painstaking work ahead).
It is necessary to remove the driver's, passenger's seats, and steering wheel.
Procedure for removing the torpedo
If you decide to start replacing the torpedo on a VAZ 2110, then follow these steps:
- Unhook the torsion bars from the front under the seat (take them out of the fixing brackets, pry them up with a pry bar);
- unscrew the four nuts;
- remove two fasteners, release the front stop;
- from the rear seat side, using a 10mm ratchet wrench, unscrew the three bolts securing the seat to the runners;
- push back, tilt the seat back;
- unscrew the 2 front bolts securing the guide skids;
- remove the seat from the car, do the same with the second seat;
- pick up and remove the silver “Lada” plate on the steering wheel;
- unscrew two self-tapping screws;
- remove the top cover;
- lock the steering wheel;
- Using a 24 mm socket wrench, unscrew the nut in the center of the column;
- Lightly tapping the wheel from bottom to top with the heel of your palm, swaying left and right, remove the steering wheel from the splines. The salon is ready.
Lada 2112 Dvin4ik › Logbook › Removing the VAZ 2110 2111 2112 torpedo.
HAVE QUESTIONS ? WAITING IN THE COMMENTS
Good day! I couldn’t post the material for a long time for personal reasons) But the time has come, iii) Let’s go, Unfortunately, part of the material was lost forever, so the photo shows a general view, except for the gearbox tannel! for the first time in one mask) I myself relied on the disassembly manuals) Not everything is written there, I want to say. And if it is written, then a lot complicates the work as a whole. Therefore, if possible, rely on my report. The hardest part was removing the torpedo! What we need for this: A 10mm head, preferably with a small ratchet! 24mm socket (socket) or ratchet with extension! Crosshead screwdriver! Flathead screwdriver! Well sharpened! For those who are afraid to disassemble and not reassemble the connectors correctly, Adhesive Band-Aid and Marker! A box is desirable for bolts, screws, etc. Pliers! Scissors!
First, we remove the gearbox panel, otherwise removing the torpedo will turn into a puzzle. Removing the gearbox panel is easy. We unscrew the fastening bolts on the sides (difficulties will arise with the bolts next to the seats, we climb under the saddle or look for a way to get to the bolts) We remove the cover from the handbrake, if it is not clear what I mean, lower the handbrake and the cover will be right under your fist. There we unscrew the bolt. + Remove the gearshift lever cover and unscrew the 3 bolts + Remove the buttons for the beet lifters and other tunnel options. We take hold of the ashtray of the rear passengers (tunnel) and lift the cover of the tunnel to the top and with small jerks we pull it towards the rear sofa. Having gained access to the bottom of the tunnel, unscrew all the bolts securing it to the floor. TUNNEL HAS BEEN REMOVED!
We remove all the air deflectors from the torpedo. We remove the air grille from the top (many have tweeters nearby) Do not pick at it from all sides! it is attached along the narrow edges, find a hole there, insert a sharpened screwdriver and remove the grille. Under the grille, unscrew the 10mm bolt with a head with an extension (on both sides of the torpedo) unscrew it with a pin? I congratulate you, you are a loser like me. We remove the steering wheel panel (the one above and below the ignition switch. We remove the board (we climb under it if we can’t find the 2 bolts and unscrew it) hold it or it will fall off and break the lamp wires. When disconnecting the wires, NOT SURE, WIND IT IN A BAND-AID! AND WRITE WHAT’S WHAT’S WHAT! AND WHERE! Having removed the control panel, we see from the top the bolt securing the torpedo + twist it. Twist the self-tapping screw + closer to the door at the very bottom of the control panel. Remove the cover of the mounting block by analogy with the control panel. Unscrew (mounting block with fuses) 1 bolt on the cover + Similar to On the side of the mounting block, closer to the right side, we see a self-tapping screw + (you will have to bend over to see it) Remove the protective panels under the feet of the passenger and driver on each side, 2 bolts + On both (passenger and driver) under the removed covers, closer to the end, we see self-tapping screws , on the driver's side there is a mass attached to them! Or we twist with the mass or twist it by analogy with the passenger side. Why am I saying this? There are slight differences in the torpedoes. Most likely, after all the manipulations, you will sit in the driver’s seat =) Look next to the hood opening lever there will be a self-tapping screw +, twist it. We remove the speedometer. Remove the 4 bolts of the speedometer mask 2 top 2 bottom Remove the speedometer by unscrewing the 2 bolts on its sides + Mark with an adhesive plaster if you are not sure about the reassembly.
Well, that's it, you can smoke =) Don't smoke? Then let's continue)
We remove all electronics from the console. Don't forget about the emobilizer sensor! If it doesn’t work or is disabled, we cut it off; if you don’t want to put a start button in its place, you can rewind it, or put it on for show off. There aren't many wires there, we'll clean 2 of them. Also, don’t forget about the headlight range control. As a rule, problems arise only with pulling out the radio, we work with a sharpened screwdriver, it is advisable to have disposable pullers. Everything except the radio can be removed quite easily. Don't forget to mark all connectors if you are not sure! We remove the horn cover on the steering wheel (((gudyps) fafakolki) horns) by unscrewing the plastic LADA cover with a 24-mm wrench, using the HEAD or end, we unscrew the steering wheel fastening nut. We mark the spline connection with a marker so that we can then put the steering wheel in the correct position, and with sharp movements from left to right we tear out the steering wheel. Release the steering wheel position lever. We disconnect the covers on the racks (from the left and from the right) For those who do not understand what I mean, these are the covers on which the tweeters are often located or next to them, by the way, did you remember to disconnect them? =) Since many of us are losers who have unscrewed the top bolts along with the studs, either the torpedo has already crashed on you or you need to pull it a little towards the top and towards you, it will not come out completely! Don't wait any longer! We take a good flashlight and look behind the moved panel on the driver’s side. We take good scissors and cut off all the bundles that secure the bundles of wires, disconnect everything that can be disconnected and mark and mark. The panel still won't come out? Look carefully, not everything has been disconnected, not all the harnesses have been cut off. As the wires are disconnected, the panel will move away more. When removing the panel, it is better to immediately disconnect the Christmas tree from the stove or from the panel, otherwise it will no longer be necessary to lift it) Why don’t you remove it! I WILL GIVE ADVICE TO CLEAN THE PANEL! Seal all the cracks in the air tunnels and modify the Christmas tree! (information in the next post) and install at least the worst Shumka shield for the interior and engine. Kill 2 or 3 birds with one stone in one go! That's it, the panel is removed! Tin...
How to put on the panel? In reverse order! But there are features, details in the next post! (Post above)
It will be useful: Engine water hammer: what is it?
HAVE QUESTIONS ? WAITING IN THE COMMENTS
Step-by-step instructions for removing the VAZ 2110 dashboard
If you decide to start working on removing the torpedo with your own hands, then first read the step-by-step photo guide; if you have any questions, below there is a description of the steps in text.
- Work that involves tampering with the vehicle's electrical wiring (disconnecting connectors, devices) begins with disconnecting the negative terminal of the battery.
- Remove the steering column trim, disconnect the steering switch plug, remove the switch, ignition switch, block with wires.
- Disassemble the floor tunnel:
- On the left and right of the tunnel, facing panels with slots are secured with four self-tapping screws (through them warm air is supplied to the feet of the driver and front passenger). Use a Phillips screwdriver to remove the cladding elements.
- There is a rectangular plastic plug between the handbrake and gearshift levers. Using a flat blade screwdriver, carefully pry and remove the tunnel cover part.
- Remove four self-tapping screws securing the tunnel lining, in pairs, two on the right, 2 on the left.
- Lift the facing box from the rear edge and move it back a little.
- Disconnect the cigarette lighter and window controls (if the car is equipped with an electric window system) from the on-board power supply (plastic connectors), and mark them.
- Turn the cover to one side and, from the inside, disconnect the fastener holding the gearshift lever housing. Place the lid aside.
- Using a wrench, unscrew the nut securing the metal air duct to the floor on the passenger side. Remove the heat pipe.
- The base of the tunnel is held in place by four nuts: two in the middle, the rest in the rear. A 10mm socket wrench will help remove the fastening. Remove the box from the car.
- Remove the glove box.
- Unscrew the self-threaded fasteners on the hinge brackets with a screwdriver.
- Disconnect the backlight wires, hold the structure from below, and remove the box.
- Remove the mounting block.
- Press the latch button and easily fold the fuse box down.
- Unscrew the self-tapping screw and remove the latch.
- Lift, turn the block over, disconnect the wires, take it out. Don't forget about labeling.
- Detach the compartment door.
- Removing the torpedo.
- In the depths of the opened niches, screws are visible that secure the instrument panel. Remove them with a screwdriver with a cross on the end. Do the same with the lower side screws.
- The instrument panel is screwed to the controller bracket with two screws. While holding the head from turning with a screwdriver, unscrew the nuts with an 8-mm open-end wrench.
- Pry and remove the grilles of the side air exchange nozzles in the cabin.
- Two nuts secure the panel at the top. Using a ratchet wrench and a 10mm socket, remove the fasteners.
- Using both hands, remove the structure from the studs and bring it into the salon.
- Arm yourself with marking material, sequentially disconnect and mark the pads.
- Unhook the headlight hydraulic adjustment.
- Remove the dashboard.
- Use a tool to separate the air duct from the air distributor.
- Carry out the necessary work. Assembly occurs in reverse order. Plastic latches require careful handling. Tighten the screws gently. Lubricate threaded connections.
How to remove the Europanel on a VAZ 2112 video
The average owner of a VAZ 2112 rarely faces the need to remove the instrument panel of his car. The main reason why you have to dismantle the Europanel is body repair, electrical repair or repair of devices installed directly behind the instrument panel. Since it can be very difficult or even impossible to get to such devices without removing the instrument panel, in such cases you have to remove the entire europanel.
READ How to remove the heater motor on Priora
Removing the instrument panel is also required when eliminating squeaks and other noises that occur while driving a car, or when installing additional sound insulation for the interior. In addition, even with careful handling of the car, over time the instrument panel may lose its appearance and require replacement with a new one.
In this article we will try to cover the main stages of removing the europanel from a VAZ 2112 car. The “Euro” instrument panel can be found on cars of the VAZ 2110, VAZ 2111 and VAZ 2112 line. Therefore, everything that will be said below about dismantling the VAZ 2112 europanel is also true for the rest models. In addition, it should be noted that the fastenings of the Europanel are identical to the fastenings of a conventional instrument panel, so this step-by-step instructions can also be used when dismantling a conventional panel.
So, when removing the Europanel from a VAZ 2112 car, the sequence of actions should be as follows:
For safety reasons, it is necessary to turn off the power to the vehicle's on-board network. To do this, you need to disconnect the negative terminal from the battery.
The steering wheel needs to be removed. To do this, use a flat screwdriver to pry up and remove the decorative trim with the inscription “LADA” from the steering wheel. Next, using a Phillips screwdriver (PH2), unscrew the two screws that are located in the recesses under the removed cover. After this, remove the horn switch cover.
Now you need to fix the steering wheel. This can be done in two ways: turn the steering wheel all the way to the left or remove the key from the ignition switch and turn the steering wheel in any direction until it clicks when it locks. After this, you should unscrew the central nut holding the steering wheel. To do this, you will need a socket wrench with a 24mm head (for convenience, it is advisable to use a socket wrench with a ratchet).
For safety reasons, there is no need to immediately remove the central nut - it should be left on the last 3-4 turns of the thread. After this, set the steering wheel to the middle position (the front wheels should be parallel to the longitudinal axis of the car). In order not to waste time finding the correct position of the steering wheel when installing it, before removing the steering wheel, you can apply coaxial marks on the steering wheel itself and the upper plastic cover of the steering column.
Next, you need to use medium-force blows on the rear of the steering wheel from the left - right and from above - from below to knock it off the splines of the steering shaft. After this, you can completely unscrew the central nut and remove the steering wheel.
The process of removing the steering wheel from VAZ 2110-2112 cars is shown in detail in the following
Now you need to remove the side panels on the left and right sides of the center console. Each shield is secured at the rear with two screws, which must be removed using a Phillips screwdriver (PH2).
Next, use a Phillips screwdriver (PH2) to unscrew the screws securing the glove compartment, located underneath the glove compartment at the front wall of the car interior. Having removed the glove compartment from its place, it is necessary to disconnect the wires going to the glove compartment illumination lamp. After this, the glove compartment can be completely removed.
The next step is to use a Phillips screwdriver to unscrew the screws securing the instrument panel. One of the screws is located in the glove compartment niche, the rest are along the edges at the bottom of the instrument panel.
Now you need to use an 8-mm open-end wrench and a Phillips screwdriver to unscrew the screws securing the instrument panel in the area of the center console.
After this, remove the protective grilles of the air ducts located along the edges of the instrument panel. To do this, just pry them off with a flat-head screwdriver.
Next, use a socket wrench to unscrew the nuts located under the removed air duct grilles.
Remove the instrument panel from the studs by lifting it up and pulling it towards you. After this, you need to disconnect all the connectors on the wiring harnesses going to the instrument panel, having previously marked them for subsequent assembly. Now panel can be completely removed.
The process of removing the instrument panel from a VAZ 2112 is shown in the following
We hope our instructions will be useful for you!
How to remove a panel on a VAZ 2110
We will not understand the reasons why you decide to disassemble the instrument panel on your “ten”. It’s better to talk about how to properly remove the instrument panel on a VAZ 2110.
The procedure is quite labor-intensive, but if you have free time and patience, you can do the work in your own garage with your own hands without any problems.
Installation of an instrument panel from Priora on a VAZ 2110-2112
There is another method of modifying and tuning the instrument panel, which consists of replacing the dashboard from the Priora - VAZ 2170. Of course, the appearance will be much more interesting than even the Europanel, but connection and installation require a lot of investments, both financial and physical. The main problem with this modification is that the connectors for the under-panel wiring of the Priora and the under-hood of the VAZ 2110, which of course need to be connected, are different, and the connectors simply do not fit together.
In this case, there are two ways:
- Completely take all the wiring from the Priora, including the engine compartment harness, interior harness, power window control unit, comfort unit, etc.
- Join completely two different types of wiring manually, cutting off the connectors and insulating almost every wire.
Everyone decides for themselves whether the game is worth the candle, namely whether the result obtained is worth the money and time that will be spent on all these improvements and alterations. Even if you take the price of the Europanel, you will have to pay up to 20,000 rubles for it. new or from 8000 for a used one, it’s already expensive. As for the panel from Priora, everything here will be even more expensive - the assembled panel alone can cost 25,000 rubles. new and from 10,000 rub. boo. at a car wrecker.
When disassembly is required
There are several reasons why car owners want to remove the tidy:
- It is damaged by mechanical shocks, as a result of hitting potholes, etc. In fact, the strength of the standard dashboard leaves much to be desired, so damage is not uncommon for dozens;
- There are scratches and abrasions on the surface of the device, the paint has peeled off somewhere, and there are signs of wear. That is, the appearance of the panel leaves much to be desired, so to correct the situation it needs to be removed;
- The desire to transform the interior of the car. Many VAZ 2110 owners decide to get rid of the old dashboard in order to put something more modern, original in its place, and change the backlight to LED lights.
If you connect something incorrectly and reassemble the panel without checking, you risk not only having to re-disassemble the dashboard, but also encountering non-functioning devices, short circuits and even worse consequences.
Now let's talk specifically about how to remove the panel on a VAZ 2110. To do this, it is enough to follow a certain sequence that will allow you to dismantle the unit correctly and quickly without unnecessary risks.
Removing the lining
Many motorists, being confident in their own abilities, ignore recommendations and do not follow instructions. At the same time, they remove the panel, while simultaneously dismantling another half of the interior.
The step-by-step guide we offer will allow you to avoid unnecessary manipulations, save time, effort and nerves.
- Buy special self-adhesive pieces of paper. The type that they stick on products in stores. You will also need a marker, pen or just a pencil. Each element to be removed should be marked so as not to get confused later when reassembling the elements. Write down the sequence on a piece of paper, or have your assistant do it under your dictation.
- Removing the front seats will make access to the instrument panel much easier. You won’t have much time to sit on them, and in order to get to certain fastening elements, the chairs may simply get in the way.
- There are screws on the sides that will allow you to remove the tunnel. Moreover, the upper part is removed first, and only then the lower. The order is not important, you can try in reverse order. Only then will it be frankly inconvenient for you to work. Tested by many craftsmen when disassembling the dashboard.
- Remove the steering column cover. This way you can remove the cover itself, as well as the steering wheel. To perform this task, three self-tapping screws and four fixing screws are removed. The steering wheel will sit on the splines quite firmly, so you will have to remove it with force. You can shake the steering wheel to the sides, tug. Just take care of your face, because with a sudden force the steering wheel can fly out of its seat and fly right at you.
- The steering column switches must be removed.
- Remove the glove compartment fasteners and remove it from its seat.
- After that, proceed to the mounting block. You have to remove not only the cover, but also remove all the connectors and relays.
- Now it’s time to figure out how to remove the VAZ 2110 panel trim and pillar trims. This is done quite simply, given that all fasteners are not hidden. Be sure to unscrew the fasteners of the headlight hydraulic corrector and push it inward.
- Now comes one of the most important moments - removing the screws that hold the instrument panel. They connect the panel to the body of your car. Unscrew the screws and two studs. It is not difficult to find them, since these studs are located under the cover of the air supply tunnel to the side windows.
- Having completed all the specified procedures, only the lower air duct and the steering shaft will hold the panel. After this, you can begin the planned repair or modernization of the car, which required the mandatory removal of the dashboard.
Lada 2112 “IraFastBack” › Logbook › Vacations. Part 5. Removing and soundproofing the front panel of the VAZ 2112
Cheers to everyone again)
As soon as the touch-up of the body was finished (THANK THE GODS), I got to the global alterations in the interior. For as long as I can remember, the most hellish nightmare
for me it was removing the front panel on absolutely any car. If you took it off, it means you have balls dude... This is how a boy becomes a man, this is how character is tested, this is how nerve cells are tempered)))
Why remove it at all and is there any point in it? The work is not easy
I answer: - yes there is! There is, and what kind of one! I’ll write a little more at the end!
The reason I don’t like basins is because of their disgusting interiors. Not so much for the interior itself, but for the noises, squeaks and rattles... The interior is built on snot. When driving on our roads, all the plastic becomes loose and the interior begins to be held together by snot and with God's help. And on old cars that have already seen life and these roads with God's help on old dried up snot. I was always bothered by extraneous sounds in a car, rattling, clanging. This is how you drive with friends or with a girl in a car - such a roar is as if we were driving a cart in a harness. I endured it. But when my eye began to twitch and my hair turned gray, I realized that I'm ready. I understood perfectly well that it would never be a foreign car, no matter what you do with it...But! The goal of all this in general is to assemble a VERY NON-STUPID TAN, in which it would be PLEASANT to be in, so that it would not look like a wreck and in general would clearly demonstrate that even a Lada can be quite a pleasant car if you put your hands on it, I wanted to assemble a beautiful, thoughtful and well-organized car, to collect for it all the best that I could, so that I AND MY PASSENGERS WOULD LIKE IT
...
My salon was already half spread out. It was a matter of little things... a matter of courage... I had no idea what could be waiting for me there... Cockroaches, 6 kilograms of wires, plugs, twists... A corpse.
