Print this article Font size 16
We will not understand the reasons why you decide to disassemble the instrument panel on your “ten”. It’s better to talk about how to properly remove the instrument panel on a VAZ 2110.
The procedure is quite labor-intensive, but if you have free time and patience, you can do the work in your own garage with your own hands without any problems.
The main reasons for replacing the front panel:
- Appearance - You want to replace your old, scratched or damaged panel with a new one.
- Sound insulation - for this you will have to remove the dashboard to carry out work on noise, sound, and vibration insulation of the cabin.
- Problem with air ducts.
We recommend disassembling the components with a partner, as well as marking or remembering the wire connections.
First of all, you need to disconnect the negative terminal from the battery, then remove the steering shaft casing, remove the steering wheel and the ignition switch. After this, we proceed to disassembling the torpedo.
So, below are instructions for removing and replacing the front panel on VAZ 2110, 2111, 2112 in the photo.
Unscrew 2 screws on the right and 2 on the left on the central tunnel.
Next, remove the covers on both sides.
Remove the plug near the handbrake.
Unscrew the screws on the left and right of the central tunnel.
Unscrew the screws at the back of the central tunnel.
Removing the plastic of the central tunnel.
Disconnecting the cigarette lighter wires. Mark so as not to get confused when connecting to the assembly.
Remove the gearshift knob cover.
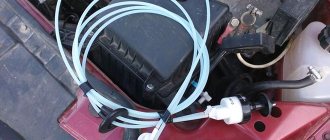
Using a wrench, unscrew the interior heating air duct.
As you noticed, if you follow our instructions, the process becomes much easier. You can remove the VAZ 2110, 2111, 2112 torpedo with your own hands, but it is better to do it with an assistant.
Source: https://automas.ru/vaz/2110/snyatie-zamena-torpedy-perednej-paneli-na-vaz-2110-2111-2112/
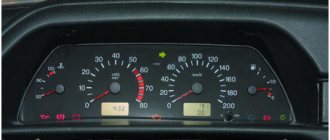
Replacing a car speed sensor
As for its location, look for the DS in the engine compartment in close proximity to the exhaust manifold. To be honest, the place where it is installed cannot be called ideal. While the car is running, the manifold heats up. The sensor wires rub against it, which over time leads to malfunctions and short circuits. Therefore, experts recommend that the first step is to properly insulate the wiring, and also use some kind of clamps so that the wires do not come into contact with the collector. This significantly extends its service life.
If the check shows that the DS is faulty, it needs to be replaced. Repairing sensors and similar small electronic devices is a thankless task. In a garage environment, this is unlikely to be possible, and the only thing that can be done is to clean the contacts from oxidation (this can be a problem).
It doesn’t matter whether you have an injection car or a carburetor with a Europanel - the connection of the speed sensor to the instrument cluster is identical.
Replacing the VAZ speed sensor: step-by-step instructions:
- Drive into the pit - it will be more convenient to work from below - and wait until the engine cools down.
- Turn off the vehicle's power by removing the cable from the negative terminal of the battery. Do not close the hood after this, this will provide you with lighting.
- Locate the speed sensor on the transmission. Clean it and everything near it with a rag to remove any dirt.
- By pressing the spring clip, disconnect the wire block from the sensor.
- Dismantle the sensor itself by unscrewing it counterclockwise - with your fingers or an open-end wrench to “22”.
- Carefully, so as not to break anything, install a new part in place of the removed part. Connect the wire block to it and the procedure for replacing the speed sensor can be considered complete.
How to properly connect a new DS? It is important here that the device rod fits correctly into the fixing sleeve, otherwise rotation will not be transmitted to the sensor. If the sensor fits into the socket the first time, then everything is in its place, and if something prevents it from moving, then the rod did not fit into the bushing.
How to remove a torpedo on a VAZ 2110 with your own hands
VAZ 2110 owners pay attention not only to timely maintenance and vehicle serviceability. Appearance, interior trim, and instrument panel play an important role.
Sometimes it becomes necessary to disassemble the front inner lining of the car.
The article will help car enthusiasts independently remove, replace individual elements, change the interior, torpedoes of a VAZ 2110 car, and perform the necessary repair and maintenance work.
Types of torpedoes on the VAZ 2110
The VAZ automobile plant produces a number of different modifications of the VAZ 2110. The differences concern not only the power unit, transmission, systems, and mechanisms. The surroundings of the cars are undergoing changes. The main options for completing the front panels are known.
Basic old sample. Simple strict design. The instruments are located opposite the steering wheel.
Overlay panels "Chestnut":
- with a standard layout (reminiscent of the first issue);
- The dashboard is in the center, to the right of the steering wheel.
Home craftsmen contribute to the decoration and replace the cladding using spare parts from other car models. The landing mounts of the released panels and torpedoes match. It remains to pay close attention to the wiring and establish the correspondence of the signals.
Why is it necessary to remove the torpedo?
In addition to the aesthetic component, dismantling a torpedo has the following goals:
- gaining access to on-board electrical wiring - repair, replacement of electrical wires, connectors;
- connection of additional devices,
- air duct maintenance;
- prevention, installation of insulation of the interior from engine noise;
- elimination of vibration, squeaks of panel components, torpedoes.
Preparing to remove the torpedo on a VAZ 2110
To work you will need:
- standard set of wrenches (open-end, socket, ratchet wrench with a set of heads),
- flat blade screwdriver, Phillips head,
- mount,
- marking tags (sign connectors),
- attentiveness, patience (there is delicate, painstaking work ahead).
It is necessary to remove the driver's, passenger's seats, and steering wheel.
Procedure for removing the torpedo
If you decide to start replacing the torpedo on a VAZ 2110, then follow these steps:
- Unhook the torsion bars from the front under the seat (take them out of the fixing brackets, pry them up with a pry bar);
- unscrew the four nuts;
- remove two fasteners, release the front stop;
- from the rear seat side, using a 10mm ratchet wrench, unscrew the three bolts securing the seat to the runners;
- push back, tilt the seat back;
- unscrew the 2 front bolts securing the guide skids;
- remove the seat from the car, do the same with the second seat;
- pick up and remove the silver “Lada” plate on the steering wheel;
- unscrew two self-tapping screws;
- remove the top cover;
- lock the steering wheel;
- Using a 24 mm socket wrench, unscrew the nut in the center of the column;
- Lightly tapping the wheel from bottom to top with the heel of your palm, swaying left and right, remove the steering wheel from the splines. The salon is ready.
Step-by-step instructions for removing the VAZ 2110 dashboard
- If you decide to start working on removing the torpedo with your own hands, then first read the step-by-step photo guide; if you have any questions, below there is a description of the steps in text.
- Work that involves tampering with the vehicle's electrical wiring (disconnecting connectors, devices) begins with disconnecting the negative terminal of the battery.
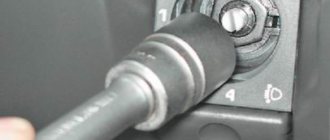
- Remove the steering column trim, disconnect the steering switch plug, remove the switch, ignition switch, block with wires.
- Disassemble the floor tunnel:
- On the left and right of the tunnel, facing panels with slots are secured with four self-tapping screws (through them warm air is supplied to the feet of the driver and front passenger). Use a Phillips screwdriver to remove the cladding elements.
- There is a rectangular plastic plug between the handbrake and gearshift levers. Using a flat blade screwdriver, carefully pry and remove the tunnel cover part.
- Remove four self-tapping screws securing the tunnel lining, in pairs, two on the right, 2 on the left.
- Lift the facing box from the rear edge and move it back a little.
- Disconnect the cigarette lighter and window controls (if the car is equipped with an electric window system) from the on-board power supply (plastic connectors), and mark them.
- Turn the cover to one side and, from the inside, disconnect the fastener holding the gearshift lever housing. Place the lid aside.
- Using a wrench, unscrew the nut securing the metal air duct to the floor on the passenger side. Remove the heat pipe.
- The base of the tunnel is held in place by four nuts: two in the middle, the rest in the rear. A 10mm socket wrench will help remove the fastening. Remove the box from the car.
- Remove the glove box.
- Unscrew the self-threaded fasteners on the hinge brackets with a screwdriver.
- Disconnect the backlight wires, hold the structure from below, and remove the box.
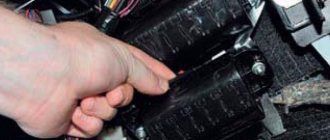
- Press the latch button and easily fold the fuse box down.
- Unscrew the self-tapping screw and remove the latch.
- Lift, turn the block over, disconnect the wires, take it out. Don't forget about labeling.
- Detach the compartment door.
- In the depths of the opened niches, screws are visible that secure the instrument panel. Remove them with a screwdriver with a cross on the end. Do the same with the lower side screws.
- The instrument panel is screwed to the controller bracket with two screws. While holding the head from turning with a screwdriver, unscrew the nuts with an 8-mm open-end wrench.
- Pry and remove the grilles of the side air exchange nozzles in the cabin.
- Two nuts secure the panel at the top. Using a ratchet wrench and a 10mm socket, remove the fasteners.
- Using both hands, remove the structure from the studs and bring it into the salon.
- Arm yourself with marking material, sequentially disconnect and mark the pads.
- Unhook the headlight hydraulic adjustment.
- Remove the dashboard.
- Use a tool to separate the air duct from the air distributor.
- Carry out the necessary work. Assembly occurs in reverse order. Plastic latches require careful handling. Tighten the screws gently. Lubricate threaded connections.
Source: https://vaz-2110.ru/kuzovnoj-remont/kak-snyat-torpedu-na-vaz-2110-svoimi-rukami.html
Removing the instrument panel and disassembling the center console on a Ford Focus 2
The content of the article:
Removing the instrument panel on a Ford Focus 2
The need to remove the instrument panel (speedometer, tachometer, etc.) occurs quite rarely. The reason may be the need to replace light bulbs or solder contacts, or when one of the devices described above needs to be replaced. This article shows how to do this correctly and quickly, without harm to the panel and the devices themselves.
Step-by-step instructions for removing the instrument panel for Ford Focus 2
To remove the instrument panel on a Ford Focus 2 you need:
1. TORX T25 key.
2. Medium sized screwdriver.
Progress of work on removing the instrument panel on a Ford Focus 2
1. Pull the steering wheel towards you as far as possible.
2. Then pull the plastic decorative cover towards you, it is marked in red in the photo.
3. After this, you will have access to the panel mounting screws. To unscrew them we use a TORX T25 key.
4. Take a screwdriver and center it between the dashboard and the visor until it touches the latch, then pull up until the latch is disengaged.
5. Pull the Ford Focus dashboard towards you, not too much, so as not to break anything. If it doesn’t work, grab the connector latch with your fingers and try again in the direction of the arrow.
6. When the latch is turned, the connector should come out of the mating part.
7. Now you can remove the glass. Unfasten the latches marked in red in the photo.
8. As a result, you will get two different parts, which can now be disassembled further.
9. Now you need to remove the arrows. To ensure that nothing goes astray and that after assembly the instruments show accurately, take a pencil and mark with it the position of the arrow in the lowest position.
10. Remove the caps from the arrows; mine are silver.
11. Using gentle movements so as not to break anything, remove the arrows. To do this, use a wide knife, place it at the base and pry the arrow up.
12. Remove the scales.
13. Unfasten the back cover from the panel.
14. Remove the board by bending the latches.
15. You can clean the on-board computer display if necessary.
After carrying out the work you need, you can assemble the Focus instrument panel; assembly is performed in the reverse order.
Well, now you know how to remove the dashboard of a Ford Focus 2, and if necessary, you can do it yourself.
How to disassemble the center console of a Ford Focus 2 down to the armrest
Firstly, we must immediately make a reservation that there are many different interior options for Focuses, depending on the year and configuration. I am only describing my version, namely FF2, 2008, Spanish, Ghia SE equipment, square radio.
The order doesn't have to be this way. We'll go from top to bottom. 1. Remove the frame that is around the radio. First, we take out the radio and see this picture.
To unscrew these bolts you will need a screwdriver or a torx bit of the appropriate diameter. Here it is, if anyone doesn’t know
This pad is no longer secured in any way and can be gently pulled towards you.
2. Next, remove the heating frame. As soon as you remove the top frame, you will see 2 more bolts exactly the same as before.
Once everything is unscrewed, you can pull the frame towards you a little. To remove it completely, you need to disconnect the connectors from the heating buttons (someone else has an ESP button). There is no need to disconnect the connectors from the seat heating controls. The blocks with twisters are separated from the frame along with the wires. Everything is easy and simple there.
3. Next we seem to have a mini-glove compartment in order (someone has an ashtray), but that was not the case. We're skipping this one for now. At this stage we need to remove the plastic that goes to the armrest. a) To do this, first remove this gearshift knob cover.
How to disassemble the instrument panel of a VAZ 2110
Background
The car constantly aggravates difficulties that must be solved either by independent knowledge, ingenuity and advice from experienced motorists, or by contacting a service center. In the latter case, the result will be more expensive, but not always better.
Even if you are not going to do this right now, it won’t hurt to know how to properly disassemble the panel on a VAZ 2110, and even more so if you continue this work.
Instrument panel VAZ 2110
If necessary
It should be clear that the dashboard of the VAZ 2110 is not particularly strong, because it can simply be destroyed. Or she dressed, rubbed, scratched.
But often the reason is different: the design will be more pleasant, well, not for everyone, not everything is in order with “ordinary” lighting. And there are more modern, LED, elegant ones. But in order to change or change anything, you must first disassemble the old dashboard.
Replacing backlight bulbs
1. Take the plastic rim of the lamp and turn it to the left. When turning, you will feel that the lamp has become free.
2. Take a new lamp, insert it, and turn it to the right until it locks.
If you don’t understand anything about removing the shield or replacing lamps, watch the video below.
Video lesson
Source
How to disassemble the floor of a VAZ 2110 for sound insulation
To successfully remove the instrument panel, you can use the following instructions:
- Disconnect the negative terminal from the battery;
- Next, we look at the steering wheel housing, the ignition switch and the steering wheel;
- We unscrew and remove the two self-tapping screws securing the right panel of the floor tunnel lining (photo below);
- · Remove the shield (photo below);
- · Similarly, remove the left shield; · We remove the plug for the floor tunnel lining cover by slightly prying it with a screwdriver (photo below);
· Using a Phillips screwdriver, unscrew the screws securing the lining cover: two of them are located in the middle part of the tunnel (in the photo below - on the left) and two in the rear part of the tunnel (in the photo below - on the right).
· After this, lift the cover of the floor tunnel lining slightly (photo below);
- · If your VAZ 2110 is equipped with electric windows, then to carry out the following actions you must first disconnect the connectors from the control keyboard; · After this, disconnect the cigarette lighter wire connector (photo below);
· The holder of the gearshift knob cover from the floor tunnel lining cover can be detached more easily if it is slightly pryed from below with a screwdriver (photo below);
- · After this, you can remove the cover of the floor tunnel lining;
- · Next, using a 10mm wrench, unscrew the nut securing the interior heating air duct (in the photo below - on the left) and remove the air duct (in the photo below - on the right);
- · In the front (in the photo below - left) and in the rear (in the photo below - left) parts of the fastening there are two nuts each, which also need to be unscrewed (using a 10mm socket);
- · Now you can remove the housing of the floor tunnel lining (photo below);
- · Unscrew the screws securing the glove box hinge bracket with a Phillips screwdriver (photo below);
- · To remove the glove box itself, you need to disconnect the wires from the lampshade (photo below);
- · On the left, under the cover of the mounting block, and on the right, under the glove compartment, there are two more self-tapping screws that hold the instrument panel fastening - we unscrew them using a Phillips screwdriver;
- · On each side of the lower side fastening of the instrument panel, unscrew one self-tapping screw (for this we use a Phillips screwdriver - photo below);
- · Using a size 8 wrench and a Phillips screwdriver, unscrew two more screws securing the panel to the controller brackets (photo below);
- · We remove the side nozzles for heating and interior ventilation from their sockets by prying them from below with a screwdriver (photo below);
- · The upper fastening of the instrument panel is held in place by two nuts - we unscrew them with a 10mm socket (photo below);
- · Lift the instrument panel, remove it from the studs and move it toward you (photo below);
· Disconnect the wire connectors and remove the headlight hydraulic corrector. After this, you can completely remove the panel (photo below).
- After the instrument panel is unscrewed and removed, remove the dashboard from the upper side pins.
- When disassembling the interior, it is recommended to put each nut, bolt and other small parts into separate bags and label them: this way, when reassembling, it will be easier for you to understand what was removed and where it came from.
- After this, we remove the carpet - underneath there is standard sound insulation (photo below).
In some places you can see standard vibration isolation. The vibration material we have chosen will be glued just on top of the standard one. First you need to remove the factory sound insulation and degrease the surface (for this it is best to use White Spirit).
Since for the convenience of soundproofing the interior you have to disconnect all the wires, it is better to sign them with a marker or mark them in some other way when disconnecting.
Source: https://xenon-kiev.com.ua/razborka-pola-vaz-2110-dlya-shumoizolyacii/
Photo instructions
So, we only need two Phillips-blade screwdrivers:
The first step is to unscrew the two self-tapping screws at the top of the shield trim, for which you will need a short screwdriver:
Then also two bolts from the bottom along the edges (shown below as an example of one side):
Now carefully detach the cover from above and move it to the side.
Now you need to disconnect the plugs with wires from the buttons on one side in order to move the cover to the side:
Now you can unscrew the two bolts securing the VAZ 2110 instrument panel, on both sides (the self-tapping screw is shown on the right):
Then carefully move the shield back, disconnecting it from the upper plates:
To completely remove it, you need to disconnect the two plugs with bundles of wires that go to the back of the instrument cluster:
And without any problems we remove it from the instrument panel, the result of which is clearly shown in the photo below:
Replacing light bulbs in the dashboard lighting
The light bulbs are attached quite simply and in order to remove them, you need to carefully turn the base counterclockwise until it comes out of its place.
And we install the new lamp in its original place:
If you have any questions on this topic, you can ask them in the comments to the article.
Source
VAZ 2110 panel, removal, installation of dashboard, sound insulation of VAZ 2110 panel
The VAZ 2110 panel or the “tens” dashboard has become a new word in the interior design of Lada cars. Despite its interesting shape and ergonomic appearance, panel 2110 eventually begins to make a lot of unnecessary sounds when the car is moving.
This is especially noticeable on cars with high mileage. Therefore, very often the “tens” torpedo is completely disassembled in order to carry out total sound insulation and eliminate squeaks.
Let's say right away that disassembling the VAZ 2110 panel is not difficult in principle, but it is a very labor-intensive job that requires time and attention. The fact is that to remove the panel you will have to completely unscrew the steering wheel and disconnect a lot of electrical connectors.
In order not to damage the electrics, before disassembling the VAZ 2110 dashboard, be sure to disconnect the battery . This is how the “tens” panel looks schematically.
This figure shows in detail, in the smallest detail, all the fasteners of the VAZ 2110 panel.
- 1 – panel
- 2 – side nozzle for ventilation and heating of the cabin
- 3 – instrument panel trim
- 4 – cover fastening screws
- 5 – panel fastening screws
- 6 – box
- 7 – console trim
- 8 – cover
- 9 – instrument panel panel
- 10 – mounting block cover
To change the torpedo trim, it is not necessary to remove it completely!
So let's get started, let's look at the panel overlays, which are divided into:
Euro-1, another name is Caprice and has the index 21104. The features of this lining are that it does not have a passenger shelf.
Euro-2, index 2110L, cover but already comes with a passenger shelf.
Euro-3, a cover without a shelf, but under the instrument panel of Kalina, Priora, and has a climate control module with 3 knobs and an emergency stop button.
There are also exclusive panel that make the VAZ 2110 similar to the Nissan Primera, where the instrument panel is in the center.
In addition to these Euro-overlays, there are overlays that are installed on top of them. For example, the overlay of the Chestnut panel.
It is not difficult to install the Kashtan overlay on the dashboard, so we will not dwell on this, but changing the old panel overlay to the Euro one is already more difficult.
The euro overlay for the panel consists of:
- On the masonry itself
- Inserts for buttons (small insert 2110L-2120031, large 2110L-2120032)
- Air ducts (2114-81080623)
Replacing the torpedo lining of a VAZ 2110
Replacing the torpedo lining of a VAZ 2110
.
How to remove the ponnel on a VAZ 2110
our group on VK.
- Device panel trim (2110L-5325124)
- Double button for turning on the headlights and low beam
- Key for turning on the rear fog lights (with fixation)
- Rear window heating switch (latching)
- Key pads 2 pcs.
- Plugs instead of keys 6 pcs.
- Wiring harness for connecting the dual side position switch and low beam headlights
- Block
- Device panel fastenings
- It may be necessary to purchase separately different keys for the VAZ-2114 and pads for them.
The cover gives the impression of a high quality product. It is softer than the old pad and, as the developers say, is more injury-proof. They also promise improved air flow to the side windows.
Now we are moving towards installation, and here we can distinguish 2 methods, each of which has its own advantages and disadvantages:
How to properly remove a torpedo on a VAZ-2110 without damaging it: step-by-step instructions
In the design of the VAZ-2110 car, the torpedo is the most revealing part.
Every driver wants to sit in a beautiful and expensive interior while driving. But the factory panel has a moody, angular appearance. This becomes especially noticeable after using the car for a long time, when abrasions and scratches begin to appear on it. Each driver solves this problem in his own way, some purchase a new factory dashboard, others install a panel from foreign car manufacturers. A beautiful trim from a third-party manufacturer allows you to decorate the interior to the level of a foreign car. Whatever option is chosen, you initially need to know how to remove the dashboard on a VAZ-2110 car in order to install another one.
The material from which the pad is made is much softer than the factory panel and is not surprising at the presence of a grinding noise while the machine is moving.
In most cases, motorists dismantle the standard panel precisely because of grinding and squeaking. There are several options for the updated panel for the VAZ-2110, which differ in their design. The panel is available for sale as a set:
- New version of the panel, significantly different from the factory design.
- Brackets, buttons, instrument panels and air vent inserts.
- Set of wires and block for switch.
- Buttons for low beam, fog lights, dimensions and heating.
- Special plugs that are installed in places where there are no buttons.
Dismantling
Removing the dashboard takes a lot of time, since there are a huge number of wires under it, through which electricity is distributed throughout the cabin. The fastenings on the dashboard of the VAZ-2110 car are fragile, so every action during dismantling must be careful.
If the fastenings are damaged, it will be impossible to firmly install the panel in its original place, and squeaks and noise during movement will increase significantly.
In most cases, to improve the design there is no need to completely remove the panel; it is enough to dismantle only the upper part, but there are non-standard situations, so the article offers a description of a complete analysis.
Tools
In order to completely remove the housing, you will need:
- a set of keys and screwdrivers;
- marker;
- adhesive based labels.
The main work will involve a 10 mm wrench and a Phillips screwdriver. You will also need a water-based marker, since it washes off easily, it is necessary so as not to mix up the removed parts. This also applies to adhesive labels. There are too many parts and wires, so you shouldn't rely on memory. Stickers and bullet points will help you remember the starting place of all the components.
Preparatory work
Some are satisfied with dismantling without removing the remaining components of the interior, but this takes extra time and complicates the process as a whole. In order not to add more work to yourself, it is recommended to clear the interior for free movement. Strictly observing the sequence, you need to remove:
- armchairs;
- glove box;
- steering wheel;
- disassemble the floor tunnel. To do this, you need to unscrew the screws and move the part back a little.
Choosing an oil filter for the VAZ-2110
We dismantle the lower part in the same way. The next step is to remove the glove compartment, after which you should remove the relay and mounting block. As you disassemble, you need to mark all the wires. Particular attention should be paid to the speedometer.
Removing the torpedo step by step
We find two screws on the central panel on the right and unscrew them. We perform the same action on the other side on the left. After this, carefully remove the shield from both sides.
- Using a flat-head screwdriver, pry off the plug, which is located on the central tunnel. We unscrew the tunnel fastenings located on the sides and behind it. Unscrew the screws holding the central panel.
- This part of the interior can already be removed completely. We see that there is access to the cigarette lighter. We mark the wiring and disconnect it, then remove the cover from the gearbox handle.
- The next step is the air duct. We take the key for 10 and dismantle it. There is access to the central panel, which is held on a mount in the front and rear. Unscrew the screws and remove the panel. After dismantling the central panel, you can move on to the main body of the torpedo.
- The glove compartment was removed in advance, as it interfered with the overall process. All that remains is to disconnect the backlight and unscrew the fastener on which it was held.
- Carefully pry up the air duct with a screwdriver and then remove it. There is still a nut on the dashboard that needs to be unscrewed. Now the panel can be easily removed by lifting it up and slightly pulling it towards you. Now it will easily slide off the stilettos. We take out the plugs, not forgetting to mark them with a marker.
Preparatory work
Some are satisfied with dismantling without removing the remaining components of the interior, but this takes extra time and complicates the process as a whole. In order not to add more work to yourself, it is recommended to clear the interior for free movement. Strictly observing the sequence, you need to remove:
- armchairs;
- glove box;
- steering wheel;
- disassemble the floor tunnel. To do this, you need to unscrew the screws and move the part back a little.
We dismantle the lower part in the same way. The next step is to remove the glove compartment, after which you should remove the relay and mounting block. As you disassemble, you need to mark all the wires
Particular attention must be paid to the speedometer
How to quickly and accurately disassemble a panel on a VAZ 2110
The car constantly throws up problems that have to be solved either using independent knowledge, ingenuity and tips from experienced car owners, or by contacting a service center. In the latter case, the result will be more expensive, but not always of better quality.
Even if you are not going to do this right now, it still doesn’t hurt to know how to properly disassemble the panel on a VAZ 2110, and even more so if you are one step away from this work.
When you need it
It should be noted that the instrument panel on the VAZ 2110 is not particularly durable, so it can simply be damaged. Or it has become worn, frayed, scratched.
But often the reason is different: I would like the design to be more beautiful, and not everyone is satisfied with the “standard” lighting. And there are more modern ones, LED, stylish. But in order to change anything or even replace it, you must first disassemble the old instrument panel.
This material will help you change the dashboard lighting on a VAZ 2110: https://vazweb.ru/desyatka/salon/podsvetka-paneli-priborov.html
Disassembly procedure
Many people are interested in whether it is possible to remove the dashboard of a VAZ 2110 without “demolishing” the floor of the cabin? It's probably possible, but it would be very inconvenient.
Therefore, we act according to this plan:
- Let's prepare a marker and self-adhesive labels (which are usually glued to the product). They can be bought at points where all sorts of small things are sold such as napkins, bags, etc., as well as in stationery stores;
- We remove the front seats from the interior;
- We unscrew the screws on the sides, remove the tunnel (first its upper part, then the lower);
- We disassemble the steering column casing, remove it and the steering wheel. To do this, you need to unscrew 3 self-tapping screws and 4 screws. Please note that the VAZ 2110 steering wheel sits quite tightly on the splines, so you need to remove it by rocking and tugging, but being careful of a sharp blow to the face, if you suddenly overdo it and it will fly out;
- Next are the steering column switches. They also need to be removed;
- Don’t forget to mark everything and write down on a piece of paper what we are filming;
- We unscrew the glove compartment (in “understandable” language - the glove compartment) and also take it out;
- Next comes the disassembly of the mounting block and its cover. To do this, disconnect all connectors and relays;
- Now we have almost opened the instrument panel on the VAZ 2110. All that remains is to remove the strut covers, unscrew the headlight hydraulic adjustment and push it inward;
- Now the main task is to unscrew the screws securing the instrument panel to the body. To remove it completely, you need to unscrew the two studs located under the covers of the tunnels for supplying air to the side windows.
What to do with the wires?
You will probably be amazed at the number of wires located in the panel space, intended to power various devices in your VAZ 2110. It would be more convenient to remove everything together with a lump of wires. But take your time.
It is unlikely that you are going to change anything on a completely new car, so in the future you will spend a long time figuring out which wire comes from what, and how to connect it.
So that it turns out that disassembly went quite smoothly, but reassembly led to a slight stupor.
So try to disconnect all the connectors and wires that you can. Now you can finally remove the panel and remove it from the car. For fresh traces, do not forget to separate (you can tie in a pile) the entire wiring harness that belongs directly to the instrument panel, and mark the rest with self-adhesives. This will help you a lot when you start installing new equipment.
Source: https://vazweb.ru/desyatka/salon/kak-razobrat-panel.html
When disassembly is required
Electronic instrument panel VAZ 2107
There are several reasons why car owners want to remove the tidy:
- It is damaged by mechanical shocks, as a result of hitting potholes, etc. In fact, the strength of the standard dashboard leaves much to be desired, so damage is not uncommon for dozens;
- There are scratches and abrasions on the surface of the device, the paint has peeled off somewhere, and there are signs of wear. That is, the appearance of the panel leaves much to be desired, so to correct the situation it needs to be removed;
- The desire to transform the interior of the car. Many VAZ 2110 owners decide to get rid of the old dashboard in order to put something more modern, original in its place, and change the backlight to LED lights.
To make any changes to the instrument panel, the first priority for the car owner is to remove the old structure. It's not difficult to do this yourself. Follow the instructions strictly, do not break the sequence of steps, and pay close attention to the markings of all elements and especially wires.
https://youtube.com/watch?v=QH_04nB8OrI
If you connect something incorrectly and reassemble the panel without checking, you risk not only having to re-disassemble the dashboard, but also encountering non-functioning devices, short circuits and even worse consequences.
How to remove a VAZ 2110 torpedo
In the interior of the VAZ 2110, the dashboard is the most noticeable part. Every driver wants to sit in a stylish and well-maintained interior. But the standard panel looks angular and gray. This is especially noticeable after long-term use, when abrasions, scratches and cracks appear on the panel.
Motorists solve this problem in different ways - some install another standard dashboard from a VAZ 2110, other drivers prefer to install a Europanel - this is the name of the trim from a third-party manufacturer. The trim allows you to transform the interior and turn the “ten” into a foreign car, at least on the inside. Whatever you choose, removing the panel is a must.
In this material we will tell you how to properly dismantle the standard panel and install the Euro version.
This is what a standard VAZ 2110 torpedo looks like
Alternative torpedo
The alternative dashboard is softer than the standard “tens” dashboard, but the main advantage is the absence of unpleasant grinding and squeaking. Motorists decide to get rid of the standard one precisely because of the squeaking. For the VAZ 2110 car there are several types of panels that differ in design.
The panel is sold as a set:
- The panel itself, which is an alternative to standard plastic.
- Buttons, brackets and inserts for blowers and instrument panels.
- A set of wires and a block for a double switch.
- Buttons for low beam, heating, dimensions and fog lights.
- Plugs for buttons are installed in places where keys are not needed.
Alternative Euro-3 cover.
The experience of the owners of the “Ten” shows that proper removal and installation of the Europanel improves sound insulation, increases airflow and changes the appearance of the VAZ 2110 interior for the better.
We remove the torpedo
Removing and installing a new torpedo on a VAZ 2110 takes a lot of time, we also advise you to be patient, since there are dozens of connections and wires in this part of the interior. Each action must be careful, since the VAZ 2110 mounts are very fragile and can be easily broken. After this, the panel will no longer fit properly, and the car will noticeably increase in squeaking while driving.
In some cases, it is not necessary to completely dismantle the standard panel. Our article provides a description of a complete analysis.
Necessary tool
To remove the case, you should have in your arsenal:
- Labels with adhesive backing.
- Marker or pencil.
- Set of screwdrivers and keys.
The main assistants in this work will be a 10 mm wrench and a Phillips screwdriver. We need a pencil or a washable marker in order to mark the removed elements. This also applies to self-adhesive labels. There are too many wires and parts, after disassembling you will already forget where each component is located. Markings and stickers will remind you of the location of wires and parts.
Preparatory work
Some people prefer to disassemble without dismantling other components of the interior, but this significantly complicates and prolongs the work. We recommend preparing the interior as you will need room to maneuver. Remove the seats and steering wheel - follow this sequence. It is also worth dismantling the floor tunnel.
To do this, you need to unscrew the screws and move the VAZ 2110 part back. We perform the same operation with the lower part. The next step is to dismantle the glove compartment, now you can remove the mounting block and relay. During the process, each wire must be labeled. You need to be especially careful when handling speedometers.
Removal - step by step instructions
- We find the central panel, on the right side of it there are two self-tapping screws - unscrew them. We do the same with the opposite side. Now we dismantle the shield on both sides, as shown in the photo. Remove the shields from each side of the panel
- Next, use a flat screwdriver to pry off the plug installed on the central tunnel. Now you can unscrew the tunnel fastenings; they are located on the back and sides. Unscrew the screws that hold the central tunnel
Source: https://remontvazov.com/kak-snyat-torpedu
Let's prepare a new dashboard trim for installation
To do this, we cut off the remaining material of the Euro lining. There is no need to cut out any space under the dashboard, otherwise there will be a gap between the control column and the trim. In this place you simply need to make 2 cuts on the sides so that this part of the lining can be slightly bent as needed. Also, there is no need to cut off 10 mm from the sides of the lining in the area of the side air ducts; these places must be adjusted to the location.
We measure the panel overlay and adjust it as necessary. At this step, it is recommended to use anti-creak (soundproofing the panel). This way, you will insure yourself against squeaks in the future.
To install the dashboard in the Euro trim, you can use one of the methods:
- Use fasteners from the Euro lining kit.
- Use fasteners from an old lining (from drilling).
- We connect connectors and Europanel keys according to the instructions:
When the overlay is ready, let's try to install it. Fastening the Europlate in positions 1-7 of the diagram. We fix 35mm screws on top, which are then hidden under a plastic cover.
The advantage of this method is time. If you dismantled the panel, then you will spend no more than 3 hours changing the lining. If this is the first time you are faced with a similar type of work, then about five hours.
Post Views: 6