The article was sent by a blog reader to share his experience and help in solving the problem of a faulty on-board computer. I think that the material will be useful to many owners, since similar problems were encountered in one of the blog topics. And the solution is described below. I hope that the author will follow the topic and, if any questions arise, will help with advice, as he did all this with his car.
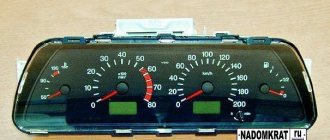
I won’t describe the process of removing the tidy, since I have a twelve-piece, not a viburnum (and to be honest, I don’t know how you remove it :-) We take the removed tidy and begin to disassemble it completely, that is, remove the glass, unscrew the screws (the so-called torx ), then carefully remove all the arrows (to remove the arrows, you can use a regular fork, so as not to scratch the backing, we put a napkin).
Just remember first, or as I did, take pictures of how the arrows are positioned. In general, we get to the printed circuit board and look for the resistive assembly number 393, we look closely and see that it is not really soldered (if we know how to use a soldering iron, we solder it very carefully), we assemble it and are glad that the shuttle bus is working again
