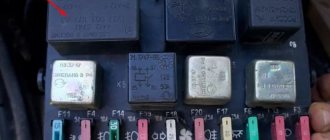
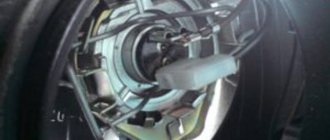
Standard replacement procedure
- Replacing the low beam lamp, as well as the high beam, begins by disconnecting the on-board power supply. This precedes all electrical repair work. In this case, a special switch is turned or the negative terminal is disconnected from the battery, which avoids accidental short circuits or erroneous connections during installation.
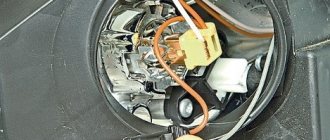
- The place where the Largus lamp will be replaced is determined. There, the rubber plugs covering the electrical components are removed, and two metal antennae are opened in front of the car owner, fixing them in the reflector. They are separated so that the used parts can come out of their seat without damaging the housing.
- Next, you need to disconnect the plugs from the wiring that was previously disconnected. Here it is worth paying attention to the order of arrangement, otherwise, during the installation of new parts, everything can be mixed up and they will have to be changed again.
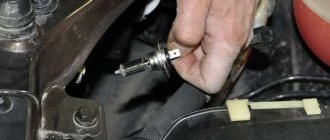
- After connecting the plug with wiring to the new parts, they are mounted in place and secured with antennae. You should try not to touch the flasks with your hands, as this can lead to their rapid failure.
- If the light is dim during lighting, and the headlights flash when you turn on the headlights, then it is imperative to restore the contacts of the wires with the vehicle body. This is especially true for a marker lamp, because the fat that gets there begins to evaporate when heated and can cause ignition.
- At the end of this procedure, you need to put on the rubber plugs and secure all the parts in their places. After this, the car will be ready for use and the driver does not have to worry about malfunctions of the Lada Largus lighting fixtures.
As practice shows, in modern domestic cars, one of which is the Lada Largus, lamps with directional luminous flux are most often used. The essence of such lighting is a reliable view in front of and behind the car. At the same time, inconvenience to other traffic participants heading towards the driver or driving behind is excluded.
Block lights
Structurally, each block headlight of the LADA Largus station wagon consists of two sections. One contains:
- "marker" lamp (W5W).
- double-filament lamp for low and high beam (type H4);
Nearby is the section in which the PY21W turn signal lamp is located.
The headlight unit is dismantled when it is damaged or needs to be modified (tuning).
Replacing the headlight
Before you begin work related to replacing the headlight, you must:
- Secure the station wagon using the handbrake.
- Remove the key from the ignition.
- Remove the negative wire from the battery terminal.
The dismantling of the headlight block of the LADA Largus station wagon begins by first removing the front bumper. This operation is shown in detail on the video page:
Read more: Which carburetor for Gazelle 402 engine is better?
After this, access to the fastening elements in the lower part of the case will open. Next, you need to disconnect the electrical wires:
- going to the H4 type lamp. To do this, remove the cover 3 and disconnect the pads;
- remove the sockets for the direction indicator lamps 5 and indicator lamps 7;
- remove the actuator of the headlight hydraulic corrector (if equipped) from the headlight housing, to do this, slide boot 4 along the cable and unclip the fastening latch.
- after this, you need to unscrew the fastening bolts (items 1, 3 and 4) located around the perimeter of the body part (2);
- push the headlight housing forward a little and remove it.
The new headlight unit is installed in the reverse order, maintaining a uniform gap between housing 2 and body parts.
Adjusting the luminous flux
After carrying out any work related to the head optics of the LALA Largus car, it is mandatory to check and adjust (if necessary) the direction of the luminous flux of the switched on lamps. To do this, it is best to contact a specialized service station, equipped with special instruments and staffed by qualified specialists. However, in case of emergency, such an operation can be carried out independently and without the necessary equipment. In practice, there are several ways to check and adjust headlights. You can see one of them by watching the video:
Replacing lamps in a headlight
Among the sudden malfunctions that almost all car owners encounter, one of the first places is the failure of head optics light sources. These include lamps:
- low/high beam;
- direction indicator;
- Dimensions indicator.
All of them are located inside a separate headlight and changing them, if necessary, is not difficult.
Replacing the low/high beam lamp
Change the low/high beam lamp in the LADA Largus headlight in the following order:
- remove the protective cover;
- disconnect the block with wires;
- pull out the rubber seal;
- pressing on the spring holder, remove it from under the latch;
- Carefully releasing the holder, carefully remove the burnt out lamp.
The new lamp is inserted into the reflector hole and secured using standard fasteners. Then all the removed parts are returned to their places.
Attention! Lada Largus uses halogen light sources, the glass surface of which is not recommended to be touched. To avoid darkening of the flask when heated, it is recommended to hold them by the base.
Read more: Cars for exchange with surcharge
Replacing the turn signal lamp
In order to change a faulty lamp installed in the turn signal compartment, you must:
- gently press out the plastic connector retainer;
- disconnect the connector with the on-board power supply wires;
- remove the lamp socket from the headlight socket by turning it clockwise (left lamp) or counterclockwise (right lamp);
- By pressing and turning the lamp counterclockwise, we take it out.
The new lamp is installed in the reverse order.
Replacing the indicator lamp
A burnt-out baseless bulb installed in the size indicator is changed as follows:
- disconnect the block with electrical wires from the cartridge;
- turn the socket clockwise (left lamp) or counterclockwise (right lamp) and remove it from the headlight housing;
- A new lamp is placed in place of the burnt one.
The cartridge is returned to the standard socket, performing all operations in the reverse order.
Stop signal
The principle of replacement is similar to the installation of the above-mentioned lamps, but it has its own nuances. Here, first, the trunk lid is opened and its decorative panel is removed. So, in order to replace the brake light, you must first of all clear the approach to the wing nuts.
After removing them, the entire headlight is turned out, which would be very problematic to do on your own. After all, you need to bring out its upper and lower parts at the same time so that they do not become a surprise. After unscrewing the screws, access to the lamp is open. The failed part is replaced, and all the previously listed steps are performed in the reverse order.
Headlight malfunctions and how to fix them
There are not many items on the list of headlight headlight breakdowns. This is mainly due to damage to the lantern glass, failure of the corrector or the lamp itself. If the Lada Largus low beam lamp and corrector can be replaced, then the glass is installed only with the headlight assembly. Largus optics do not cause any inconvenience to owners. The most common problem is low beam bulbs burning out.
You can choose and install a good headlight bulb yourself. On the market of automobile spare parts and accessories there are light bulbs from both domestic and foreign manufacturers. Chinese lamps are not of very high quality: they burn out quickly and do not provide sufficient visibility on the road.
Standard halogen light should be yellowish. Many people prefer the so-called pseudo-xenon, which makes the glow white, but in bad weather conditions such lamps are inferior to standard ones. The latter sometimes even outperform LED and xenon optics, which produce a powerful luminous flux, but cost a lot of money and are installed in specialized centers. In fog and rain, halogen lamps demonstrate the highest penetrating ability of the light beam, which ensures their leading position.
Return to contents
Dimensions
A special feature of this procedure is the preliminary dismantling of the headlight unit, under which the side light lamps are located. After this, it is necessary to disconnect the wires from the battery, which is done with extreme care.
Removing the front bumper will allow you to get to the cover that protects the dimensions. Since they come into contact with other light devices, it is advisable to carry out all procedures using sterile gloves. If any device has been touched, it must be wiped with a clean, lint-free cloth.
To replace the side light bulb in Largus, the socket of the old part is turned counterclockwise. The black and yellow wires connect it to the battery, so it turns off from them. A new part is installed in this place, and assembly is carried out in the reverse order.
How to change headlights on a Lada-Largus
Lada Largus is a popular family multi-purpose station wagon, mass production of which was launched by AvtoVAZ PJSC in 2012.
A car of this class is designed to meet the most diverse needs of potential buyers and can be used for both everyday and long-distance trips. At the same time, it feels great in urban conditions and on country roads.
The universal use of this car quite often contributes to damage to the elements of the front optics by stones flying from under the wheels of oncoming or passing vehicles, branches of low-growing bushes, etc.
Replacing damaged head optics and installing new elements is not difficult and can be carried out by almost any car owner, even those without experience in carrying out such work. The only difficulty with this is the need to dismantle the front bumper, where not only fog lights are integrated, but also headlights.
What kind of bulbs are in the headlights?
Several types and classes are used in automobile lighting. The following lamps are suitable for Largus:
- optics type H4 with a power of 12 watts, 60/55W for near and far illumination;
- PTF lamps with characteristics H11, 12 W, 55W;
- for side lights, W5W models with a power of 5W are acceptable;
- PY21W for turn signals.
PTF lamp (fog lamp)
There is no access to the lamp from the engine compartment, so replacement is made from below.
- Remove the fender liner by removing the screws;
- Disconnect the block from the lamp by pressing the lock;
- Remove the lamp by turning it a third of a turn counterclockwise.
Install the lamp in the reverse order.
Attention! In practice, replacing lamps in a Largus headlight is much easier. In other words, it is not at all necessary to remove the battery and fender liners (lockers). If you get the hang of it, you can access all the headlight bulbs from the engine compartment.
Let us remind you that other operating and repair instructions for Lada Largus are in this category. It is convenient to find the answer to your question based on the content.
Keywords: headlights Lada Largus | turn signals Lada Largus | fog lights Lada Largus
Found an error? Select it and press Ctrl+Enter..
- How to change light bulbs in the headlights of a Lada Priora
- How to change light bulbs in the headlights of Lada Vesta and XRAY
- Replacing low and high beam lamps on Lada Kalina 2nd and 1st generation
What to choose for replacement
The standard factory installation is a halogen H4 light bulb on Largus. However, the modern car market offers alternative options for daytime car optics. There are three analogues:
Xenon ones have a bluish glow, which is inconvenient in cloudy or rainy-snowy weather. Halogen units shine brightly and warmly. They are a common installation option, although they are inferior in power to other analogues. The advantage of LED elements is that they can store energy for a long time at high power.
Replacing a fog lamp on a Renault Logan 2
Let's take a closer look at how this can be done. The basic equipment of Renault Logan includes a regular headlight.
First, you will need to stock up on all the necessary materials. In order to purchase what you need and not make a mistake, you should take into account the model and equipment of the car.
If your car is not under warranty, or the PTF is not included in the list of parts available for free replacement, you can do the work yourself.
It is enough to have with you all the tools necessary for the work, as well as to first familiarize yourself with the procedure for carrying them out. Sequence of work First, the owner needs to remove the special mudguard located on the bumper of the Renault Logan car.
It is removed from the side on which the defective light source is located - PTF. Once this work is done, the next task is to disconnect the plastic wire retainer. The phase is checked for intermittent operation.
This work is being done extremely well. The next step is to disconnect the connector from the fog lamp, the phase is turned off.
Replacing a Renault Logan/Sandero fog lamp
As soon as it is separate, the lamp must be turned counterclockwise. Now the fog light can be removed, and the wire on which the phase is located should preferably be put aside.
Fog lights do not always need to be replaced entirely. It also happens that you need to replace a burnt-out lamp in which the phase has burned out.
After disconnecting all connectors powering the light source, removing the lamp will be possible with a slight movement of the hand.
If it is necessary to replace only the LED lamps, and not the entire PTF headlights, you need to pay attention to the presence of condensation. We adjust the fog lights in such a way when the upper level of the light spot coincides on our created screen with a drawn horizontal line, which is necessarily located mm below the previously marked centers of the headlights with a straight line connecting them. The distance between these centers should be in mm.
Conclusions Installation of fog lamp replacement for Renault Logan fog lamps in Renault Logan, as practice has shown, is usually not capable of causing difficulties and increased time costs. If problems arise when replacing the PTF light bulb or subsequent adjustment, a reasonable measure would be to contact specialists, which will save time and nerves.
In most cases, they resort to replacing a set of Renault Logan headlights if they are damaged. If there is no such factor, then we limit ourselves to replacing the lamps and, if desired, polishing the working surface of the plastic bulb.
How to replace
After choosing a light bulb model for Largus, new components are purchased.
It is not recommended to use used cartridges and fuses: during long-term storage, electrical wiring contacts, terminals and adjacent components oxidize.
Required components to replace the front low beam lamp:
- car lamps;
- circuit breakers;
- cartridge;
- tools (screwdriver, pliers, etc.).
To begin with, the car's electrical network is disconnected from the power supply (battery), then the burnt-out part is removed.
How to change headlights on a Lada-Largus
Lada Largus is a popular family multi-purpose station wagon, mass production of which was launched by AvtoVAZ PJSC in 2012.
A car of this class is designed to meet the most diverse needs of potential buyers and can be used for both everyday and long-distance trips. At the same time, it feels great in urban conditions and on country roads.
The universal use of this car quite often contributes to damage to the elements of the front optics by stones flying from under the wheels of oncoming or passing vehicles, branches of low-growing bushes, etc.
Replacing damaged head optics and installing new elements is not difficult and can be carried out by almost any car owner, even those without experience in carrying out such work. The only difficulty with this is the need to dismantle the front bumper, where not only fog lights are integrated, but also headlights.
Daylight
If the optics on the Lada Largus are faulty, replacing the light bulb will require the following algorithm:
- The rubber pad is removed, which serves as protection for the electrical unit.
- The block with the installed wires is removed.
- The U-shaped lock moves (moving to the side and back).
- The electric lamp is pulled out.
- The detail changes.
It is important to remember the orientation of the cartridge - two teeth at the top, one at the bottom.
How to replace a Largus lamp:
- When installing, hold the lamp by the base or use microfiber, otherwise marks will remain on the electrical appliance and it will burn out faster;
- Repeat all the above steps to remove the optics in reverse order.
It is recommended to replace both bulbs at the same time. This will prevent unexpected overheating of the remaining part and ensure the same light beam parameter.
Replacing the headlight
Now let's see how to remove the headlight on a Lada Largus if you need to replace or repair it:
- First, remove the wheel from the side where you are going to change the light.
- Unscrew the fastening screws and remove the fender liner.
- Disconnect the wires.
- Remove the block.
- While turning, remove the marker and turn signal cartridges.
- Open the hood, remove the lamp cover and remove the block.
- Disconnect and remove the hydraulic correction cable.
Removing the hydraulic corrector unit on the Lada Granta headlight
- Remove the front bumper to gain access to the light mounts.
- Unscrew the three bolts - use a ten-point socket to do this.
- Remove the headlight and install a new one in its place.
- Reassemble in reverse order.
Installing a new headlight on Largus
See also:
Rear additional lights for Lada Largus
How to remove a headlight on a Largus video
Removing the headlight
Lada Largus
We remove the headlight unit for replacement. Remove the front bumper (see “Removing the front bumper”, p. 238). We disconnect the wire blocks from the headlight lamp and the turn signal lamp socket and remove the socket with the side light lamp from the headlight housing (see “Replacing lamps in the headlight,” p. 211).
We remove the protective cover from the housing of the actuator of the headlight beam direction control.
We remove the cable sheath from the holder on the actuator housing.
To change the direction of the light beam in the vertical plane, rotate screw 1 with a 6-point hexagon (see previous photo), inserting the hexagon through the hole in the upper cross member of the radiator frame. To change the direction of the light beam in the horizontal plane, rotate knob 2.
The headlight unit is removed in case of body work or when replacing it. The glass on the Lada Largus headlight unit is glued in and if it is damaged, the headlight unit is completely replaced (along with it). Replacement operations are shown using the example of the left headlight unit. The right headlight unit is replaced in the same way. The main problem when removing the front headlight of a Lada Largus car will be the need to remove the front bumper.
Operations for removing the headlight unit Lada Largus
1. Disconnect the wire from the negative terminal of the battery. 2. Remove the front fender liner - the plastic arch protection.
3. Press out the clamp of the turn signal lamp socket wiring harness block. 4. . and disconnect the block from the cartridge
5. Turn the side light bulb socket clockwise (for the right headlight, counterclockwise). 6. . and remove it from the headlamp.
Read more: Connecting fogs on a gazelle
7. Turn the plastic headlight cover 8. . release the cover lock. 9. . and remove the cover..
10. Press the clamp of the harness block 11. . and disconnect the block from the base
12. Remove the protective cover with the headlight corrector 13. Remove the corrector drive cable from the holder. 14. . and disconnect it from the headlight range control unit.
15. Remove the front bumper.
16. Remove the three lamp mounting bolts. block headlights to the radiator frame.
This is how the headlight mounting bolts are located. 17. . and remove the headlight unit.
18. Install the headlight in the reverse order of removal and check that the headlights are adjusted correctly.
Lada Largus is a popular family multi-purpose station wagon, mass production of which was launched by AvtoVAZ PJSC in 2012.
A car of this class is designed to meet the most diverse needs of potential buyers and can be used for both everyday and long-distance trips. At the same time, it feels great in urban conditions and on country roads.
The universal use of this car quite often contributes to damage to the elements of the front optics by stones flying from under the wheels of oncoming or passing vehicles, branches of low-growing bushes, etc.
Replacing damaged head optics and installing new elements is not difficult and can be carried out by almost any car owner, even those without experience in carrying out such work. The only difficulty with this is the need to dismantle the front bumper, where not only fog lights are integrated, but also headlights.
