The generator in the car provides the generation of electricity through the power plant. If it breaks, then first of all the battery runs out, and as a result the car simply cannot move.
This article tells you how to check with your own hands the generator installed on a VAZ-2109 car.
It is worth noting that it makes no difference which engine is installed on the car - an injector or a carburetor. In both cases, diagnosis is made using the same algorithm.
Examination
In order to determine the nature of the breakdown at home, you first need to know how to diagnose the generator.
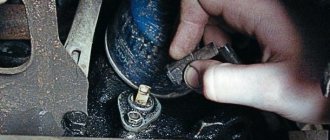
The first stage is carried out without removing the device from the machine. There are several options, but the best quality is a multimeter. True, for this it is best to involve someone you know.
First of all, you need to find out whether the voltage regulator is capable of doing its job. Experts note that most often it is because of this that the generator may not function properly. The problem with it arises due to excessive voltage in the electrical network.
The generator itself is tested like this:
- set the multimeter to volts;
- start the power unit;
- measure the voltage at the battery and at the generator terminals.
Normally, the device will show from 14 to 14.2 volts. After this, you will need to depress the gas pedal - the voltage increase should not exceed half a volt in this case.
An increase in this indicator indicates that the generator’s performance is impaired. Most likely, the voltage relay will need to be replaced.
Alternatively, you can also do this:
- start the engine and let it run for a while;
- press the gas and bring the crankshaft to 3 thousand revolutions;
- turn on the headlights (high beam);
- heated rear window;
- stove fan.
With such a load, the battery voltage should be more than:
- 13.2 volts (generator type – 9402.3701);
- 13,6 (37.3701).
Indicators different from normative ones indicate:
- winding faults;
- failure of the voltage regulator;
- brush breakage.
To exclude the regulator from the list, you need to de-energize all devices except the headlights and measure the voltage again. If the specified node is serviceable, then the indicators will be as follows:
- for 37.3701 – up to 14.6;
- for 9402.3701 – up to 14.7.
The practical part is removing the generator, disassembling it, repairing it and reinstalling it.
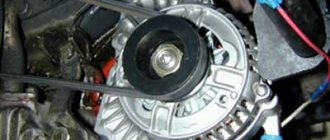
Due to the fact that the generator is located under the hood of the car, it is necessary to turn off the engine, turn the steering wheel to the right all the way and open the hood. The electric generator on VAZ 2108 - 15 cars is installed in front of the engine, in the lower left corner of the engine compartment, between the engine and the cooling radiator.
Before dismantling the generator, it is necessary to disconnect the ground from the battery, i.e. negative contact.
Replacing VAZ generator brushes
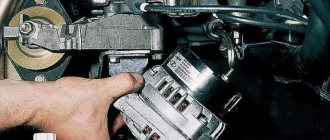
Before removing the generator itself, in order not to do unnecessary work, we remove the charging relay from the generator housing and check the production of the generator brushes.
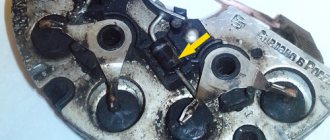
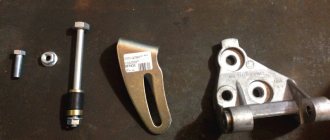
The charging relay is installed in the rear of the generator housing, and is attached to it with two bolts. To unscrew them you will need a Phillips screwdriver. When unscrewing the bolts, be careful not to drop them on the crankcase guard, otherwise getting them out of there will be one big problem. To remove the relay, you need to disconnect the wire, the “female” contact. After removing the charging relay and visually inspecting the brushes, we decide to purchase a new generator voltage regulator relay or reinstall the dismantled one, depending on the wear of the brushes. For their normal operation, a brush length of at least 4 cm is required. Now we proceed directly to removing the electric generator from the engine.
- We disconnect the wires from the generator - as a rule, they are red and consist of two groups of wires, red. One group consists of two wires and is attached with a nut to a bolt on the rear wall of the generator. The other group consists of one wire and is connected to the generator terminal via a male-female contact, also on the rear wall of the generator.
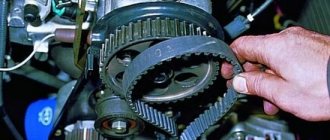
- To remove the generator from the engine, you need to unscrew two nuts and one bolt in the following sequence: unscrew the nut attached to the generator belt tensioner bar (at the top of the generator), unscrew the bolt securing the tensioner bar to the engine block and remove it. The last step is to unscrew the nut from the bolt securing the generator bracket to the engine block.
- The generator mounting bracket is located at the bottom of the engine block, directly below the generator. After unscrewing this nut, you need to remove the generator belt from the generator pulley itself.
- The generator mounting bolt should be pushed to the left, out of the bracket, until it stops against the body shell or the generator’s mud protection.
- On the right wheel side, you need to unscrew the two screws that secure the dust protection of the generator to the car body.
- If the generator mounting bolt still rests against any body parts, you should press on the engine with one hand, and at the same time pull out the bolt with the other hand.
Now your generator is completely disconnected from the engine, and you can begin to disassemble and repair it.
Disassembling the electric generator
When disassembling an electric generator, you need to have two important things on hand: a bearing puller and a vice. This will greatly simplify and speed up your work. Using a wrench set to “19”, unscrew the nut from the rotor shaft, which secures the impeller to the shaft.
To do this, you need to hold the impeller directly with one hand and unscrew the nut with the other hand, counterclockwise. It will take some effort, of course, but this nut needs to be unscrewed. The generator impeller is secured to the shaft with a key, and after removing the impeller from the shaft, it is necessary to remove this very key.
Now we turn the generator over with the back cover up, and unscrew the four nuts with an “8” wrench. We take out the released four studs and release the front part of the generator housing.
In the front part of the generator cover there is a “front” bearing secured by plates. We remove it by unscrewing the nuts and plates and knock the bearing out of its seat. The easiest way to do this is with a wooden plank, the size of which matches the diameter of the bearing.
Now we need a vice: screw a nut onto the rotor shaft and secure the generator, or something that we have not yet disassembled, in the vice. We tear off the back cover with a sharp upward movement from the bearing seat.
We still have the rotor shaft clamped in a vice, with the “rear” bearing in the very top part. To dismantle it, you need a puller; we put it on the bearing and remove it from the shaft.
Now you have two bearings on your hands - “front” (small) and “rear” (larger) - look at their markings and purchase exactly the same ones.
Important : Practice shows that when purchasing bearings for a generator , you need to remove them and, by analogy, buy them in a store. Advice from sellers such as: “they are all the same type” or “if you have an old-style generator, then take these” are often wrong. Yes, they are almost always wrong. To save time, the easiest way is to remove the bearings and select similar ones based on their markings.
The same advice applies to the diode bridge installed in the rear cover of the generator. If damage or metal oxide is visually observed on it, it is better to remove it without hesitation (it is secured with four nuts to the inside of the back cover) and purchase a new one.
Cost of spare parts (on average): Bearings (pair) – 150 rubles. Charging relay: 140 rubles. Diode bridge – 200 rubles. Bearing puller - 100 rubles. Total: 590 rubles.
The generator is assembled in the reverse order:
- We start by installing the rear bearing on the shaft. This is done using a hammer and a small board. With two or three blows we seat the bearing on the shaft.
- If the diode bridge is removed, we fix it in its “original” places, on the same four studs, in the back cover of the generator housing.
- We install the back cover on the generator rotor so that the bearing completely “sits” into its seat in the back cover of the generator; to simplify the procedure, you can use a hammer and, with not very strong blows on the back cover, “seat” it onto the shaft.
- In the front cover we replace the small (or front) bearing and secure it with plates in the seat.
- We take the generator out of the vice and before putting on the front cover, we put the spacer ring on the shaft, between the front bearing and the thrust recess on the shaft.
- We install the front cover and tighten the nuts “crosswise” on long studs so that the tightening is even.
- We install a key in the recess on the rotor shaft, then put on the generator impeller and tighten it with a nut.
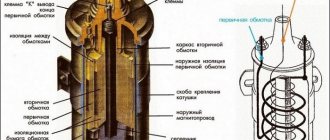
Diode bridge
This unit is a regular rectifier. It contains 6 diodes. Half of them fall on the “minus” (the mass is connected to the cathode), the other, respectively, on the “plus” (anode). The bridge is checked with a tester switched to sound mode. It will be much more convenient to work here.
It is necessary to ring each diode separately in different directions. But normally the signal will sound only once. If a squeak is heard in both cases, the part needs to be replaced. However, in fact, the easiest way is to install a completely new bridge - it is not that expensive.
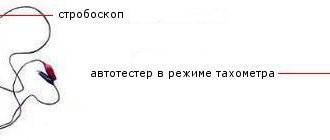
How to test a generator with a multimeter
The diode bridge of the generator can be checked with a multimeter, but you can also use the stand that was used to check the regulator.
But before that, first of all, without removing the rectifier bridge from the generator, connect the red wire of the tester to terminal 30 of the generator, and the black wire to the housing. Set the tester operating mode to dial (diode icon). If it is not there, then set it to 1-2 kOhm. The multimeter should show infinity. If the readings are different, the diode bridge is faulty.
Then check the current rectifiers for breakdown. Leave the positive (red) probe on terminal 30, touch the negative one to the bridge mounting bolts one by one. The multimeter display should show infinity in all cases; any others mean a breakdown.
Next, connect the positive probe to the axle mounting bolts, and the negative probe to the generator housing. In this case, the tester should also output infinity.
But in practice, such verification is most often not enough. In most cases, it is necessary to ring the generator in more detail.
Basic faults
Quite often the following picture is observed - the ignition is on, but the generator light on the panel does not light up. This usually indicates that:
- there was a wiring break;
- The fuse has blown.
In this case, check all cables coming from the generator. If damaged wiring is found, it is replaced.
It also happens that:
- the light does not light;
- the battery drains quickly, even if it has just been charged;
- however, the remaining control devices operate normally.
All these signs clearly indicate a malfunction of the generator. Here it is possible that:
- the diode is shorted;
- contact on the winding was lost;
- the traction relay is broken;
- The brush holders have become unusable.
However, quite often all that happens is a wire break between the generator and the dashboard or a light bulb burns out.
If the lamp lights up when the ignition is on and the battery is charged, then you should pay attention to the serviceability of the voltage regulator.
When the engine is running, the display lights up too brightly or, conversely, too dimly. Here, perhaps, the problem lies in the low tension of the drive belt. Normally, it should not give in when pressed with a finger more than 10 millimeters. It will also have to be replaced if signs of significant wear are visible on the surface with the naked eye.
Sometimes the generator does not work because the stator winding is shorted to ground or the electrical circuit is broken.
In addition, at the anchor, sometimes the terminals of the contact rings move away from the winding. They can be soldered in place.
Loud noise from the alternator most likely indicates bearing failure.
see also
Battery charging lamp is on
Whistle on a cold engine
Checking the voltage relay
- 156 1 143k
Car generator circuit
Generator malfunctions - signs, diagnostics, causes, testing
- 777 12 618k
Current to power conversion calculator
Convert how many amperes a kW has online. Calculator for converting current amperes to power watts
A car generator is the main source of energy in the on-board network, and if it malfunctions or fails, you won’t be able to drive for long on one battery. This is why it is so important to monitor the performance of the generator.
In most cases, checking a car's generator with your own hands is not difficult, since no matter what car you check on, the principle is the same. But still, many car owners often wonder: how to check the generator with a multimeter or with improvised means?
Next, we’ll look in more detail at how to check a generator in a garage without special stands that are used at service stations.