How to install an acoustic shelf
It is quite difficult to achieve good sound in a car, but it is still possible.
In addition to noise, in a moving car, there is the problem of a weak stereo effect, especially from the rear speakers. The problem of stereo effect in a car is associated with the wrong direction of the speakers and the obstacles that exist between the speaker and the listener, this could be the rear seat headrests, passengers in the back seat. This problem can be solved in two ways: 1. Point sound - Installing speakers aimed directly at the listener, but since the passengers are located in different corners of the car, so as not to deprive anyone, you should direct the speakers to the center of the cabin, bypassing obstacles. In this case, the speakers will have to be installed under the ceiling and acoustic podiums made for them. The disadvantages of this type of design are the difficulty of implementing durable mounting of the podiums and the almost complete absence of bass.
2. Reflected sound - Well, here, everything is much simpler, we direct the speakers to the rear window, the reflection of sound from the glass enhances the stereo effect, the sound becomes more voluminous. This option is much simpler, and if the acoustic shelf is manufactured correctly, the bass will not suffer.
Store acoustic shelves usually have speakers pointed at the ceiling of the car, where some of the sound is damped by the soft or fleecy ceiling, and if there are obstacles in the form of headrests and passengers, you actually want to cry. It’s better to do this shelf yourself, especially since it’s not that difficult, but you’ll have to work hard.
How to make an acoustic shelf with your own hands.
A friend asked me to help him make a classic acoustic shelf for 6x9 coaxial speakers (ovals), this is how we made it, based on the above.
We prepared the interior, removed everything unnecessary, removed the factory decorative shelf and insulation.
We marked it on a piece of chipboard using a decorative shelf.
It is necessary to mark it in such a way that the future acoustic shelf is shorter than the decorative shelf, half a centimeter on each side, otherwise it will not fit.
Tried it on in the car.
We mark the holes for the speakers.
Shelf with cut holes for speakers.
At the request of a friend, so that it would not fall from the shelf, and to tilt the speakers onto the rear window, we made a template.
When you turn the template over, you get another symmetrical half.
We trace the template and cut out the second level of the acoustic shelf.
We glue it with construction glue and tighten it with self-tapping screws.
We tried it on again in the car, along the holes for the speakers in the acoustic shelf, with a sharp object, and made notches to cut large holes in the iron shelf.
We used a small grinder to cut holes in the iron shelf. The holes must be made no smaller than in the acoustic shelf. If you don’t make free access to the trunk, you shouldn’t hope for a decent bass. And one more piece of advice: the cleaner the trunk, that is, the less junk in it, the better the bass.
We screwed on the next level of the shelf.
Trimmed, sharpened and sanded.
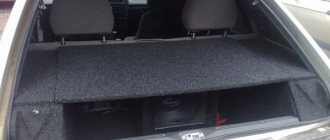
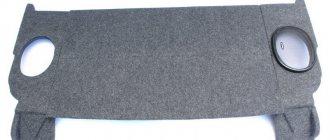
They covered it with carpet and the acoustic shelf is ready, all that remains is to screw on the speakers and you can put them in the car.
Someone glues noise insulation or vibroplast under the shelf; with a shelf like the one we got, this is of no use, but it wouldn’t hurt to tape it over the trunk.
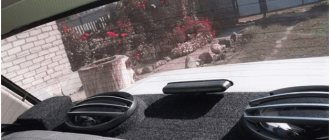
Here you can clearly see that the speakers will play on the reflection from the rear window.
We got everything we wanted from an acoustic shelf; we made the shelf at random, and came up with the appearance and functionality along the way. I would like to say separately about the bass, it is there. And if you install a good car radio, speaker and power cables, and add an amplifier, I’m sure it will be no worse than with a ten subwoofer. And for fans of subwoofers, I recommend making a large hole in the center of the shelf, and a mesh on top, a subwoofer with a bass reflex or a proper bandpass in the trunk, that’s what will happen.
UAZ 31512 Shushpanzer › Logbook › Rear acoustic shelf with glove compartment in UAZ
Well, I finally finished what I couldn’t do.
But sooner or later everything ends and pencil sketches on paper begin to be embodied in the final product:
For fixing and fastening to the roof I used ordinary corners, which are on sale “above the roof” at a price of 0.9 UAH
The corners of the roof were covered with foam sound insulation. The piece has been lying around in the garage for a long time without proper use, now its time has come to serve for the benefit of the comfort of the owner and passengers
