Tips for motorists
When you turn the ignition key of a Lada Granta passenger car to the “ignition on” position, the instrument cluster should start working. If this does not happen, then the driver will have to check the fifteen-amp fuse F20. You can find it in the mounting block located in the front panel to the left of the steering column. The color of this fuse is blue, and it is the seventh in a row, if you count from the bottom.
This fuse blows mainly because it protects not only the electrical circuit of the instrument cluster, but also the cigarette lighter circuit, and drivers try to use this socket as an outlet, connecting additional equipment through it (navigator, compressor, charger, etc.) .d.). A short circuit occurs due to the fact that the plugs of these devices are unbent by two U-shaped symmetrical contacts located at the base, which begin to touch the body of the socket connected to the ground of the car. Before installing a new fuse, you need to bend these contacts back to the center, but this should not be done with a metal object.
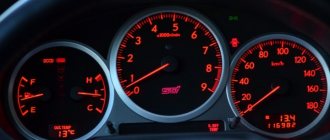
If, after checking fuse F20, it turns out that it is intact, then to find out the reasons for the failure of the instrument cluster, you will have to carry out a test, which consists of pressing the odometer daily mileage reset button with the ignition off and then turning on the ignition. If, while holding this button, you see that all instrument needles start moving from zero marks on the scale, and then return back and this process is repeated three times, then we can conclude that the instrument cluster itself is working properly.
Considering that all information (vehicle speed, crankshaft speed, coolant temperature, fuel level in the gas tank) comes to the dashboard from the electronic control unit (ECU), we can conclude that for some reason the ECU does not output connection with the instrument cluster. One of the reasons for this state of affairs may be the ingress of water or antifreeze (if the interior heater radiator is not sealed) inside the ECU housing. This can cause corrosion of the track on the ECU printed circuit board going to the CAN bus, which will lead to loss of communication with the instrument cluster, since it is through the CAN bus that information is transmitted from the electronic control unit to the devices.
What to do if the battery light is on - car diagnostics
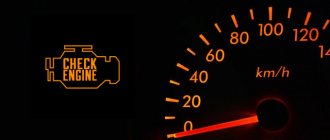
Diagnostic systems in modern cars allow car owners to practically not worry about the quality of operation of the equipment. If certain problems occur, the corresponding lights on the dashboard light up. After such an incident, you need to immediately diagnose the machine, find out the reasons for the breakdown signal and fix the problem. There are quite a few diagnostic lamps today, and by the combinations of their illumination, you can determine which components should be checked in the event of a potential breakdown. If while driving or with the engine running, certain lights on the instrument panel in your car continue to light up
, you should check the corresponding nodes.
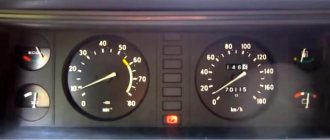
Immediately when the ignition is turned on, the instrument panel will turn on completely, all light bulbs will be checked so that the driver can identify failed illumination elements. After a few seconds of loading the on-board computer, most of the lights fade out, only the oil and battery indicator lights up. When the engine is running, these two lights should go out. All that remains is the parking brake engaged indicator, if it is, of course, on.
Turning on the instrument panel lighting with the ignition
New instrument cluster
Another option, more humane in relation to wiring. When the ignition is turned on, the lights will not spontaneously light up, therefore, when the lights are turned on, the ignition will light up.
Old style instrument cluster
For old-style tidy, we perform similar steps, taking into account that:
- Pin 18 of the new tidy is pin 4 of the red block of the old tidy.
- 21 contacts – 10 contacts of the white block.
The diagram and explanation of the block panels (old and new type) are here. By the way, the instrument panel lighting is easy to modify (old model, new).
An effective way to adjust the backlight
The problem with the first modifications of the Lada Vesta is insufficient lighting of the dashboard. In sunny weather, the driver cannot see the readings of sensors and instruments. Excessive distraction on the “visor” provoked accidents, crashes, and collisions with oncoming traffic.
In order to eliminate the defect, engineers developed and made publicly available on-board computer firmware with an increased brightness coefficient. However, the program code did not always work correctly, and malfunctions occurred from time to time.
Self-taught people worked together with the official VAZ developers and came up with a much better method - installing a 2-channel PWM controller.
The cost of a set of equipment is from 650 rubles in online catalogues, perhaps it will be cheaper in the car market. There is no catalog article, look for the production name: “KIT, PWM power regulator set, 12-50V 30A, 20kHz.”
Pioneer, Mystery, Soundmax in the car
Anyone who spends a lot of time behind the wheel knows that a car radio is a very important part in a car. Any trip is more enjoyable accompanied by your favorite music
Currently, there are many models of car radios to suit every taste and budget. They are equipped with various functions and can satisfy any motorist.
Regardless of its cost, a car radio, like any other complex electronic device, can sometimes fail. It often happens that the car radio simply stops turning on, or turns on and immediately turns off. There may be several reasons for this malfunction.
Why doesn't my car radio turn on?
Main causes of malfunction:
- The fuse in the car unit responsible for the operation of the radio has burned out. To solve the problem you just need to replace it. We must not forget that a blown fuse cannot always be identified only by appearance. It is better to ring all the fuses using a special device - a multimeter.
- The fuse on the radio itself has blown. In order to replace it you will have to remove the radio. How to do it Check the wiring
to do it correctly depends on the car model and the receiver itself. The fuse is usually located on the back of the device and is blue in color.
- The problem is with the car's wiring. To fix the problem, it is better to contact an auto electrician. It is advisable to do this immediately after a malfunction occurs, since problems with the vehicle's wiring can have very serious consequences.
- There is a malfunction in the radio. This could be a faulty board or radio relay. To diagnose and fix the problem, you need to dismantle the receiver and take it to a service center. Competent specialists will be able to re-solder the radio board. If the malfunction is serious, repairs may have a high cost, comparable to the price of a new radio.
Why does the radio turn on and off:
Poor grounding. Poor grounding causes surges in electricity in the network, and, consequently, unstable operation of the receiver. It can be quite difficult to determine this visually, so it is better to contact an automobile electrician.
Why does the radio turn on by itself?
- The receiver power button is stuck. If it is not possible to send the radio for repairs, you can temporarily solve the problem by removing the radio panel after turning it off.
- Incorrect installation of the radio. When installing, you need to make sure that the wires are not mixed up. Since incorrect installation leads to various problems in the operation of the car radio, it is better to install it in a specialized service center. If you decide to install the car radio yourself, you need to carefully study the instructions for it before starting work.
- Short circuit in the wiring. The described reasons and methods for eliminating them are common to most models of car receivers, such as Pioneer, Mystery, Soundmax, Prology and many others. If you want to solve the problem yourself, you first need to carefully study the instructions for it. Different models of receivers are mounted and dismantled differently. If the radio has stopped working correctly due to a blown fuse, it is very easy to fix it yourself, but if the problem is
When installing any electrical equipment, including a radio, in a car yourself, you need to be very careful. Before installation, you must carefully study the instructions. Be sure to follow safety precautions while working. If installed incorrectly, not only may the radio malfunction, but also more serious problems associated with the vehicle's electrical system.
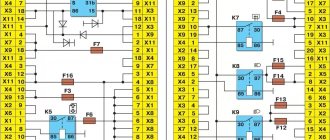
Fuse box
The fuse box in Grant is located to the left of the steering column, near the light switches. To remove the cover and access the fuses and relays, pull the top left side of the cover towards you. It’s made conveniently, everything is at hand and you don’t have to climb anywhere when getting up from the driver’s seat. Maybe this is a hint that they will often have to be changed, or maybe just convenience - the developers know better.
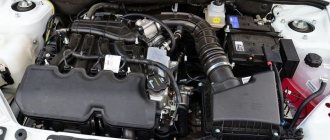
F1 (15 A) - engine control unit, injectors, ignition coil, cooling fan relay, short circuit 2x2.
If you have problems with electronics, and replacing this fuse does not help, in the worst case scenario, you will have to reflash the ECU or replace it. Also, if this fuse blows, the injectors and ignition coil stop working, which makes engine operation impossible. Therefore, if the Grant does not start, check this fuse first.
Do-it-yourself installation of a radio in a Lada Granta
This article will discuss how to install a radio on a Lada Granta car. I would immediately like to say about the electrical connection of the radio. AvtoVAZ has made a significant step forward.
Now, when installing a radio, there is no need to run wires to power the radio and speakers; all this is included in the standard audio preparation of the car.
This is a big plus if you remember the tenth family, when the owners of tens and twelves had to do everything from A to Z, everything themselves.
Dimensions of the radio for installation in a regular place in the Lada Granta
The space for installing a radio in the dashboard console of a Lada Granta car is designed for 1 DIN radio. Here is an example of installing such a radio.
When installing a 2 DIN radio, you will need to cut the partition up and adjust the frame in the console to the size of your audio system, which will make your life somewhat more difficult
Operations for connecting a radio to a Lada Granta
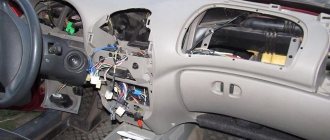
The first thing you need to do is remove the plastic pocket installed in place of the future radio. To do this you will need a flat blade screwdriver. Having taken out the pocket, on the reverse side you will find slots where ISO connectors will be inserted to connect the radio.
You can learn more about them from the article “How to connect a radio with your own hands.” The connectors fit quite securely into pockets, meaning you don’t have to look for them in the wilds of the panel to make connections. Now you need to remove the metal frame from the radio and install it in the place where the plastic pocket was. Unbend the frame's antennae to lock it securely in place.
When installing the radio, you will not need any tool to change the shape of the holes (a file, a file), all dimensions have already been made in accordance with generally accepted standards for 1 DIN radio casings.
Installing speakers in the standard places of the front doors on the Lada Granta
In addition to the radio, for its normal operation, it will also be necessary to install speakers and acoustics in the car door.
To cut holes in the door trim, it is better to remove it from the car.
To do this, you need to dismantle the door handle, the plastic casing in which the door opening lever is installed, and the glass position adjustment handle (if you have a standard package).
See the article “Removing and installing door trim on the Lada Granta.” The door trim and metal frame of the front doors provide a size for 16 cm speakers.
In this case, the hole in the door frame is slightly larger and you will have to increase the plane from the mounting “ears” of the speaker to the mounting holes in the door; - If you decide to install 16 cm speakers, then you may have to modify the door frame here, since the speaker basket can It definitely won’t fit into the standard hole in the door hardware.
You will need a grinder or a jigsaw with metal files. We cut a hole of the required diameter and try on the speaker.
We connect the speaker and install it in place. We install door trim. We mount the frame for the metal grille of the speaker and, accordingly, firmly fasten the speaker to the door with 4 self-tapping screws. We install the speaker grille.
In addition, you may find the material from the article “Wiring diagrams of the Lada Granta” useful, which shows the blocks for connecting the radio power supply and connecting the speaker wires to it, blocks 17 and 18.
The “standard” configuration also includes wires leading to the speakers of the front doors of the car. So, the connection of the radio speakers in the doors is carried out through the rear harness, see the article “Wiring diagram of the rear wiring harness of the Lada Granta”, contacts on the block 16,17,18,19.
If replacement of lamps is required, it is carried out using the following simple method.
We answer the question of how to change the running light bulb on your own.
- We provide comfortable access to the lighting device on the left (upstream) side. For this purpose, we remove the housing of the filter component of the air intake tract and disconnect the sensor, its supply cables and pipes.
- The body itself is forced to move upward and to the left.
- To provide access to the headlight on the right side of the car, it is necessary to remove the decorative engine cover. Here we temporarily unscrew the oil filler plug, then unscrew the 4 fastening units and pull the cap (snap it off).
- Removing a used DRL lamp involves first rotating the socket counterclockwise, after which it is removed from the socket. Having taken out the old lamp, we mount the new element into the cartridge groove. Now we screw the cartridge itself into the block.
Attention! Changing halogen devices does not “tolerate” touching the surface of their bulbs with your fingers.
This is due to the risk of leaving marks from sweat and fat, which negatively affects the service life of the device. We recommend using cotton gloves when working that do not have rubber coating on work areas. Before installing lamps on LADA Granta, wipe their bulbs with alcohol-containing wipes. This is exactly how the running light bulb is replaced.
Trunk mat for Lada Granta liftback
Comparison of West and Grant comparison
Basic malfunctions of car radios
In total, nine main problems can be identified that will answer the question: Why does the radio in the car not work, namely:
It doesn't even turn on. The main cause of this failure is lack of power. To check it, you need to use a tester. If it turns out that everything is fine with it, then it is necessary to carry out a full diagnosis of the car radio. No or intermittent backlight on the control panel. This indicates problems with the LEDs or light bulbs or in the power circuit. Why don't the buttons on the radio work? There are several possibilities for a malfunction to occur, namely: a fuse, a chip has broken, or the contacts or buttons have simply become clogged. This is possible if you often use polish, or spill some drink on the car radio. Also, over time, the buttons become clogged with dust. Disk reading problems. It may be due to damage to the laser head or shock absorbers of the radio. They can occur due to the car shaking, for example when driving on a rocky road. If the inscription “Please code” is displayed, it means that the settings have failed and you are on your way to a service center, where they will enter the code for the standard car radio. Why doesn't the flash drive work in the radio?
First of all, it is important to make sure that the indicator light on the drive is on. This indicates that the USB input is working properly.
After checking that the amount of memory on it is suitable for the car radio, older devices may not read flash drives with a large amount of memory. Next, you need to check its operation on another device or insert another USB drive into the unit, with which everything is absolutely fine. If the flash drive is in working condition, then you need to look for the problem in the music unit. Also, the software very often crashes, which is why the radio requires flashing. I can't insert or remove a disc. Very often this problem lies in the disk loading motor, or rather in the pressure roller, power supply, control and sensors. Why did the radio, or rather the radio, stop working? With this malfunction, the reason may lie in the chip, tuner or antenna. There are cases when the tuner does not have protection against voltage surges, and either the entire device or only the radio may stop working. If the car radio does not want to read the disc, then you need to pay attention to the motor that rotates it, as well as the laser head and control board.
[Closed] Solved: Dashboard backlight does not light up.
Topic: Resolved: Dashboard lights do not come on.
I'll start like this. Previously, when I started the car, the instrument panel was either on or off; to be more precise, everything was off except the turn signal indicators and the high beam lamp (although the high beam was turned off, and when the high beam was turned on, the light went off.) When you turn the key, the indicator lamps always light up as expected. Then I solved this problem by simply clicking the window regulators (I don’t know why, but it helped, the backlight came on). Now clicking has stopped helping))) and the darkness on the tidy is boring. I removed the tidy, changed all the light bulbs, they all work, and checked. I checked all the fuses, all are fine. I checked the backlight brightness control, it was also working, I even connected the wires directly, same garbage. Well, I don't know what else. Tell me what could be (((I don’t want to change the whole tidy(
2 Reply from Alevtina.Trofimova 2014-08-04 18:39:34
- Alevtina.Trofimova
- Experienced
- Inactive
- From: Selty, UR
- Registration: 2014-08-04
- Messages: 169 Thanks : 58
- Car: VAZ 21103
Re: Resolved: Dashboard lights do not light up.
I had the same bullshit, I decided this way: there are pads behind the fuse block (now I don’t remember which one I removed), my terminal that is responsible for the backlight was dangling like a god in an ice hole, I pressed it and everything became OK.
3 Reply from kostya.ishekov93 2014-08-04 19:58:08
Re: Resolved: Dashboard lights do not light up.
I had the same bullshit, I decided this way: there are pads behind the fuse block (now I don’t remember which one I removed), my terminal that is responsible for the backlight was dangling like a god in an ice hole, I pressed it and everything became OK.
Can you be a little more detailed, what does this terminal look like or something else)) thank you very much for your answer
The radio does not work without the ignition
Musical accompaniment, and just useful news information on the road sometimes helps us out a lot. But it often happens that as soon as you get there, you turn off the engine, and bam, the radio no longer works. Which is very unfortunate, because you want to listen to something, but you can’t do it. Since the radio turns off when you turn off the ignition in the car and that’s it. How to fix the situation? How can I make the radio work even when the ignition is off? This is exactly the topic we will talk about.
We will start with the very case in which problems arise. That is, the recommended case for connecting a radio from the manufacturer. Take a look at the diagram. Everything is very simple and clear. Two wires for power. At the same time, the yellow one is power and provides power to the memory, and the red one is the control one. To turn on the amplifier stages in the radio when it is running. If the red one is left on constantly, along with the yellow one, then the radio will not go into energy-saving mode and, of course, all this will end badly for your battery. That's why red is turned off through the ignition switch. But as we already understood, this does not suit us. This means we come up with another circuit that would ensure operation when the ignition is turned off. Take a look at this option.
This solution cannot but please the eye and mind if you know how to read diagrams. And if not, then we will now tell you what is happening here. Actually, we turn on the ignition, voltage is supplied to the red and yellow wires, which means the radio can be turned on. At the same time, power is also taken from the radio from the blue wire. This is power for an amplifier or active antenna. You can find out where to get all these wires by looking at the ISO connectors in the article “How to connect a radio in a car.” The result is self-pickup, through diodes that converge according to the circuit and are connected to the control voltage. That is, the radio will power its control wire itself, even if the voltage from the ignition switch suddenly disappears. This is very similar to a self-pickup relay circuit. Well, in the end, the algorithm works like this. Turn on the ignition and turn on the radio. Everything is working! We arrive, turn off the ignition, everything works! We turn off the radio and that's it, it turns off. In this case, it will not turn on again until we turn on the ignition and turn it on with the power button.
Actually, such a scheme and such an algorithm are quite pragmatic. For most motorists, you can stop there. However, let’s also fantasize about the convenience of powering the radio. Let's say we forgot to turn off the radio, or we just don't want to bother ourselves with this, but we just get out of the car, set it to the alarm and our radio turns off. In this case, the possibility of turning on appears again when we remove the car from the alarm system and turn on the ignition. The end result is something like this.
Where is PWM installed and how to adjust the brightness of the dashboard backlight
The equipment is fixed to the back of the instrument board with double-sided tape. The contacts themselves are soldered directly into the board according to the diagram below.
Adjusting the dashboard backlight on the Lada Vesta is configured using two channels:
- First: when the ignition is activated, the arrows of the tachometer, speedometer, fuel level sensor, and coolant temperature light up. After two seconds, the instrument panel lights up.
- Second: the brightness of the instrument panel dims by 25% when the high beam and daytime running lights are activated.
Power fuses
The power fuse box is located under the hood and is located between the battery, strut support and coolant reservoir. Looks like a vertically mounted box. By removing the top cover, access to the power fuses appears.
F1 (50 A) - electric power steering . If the steering wheel turns hard, also check fuse F32.
F2 (30 A) - heater fan
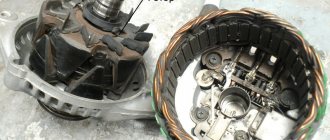
F3 (60 A) - generator . If the battery discharges quickly or the discharge lamp is on, check this fuse, as well as the operation of the generator itself and its brush.
F4 (60 A) - generator
F5 (30 A) - low beam headlights . Also check relay K9 and fuses F12, F13.
When troubleshooting any electrical problems, use caution. Replace fuses and relays only with the engine off and the ignition off.
If your fleet contains not only Grants, you can also read about Kalina fuses and relays.
Hi all! The instrument panel, cigarette lighter and signal stopped working. And when I turn on the alarm it starts screaming. And all this came at once. Has this happened to anyone?
My fuel consumption indicators are running on my dashboard.
by Adminrive · Published 01/26/2015
For 10k I took the normal one
by Adminrive · Published 01/31/2017
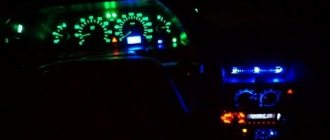
How to change the color of the instrument cluster illumination
1. Use SMD of the desired color. For example, use white LEDs to illuminate one part of the panel, and blue LEDs for the other.
2. Use a light filter (electrical tape or film of different colors) together with white LEDs. We stick it on the desired area, as a result of which we get the illumination of the desired color. To change the color, you do not need to use a soldering iron, just disassemble the instrument panel and stick a film of a different color.
It is worth noting that the hands have an orange coating. To change the illumination of the hands, wipe off the varnish with nail polish remover and, if necessary, apply a new varnish of a suitable color. Another option is to use LEDs for the arrows of the desired color.
You can change the backlight of the screen (display) not only by replacing its LEDs, but also by turning the film over. First, we tear off the film from the display, clean the remaining adhesive with a solvent and glue the film on the back side. This results in an inversion of the panel display:
3. Use RGB-SMD LEDs. If you want to change the backlight color at once. In this case, you will have to additionally output switching control.
Turns off during operation
The main reason that the buttons stop working or stick is, as a rule, dust and dirt getting under them or accidentally spilling soft drinks on the panel. As a result, the radio components overheat and the buttons fail to respond to commands when pressed. This can also happen for purely mechanical reasons.
That is, due to a broken solder contact. If a malfunction occurs such as sticking buttons of a car player, it is recommended to disassemble the top panel and clean the board and the connection points of the buttons with it, and also check the contacts of all buttons with a multimeter.
It happens that the radio turns off during operation. This problem can be caused by a poor or unreliable connection in the power circuit, which occasionally becomes loose when driving fast on rough roads, resulting in an unexpected shutdown. To fix the problem, you need to connect the power cables of the car radio more securely. Connecting the negative wire of the car radio to the car body is carried out as follows:
- Find the stud closest to the radio
- Clean it from dirt and paint.
- Take a piece of wire with a terminal that has a hole of a suitable diameter.
- Connect one end to the negative terminal of the radio
- Place the terminal onto the stud and screw it securely.
This malfunction is caused by poor contact or careless installation of the front removable panel of the head unit. The buttons do not work due to natural wear and tear caused by active use of the device. This problem will appear the sooner the harder you press the buttons. If the volume control encoder is worn out, control will not occur correctly.
Read more: The starter does not turn over when hot, reasons for diagnosing the starter and troubleshooting
To eliminate this problem, you should carefully remove the front panel and wipe the contacts on it and the radio itself, and then put it back in place. When installing, make sure that the panel fits tightly and evenly into place, and that the latch clicks into place. To replace worn or sunken buttons, you can take the panel to an electronics workshop.
An internal fault in the car radio results in the display not working. The cable connecting the display to the head unit may have come loose. This problem can only be fixed at a service center. You should not repair the display yourself to avoid causing more damage.
For the same reason, the sensor on the radio does not work. If this device is equipped with a control panel, then using the latter you can turn it on, off and perform other operations. Inaccurate installation of the front panel with a display or sensor also leads to incorrect operation of these components of the car radio.
Standard on-board computer Lada Granta/Kalina 2
The liquid crystal display is an electronic device that displays trip information collected and processed by the trip computer. Depending on the configuration, three types of trip computers are installed on the car, differing in the amount of information displayed.
The display shows the following information:
- line 1 displays the current time or (in a variant) the gear shift prompt indication mode, as well as the automatic transmission operation indication mode;
- Line 2 displays your choice of total or daily mileage;
- line 3 displays the outside temperature or (in an optional version) the functions of the on-board computer;
- line 4 displays the fuel level.
Instrument lighting does not work - on a VAZ 2115 - how to find the fault
Dear visitors, hello everyone. I have created the “auto electrics” section for you and at the beginning I want to share with you my idea of why exactly such a section was created and how it relates to everything else that was previously described on this site.
In general, I don’t find much difference here in, say:
- how to identify faulty lighting in an apartment,
- How to identify faulty lighting in vehicles.
The comparison is of course rough, but nevertheless, it makes a slight difference. For example, if a large current load is created in the electrical circuit of an institution, in this case either the fuse in the electrical distribution point blows, or the residual current circuit breaker in the distribution panel is triggered. As for auto electrics, if the current value for a separate circuit exceeds (the same thing), the consequences lead, for example, to the burnout of any light bulb or fuse located in the mounting block of the car. Previously, I had to troubleshoot minor electrical faults in vehicles such as:
So, let's start with the VAZ 2115 car.
Lada Granta. The dashboard went out. Cigarette lighter fuse is on
Many owners of a Lada Granta car have encountered such a malfunction as an extinguished dashboard. Typically, this malfunction appears after an attempt to turn on a recorder or compressor to inflate tires in the car’s cigarette lighter. When you turn the key in the ignition, the dashboard does not turn on, the green screen of the on-board computer does not light up, the car signal does not work, the trunk does not open with the button - all these are signs of a blown fuse F20 located in the mounting block in the front panel to the left of the steering column. Fuse F20 is the seventh from the bottom and has a blue body and is designed for a protection current of 15 amperes. This fuse blows mainly when trying to use the cigarette lighter as a socket for connecting additional devices: navigators, recorders, charging a mobile phone, compressor, etc. A short circuit in the cigarette lighter occurs due to a rigid plug of electrical appliances, which, with its central contact, unbends two “U” shaped tabs of the “+” contact at the base of the cigarette lighter socket. The main reason for the short circuit is the old long design of the plug for connected electrical appliances, which is not designed for the new cigarette lighter installed on Lada Granta and Kalina cars. Before replacing the fuse with a new one, it is necessary to bend these contacts to the center with a NON-METAL object.
The cigarette lighter socket is shallow, so it is difficult to hold the plug in it.
To prevent future short circuits, it is recommended to install an additional connector with USB outputs in the car for connecting navigators, recorders, radar detectors, etc. To connect a car compressor, it is not recommended to use the car's cigarette lighter as a socket. The easiest way to connect a compressor is to solder two alligators instead of the compressor plug and connect the compressor directly to the car battery. If possible, change the compressor connection cable to a longer one 1-1.5 meters with a cross-section of 2.5mm, so that you can easily reach the rear wheels.
After replacing the fuse, you can diagnose the operation of the dashboard. To do this, you need to press the daily mileage reset button on the Lada Granta dashboard and turn on the car’s ignition. The arrows of a working instrument panel will move and deviate three times to maximum values and return to their original position.
Installing an additional USB connector for connecting electrical appliances
Since Grants do not have a uniform fuse connection diagram, on some cars the cause of a dimmed dashboard, a non-working power window on the right side where the passenger usually sits, a non-lit license plate light and the left rear parking light may be a blown 5A fuse F10.
If the instrument panel still does not work, check the F10 5 Amp fuse. Check if the side lights on the right side of the car are on. Sometimes the cause of a blown fuse and a dim dashboard is a burned out parking light bulb.
Source: celyjmir.ru
What does the dashboard assembly look like?
This important segment of salon equipment is pleasantly impressive. The precision in the fitting of the elements (minimal and even gaps) is striking. The design solutions and color scheme of the components also achieve high marks, because everything looks like a stylish and logically completed product.
The material of the instrument elements is ordinary, but high-quality plastic with a pleasant texture to the touch. It is devoid of unpleasant creaks and crunches. There are no extraneous irritating sounds even after a long period of use. This indicates the reliable assembly of the panel and its high-quality fixation with other interior components.
Replacement process
A domestic manufacturer like AvtoVAZ is used to surprising its fans, believing that this is the only way to refocus the attention of modern drivers on domestic cars, to make them believe that they are no worse, and in some respects better, than foreign cars. Based on this, each new AvtoVAZ model impresses not only with original engineering solutions, but also with more interesting design ideas
Unfortunately, for some reason only the heater control knobs remained unattended. They are made of rough plastic, and the unattractive shape is completely unsuitable for a stylish interior.
Original heater handles for Lada Granta
If you do not want to put up with some aesthetic flaws, we suggest you familiarize yourself with our recommendations, based on which you can transform the heater control panel, decorating it with bright and attractive switches.
How to identify a malfunction
There was no indicator screwdriver, just a small flashlight and some thin copper wire. It was decided to identify a blown fuse in the mounting block by dialing. For this diagnostic method, it was necessary:
- disassemble the flashlight;
- cut one wire (in the flashlight circuit);
- add two small pieces of wire (about the same cross-section) to the ends of the cut wire;
- close the flashlight key (turn on the flashlight).