Reasons for replacing the Lada Priora receiver
There are a considerable number of varieties of intake manifolds, for example, made from various types of metals or composite materials. However, the Priora receiver is made entirely of plastic. This material prevents excessive heating of the manifold due to a hot car engine.
Thus, the air flow characteristics are improved, which has a positive effect on the proportions and quality of the air-fuel mixture. However, plastic also has a main, negative side - fragility. As a result, numerous breakdowns occur both due to the fault of the car owner and due to low temperatures at which the plastic loses its strength coefficient.
The most common damage can be caused by: - road traffic accidents (even minor ones); — accidental impacts during any repair work in the engine compartment; — other reasons;
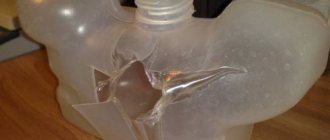
If the receiver on your car has through holes or any other leaks, then it must be repaired (if possible) or replaced. If a part is faulty, air loss will occur, resulting in improper engine operation.
Replacement and installation of the intake manifold Lada Priora 8 and 16 valves
Sooner or later, the car needs to be repaired.
In some places the replacement must be carried out as planned, in others it is not. But every car owner faces a similar problem. The question immediately arises: what repairs can you realistically carry out on your own, and where do you need to go to a car service center? Thanks to the Internet, all the necessary information, even with video instructions, can be found quickly.
The main function of the manifold is to distribute air among the engine cylinders, and also mix the fuel-air mixture there. And if you do not diagnose the operation of the air system in a timely manner and do not pay attention to the symptoms, this can lead to more serious engine damage.
Determining whether the engine is sucking in air
Before you start removing more than half the engine parts to get to the manifold, you should check other parts of the air system.
And after that, carry out a complete tuning of the car. First of all, you need to inspect all the hoses and gaskets located on the cylinder block. The most common method of finding air leaks is to spray the hoses with plain water; if there is a hole in one of them, the engine speed will decrease when water enters.
Detailed instructions for removing the intake manifold on a new Priora
It is necessary to remove parts from a cooled engine. It will take about an hour, provided that you have at least a little understanding of the injection system. The following sequence of actions must be followed:
- First of all, you need to remove the throttle. There is no need to completely remove it, just move the assembly connecting it to the manifold to the side. You also need to remove the throttle valve to thoroughly clean everything;
- disconnect the drive throttle cable from the manifold;
- disconnect the connectors from each other to remove the wires from the ignition coils;
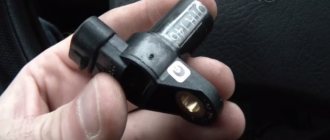
- on the camshaft, disconnect the sensor wires;
- disconnect all canister wires;
- disconnect the brake booster vacuum hose going to the manifold;
- then unscrew the clamp and remove the ventilation pipe;
- Unscrew the self-tapping screw of the oil level indicator guide tube;
- remove the dipstick with the guide tube;
- using sockets and a ten-size wrench, unscrew the nuts and bolts securing the exhaust module and coils from cylinders 1-2-3;
- remove the coils;
- then you need to unscrew the collector fasteners;
- slide it forward and remove the manifold.
How to replace the intake manifold on a VAZ 2170-VAZ 2172?
Removal: 1) It is attached with just some bolts and nuts, but some parts prevent you from getting to it, that’s why it doesn’t take as long to remove it as all the parts are removed that prevent its removal, first, turn off the power to the car’s on-board network since you will have to work with electronics, to do this, take a wrench and use it to remove the negative terminal from the battery, after which the on-board network will be de-energized (For more details on how to do this, if you have not yet understood, read the article: “Replacing the battery”, namely the first read the paragraph in it), as soon as the current stops supplying to all electrical equipment, remove the four ignition modules from the car engine (For clarity, all modules are indicated in the photo below with arrows, if you do not yet know how to remove them, then in this case, read the article: “Replacing spark plugs ignition on a VAZ”, be sure to read the second paragraph in this article and the note to this paragraph).
2) Let's move on, now remove the throttle assembly (it is also popularly called a throttle valve, but this is the wrong name) from the car and between this assembly, by the way, there will be the same gasket that is recommended to be replaced with a new one during any disassembly, but you should pay special attention for now do not pay attention to this gasket and read the article further, almost at the very end we will explain in detail how all these sealing gaskets are removed and in what cases they need to be replaced with new ones, and for more details on how to remove the throttle assembly, read the article: “Replacing the throttle assembly by car".
3) Then disconnect the crankcase ventilation supply hose from the pipe that is poured onto the cylinder head covers, to do this, take a screwdriver in your hands and use it to slightly loosen the hose clamp (see photo 1) and then disconnect the hose, followed by the guide with the probe which you are checking the oil level, you will need to remove it, the guide itself is attached to just one screw by unscrewing it (see photo 2) you can remove both it and the dipstick itself completely from the car (see photo 3), and then use wrenches to unscrew the two side nuts that secure the intake manifold to the cylinder head (see photo 4).
4) After unscrewing the side nuts, using a wrench or a socket wrench (Depending on what you have), unscrew the three central nuts and the two outermost nuts (see photo 1) and immediately after that remove the manifold from the car engine .
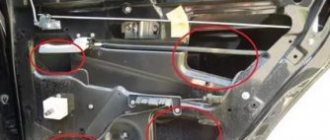
Installation: A new intake system manifold on a car is installed in the reverse order of its removal, but only you should know some aspects of its installation, firstly, it is possible that you did not remove it for replacement, but in order to get to other parts, for example, so on the removed the manifold has sealing gaskets, we mentioned them a little earlier, they can be removed quite easily, but if you don’t have new ones, then we don’t recommend disturbing the old ones, otherwise you’ll tear them, it’s recommended to always replace these gaskets with new ones, but if that’s not possible, then don’t remove them just visually inspect them, if cracks or traces of defects are found on them, then replace these gaskets with new ones (Where are all five gaskets located and how to remove them, see photos 1, 2 and 3), in addition, when installing the manifold back, take a lot of newspapers and crumple them up and put them in all four holes, which are indicated by arrows in photo 4 (But just make sure that they don’t fall inside), then take a brush that won’t scratch the metal too much and use it to clean the edges of the seats of those same sealing gaskets , it’s just that over time, pieces of gaskets stick to these edges, which is unacceptable, and therefore the edges must be clean and free of roughness that a brush with a metal part can cause, so do not use brushes with a metal rag.
Note! By the way, if these gaskets are deformed, the connection of the intake system is broken and the car, in the literal sense of the word, will start to shake and run poorly (This is all because of the small sealing gaskets, which is why we advise replacing them immediately with new ones), you will most likely It takes a long time to look for the problem, but it turns out to be very simple, the intake manifold gaskets were not changed in time, so keep this in mind!
Additional video clip: Just below, as you can see, there are two video clips, they don’t particularly show how to replace the manifold on cars, but they are interesting because the person explains and shows in practice which intake manifold adds the most power to a 16 valve car , look at them carefully and perhaps instead of the original collector you will install a sports one on your car and there are no particular disadvantages from them, and even more so, as some say, the resource does not decrease from them.
Note! Let’s add to the word (About the resource), a very large number of people have recently installed zero resistance filters on their cars, they say the car drives better on them, so if you are thinking about this filter, then we are immediately recalling you, because all the dust that is in the air is not properly cleaned by this filter and thereby flies into the car engine (For the mirror part of the cylinders, dust is like sandpaper, it scratches the mirror part and soon scratches will appear on it, which will slightly increase the coefficient of friction of the pistons in the cylinders and thereby the power of the car decrease and the resource will also decrease accordingly, since the mirror part of the cylinders will suffer from this), and the collector only has different shapes and with these shapes correctly selected, the car can drive noticeably better, so think about installing it on your car and that same video (This is a continuation of the first by the way) see below:
Removing the intake manifold
It is removed either for replacement or when repairing the ramp and injectors. Polishing the intake manifold will also help, as this will make it easier for fuel to enter the combustion chambers. Consequently, the power will increase. It is necessary to begin work by reducing the pressure in the fuel system. This can be done by removing the fuse for the fuel pump and starting the engine.
Wait until the engine stops on its own. This will indicate that there is no gasoline left in the system and the pressure has dropped. Now disconnect the battery and begin dismantling the system elements. First you need to remove the decorative casing, which is located on the top of the engine. It is attached at three points. Then proceed to dismantle the air filter. Remove the pipes that go to it.
Having freed up space, you can begin to remove the throttle assembly. There will be no problems with its dismantling, the main thing is not to remove the screws securing the damper. Otherwise, if you do not tighten and secure it properly, it may fall out and go into the engine. Then you will have to carry out large-scale repairs, which can be compared with a major one. With the throttle assembly removed, you can begin removing the intake manifold. Installation is carried out in reverse order.
To seal the joint between the flanges of the cylinder head and the intake manifold, as well as between the flanges of the throttle assembly and the intake manifold, O-rings are installed in the grooves of the intake manifold pipes.
If the tightness of these rings is broken, the engine runs unevenly (“troit”).
When air leaks through the intake manifold, popping noises may occur from the exhaust pipe.
Interruptions in engine operation and loss of power also occur. During this malfunction, the engine consumes more gasoline.
You will need: screwdrivers with a flat and Phillips blade, wire cutters or a knife, keys “10”, “13”.
1. Lift the hood and disconnect the wire from the negative terminal of the battery.
2. Remove the decorative engine cover.
3. Remove the throttle assembly from the intake manifold (see “Removing and installing the throttle assembly”).
Remove the inlet port O-rings.
How to remove the receiver on a Priora
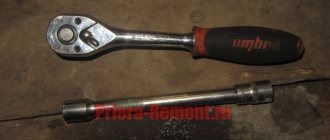
Tools that may come in handy: - 10mm socket; - key 13; - screwdriver.
To remove the intake manifold you will need:
- Due to the fact that in the next steps of the instructions there will be manipulations with electrical wiring, it is necessary to remove the negative terminal of the battery.
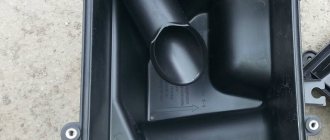
- The next step is to remove the plastic screen (cover) from the engine housing. This is done so that it does not interfere with your work.
- After which, it is necessary to remove power from the four ignition coils and dismantle them. To do this, pull out the contact chips. Take a 10mm socket (or a wrench of the same size) and unscrew one fastening bolt on each coil. Simply pull the coils upwards using the necessary force. Now they can be removed. There is no need to remove the spark plugs themselves; they will not interfere with removal. On the other hand, it is advisable to take advantage of the situation and check their condition (gap and spark quality).
- Our next task is to dismantle the throttle assembly. The receiver cannot be removed without removing it. To remove the throttle and avoid excess antifreeze leaking out of the cooling system pipes, you need to prepare first (unscrew the cap of the expansion tank with coolant). To remove the throttle, it is necessary to disconnect all the pipes connected to it, including those responsible for the air supply (corrugation) and cooling. In order to remove the assembly itself, you need to unscrew the two fastening nuts with a wrench or a 13mm socket. Now the assembly together with the sealing strip can be removed, and at the same time inspected and, if necessary, cleaned.
- At this point, locate and remove the crankcase ventilation hose. To do this, loosen the tightened clamp using a flat-head screwdriver and pull it towards you.
- The next step is to dismantle the dipstick structure to check the oil level. It is attached to one screw, which must be unscrewed.
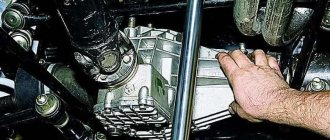
- Now the most important thing is to remove the Priora 16 valve receiver. Doing this is not as difficult as it seems. First of all, we need to unscrew the nuts from the three connecting bolts at the junction of the block and the manifold. It is most convenient to work from a repair pit or using a lift, having previously dismantled the underbody protection of the car. After that, you just have to unscrew two additional nuts.
- It's time to move into the engine compartment and unscrew the two special mounting bolts that are located on the right and left of the receiver housing.
- After which the receiver can be carefully removed.
- Depending on the type and configuration of components in your engine, you may need to unscrew, rotate or remove any component that prevents the receiver from being removed (for example, power steering or a generator).
Removal and installation of the cathode collector Lada Priora, VAZ 2170, VAZ 2171, VAZ 2172
The nuts securing the catalytic collector to the Priora cylinder head are difficult to access.
In addition, the collector flange is sealed with a metal-reinforced gasket. The sealing gasket must be replaced every time the connection is disassembled. Before removing the catalytic converter, it is necessary to remove the intake manifold - this will facilitate access to its mounting. 1. Remove the decorative engine cover (see “Removing and installing the decorative engine cover for the VAZ 2171”). 2. Remove the wire from the negative terminal of the battery. 3. Disconnect the exhaust pipe of the additional muffler from the catalytic collector by unscrewing the nuts securing the exhaust pipe flange to the catalytic collector flange and remove the exhaust pipe flange from the studs of the VAZ 2170 catalytic collector flange (see “Replacing the additional muffler”). 4. Remove the air filter (see “Removing and installing the air filter”).
5. Remove the air supply hose and three hoses of the crankcase ventilation system of the VAZ 2170 (see “Cleaning the crankcase ventilation system”).
6. Disconnect the four connectors of the ignition module wiring harness and move the harness to the side. Remove the ignition modules (see “Removing and installing ignition coils”).
7. Remove the throttle assembly (see “Removing and installing the throttle assembly”). 8. Remove the intake manifold of the VAZ 2172 (see “Replacing the cylinder head cover gasket of the Lada Priora”).
9. Disconnect the wiring harness blocks of the control and diagnostic oxygen concentration sensors from the engine harness...
10. ...and disconnect the holders of the wiring harnesses of the control and diagnostic oxygen concentration sensors of Lada Priora from the heat-insulating shield of the steering mechanism.
11. Unscrew the three nuts securing the thermal insulation shield of the Lada Priora steering mechanism to the engine shield and remove the shield.
12. Unscrew the two nuts securing the water pump supply pipe bracket, unscrew the bolts securing the catalytic collector to its mounting bracket, unscrew the eight nuts securing the catalytic collector to the Priora cylinder head and remove the catalytic collector. Disconnecting the catenary collector from the cylinder head and troubleshooting it is described in detail in the subsection “Replacing the catenary collector gasket”.
13. Remove the sealing gasket of the catenary collector from the cylinder head studs.
Warning: Be sure to replace the sealing gasket of the catalytic collector and inlet pipe with a new one every time you disassemble the connection.
14. Clean the flanges of the block head and catalytic collector from the remains of the old gasket and carbon deposits.
15. Unscrew both oxygen sensors from the catalytic collector of the VAZ 2171 and install them on the new catalytic collector of the VAZ 2172. 16. Install the catalytic collector and all the removed parts and assemblies in the reverse order of removal.
Helpful Hints To prevent the gasket from sticking and to improve its tightness, we recommend lubricating the gasket on both sides with a thin layer of graphite grease before installation. Lubricate the mounting studs of the Priora exhaust manifold with graphite grease.
Test No. 1
For maximum accuracy, measurements were taken on one day. First on a standard receiver, then it was replaced with a 21179 receiver, and again for tests. The test results are presented in the graph (black - receiver 21126; red - receiver 21179):
Neither Cycle Filling (CN) nor Mass Air Flow (MAF) have changed much. The central frequency has only shifted a little to the top (4500-7000 rpm), and this is logical, because compared to the standard receiver, the channels of the 21179 receiver are slightly shorter (460 MHz at 4600 rpm and 5200 rpm, respectively). The owner believes that the lows (XX-2500 rpm) and the middle (2500-4500 rpm) remained the same, both in terms of graph and feel. But at the top the car rides more confidently.
Installing a receiver on a Priora
As usual, installation is carried out in the same way as removal, however, during its production you must be extremely careful not to damage the receiver body. It is extremely important to insert the installed part with the holes into the connecting pins of the cylinder block, after which the manifold is directed to the mounting points on the engine.
Small but important points for installation:
- always clean or lubricate the rubber seals installed at the points of contact between the receiver and the cylinder block;
- Properly tighten the nuts at the joints of the elements.
Other work on replacing parts on Priora
To ensure a good seal between the flanges of the cylinder head and the throttle assembly at the manifold, sealing rings are installed there.
But before you put the manifold in place, you should plug the holes in the intake channels with a plug. To avoid excess debris when cleaning out the seats of the new rings, you must carefully align the O-rings so that they fit snugly into place.
You can replace the rings yourself, the main thing is to do everything according to the instructions and put the parts back in the reverse order of removal.
Sooner or later, the car needs to be repaired. In some places the replacement must be carried out as planned, in others it is not. But every car owner faces a similar problem.
The question immediately arises: what repairs can you realistically carry out on your own, and where do you need to go to a car service center? Thanks to the Internet, all the necessary information, even with video instructions, can be found quickly.
The main function of the manifold is to distribute air among the engine cylinders, and also mix the fuel-air mixture there. And if you do not diagnose the operation of the air system in a timely manner and do not pay attention to the symptoms, this can lead to more serious engine damage.
How to remove the cylinder head
Diagnosis and replacement of valves on Priora begins with dismantling the cylinder head. To do this you need to follow simple instructions:
- Relieve pressure in the fuel system.
- Remove the negative terminal from the battery.
- Disconnect the wires from all sensors.
- Drain the engine oil, fuel and other fluids.
- Remove the rear engine mounts.
- Remove the valve compartment cover.
- Unscrew the wire leading to the negative terminal of the battery and the ground cable.
- Using a 13mm socket, unscrew the thermostat mounting screws. Then unscrew the spark plugs with a special wrench.
- Remove the timing belt and remove the camshaft pulleys along with it.
- Remove the tube guide to check the oil condition.
- Using a 17 wrench, remove the pipes for supplying fuel to the ramp.
- Disconnect all harnesses leading from the engine control unit.
- Using a 10mm hex wrench, unscrew the eight cylinder head screws. After that, delete it.
After removing the head, take a ruler and check the condition of the lower head mirrors. It is important that they are not skewed.
Review of the exhaust system of Lada Priora
The exhaust gas exhaust system on the Lada Priora performs the following functions:
- exhaust gas removal;
- noise reduction when the engine is running;
- neutralization of toxic hazardous substances in exhaust gases.
The basis of the Priora exhaust system includes:
- 1. Exhaust manifold with converter;
- 2. Resonator;
- 3. Main muffler;
- 4. Auxiliary muffler;
- 5. Connecting pipes.
The manifold is used to remove exhaust gases from the cylinders into the exhaust pipe. The tightness of the connections is ensured by sealing with a metal gasket in two layers between the block head and the exhaust manifold. The attachment of the exhaust manifold to the cylinder head on one side goes into connection with the converter on the other. The collector and converter connected into one unit make it possible to reduce the warm-up time to the operating temperature of the latter, which significantly increases the efficiency of the converter.
Which receiver is better for Priora?
There is no clear answer to this question. Each situation is individual. However, some comparisons can be made between receivers made of plastic and aluminum.
Advantages of aluminum products:
- higher strength and wear resistance;
- increased engine power due to design features and a larger volume of supplied air;
- Some models are easier to install and therefore easier to remove.
In addition, the shape of the collector itself plays an important role in ensuring increased power, which should not contain sharp corners and transitions. The most important difference between plastic and metal is the strength and durability of the latter. Therefore, we can recommend installing metal types of intake manifolds for Lada Priora cars.
How to replace the cathode collector of a VAZ-21126 engine on a Lada Priora
Usually the collector is removed when it becomes coked or damaged.
The nuts securing the catalytic converter to the cylinder head are difficult to access.
In addition, the collector flange is sealed with a metal-reinforced gasket.
The sealing gasket must be replaced every time the connection is disassembled.
Before removing the catalytic converter, it is necessary to remove the intake manifold - this will facilitate access to its mounting.
1. Remove the decorative engine cover.
2. Remove the wire from the negative terminal of the battery.
3. Disconnect the exhaust pipe of the additional muffler from the catalytic collector by unscrewing the nuts securing the exhaust pipe flange to the catalytic converter flange and remove the exhaust pipe flange from the studs of the catalytic converter flange.
5. Remove the air supply hose and three hoses of the crankcase ventilation system (see “How to clean the crankcase ventilation system of a Lada Priora”).
6. Disconnect the four connectors of the ignition module wiring harness and move the harness to the side.
Remove the ignition modules.
9. Disconnect the wiring harness blocks of the control and diagnostic oxygen concentration sensors from the engine harness...
10. ...and disconnect the holders of the wiring harnesses of the control and diagnostic oxygen concentration sensors from the heat-insulating shield of the steering mechanism.
11. Unscrew the three nuts securing the thermal insulation shield of the steering mechanism to the engine shield and remove the shield.
12. Unscrew the two nuts securing the water pump supply pipe bracket, unscrew the bolts securing the catalytic collector to its mounting bracket, unscrew the eight nuts securing the catalytic collector to the cylinder head and remove the catalytic collector.
The disconnection of the catalytic converter from the cylinder head and its troubleshooting are described in detail in the article - “Replacing the catalytic converter gasket of a VAZ-21126 engine.”
Remove the sealing gasket of the catenary collector from the block head studs.
Clean the flanges of the block head and catalytic collector from the remains of the old gasket and carbon deposits.
Unscrew both oxygen sensors from the catalytic collector and install them on the new catalytic collector
Install the collector and all removed parts in the reverse order of removal.
The fastening studs and gasket must be lubricated with graphite grease.
Product delivery options
Note! Below are the shipping methods available specifically for this product. Payment options may vary depending on the shipping method. Detailed information can be found on the “Delivery and Payment” page.
Parcel by Russian Post
Available payment methods:
- Cash on delivery (payment upon receipt)
- Using cards Sberbank, VTB, Post Bank, Tinkoff
- Yandex money
- QIWI
- ROBOKASSA
Shipping throughout Russia. Delivery time is from 5 to 12 days.
Parcel by Russian Post 1st class
Available payment methods:
- Cash on delivery (payment upon receipt)
- Using cards Sberbank, VTB, Post Bank, Tinkoff
- Yandex money
- QIWI
- ROBOKASSA
Shipping throughout Russia. Delivery time is from 2 to 5 days. More expensive than regular delivery by Russian Post, approximately 50%. Parcel weight up to 2.5 kg
Express Parcel EMS
Available payment methods:
- Cash on delivery (payment upon receipt)
- Using cards Sberbank, VTB, Post Bank, Tinkoff
- Yandex money
- QIWI
- ROBOKASSA
Shipping throughout Russia. Delivery time is from 3 to 7 days. More expensive than regular delivery by Russian Post, approximately 100%.
Removing the fuel rail
You will need : relieve pressure in the fuel system, remove the engine air filter, prepare a Phillips and flat-head screwdriver, a 22mm open-end wrench, a 17mm wrench, pliers, a 10mm socket, a 13mm socket and a 5mm hex socket. .
Procedure:
- Disconnect the connector from the injector wires and remove it from the bracket.
- Unscrew the screw securing the pressure plate of the fuel supply tube to the ramp using a Phillips screwdriver.
- Unscrew the fitting of the fuel supply tube to the ramp using a 17 wrench, holding the tip of the ramp tube with a 22 wrench. Otherwise, the ramp may be broken.
- Remove the fuel supply tube from the tip of the ramp tube, and remove the rubber sealing ring.
- Loosen the crankcase ventilation hose clamp using a Phillips screwdriver. Remove the hose from the cylinder head cover.
- Unscrew the self-tapping screw securing the guide tube using a Phillips screwdriver.
- Remove the tube with the oil level indicator facing up.
- Remove the brake booster hose from the intake manifold by using pliers to loosen the clamp.
Disconnect the end of the throttle valve drive cable from the drive sector. Move the throttle body away from the intake manifold (see replacing the throttle body). Disconnect the blocks with wires from the ignition coils (from cylinders 1, 2 and 3), and move the wire harness to the side (see replacing spark plugs).
- Unscrew the two nuts from the upper fastening of the intake manifold using a 10 mm socket.
- Then two bolts and three nuts for the lower fastening using a 13mm socket.
- Disconnect the block with wires from the phase sensor. Remove the ignition coils from cylinders 1, 2 and 3. Cover the holes for the ignition coils with a rag.
- Push the intake manifold towards you and lift it up, bringing it out from under the wiring harness.
- Unscrew the two screws securing the fuel rail to the cylinder head using a 5mm hexagon.
- Remove all four injectors from the cylinder head holes by pulling the ramp along the axes of the injectors. Remove the ramp with injectors and wiring harness.
- Fuel rail assembly with injectors and wiring harness.