Briefly about the drive design
To change the chain and related elements yourself, you need to know the structure of this part of the power unit. The mechanism that drives the camshaft of the VAZ 2106 engine includes the following parts:
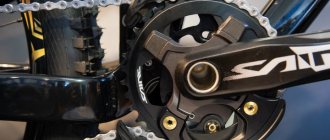
- a small drive sprocket is mounted on the crankshaft;
- large idler gear;
- the upper large gear is bolted to the end of the camshaft;
- double-row timing chain;
- tensioner shoe supported by a plunger rod;
- damper - a metal plate with a wear-resistant lining;
- pin - the chain runout limiter is installed next to the lower sprocket.
When rotating, the chain is held on both sides by the guide and tensioner pads
In older versions of the “six”, a mechanical tensioner plunger was installed, where the rod extends under the influence of a spring. The updated modification of the car is equipped with a hydraulic plunger device.
While the engine is running, the timing chain must be kept in tension, otherwise there will be beating, accelerated wear and the links jumping over the gear teeth. A semicircular shoe supporting the part on the left side is responsible for the tension.
Find out more about tensioning the timing chain: https://bumper.guru/klassicheskie-modeli-vaz/grm/kak-natyanut-tsep-na-vaz-2106.html
After the camshaft sprocket (in the direction of rotation), a damper plate is installed, pressed against the chain drive. To prevent the element from jumping off the lower gear as a result of strong stretching, a limiter is installed nearby - a metal rod screwed into the cylinder block.
In the updated versions of the “six”, automatic tensioning devices were installed, powered by oil pressure
The drive mechanism is located at the front end of the engine and is covered by an aluminum cover in which the front crankshaft oil seal is installed. The lower plane of the cover is adjacent to the oil pan - this feature must be taken into account when disassembling the unit.
Signs of critical wear of a part
As the vehicle is used, the chain drive slowly stretches. Deformation of the metal joints does not occur - the reason for the phenomenon lies in the abrasion of the hinges of each link, the formation of gaps and backlash. Within 1-2 bushings, the wear is small, but multiply the gap by 116 and you will get a noticeable elongation of the element as a whole.
How to determine the malfunction and degree of wear of the chain:
- The first symptom is an extraneous noise coming from under the valve cover. In particularly advanced cases, the sound turns into loud rattling.
- Remove the valve cover and check the alignment of the marks on the camshaft sprocket and crankshaft pulley with the corresponding protrusions on the body. If a shift of 10 mm or more is observed, the element is clearly stretched.
Correct operation of the mechanism is determined by the simultaneous coincidence of the marks on the crankshaft pulley and the camshaft sprocket - Tension the chain, start the engine and set the marks again. If the part has significantly lengthened, these measures will not produce results - the plunger reach is not enough to remove the slack.
- With the valve cover removed, check the technical condition of the damper. Sometimes a chain drive that is too stretched simply breaks off its lining or the entire part. Metal and plastic fragments fall into the oil sump.
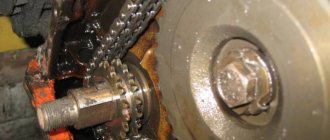
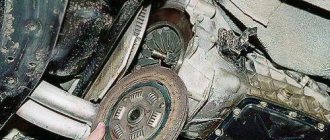
Once, during the process of diagnosing the “six” engine, I had to observe the following picture: the elongated chain not only broke the damper, but also made a deep groove in the cylinder head housing. The defect partially affected the valve cover contact plane, but no cracks or engine oil leaks occurred.
When the damper is broken, the chain rubs against the edge of the cylinder head platform and makes a groove
A chain stretched by 1 cm or more can jump 1-4 links along the gears. If the element “jumped” one section, the valve timing is disrupted - the engine vibrates strongly in all operating modes, significantly loses power and often stalls. A clear symptom is shots in the carburetor or exhaust pipe. Attempts to adjust the ignition and adjust the fuel supply are useless - the engine “shaking” does not stop.
When the chain moves by 2-4 teeth, the power unit stalls and will no longer start. The worst-case scenario is that the piston hits the valve plates due to a large shift in valve timing. The consequences are disassembly and expensive repair of the motor.
Video: determining the degree of wear of timing gears
Purpose of the sedative
The damper is designed to dampen vibrations and jerks that occur during startup on the timing chain. Without this device, the chain would easily break off the guide gears and break at the most inopportune moments.
Most often, the timing chain breaks at the moment when the crankshaft rotation speed reaches its maximum. The break occurs so quickly that the driver has no chance to react in time and turn off the engine. As a result, all engine valves fail.
After the valves, problems begin in the cylinders. It is almost impossible to restore the engine after such a breakdown. Especially when it comes to seven. After all, the cost of repair work can significantly exceed the cost of the entire car. And it’s easier to sell a car for spare parts than to restore the engine.
Therefore, we can conclude that the timing chain guide is one of those parts that needs constant monitoring. This is the most important protection of your engine from major breakdown.
Design and purpose of the camshaft
With all the variety of elements and associated systems of a car engine, the power plant is a rationally coordinated single mechanism. The engine of the “six” is represented by a four-stroke type “engine”, and the alternation of strokes is strictly regulated. This determines the purpose of the VAZ 2106 camshaft, the price of which is relatively high and amounts to 1000-1200 rubles, depending on the manufacturer.
The classic camshaft of the VAZ 2106 is responsible for the sequence (established order) of the operation of the valve elements to open and close the product for the removal of gas products of combustion of the air-gasoline mixture and the operation of the intake fuel line.
The main working body of the camshaft is the cams, which, through the influence of other elements of the product, including the camshaft chain, “open” the valves at a given frequency. The camshaft chain itself interacts between the gear and the camshaft sprocket of the “six” by means of a chain transmission.
Each valve corresponds to a separate cam, which, when operated by the action of a pusher on the protruding segment, presses on the valve element, which causes it to rise, which is why, depending on the position of the element, either a fuel-air mixture enters the cylinder or exhaust gases are discharged. When the pusher is released from contact with the protruding element, the spring “slams” the valve element with its tensile force.
The VAZ 2106 camshaft support neck is used for mounting the product in a retracted position. The mating parts are hardened using high-frequency current and are lubricated during operation.
Checking the chain for suitability
Every element of the car is subject to wear and tear. In order to avoid troubles on the road, especially when traveling long distances, it is recommended to regularly check car parts for wear. The same applies to the timing chain. How do you know if the chain is worn out or not? A worn and stretched timing chain is extremely difficult to distinguish from a new chain in appearance. The chain may not be mechanically damaged, but it may have worn pins - this is almost impossible to determine by visual inspection.
To check chain wear, it’s time to use a proven method. To do this, you need to take 20 cm of chain - place one side parallel to the horizon, then turn it in your hand so that the pin is perpendicular to the surface. Next, evaluate the hanging angle of the chain. On an unworn chain, the angle of inclination to the horizontal surface will be no more than 20 degrees; on an old worn chain, the angle will be more than 45 degrees. This indicates that the timing chain needs replacement.
You can also use another method to determine the degree of chain wear. To do this you need to take a caliper. Count out 8 links and determine the distance between the outer pins - it should be within 122.6 mm. Thus, it is necessary to measure at least three arbitrary sections of the chain; if in any section the distance exceeds the maximum permissible value, the timing chain needs urgent replacement.
Purpose and characteristics of the circuit
The timing drive mechanism of the VAZ 2106 engine solves 3 problems:
- Rotates the camshaft, which opens the intake and exhaust valves in the cylinder head.
- The oil pump is driven by an intermediate sprocket.
- Transmits rotation to the ignition distributor shaft - distributor.
The length and number of links of the main drive element - the chain - depends on the type of power unit. The manufacturer installed 3 types of engines with a displacement of 1.3, 1.5 and 1.6 liters on the “sixth” Zhiguli models. In the VAZ 21063 (1.3 l) engine, the piston stroke length is 66 mm, on modifications 21061 (1.5 l) and 2106 (1.6 l) - 80 mm.
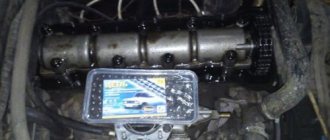
Many manufacturers indicate information about the number of links directly on the packaging
Accordingly, on power units with different displacements, chains of two sizes are used:
- 1.3 l engine (VAZ 21063) – 114 links;
- engines 1.5-1.6 l (VAZ 21061, 2106) - 116 links.
How to check the length of a chain when purchasing without counting the links? Pull it out to its full length, placing both parts close to each other. If both ends look the same, you have a 116 link part for long stroke engines (1.5-1.6L). On a short chain for VAZ 21063, one end link will rotate at a different angle.
If the ends of the stretched chain look the same, there are 116 sections.
If the camshaft fails
The camshaft on the VAZ 2106 model is rarely dismantled. Typically during repair or disassembly. Sometimes to replace it.
Signs
First, let's talk a little about the signs that indicate that the camshaft is faulty, its journals or beds are worn out. It is difficult to determine whether the shaft or something else is knocking in the VAZ 2106 engine, but it is possible. The knock of the camshaft is dull and clearly audible. As engine speed increases, the knocking becomes more frequent.
Some drivers determine knocking in this unit using a stethoscope or a stick through the valve cover. But often it is difficult for an inexperienced driver to do this. Therefore, the best way to diagnose the camshaft is to remove it, wash it and inspect it.
If the camshaft is faulty, the following symptoms may occur:
- a dull knock, reminiscent of hammer blows;
- it is impossible to adjust the valve clearances; while the crankshaft is turning, the camshaft is constantly in different positions.
This video shows how you can eliminate longitudinal runout of a camshaft.
The most reliable method for diagnosing problems with the VAZ 2106 camshaft is to dismantle it from the car and wash it. You can wash it in gasoline or other cleaning liquid. Next, you need to hold the shaft and hit the bed, when you hear the slightest knock, we determine whether the mechanism is worn out. Be sure to make sure that the shaft does not move in bed, because when it hits the limiter it will make a dull knock.
The camshaft has a great influence on the pressure in the lubrication system. If the gaps between the bed and the camshaft are large, then the pressure will be low, and as a result, unsatisfactory lubrication of other parts.
Causes
The main malfunctions that result in the need to replace the camshaft are its wear, the appearance of various scuffs and grooves on the bearing journals. Likewise, replacing the camshaft is necessary if it is found to be deformed or cracked. When such malfunctions occur, the power unit loses power and also begins to function intermittently. Problems with the camshaft are identified by a knocking sound in the cylinder head.
The camshaft on the “six” is rarely removed. In addition to the above reasons for replacing and reconfiguring the power unit. After this, you can notice a significant increase in power, like in sports cars.
Which timing chain and tensioner should I install on the VAZ 2106, VAZ 2107?
timing chain number is 2103-1006040, the average price is 380 rubles.
Analogues:
- Fenox PC2103C3 — 519 rub.
- Kraft KT 017736 — 620 rub.
The original number of the timing chain tensioner is 2101-1006060, the average price is 364 rubles.
Analogues:
- TSN 671 — 254 rub.
- Riginal RG2101-1006060 — 230 rub.
- Trialli MT 151 — 407 rub.
Prices are current for 2021, although the cost has not changed much in three years.
Replacing the VAZ 2106 timing chain without disassembling
Replacing the timing chain without disassembling
There is a simple way to replace the timing chain of a VAZ 2106 without removing the front cover. To do this, you only need to remove the valve covers and prepare a new chain.
The principle of how to change the timing chain on a VAZ 2106 is as follows: you need to disconnect one link of the old chain, as well as one link of the new one. After this, the edges of the old and new chains must be connected by making a corresponding mark at the junction with chalk or a corrector. Then you need to take the second end of the old chain and pull it out of the mechanism, while the new chain will gradually be put on the sprockets.
When the old chain comes out completely, it must be disconnected from the new one, and carefully rivet the links of the replaced chain.
How to change the timing chain on a VAZ 2107 with an injector
Replacing the timing chain on a VAZ 2107 injector is carried out according to the same principle as on a Zhiguli 2106. Moreover, you can install a new element either in the standard way by removing the front cover, or in a simpler way.
Checking the timing chain quality
Before changing the timing chain on a VAZ-2107, you should decide on the manufacturer and quality of the chain.
The reliability of a new product can be roughly checked by taking the chain by one end and lifting it horizontally. Holding the chain edge up, its second end will bend down slightly - the smoother this bend is, the stronger and more reliable the product!
Prepare the necessary keys and be sure to put proofreader or chalk somewhere nearby.
Replacement instructions
To install a new chain drive, you need to purchase a set of spare parts and consumables:
- double-row chain, suitable for a specific engine type;
- 3 gears - two large and one small (sold as a set);
- tensioner shoe;
- damper plate;
- power unit front cover gasket;
- high temperature silicone sealant.
Some manufacturers produce complete repair kits that include all the necessary parts.
If, when diagnosing problems, you find oil leaks under the crankshaft pulley, it is worth purchasing a new oil seal built into the front cover. The part is easy to change during the disassembly of the timing drive.
Why is it recommended to change all drive parts, including gears:
- over a long period, while the chain was stretching, the teeth of the sprockets also had time to wear out;
- for the same reason, the damper and tensioner linings were worn out;
- The repair operation is very labor-intensive, and it is impractical to repeat it for each worn-out drive element.
The teeth of worn sprockets are literally licked and allow the chain to slip
Tools and working conditions
As for the special tools, you will need a 36 mm socket wrench to unscrew the nut (ratchet) holding the crankshaft pulley. Because the ratchet is located in a recess, it is much more difficult to grab it with an open-end wrench.
With a special wrench with a long handle, it is easy to tear off the ratchet nut when unscrewing
The rest of the toolset looks like this:
- a set of open-end wrenches and sockets with a ratchet and a wrench;
- flat screwdrivers - regular and reinforced;
- mounting blade;
- pliers;
- hammer;
- rags, protective gloves.
READ How to change the clutch cable on a VAZ 2115
Replacing the timing chain drive is done using a regular garage tool.
It is most convenient to replace the timing chain in an inspection ditch in a garage. As a last resort, an open area will do, but then to disassemble the unit you will have to lie down on the ground under the car.
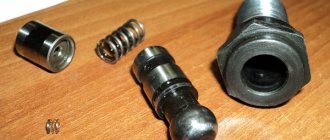
How to replace a dampener
To work you will need:
- new part (cost approximately 500 rubles);
- 20 centimeters of one and a half millimeter steel wire;
- open-end and socket wrenches;
- flat screwdriver.
- Remove the air filter.
- Using a 13mm socket wrench, unscrew the mounting bolts on the cover. Remove the cover.
- Loosen the cap nut that secures the chain tensioner.
- Using a screwdriver, carefully press out the shoe and hold it in this position.
- Tighten the loose cap nut.
- Insert the wire hook into the eye of the damper.
- Unscrew the mounting bolts, holding the device itself with a hook so as not to drop it into the motor.
- After the mounting bolts have been removed, use a spanner to turn the timing shaft a third of a turn. This will release the chain tension.
- Using a steel hook, carefully remove the damper.
- Put a new one in its place.
- Follow steps 1 to 9 in reverse order.
So in a short time you can easily replace the damper in your garage, saving about 700 rubles. Usually this amount is asked to the service station for similar work.
Preparatory operations
View under the hood.
Engine VAZ 2106
Remove the air filter housing from the carburetor. Unscrew the three 10mm and four 8mm nuts securing the housing to the carburetor.
Be careful not to drop anything into the carburetor, otherwise you will have to remove it, and maybe the intake manifold too. Because if, with the car running, they get under the intake valve, then you can go straight to repair the head.
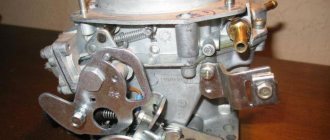
Carburetor.
Remove the fuel line and distributor cap. Unscrew the eight nuts 10 securing the valve cover and remove the washers with the plates.
Throttle drive.
Remove the choke cable and throttle valve drive. Then remove the valve cover along with the gasket; it is also better to replace it.
Camshaft bed.
Remove the protection from below.
Protection.
Loosen the nut 19 securing the generator.
Generator mounting.
Unscrew the clamps on the pipes and remove the latter.
Loosen the clamp on the lower pipe of the pump and remove it with a slight movement of your hand.
Disconnect the power wires for the cooling fan and the temperature sensor on the radiator. We remove the radiator along with the pipes and thermostat.
Loosen the generator tensioner nut and use a pry bar to move it forward. Remove the generator belt.
Setting Top Dead Center
Now we rotate the crankshaft by the pulley with a magic wrench of 36 and ensure that the marks on the pulley and the cover match, as well as on the camshaft sprocket and the ebb of the latter bed.
TDC marks. Camshaft mark.
Now comes the fun part. Unscrew the nut 36 holding the crankshaft pulley. We lock the pulley with a special key and unscrew it. If there is no such thing, you can turn on the fifth speed, ask a friend to press the brake and lightly turn the key to unscrew it.
Crankshaft pulley nut.
We remove the pulley. We unscrew the six bolts and three nuts 10 on the side, three bolts from the bottom of the camshaft drive cover. Let's take the last one.
Unscrew the two nuts securing the chain tensioner and remove it.
Timing chain tensioner.
This machine was equipped with an automatic tensioner. Finally someone got it!
We unscrew the bolt securing the camshaft sprocket and, having removed it, remember or mark the hole for alignment.
An amazing picture appeared before us.