When is it necessary to replace and remove the exhaust manifold on a VAZ-2114
Huge temperature changes are the main problem faced by the exhaust manifold and the gasket, for which it is removed. The collector itself is made of a special grade of cast iron; it can withstand high temperatures (up to 800-900 degrees) , however, these are critical values, after which the collector may warp or crack.
Exhaust manifold VAZ-2114
Its main task is to collect exhaust gases and distribute them into the exhaust pipe of the muffler.
Replacing or dismantling the VAZ-2114 exhaust manifold is necessary in the following cases:
- Mechanical damage to the collector.
- Warping and loss of tightness at the junction with the cylinder head.
- Burnout of the gasket between the head and the manifold.
- The appearance of cracks as a result of engine overheating.
- Replacing the collector with a device of a different configuration, adapted to a more severe operating mode.
In the event that we are not going to participate in high-speed races for the prize of the head of the regional traffic police, replacing or dismantling the collector may be necessary in a number of cases.
Tools and materials for dismantling
There are a number of symptoms that will indicate that you need to prepare to remove the exhaust manifold:
- increased noise level in the engine compartment , the engine produces a characteristic, loud sound in any operating mode;
- breakthrough of exhaust gases into the engine compartment and sometimes into the cabin;
- reduction in engine power due to a mismatch between the exhaust gas outlets in the cylinder head and in the manifold.
Many people decide to replace the standard manifold with a “tuning” one, made of stainless steel and having a different configuration, thereby wanting to increase engine power and reduce the resistance that the standard manifold provides to exhaust gases. As a rule, the most common reason for dismantling a unit is gasket burnout .
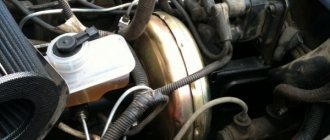
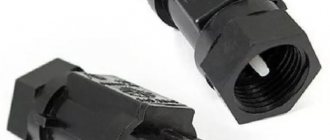
Exhaust manifold gasket
The manifold gasket on the VAZ-2114 is made of pressed reinforced asbestos and is designed to ensure a tight connection between the block head and the manifold flanges. Asbestos is used to correct the coefficient of thermal expansion of the aluminum alloy from which the head is cast and the cast iron from which the manifold is cast. At high speeds and under prolonged loads, the gasket may burn out. Then its replacement and dismantling of the collector are inevitable.
To dismantle the manifold, you will need a standard set of tools, a set of sockets with extensions, and WD-40 penetrating lubricant or its equivalent. In case of broken studs, a stud extractor, drill, drill bits and a set of taps will be useful. A day or two before dismantling the collector, it is worth moistening all the fasteners several times, this will significantly simplify the removal procedure .
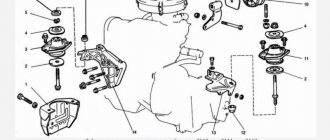
Exhaust system design
All parts of the gas exhaust system of the VAZ-2115 car can be easily disassembled, which allows you to replace them yourself, without the involvement of specialists.
Main parts of the gas outlet unit:
- Bracket mounting of the exhaust pipe.
- A gasket located between the pipe and the intake manifold.
- The clamping part of the bracket (represents a plate).
- Pipe for receiving gases from the engine.
- Metalgraphite gasket in the form of a ring.
- Catalyst.
- Rubber mounting pad.
- First (additional) muffler.
- Main muffler.
- Rear mounting cushion.
- Fastening clamp (often called brackets).
The location of most of the listed spare parts is under the bottom of the car, which makes them vulnerable to mechanical damage.
The cause may be not only external damage (most often caused by falling into holes or difficult to navigate places), but also exposure to chemical reagents or the influence of climatic conditions.
Replacing a VAZ 2115 - how to do it
VAZ 2115 or Lada Samara 2 is a 5/4/3 door modified hatchback/sedan/coupe based on the Lada Samara.
Table of contents
Manifold Gaskets Door Handles Brake Hose Injectors Coolant Steering Rack Windshield Muffler
Manifold gaskets
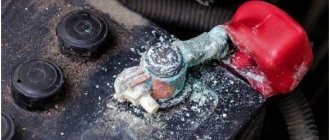
For ease of operation, remove the battery from the car.
We remove the windshield washer reservoir from the bracket without disconnecting the wire tips from the electric pump terminals and the hose from the pump connection.
We move the tank to the side, placing it on the platform under the battery.
We remove the receiver (see Removing the receiver) and the fuel rail (see Removing the fuel rail and injectors, checking the injectors).
Using a 13mm wrench, unscrew the bolt securing the front support bracket to the inlet pipe.
Using the same tool, loosen the nut securing the front support bracket to the stud of the right power unit support bracket.
Remove the front support bracket.
Using a 13mm wrench, unscrew the bolt securing the rear support bracket to the intake pipe.
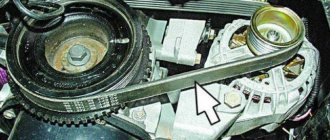
By loosening the upper starter mounting bolt (see Removing the starter).
...move the rear support bracket away from the intake pipe.
Disconnect the exhaust pipe from the exhaust manifold (see Replacing exhaust system parts).
Using the “13” head, unscrew the nut securing the “mass” wire and the front eye of the power unit.
We remove the tip of the “mass” wire from the cylinder head stud...
...and rome.
Using a “13” wrench, unscrew the two nuts of the upper fastening of the intake pipe (1) and the two nuts of the common upper fastening of the intake pipe and exhaust manifold (2).
Using a high “13” socket with an extension, unscrew the two nuts of the lower common fastening of the intake pipe and exhaust manifold.
We unscrew the two nuts and the bolt securing the starter shield and remove the shield from the exhaust manifold studs (see Replacing the starter).
Carefully bending it with a screwdriver, remove the coolant drain pipe bracket from the exhaust manifold stud.
Using a high “13” head, unscrew the nut of the front fastening of the exhaust manifold.
Using a 13mm socket with a cardan joint, unscrew the rear mounting nut of the exhaust manifold.
Remove ten washers from the mounting studs.
In the four joints between the intake pipe and the exhaust manifold, thick washers are installed on studs.
Moving the exhaust manifold away from the cylinder head...
...remove the intake pipe from the cylinder head studs.
Removing the exhaust manifold...
...and the sealing gasket of the intake pipe and exhaust manifold.
Holes for the studs for the general fastening of the intake pipe and exhaust manifold
Before installation, we clean the mating surfaces of the cylinder head, intake pipe and exhaust manifold from the remains of the old gasket and carbon deposits.
Having replaced the gasket with a new one, we carry out the installation in the reverse order. Apply graphite lubricant to the cylinder head studs.
Door handles
The tool you will need is a 8-mm socket, an extension, a wrench or ratchet and a flat-head screwdriver.
Let's get started.
We completely dismantle the door trim.
Next, unscrew the nut with a 8mm head, which is located on the edge of the door.
The second nut is located inside the door. It will be accessible when the window is fully raised.
After the handle is unscrewed, it is necessary to disconnect the lock rods.
This is quite easy to do. You will need to press down on the rod with a flat-head screwdriver.
The second rod can also be disconnected using a screwdriver, or simply by pulling the handle towards you and holding the rod, without damaging the door and rod.
We carry out further assembly in reverse order.
Brake hose
1. The first thing to do is disconnect the negative (-) cable from the battery terminal.
2. Next, you need to remove the wheel whose brake hose needs to be replaced.
3. Then remove the wire connecting the block and the wear sensor.
4. With a sharp movement, push the tip of the wire out of the block on the other side.
5. Carefully pull the wires through the holders.
6. Holding the tip of the tube with a “10” wrench, unscrew the hose from the brake pipe. At the same time, use the “15” key to hold the tip. If the nuts have “soured” in the tube mount, it should be cut in half and the tip removed from the tube.
7. Remove the tip and seal from the bracket on the rack and body. Using a 15mm wrench, unscrew the tip from the wheel cylinder... remove the hose.
8. Now we replace the broken spring clip.
9. Remove the seal from the bracket on the rack.
10. Unscrew the tip of the brake hose of the VAZ car from the wheel cylinder.
11. Please note that there is a copper O-ring on the tip. When installing a new brake hose, it must be replaced.
12. We install the new brake hose in the reverse order. Make sure it doesn't twist. The colored stripe on the hose control will help you avoid kinks.
13. The rear brake pipes should be replaced in the same way. After replacing the hoses, it is recommended to bleed the brake system to make sure everything is correct.
Injectors
You will need: a 5mm hexagon, a screwdriver, a 17mm wrench.
1. Remove the wire from the “–” terminal of the battery.
2. Remove the receiver from the intake pipe (see “Replacing the Intake Pipe and Exhaust Manifold Gaskets” in the subsection “Replacing Engine Seal Parts”).
3. Drain the coolant from the engine cooling system (see “Replacing the coolant”).
4. Reduce the pressure in the fuel system (see “Reducing pressure in the power system” in the “Power system” subsection).
5. Disconnect the injector wiring harness connector.
6. Disconnect the vacuum hose from the fuel pressure regulator.
7. Remove the two screws securing the fuel pressure regulator to the fuel rail...
8. ...and take him aside.
NOTE: If the fuel pressure regulator O-ring remains in the rail, remove it. Replace any sealing ring that has lost elasticity or is torn.
9. Unscrew the fuel supply pipe nut...
10. ...and disconnect the tube from the fuel rail. Replace loose or torn tube tip O-ring.
11. Remove the two fuel rail mounting bolts...
12. ...remove the bolts along with washers...
13. ...and remove the fuel rail along with the injector wiring harness and injectors.
Coolant
You will need: an 8 wrench, a 13 socket wrench, a screwdriver, coolant, a clean rag.
WARNINGS Replace coolant only when the engine is cold.
Coolant is toxic, so be careful when handling it.
When starting the engine, the expansion tank cap must be closed.
1. Place the car on a flat, horizontal platform. If the site has a slope, park the car so that its front is higher than its rear.
2. Disconnect the wire from the “-” terminal of the battery.
3. Open the heater valve by moving the valve control lever to the right until it stops.
4. To gain access to drain plug 1 on the engine cylinder block, remove ignition module 2 along with the bracket (see “Removing and installing the ignition module”).
5. Unscrew the expansion tank cap.
6. Place a container under the engine and remove the drain plug on the cylinder block. After draining the coolant, wipe any traces of it from the cylinder block.
7. Place a container under the radiator, unscrew the drain plug on the radiator and wait until the coolant is completely drained from the system.
8. Tighten the plugs on the cylinder block and radiator.
9. To prevent the formation of an air lock when filling the cooling system with liquid, loosen the clamp and disconnect the coolant supply hose from the throttle assembly heating fitting. Pour liquid into the expansion tank until it comes out of the hose. Reinstall the hose.
10. Completely fill the engine cooling system by pouring coolant into the expansion tank until its level is at the “MAX” mark. Close the expansion tank cap.
WARNINGTighten the expansion tank cap tightly.
The expansion tank is under pressure when the engine is running, so coolant may leak from under a loose plug or the plug may break off.
11. Install the ignition module in the reverse order of removal.
12. Connect the wire to the “-” terminal of the battery.
13. Start the engine and let it warm up to operating temperature (before turning on the fan).
After this, stop the engine, check the coolant level and, if necessary, add to the “MAX” mark on the expansion tank.
Steering rack
A few words about the instrument. In order to do this work you need to have:
Steering rod puller. Hexagon on “17”. WD-40. Set of wrenches (socket and open-end). Litol. Well, actually the VAZ 2115 steering rack itself, I also bought Kroner ends for myself, but this is optional.
Now in order:
1. Remove the wheel bolts while the car is on the ground.
2. Jack up the car and hang up the wheels.
3. Remove the wheels and treat the nuts that need to be unscrewed with the “magic” WD-40 liquid.
Self-replacement of the VAZ 2115 steering rack - step-by-step instructions
4. In the cabin, unscrew the locking bolt of the steering cardan.
5. Next, unscrew the absorber under the hood, this will make the work easier and give you access to the steering rack.
6. Unsplit the tip nut, then knock the tip away from the stand, I think you can’t hit the thread, everyone knows!?
7. If you don’t have a steering rod puller, you can use a hammer and a powerful pry bar.
8. Now unscrew the steering rack mounting nuts.
9. Remove the rail from the right side.
10. Next you need to knock the rack out of the slots; as a rule, it comes out without much difficulty.
11. After the rail with tips is removed, unscrew the tips and count the number of turns, this is so that after replacement you can more comfortably get to the nearest service station.
12. Open the side plugs in the new rail and fill the holes with lithol.
13. It’s time to screw on the ends, be careful not to mix them up, the right one is different from the left one.
14. Help will be needed to install the new steering rack. Place the rack in place and attach the fasteners on the right. The assistant's task is to help you get into the splines of the steering cardan. To loosen the clamp, you can drive a chisel into it. This way the slots will fit in easier.
You might be interested in: Replacing the front struts of a Lada Priora with your own hands
15. The rack has a special groove into which a locking bolt is installed.
Assembly is carried out in reverse order. After replacing the VAZ 2115 steering rack, do not forget to adjust the camber/toe.
Windshield
Removal:
Note! The glass on the Samara family car is secured with a rubber seal and therefore it is much easier to remove, unlike more modern cars, for example the VAZ 2110, on which the windshield is directly glued into the body!
1) First, in order to successfully remove the old windshield, remove the wipers from the car. (How to remove wipers, read the article: “Replacing windshield wipers”)
2) Now use a screwdriver to unscrew the screws that secure the side pads on both sides.
3) And then remove them.
4) Now tuck the edges of the rubber glass seal behind the body.
Note! After the edges are tucked in, press the upper corners of the glass from the interior and gently push it out. The blown-out windshield should be taken care of by an assistant standing outside!
Installation:
Note!Before installing new glass, inspect the rubber seal for defects and, if possible, replace it with a new one. But installing a new seal on the glass will be much more difficult, because as a rule, the old seal is more elastic, and therefore can be installed on the glass much easier!
1) At the beginning of the operation, rinse the grooves of the rubber seal with water and then blow it with compressed air, thereby drying it completely from water.
2) After this, put the rubber seal on the windshield.
Note! After the seal is installed, lubricate the seal groove with WD-40 or something similar, or with soapy water!
3) Then use a strong cord or rope, and then, by hand or using a screwdriver, insert it all the way strictly into the first groove of the seal, which is located closer to the inside of the glass. (If you don’t understand which groove we’re talking about, then play the video below, and you’ll find out everything in detail)
Note! When the rope is completely recessed into the first groove, be sure to close it so that the ends of the rope overlap at the very bottom of the glass!
4) Next, install the glass together with the rubber seal in the opening in its place. When installing, make sure that the ends of the rope are inside the cabin.
5) Next, ask an assistant to lightly press the glass from the outside to the opening, while you gradually pull the rope out of the seal from the inside.
Note! When you start to pull the rope, make sure that the edge of the seal is pulled over the edge of the opening. For greater confidence, you should press with your hand from the outside the place where you are pulling the rope from the inside!
Silencer
We drive the car into a pit or overpass, use a metal brush to clean the bolts on the clamp connecting the muffler pipe to the resonator and unscrew it.
Once the clamp is unscrewed, pull out the O-ring gasket that is located between the connections.
Next, remove the muffler from the rubber pads on which it is suspended. Before installing a new muffler, clean the ring thoroughly; you can even coat the gasket with a heat-resistant sealant, which will allow you to avoid the passage of exhaust gases between these connections.
Assembly is carried out in the reverse order, we hang the new spare part on rubber cushions and connect the resonator to the muffler with a clamp. If other units become unusable, they are changed in the same way.
vz15-up.ru