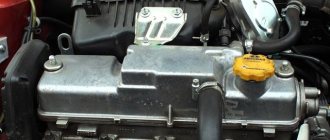
Removing the Lada Granta radiator
Tools (for 8 valve engines):
- Medium Phillips screwdriver
- Ratchet wrench
- Extension
- 5 mm hex bit
- 8 mm head
- 10 mm head
- 13 mm head
- Narrow nose pliers
- Funnel
- Compressor
Tools (for 16 valve engines):
- Medium Phillips screwdriver
- Ratchet wrench
- Extension
- 8 mm head
- 10 mm head
- Open-end wrench 10 mm
- 13 mm straight box spanner
- Narrow nose pliers
- Funnel
Parts and consumables:
- Technical capacity
- Coolant 8 l
- Radiator (if necessary)
- Radiator cushions (if necessary)
- Rubber radiator bushings (if necessary)
- Rags
Notes:
Remove the radiator to check it for leaks (if a leak is suspected) or replace it if damaged. Be sure to remove the radiator from the vehicle only when the engine is cold.
1. Remove the air filter housing and air intake as described here.
2. Drain the cooling system as described here (for 8-valve engines) or here (for 16-valve engines).
3. Unscrew and move the ignition coil aside as described here.
Note:
This item is only for 8 valve engines.
4. Remove the radiator fan by disconnecting its power plugs and mounting bolts as described here.
5. Loosen the clamp screw securing the lower pipe clamp, as shown in the photo below.
6. Disconnect the pipe and drain any remaining coolant if it remains in the system.
7. Similarly, remove the hose from the upper radiator pipe.
8. Using narrow-nose pliers, loosen the clamp securing the hose from the expansion tank to the radiator.
9. Unscrew the two nuts securing the radiator to the upper cross member of the radiator frame.
10. Tilt the radiator slightly forward towards the engine, thereby disengaging it from above.
11. Remove the radiator from the engine compartment.
12. Remove the two lower mounting pads from the radiator if they are still on the radiator mounting pins, or remove them from the holes in the lower radiator frame cross member if they are still on the body.
Note:
Replace torn or loose radiator cushions.
13. Remove the rubber-to-metal bushings from the radiator brackets.
Note:
Replace torn or loose rubber bushings.
14. Rinse the outside of the radiator with running water and dry.
Note:
If cracks appear on the plastic radiator tanks, replace the radiator on the car.
15. Check the tightness of the radiator by plugging its pipes and lowering it into a container of water, supplying air to it under a pressure of 0.1 MPa (1 kgf/cm2). No air bubbles should appear from the radiator for at least 30 seconds.
Note:
If the radiator does not fit completely into the container, check it sequentially from all sides.
16. Install the radiator on the car in the reverse order of removal, first placing the lower mounting pads on the radiator pins and inserting the upper mounting bushings into the brackets.
17. Install the electric fan and all removed parts on the Lada Granta car in the reverse order of removal.
18. Add coolant as described here (for 8-valve engines) or here (for 16-valve engines).
Grants stove (heater)
There was a small antifreeze leak on the engine cooling radiator. On the advice of a friend, I filled the cooling system with sealant for the cooling system. A day later in the morning the stove began to blow cold air. It was a little warmer when the gas was on. After removing the heater radiator pipes, it was found that it was clogged, because... it was impossible to blow it out. The photo shows that the sealant I poured completely clogged the heater radiator.
sealant
sealant
sealant
sealant
Now about the replacement: You need to buy a new radiator and specifically for Grants, because others will not fit, and get ready - it costs 2 times more than a regular one, for example, from Kalina. You also need to buy a small tube of regular sealant, one meter of pipe d-16, d-18 and a canister of antifreeze (5 liters was enough for me). It is better to do the work together, then you will understand why. It takes about 3-4 hours with smoke breaks.
We remove the battery, the air duct (connecting the air filter housing and the throttle body) and the air filter housing. all this can be removed without difficulty.
uncheck
We disconnect the connectors that interfere with us, like the one in the photo
Drain the antifreeze. We insert a meter-long piece of pipe d18 from the side of the left wheel, and at the wheel we put the end of this pipe into a canister to drain the antifreeze. One person removes the top pipe (coming from the thermostat), and the second person quickly puts the d18 meter pipe on the thermostat.
Then you need to blow into the expansion tank so that the antifreeze drains faster. We do the same with the lower pipe, only there is d16.
ATTENTION - the pipes from the stove must be kept at the top to prevent antifreeze from spilling. After that, having removed both meter pipes, we insert the one with d16 into the upper pipe of the stove, and put the lower pipe into the bottle and blow into the upper pipe. That's it, the antifreeze is drained. Next, we proceed to removing the gas pedal, brake and heater radiator.
To remove the gas pedal, you need to remove the chip and unscrew the 3 nuts with a 10mm wrench.
Behind the gas pedal there is a metal mount for this pedal; it also needs to be removed. Unscrew the 3 nuts with a 10mm wrench. There is no need to remove the brake pedal, you just need to remove your finger and press it.
Then you need to remove the plastic covering the stove radiator and saw off the top tube after bending. Pull it out into the engine compartment along with the pipe. Saw off the lower tube before the bend and also remove it into the engine compartment. While pulling out the radiator, press the brake pedal. On the new radiator, you can saw off more tubes, as in the photo, and, when trying them on, saw off the excess.
The main thing is that there is a straight section on the short tube towards the body. File the edges. Cover the perimeter of the radiator with foam rubber or double-sided tape with a thin material that is placed under the laminate. This is done so that the radiator does not dangle in the seat. Then we put the radiator in its place and put the pipes on the engine side. one person is in the cabin, and the other is screwing the pipe onto the radiator tube. first the lower one, then the upper one. We put everything on sealant and, for reliability, on two clamps.
Only you need to install the clamps on the upper pipe so that the tightening screws are between the tube and the radiator and are screwed in from below.
Then, having measured the required length of the pipes, we put them on where they should be, placing them on the sealant, and pouring a thin stream of antifreeze. We put the pedals, filter, chips, and battery back in place. Add antifreeze. We start it up and finish working. We monitor the level in the expansion tank. We blow with all our might into the expansion tank (blow into it - wait, the air comes out from there. You do this until the gurgling stops. Bring the fan to work, blow it a few more times and close the cap. Then you go up the hill and open the cap on the expansion tank you gas the barrel to expel the remaining air from the heater radiator.
Repair of the Lada Granta heater control unit
At the beginning of winter, my air temperature control lever (the same red-blue knob) broke. Those. rotated safely without any change in the temperature of the air flows. Because It was winter, the problem was postponed indefinitely, and the ill-fated stove was manually (by a cable) adjusted to the maximum value. But then spring came and this issue had to be resolved.
In general, we pick the panel until it is exposed and dismantle the fastenings of this module.
In Murzilka, as always, everything is simple and beautiful... In life it would be like that!
Lately I've been reading both the yellow pages and laughing. The inconsistencies are wild!
The hero of the occasion, except for the VAZ-2190 sticker, not a single marking!
The autopsy was performed and showed: super pelvicoplasty! The pin in the photo below should be in the red circle; it broke off safely.
It should be there, but there is only a stub...
As a result, after dismantling all the cables (they couldn’t make an electronic one, cheapeners!), we see the “loin” part of this work of art. What we see: HOLE. It feels like it was specially created for this (for repairs). At least my auto mechanic brother and I didn’t find any other (logical) explanation...
Here, here it is, the HOLE!
Because this broken off nanopin served as a pusher in the groove to rotate the blue disk, it was decided to replace it with a more functional and even more native part for AvtoVAZ - a 5*3 SCREW! The thread is not critical. You can also use a self-tapping screw, but in order not to break the grooves in which this pin goes, it is better to cut off the sharp tip.
Well, as if that’s how it should be! I'm shocked…
The test drive confirmed that this organ takes root just as well as on other basins. And they said: “Foreign car...” No flesh rejection was detected, I’ve been going strong for the second month now and I couldn’t be happier). By the way, if someone gets into trouble, don’t be fooled by the fact that the module looks like a Kalinovsky one! It is only identical from the face! From the “rear” there is nothing like it, photo for comparison.
Kalinovsky block
But at least it has markings!
Undocumented capabilities of the Lada Granta heater
Once I get into this car, I can’t stop saying that I like it. even after A6. but it is not without its shortcomings. for example, I noticed that the heater selector positions are much smaller than in other foreign-made cars. there are only four of them here, while in foreign cars there are five or six. not to mention separate climate controls.
secondly, in foreign cars for ANY
In the position of the heater dampers, part of the air goes to the
WINDSHIELD
(and, accordingly, to the front side mirrors for airflow) because this is the most important ventilation area.
And on Grant
, if there is no “windshield” icon, then the heater will not blow there.
I started experimenting, and voila! I found options on how to get out of the situation. I hope it will be useful to grant makers. First, a theory: watching the climate control in AUTO mode in the Audi A6, I noticed that in the summer the air conditioner “sends” most of the cold flow upward. and in winter most of the warm air goes to the feet (and, of course, a little to the wind).
Accordingly, I also “work” in Grant.
two new positions for driver convenience
So, I use additional position 1 like this: in winter I close the middle air deflectors, and direct the side ones to the side windows to quickly defrost the viewing area. It should be noted that the middle deflectors are closed all the time in winter. After the windows have thawed and the interior needs to be heated, I move the switch to the “left” position, as in the photo. Sometimes, the heater can’t cope with the side heaters, and my feet need to be kept warm (I don’t like to turn the fan speed up to more than the 2nd position) and then the SECOND position comes to my rescue. in this embodiment, air flows in all three directions.
Review of Manufacturer Prices
Technical parameters of the main radiator: length 560 x width 306 mm x height 20 mm.
| Name | Price, rub.) |
| Original 21901-1300008-11 | From 5500 |
| 21903-1300008-14 | From 4500 – 4800 |
| 21903-1301010-14 | —/— |
| 150925A2020 | —/— |
| 21900-1301010-14 | —/— |
| 21900130001004 | —/— |
| Lada Granta LUZAR 2190-1301012-01 | From 4600 |
| VAZ-2190 AvtoVAZ OJSC 546532532 | —/— |
| AvtoVAZ 21900-1301012-82 | —/— |
| RSO VAZ-2190 Lada Granta SB with electric fans and AvtoVAZ pipes | From 10100 |
| VAZ-2190,91,92,94 LUZAR universal 25643542 | From 6200 |
| VAZ-2190, 91, 92, 94 LUZAR 48454234 | From 4900 |
*prices are current as of November 19, 2018.
Recommendations for the selection of parts and components
The range is represented by domestic manufacturers, originals and high-quality analogues. The final choice is up to the owner of the technical device.
Service center technicians strongly recommend purchasing original parts. The service life and manufacturing quality of factory components are an order of magnitude higher than their analogues.
Before purchasing, carefully check the spare part catalog numbers with the actual data in the instruction manual. If necessary, get free consultations from service station specialists.
Lately it has become popular to order parts for subsequent installation directly in workshops. There are many advantages of this choice: prompt delivery, professional installation, quality guarantee.
Reviews
| № | Positive |
| 1. | Mikhail: I have run over 80,000 km on my car, there are no complaints, the cooling system is working as normal. I follow the manufacturer's instructions - replace antifreeze every 75,000 km. |
| 2. | Vladimir: in two years of active driving, I replaced the thermostat once. I don’t consider this a significant breakdown, since this is a normal occurrence for domestic cars. |
| 3. | Kirill: The car is a year and a half old, I bought it at a dealership. There are no complaints, all mechanisms work as usual. Breakdowns happen, but they are not so significant and can be easily fixed on your own. |
| 4. | Gennady: after buying the car from the dealership, I immediately replaced the antifreeze with a new, imported one. Domestic is of low quality and quickly loses its properties. |
| 5. | Vasily: I am satisfied with the quality of assembly and manufacturing of the Lada Granta (16 valves). As for a domestic manufacturer, this is very good, it cannot be compared with Kalina, Priora. I fix minor damage myself. |
| 6. | Konstantin: within a year and a half of using the car, I replaced two clamps on the cooling system pipe. I don’t consider this a defect; it’s normal for Lada. |
| 7. | Victor: I’ve heard negative reviews about Granta, I think they are unfounded. You should always follow the instructions in the instruction manual, then everything will be fine. |
| Negative | |
| 1. | Alexander: the radiator leaked at 39,000, corrosion formed, luckily I replaced it with a new one under warranty. After 15,000 km. The thermostat has failed. Lots of trouble with the Grant, it’s better to pay a few tens of thousands extra and buy a Renault Logan. |
| 2. | Vladislav: Two years have passed since I bought the car, and I have already had unscheduled repairs at a service station several times. The build quality is crude, many defects are not eliminated from generation to generation. |
| 3. | Igor: many components and assemblies do not maintain their service life and wear out prematurely. |
Conclusion The average service life of the cooling system radiator on a Lada Grant is over 100,000 km. Provided you follow the manufacturer's recommendations and replace the antifreeze, no problems arise after 75,000 km.
A number of owners save on maintenance, buy cheap analogues, lubricants, liquids, as a result of which irreversible processes begin. The mechanisms fail and work unstably.
How to replace a radiator on a grant with air conditioning
Removing the air conditioner radiator on a Lada Granta car is carried out to replace it with a new one or repair it, in most cases to restore the tightness of the system. To carry out repair work, you will need a Phillips screwdriver, eight-size wrenches and a ten-socket socket.
It is most convenient to carry out repairs on a vehicle mounted on an inspection pit or lifts. Do the following sequence of actions:
- Replace it, then install it in the reverse order, removing the pipeline plugs directly when connecting the pipes. Be sure to replace the O-rings with new ones and lubricate them with oil used for the air conditioning system.
Tools (for 8 valve engines):
- Medium Phillips screwdriver
- Ratchet wrench
- Extension
- 5 mm hex bit
- 8 mm head
- 10 mm head
- 13 mm head
- Narrow nose pliers
- Funnel
- Compressor
Tools (for 16 valve engines):
- Medium Phillips screwdriver
- Ratchet wrench
- Extension
- 8 mm head
- 10 mm head
- Open-end wrench 10 mm
- 13 mm straight box spanner
- Narrow nose pliers
- Funnel
Parts and consumables:
- Technical capacity
- Coolant 8 l
- Radiator (if necessary)
- Radiator cushions (if necessary)
- Rubber radiator bushings (if necessary)
- Rags
Notes:
Granta replacement of the stove radiator without removing the panel
We remove the heater radiator for replacement if a coolant leak is detected through the radiator. Remove the instrument panel (see “Removing the instrument panel”).
Using a Phillips screwdriver, unscrew the two self-tapping screws securing the radiator cap.
Remove the radiator cap and seal (shown by the arrow) from the radiator pipes.
Remove the radiator from the heater housing. Install the heater radiator in reverse order.
Preparatory stage before replacing the radiator
Any repair of the power plant cooling system requires draining the coolant. If you need to replace the cooling radiator, you will need to drain the liquid in full.
How to remove the radiator, how to change it? We act like this.
- We place the Lada Kalina in the middle of a flat area.
- Taking a “10” size key as our “helpers,” we dismantle the metal protection sheet located under the engine sump. This is necessary so that the process of draining the antifreeze is carried out directly into the container, and not along the surface of the crankcase protection.
- Draining the liquid should begin after the Lada Kalina engine has cooled. This will eliminate the risk of hand burns.
- We continue the process by dismantling the air filter housing.
- To gain access to the drain plug on the engine block, it is necessary to remove the ignition coil. To do this, you will need to de-energize the network by removing the terminals from the battery. It is also necessary to remove the high-voltage wires. The coil fastener is unscrewed using a hex key of size “5”.
- The plug on the block is unscrewed if you use the key at “13”.
- Don’t forget to first place a container of the appropriate size under the drain hole.
- After waiting for the antifreeze to completely drain, we move the container to the radiator.
- Disconnect the lower hose and continue collecting the refrigerant in the same container. The liquid will come out of the system more readily if you open the cap on the expansion tank.
- Having completed the “draining event”, we return the cylinder block plug to its original place, tightening it to the required torque.
- Now, using a suitable screwdriver, remove and tighten the clamp securing the system pipe to the fitting of the throttle assembly heating unit. This is necessary to bleed air from the circuit while charging refrigerant.
The replacement of the cooling radiator is complete.
Replacing the cooling radiator on Grant
Replacing the main engine cooling radiator on cars such as the Lada Granta is done in rare cases, and the main ones are listed below:
- The appearance of a radiator leak, which can be caused by excess pressure in the cooling system
- Damage to pipes, which most often occurs as a result of an accident
If for these or other reasons you had to change the radiator, then for this repair you will need a tool such as:
- heads for 7, 8, 10 and 13 mm
- 17 mm wrench
- ratchet handles or cranks
- pliers
- flat and Phillips blade screwdrivers
The procedure for replacing the engine cooling radiator on a Grant without air conditioning
- Remove the air filter housing
- Drain the coolant from the system
- Unscrew and move the ignition coil to the side (if it is 8-key)
- Remove the radiator fan by disconnecting its power plugs and mounting bolts
After this, you need to loosen the clamping screw securing the lower pipe clamp, as shown in the photo below.
Disconnect the pipe and drain the remaining coolant if it remains in the system.
We perform the same procedure with the upper pipe.
And don’t forget also about the thin hose that comes from the expansion tank:
When all the pipes are disconnected from the radiator, you can proceed further - unscrew the two fastening nuts on top. One on the left side:
And the second one from the right:
We tilt the radiator slightly forward towards the engine, thereby disengaging it from above.
And we remove it from the Granta’s engine compartment, as shown in the photo below.
If necessary, we buy a new radiator and replace it in the reverse order. Of course, we carefully inspect the condition of the cooling system pipes for cracks and breaks, and if necessary, change them too.
Repair costs
When performing this repair, considerable costs cannot be excluded, the list of which will be listed below in the table.
| Necessary parts and components | price, rub. |
| Radiator main | 1700 |
| Top pipe | 200 |
| Bottom pipe | 800 |
| TOTAL | 2700 |
Of course, you can do without replacing the pipes, thereby saving at least 1000 rubles, but the old ones should be carefully checked.
Radiator dismantling in Kalina
To remove the designated assembly and related components, you will need to use the following tools:
- wrench "10" (socket type);
- pliers with thinned grips;
- Phillips screwdriver;
- If the Lada Kalina is equipped with an air conditioning system, then we additionally stock up on a set of Torx (star profile).
- Disconnect the power connector from the system fan.
- Let's dismantle this unit. It is held on the radiator with 4 bolts. To unscrew them, you will need to use a “10” key. Extraction is carried out in the upward direction.
- Next, we move on to removing the pipes from the radiator fittings. We loosen the clamps using pliers or a screwdriver. We use the same wrench to unscrew the two nuts that hold the radiator assembly in the seat.
- Now we tilt the product slightly towards the engine and lift it up.
When dismantling the unit on a Lada Kalina equipped with air conditioning, you will need to resort to removing additional components that are directly attached to the radiator. To carry out this activity, you should stock up on a key with an asterisk profile.
You need to unscrew 4 screws. During dismantling, look towards the lower radiator cushions. They can either be removed along with the product or left in the landing niches. Experts recommend removing these support elements to assess their condition. It would also be useful to remove the rubber-metal bushings present on the body of the LADA Kalina radiator unit. It is better to replace them with new analogues.
How to remove the radiator of the VAZ 2190 Granta cooling system
The radiator of the cooling system on a VAZ 2190 Granta car is removed to replace it with a new one in case of damage or severe wear, when it is not possible to carry out restoration work. The radiator is also removed when carrying out various works in which its presence will interfere with the progress of their implementation.
It is necessary to remove the radiator only when the engine is cold. Prepare a standard set of tools and perform the following sequence of actions:
- First of all, you need to drain the coolant.
- Next, remove the electric cooling fan.
- We compress the antennae of the clamp securing the expansion tank hose to the radiator and slide the clamp along the hose. Then disconnect the hose from the fitting.
- Similarly, by squeezing the clamp antennae, we disconnect the upper pipe from the radiator.
- Also disconnect the lower pipe.
- Unscrew the two nuts that secure the radiator to the frame cross member.
- Carefully tilt the radiator towards the engine and remove it from the engine compartment.
- We remove the two rubber pads of the lower mounting from the radiator and remove the two rubber-metal bushings of the upper mounting from the brackets. Replace rubber parts if they have lost elasticity or become dry.
- Make any necessary repairs or replacements, then perform installation in reverse order.
At this point, the repair work to remove the radiator of the cooling system on the VAZ 2190 Granta car has been completed.
Replacing the main engine cooling radiator on cars such as the Lada Granta is done in rare cases, and the main ones are listed below:
- The appearance of a radiator leak, which can be caused by excess pressure in the cooling system
- Damage to pipes, which most often occurs as a result of an accident
If for these or other reasons you had to change the radiator, then for this repair you will need a tool such as:
- heads for 7, 8, 10 and 13 mm
- 17 mm wrench
- ratchet handles or cranks
- pliers
- flat and Phillips blade screwdrivers
Eliminating air jams
The design of the cooling system in the VAZ-1118 has one unpleasant drawback - the tendency for the circuit to become airy. This can lead to overheating and engine damage. Here we recommend resorting to minor system upgrades. You need to act when the liquid is drained.
- First we replace the thermostat. Instead of a standard product with five holes, we install a component with six such holes.
- We add a refrigerant filter to the circuit.
- We install a shut-off valve on the pipe leading to the stove.
These actions are not capable of radically transforming the system. Experienced owners of LADA Kalina have moved further in this matter. They add steam exhaust pipes, install a forced fan activation button, etc. To install the designated outlet, the diagram looks like this: we cut a tee into the pipe leading to the expansion tank. It is connected through a separate hose to the pipe of the throttle body heating unit. We place the second tee in the return from the radiator of the heating system and connect it with an expansion tank. Now you know how to remove, as well as how to change the radiator, and fix other problems yourself.
Replacing the stove radiator on a Lada Granta with your own hands + video
Lada Granta has become a really popular car. And, in many ways, this happened thanks to the affordable price and good components. For example, the stove installed on the Lada Granta is quite good, as it warms up the interior to the required level very quickly. AvtoVAZ engineers did a very good job on this issue, since for our harsh winters the issue of high-quality heating of the interior is very relevant.
How to change the heater radiator on a grant?
Replacing the Lada Granta heater core
The Lada Granta stove often does not heat up, especially in cars with fairly high mileage. To understand why the Lada Granta stove does not blow warm air, you first need to understand the structure of the entire heating and ventilation system. For clarity, we will add to our article a photo of parts of the car’s heating system and tell you where the stove and other ventilation elements are located.
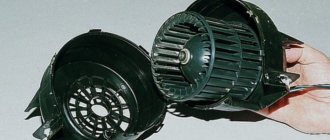
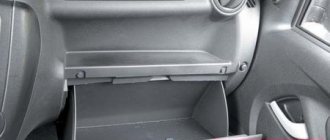
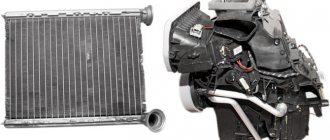
The main elements of the Lada Granta heating system - stove, fan, air ducts, heater radiator - are located under the dashboard (device panel). But if you don’t need to disassemble much to remove the fan (it’s enough to remove the glove compartment lid), then to remove the heater radiator you will have to completely remove the dashboard (Lada Granta panel), and this is quite labor-intensive work.
Heater parts Lada Granta
1 – air duct to the left deflector
2 – radiator cap
5 – air duct to the glass blower grilles
6 – heater body
7 – air duct to the central deflectors
We dismantle the radiator of the Lada Granta stove
This radiator eventually leaked into the car interior. And antifreeze vapors are harmful!
Despite the fact that there are usually no complaints about the quality of the stove, breakdowns can still occur. If you focus on the radiator, it may clog or leak. In any case, you need to immediately begin dismantling the stove, after which it will be possible to inspect it in detail and understand the causes of the breakdown.
Most of the work will have to be done on the top of the engine compartment, as well as from inside the car. In fact, in this case we will not need a pit, a jack, or a lift. Just keep in mind that access to the engine compartment will be extremely difficult.
- To begin, unscrew a couple of clamps that secure the heater pipes to the heater radiator. This frees them up so we can remove the pipes completely.
- Now we will have access to draining the coolant from the radiator. Naturally, you will have to take care in advance of the container where this liquid will be drained.
- If possible, we move the pipes to the side. In principle, most of the work in the engine compartment is completed here.
- Next comes work from inside the car. Near the handbrake you can find one self-tapping screw that secures the tunnel, as well as another self-tapping screw for fixing the parking brake housing. Unscrew them completely. In addition, on the driver's side and on the passenger's side there will be two more screws that secure the tunnel on both sides.
One self-tapping screw under the handbrake tunnel
Unscrew the two screws. One is visible in the photo, the second is to the right, closer to the gearshift knob
Three pedal mounting bolts
Gained access to the heater radiator pipes
We saw off the radiator tubes to remove it
Installation of a new Lada Granta radiator
The new radiator must be original or at least compatible with it in size and technical parameters.
We carefully cover its perimeter with foam rubber, after which we begin to work with the window in the stove body.
Carefully cut a small window of a suitable size, closer to the bottom of the stove body.
After this, the new radiator will fit into place very well. All other parts are assembled in reverse order.
Selecting a new heater radiator (verified articles)
A model specifically for the Lada Granta Luzar under the symbol LRh 0190b would be a good fit for the role of a standard heater radiator.
It is completely made of aluminum alloy, and the price of this radiator is about one and a half thousand rubles. In addition to the Lada Grant, it is also suitable for installation in the second version of the Lada Kalina.
In general, so far, alternatives are rarely found on the domestic market. So car enthusiasts have to be content with this radiator. However, it performs quite well, especially if you do not use special additives to “repair” it, which seal the liquid supply channels.
Radiators of the so-called new type are characterized by mounting features. In addition, such radiators are not solid, but consist of two parts. They are assembled together using three self-tapping screws.
As for the “old” radiator model, it has a completely solid structure. However, most of the fastening elements are the same as the new type, so installing any of them should not lead to any difficulties.
Installation of a new Lada Granta radiator
When buying a new radiator, you need to understand that it must be either original or very close to the original in its characteristics.
Car enthusiasts have to console themselves mainly with a radiator heater for the Lada Granta Luzar. In general, he performed well. Especially with the use of special additives that seal the liquid supply channels. The new generation of radiators has features in the fastenings; they consist of two parts and are assembled together with three self-tapping screws.
The new radiator will fall into place correctly if, after purchase, you carefully cover it with foam rubber around the perimeter, after which a small window of the required format is cut, somewhere at the bottom of the stove body. Thanks to these manipulations, the new radiator should fit perfectly into place. Next, the entire assembly proceeds in reverse order.
Adviсe
Antifreeze leaked into the cabin
To prevent problems with the heater core, you need to carefully monitor it. For example, from the first days of buying a car, periodically look under the car to see if there are dark spots there. And in the engine compartment it would be a good idea to observe the condition of the cooling system hoses. If you notice traces of antifreeze in any of these places, you need to immediately seek help, or carry out repairs yourself.
If possible, the hoses for connecting the heater radiator should be replaced with new ones, having coated the connection points with sealant. But some do not agree with this opinion. After all, sealant from the hose can get inside the cooling system and cause damage to the pump. As a result, the timing belt will break and the valves will meet the pistons.
