What is the first thing a person thinks about after buying a car? About its safety! The most popular way to protect your car from theft or accidental collision in a parking lot is to install an alarm system. In addition, the security system can combine other useful functions, for example, automatic engine start or remote trunk opening through an additional channel.
Step-by-step installation of an alarm system on a Lada Granta with your own hands
The alarm is very useful and multifunctional.
With its help, you can protect your car from thieves or accidental collisions in the parking lot. More complex security systems are capable of using a key fob to open the trunk from a distance, start the engine, or perform a host of other interesting functions. Lada Granta models such as Norma and Standard do not have an anti-theft system in their factory equipment. The factory simply does not install them, since the designers considered this part superfluous, if you do not take the immobilizer into account. That is why this article was created, since the relevance of the issue of installing an alarm system on the Lada Granta is soaring at exorbitant heights. Despite the fact that there is a huge range of car security systems on the market, they have almost identical installation schemes, with only minor differences.
Features of installing an alarm system on Lada Granta
I'm completely tired of using the standard central locking. This was followed by the fact that a couple of times I forgot to lock the car before work (fortunately, the parking lot was near work), and when I remembered on the way, the standard key fob clearly did not have enough range.
As a result, it was decided to install an alarm with auto start, and with a normal range, according to reviews. The choice was not easy, I was tossing between Starline A 91 and SCHER-KHAN LOGICAR 2. In the end I decided on “SCHER-KHAN”.
I installed it in a friend’s garage, but only because I was confident in his professional knowledge. As a result, my hands guide his head. If you have never done this on your own, you shouldn’t start. So, let’s open and understand the wires of the mounting block, this is necessary for understanding, and so as not to cut off unnecessary things.
[adsense]
The central locking relay slightly jumped off the contacts, which is probably why it didn’t always work.
I was then faced with the choice of creating an additional secret button; at the moment it was possible to insert it into the ignition switch circuit, these three standard wiring. I changed my mind and am going to install an ignition switch from Garant. And later we’ll put a seal on the fuel pump.
And then the most interesting part begins - finding a place where we will crash. We take out the wiring harness from the central threshold and disassemble the wires.
The main thing here is not to confuse anything - there are blue and black wires going to the turn signals, and brown and green wires to the left front door.
But for the rest of the doors you don’t even have to look for wires for limit switches - you’ll have to lay them yourself. Since I was interested in installing an alarm system with auto start, a handbrake is strictly necessary.
It was decided to take the wires for it from under the instrument panel (closer to the alarm control unit, it was also placed under the panel). Fortunately, there is plenty of space under the Grants panel.
Next, open the glove compartment and look for the engine control unit. You need to take a signal from the generator from it - this is a brown-blue wire.
We connect a white-black wire to the trunk end switch, into the gap of which it is necessary to insert a diode, but we had to install a Euro end switch in the engine compartment.
Next was the long installation of limit switches on the remaining doors, the main thing was to connect them to the driver’s door, and not according to another scheme. Tested and produces fewer glitches.
At first there was a defect - when arming, the locks in the passenger doors kept clicking. this is because their locks also have limit switches. They simply fixed it - diodes were soldered into the circuit (as on the trunk end) and now the control unit receives the signal correctly.
Taking into account these features of installing an alarm system on a Lada Granta, you can be guaranteed to install the system in 1 day, and not overpay for a service station.
Connection points
As soon as the thought of purchasing an alarm has occurred to you, you must first decide on your choice.
What exactly do you want from a security system? You only need protection or some other additional functions that a device of this kind can provide. It’s worth saying right away that in most cases there is no point in buying the most sophisticated newest model. A strong middle player will be more useful for Granta. Typically, brands of such systems quickly become popular or fly off the shelves like melted popsicles. An alarm system that has proven itself to be excellent will be in demand simply because it has been tested by many, and nowadays information reaches consumers much faster than even just five years ago.
The configuration of the security system completely depends on its model, so the presence or absence of any elements does not yet indicate a defect, etc.
Next, we will look at one of the proven autostart systems - Starline. It is chosen by car owners who prefer to service their iron horse themselves, rather than throw it into the hands of service station masters on every occasion. Moreover, this system is perfect not only for Grants standard, but also for liftback and luxury.
Initially, during assembly, the factory equipped the Grant with a limit switch only for the driver's door, so you will need to additionally purchase new ones for the remaining three doors, as well as connection blocks. In addition, you will need about 10 m of wire and an alarm bell, which usually comes with the security system, but not always.
Step by step installation
If this is your first time performing such manipulations and you have no idea how, what and where, follow exactly the recommendations in the step-by-step instructions, and everything will work out for you:
- First of all, you need to install an alarm bell (siren) under the hood.
- Then the limit switch is installed on the hood cover. There is even a special place for it on the engine shield. But only a limit switch according to the European standard will do, and in order to install a domestic analogue there, you will have to work hard.
- To the left of the engine you will find a rubber plug through which you need to lay the wire from the siren and the previously installed limit switch into the cabin.
- Next comes work with the main unit of the security system. It is best to install it behind car instruments. Select the appropriate bracket and install the device.
- Attach the service button to the bottom strip of the fuse box.
- Install a shock sensor nearby.
- To install the wiring to the signal transmitter, you will need to remove the lamp shade and sun visors. Place the transmitter above the rearview mirror.
- The LED indicator is traditionally attached to the left pillar.
- After carefully studying the connection diagram, you can begin connecting the main unit of the alarm system to the ignition switch.
- The most difficult stage is the automatic opening of the door. And all because central locking is installed and the driver's door can only be opened with a key. But still there is an opening electric drive, but it is not connected. This means that there are no necessary wires in the connectors. Therefore, you need to remove the 9-pin and look for suitable microcontacts, because the standard ones will not fit - they will not be able to provide the necessary grip. Then simply assemble the connector and then connect the wires. This procedure must be repeated on all doors.
- Route the wires into the interior through a corrugated tube and install all the door switches. The latter must be connected in parallel.
Test the installed security system. If it works, then you did everything correctly. It is not so easy to install it yourself, but if you want to do it, you will succeed.
Stages
Alarm connection points
New Lada: Error p0504 Lada Granta: reasons and how to fix it
Installation of the anti-theft system is carried out in the following order:
- First install the siren in the engine compartment; when installing, keep in mind that it should not be exposed to moisture or high temperatures.
- Attach the hood warning switch.
- It is necessary to install a power unit temperature controller on the motor itself.
- To the left of the cylinder block you can see a plug - through it you need to pull all the cables from the siren, the controller and the installed open hood limit switch. When all the wires are in the cabin, it is necessary to diagnose the plug and the reliability of the wires.
- After completing these steps, you need to install the anti-theft system control unit; it is best to place it behind the control panel. When installing, keep in mind that the unit must be securely fastened, otherwise vibrations will affect it, and this will not lead to anything good.
- Now open the fuse box - you need to mount the Valet service button on its bottom bar. You can also install a shock sensor here, in accordance with the signal of which the siren will turn on.
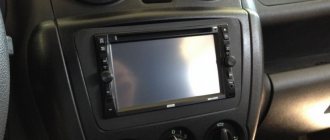
- Next, we move on to installing the transmitter; it can be placed near the rearview mirror or opposite the driver’s seat. As a rule, this adapter is fixed with tape. If the kit comes with a separate light indicator, it can be installed in the rack housing. The light bulb is fixed with glue.
- The next step is to connect the wire to the door end switch, to this wire you will then connect the wiring from the remaining doors. We move on to the luggage compartment and lay out the wiring, connecting the corresponding cable to the end switch.
- Now all you have to do is connect all the necessary contacts to the control unit, as well as to the ignition switch. To do this, use the diagram above.
Alarm installation
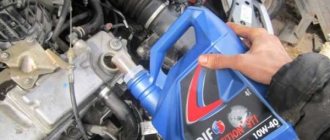
You will need : alarm, siren, medium diameter wire (10 meters), tool.
Installing an alarm system begins with attaching a siren (bell), which we place in any convenient place in the engine compartment. Then we fix the hood limit switch; the Lada Granta has a special Euro bracket for it.
We lay the wires from the siren and limit switch from the engine compartment into the passenger compartment through the standard hole on the left side of the engine shield (if viewed in the direction of travel).
It is most convenient to place the alarm unit under the instrument panel (removal process), securing it with a suitable bracket. The shock sensor can be mounted on a strip under the mounting block. The “Valet” button (service button for setting up the alarm) is installed individually in each case; it should be well hidden, but at the same time easily accessible. The alarm signal transmitter is most often mounted in the upper part of the windshield.
The LED alarm indicator is most conveniently placed in the left windshield pillar. There is only a driver's door switch; the rest will have to be installed and connected to the driver's switch, i.e. to red/green in the threshold.
Depending on the configuration of the Lada Grant, to automatically open/close the doors, it may be necessary to install an electric drive (activator) of the central locking system in the driver's door (removing the door trim). To quickly route wires from the door to the passenger compartment, you can drill a hole for them in the round connector. Connection diagram:
1-block of wires; 2-window lift motor; 3-lock; 4-block of switches; 5-pad speakers.
Sequence of actions when installing an alarm system on the Lada Granta Liftback
- We place the car on a level surface, ensuring unobstructed access around the perimeter, body, and interior.
- We provide priority safety measures, squeeze the handbrake, activate first gear to prevent the car from arbitrarily rolling back.
- We reset the terminals from the battery to avoid a short circuit in the circuit.
- We disassemble the door card on the driver's side, pry up the plastic clips, and remove the terminals from the double-glazed window control unit.
- We disconnect the block with wires from the double-glazed window control unit, connect third-party contacts to Pin No. 2 and Pin No. 7. We put on the block and lay the wire through the standard channels.
- We put on and fix the door card. The work on the doorway has been completed.
- We unscrew the screws and remove the plastic panel from the steering column.
- We remove the dashboard.
Removing the dashboard
- Disconnect the CAN module from the back.
- Remove the plastic decorative cover on the left side, into which the LED will be mounted.
- In the luggage compartment, remove the backlight and remove the left side of the trim. We connect the electrical wires to the lighting lamp. We connect the positive cable in black insulation with diode No. 4007 to the “+” of the lampshade.
- We secure the wiring and install the casing.
- We lay the wiring from the trunk towards the passenger compartment under the carpet and decorative inserts.
- Next, we prepare the anti-theft unit for connection in accordance with the diagram (connection points).
- We fix the sound siren in the engine compartment. We choose a place arbitrarily. It's best on the right side, behind the optics.
Siren (bell) mountings
- We connect two wires “+” and “-” from the siren, lead them into the cabin, under the dashboard through standard technical holes in the partition.
- We install the antenna on the front windshield, in the center. We fix the antenna cable with tape, insulation, and lay it under the standard casing.
- On the left front pillar we drill a hole for the “signaling” diode. We install the decorative panel.
Inserting an LED into a panel
- We collect the previously laid wires together, fix them along the route with plastic clamps, and bring them under the dashboard to fit them onto the terminals.
- We connect the wire to the driver's door opening limit switch. We power all the remaining three doors on it.
Connecting the wire to the driver's door
- We power it from a DC source, preferably from a battery.
- We power the light display not from the side lights, but from the direction indicators.
- We install the relay and make the pinout strictly in accordance with the diagram below.
Connection points for car alarms on Lada Granta, the cheapest equipment
Ignition switch: +12 – brown ign1 – blue/black starter – red
Instrument panel: turns – blue and blue/black handbrake – brown/blue (diode breaks)
Driver's threshold: driver's limit switch - red/green, we connect the rest of the doors to it
Under the hood: Tahoe - white/black on the ignition module, the hood tip is in its normal place
Trunk limit switch – we install the connector on the trunk (the limit switch is already in the lock).
central locking .
Photo report on connecting a car alarm to a Lada Granta Luxury package
On the ignition switch: +12 - pink starter - red ignition - blue/black
We connect to the central locking in the driver's door according to the figure below.
We connect to the tachometer on the small connector of the electric power steering - brown/red wire.
In the left threshold we connect to the door and trunk limit switches , turns , and handbrake .
We connect to the hood terminal in the harness that goes under the hood behind the mounting block - white/black wire.
To block, you can use the fuel pump - the gray wire on the back of the mounting block.
To remotely unlock the trunk, connect the negative wire to the red/white wire on the trunk release connector.
Car alarm connection points for Lada Granta 2012
Ignition switch: + 12V - pink IGN_1 - blue Start - red
Left threshold: Turns - blue and blue/black Fuel pump - gray Driver's limit switch - red/green Handbrake - brown/blue
Tidy: Driver's limit switch - red/green Handbrake - brown/blue
Central locking - install an electric drive in the driver's door, if there is no electric drive in the door Trunk - white/black; harness in the trunk (install a diode) Tachometer - brown/red; In the configuration, the standard can be taken on the electric power steering unit
If the car has painted bumpers (standard equipment), then there is no need to install an additional activator; we connect pins 2 and 7 on the door lock using a power circuit. The locks on the doors are Kalinovsky, the activator is built inside, but the wires are not routed.
There is only a driver's door switch. The rest need to be installed and connected to the driver's limit switch, i.e. to red/green in the threshold. The limit switches are the same as the engine compartment on the Priora. The limit switches will have to be taken with a connector and wiring.
4. Car alarm connection points for Lada Granta 2012
Ignition switch: + 12V - pink IGN_1 - blue Start - red
Left threshold: Turns - blue and blue/black Fuel pump - gray Driver's limit switch - red/green Handbrake - brown/blue
Tidy: Driver's limit switch - red/green Handbrake - brown/blue
Central locking - install an electric drive in the driver's door, if there is no electric drive in the door Trunk - white/black; harness in the trunk (install a diode) Tachometer - brown/red; In the configuration, the standard can be taken on the electric power steering unit
If the car has painted bumpers (standard equipment), then there is no need to install an additional activator; we connect pins 2 and 7 on the door lock using a power circuit. The locks on the doors are Kalinovsky, the activator is built inside, but the wires are not routed.
There is only a driver's door switch. The rest need to be installed and connected to the driver's limit switch, i.e. to red/green in the threshold. The limit switches are the same as the engine compartment on the Priora. The limit switches will have to be taken with a connector and wiring.
Car alarm connection points for Lada Granta 2021, automatic transmission, Starline A93 2can2lin
Ignition switch: +12 – brown ign 1 – blue/black acc – pink starter – connect to the gray connector at the bottom of the fuse box, the outermost red
From the can doors , brake pedal , engine running . When activating the comfort function, be sure to allow control of the standard security system.
Instrument panel: turns – blue and blue/black c an h – pink/green c an l – yellow/blue
LIN bus - red/green to the gap (white/green towards the connector, white towards the car) in the harness from the driver's door
trunk - black/blue from the trunk, diode in the gap hood - standard limit switch white/black, diode in the gap
The keyless bypass was trained not when the ignition was turned on, but rather when it was attempted to start (before starting, both learning methods gave an error). The engine had a mass air flow sensor.
Passage under the hood through the plastic plug of the clutch pedal.
Alarm connection points on the Lada Grante liftback
| Chain | Color | Polarity | Location |
| 12V | Pink | Egnition lock | |
| IGN_1 | Blue | —/— | |
| Start | Red | —/— | |
| 12V | Pink | Ignition relay | |
| 12V | Blue | —/— | |
| Turn signals | Blue/black | Threshold | |
| Gasoline pump | Grey | —/— | |
| End cap | Red Green | — | |
| Handbrake | Brown/blue | — | |
| End cap | Red Green | — | Dashboard |
| Handbrake | Brown/blue | — | |
| Trunk | White black | — | |
| Tachometer | Brown/red |
We install an alarm system on a Lada Granta with our own hands: connection points and diagram
Almost every owner of his car has thought about how to equip his iron horse with protection against theft. This also applies to owners of the Lada Granta, because the standard and standard configurations are not equipped from the factory with any anti-theft system other than an immobilizer. And in this article we will tell you how to install an alarm system on a car with your own hands, because in essence, despite the wide variety of different types and companies, the procedure for installing them is quite similar.
Alarm connection point options
Once you have decided to start installing the alarm yourself, you need to make a choice. Don't choose the latest model with the latest bells and whistles. It is enough to turn your attention to a strong middle peasant whose brand has long established itself in this market. Consider installation on a popular car alarm model from Starline .
Depending on the model, equipment may vary.
Since the manufacturer equipped the car from the factory with a limit switch only for the driver’s door, you should purchase new elements for the remaining three, as well as connection blocks, from the store.
In addition, you should purchase about 10 meters of wire, as well as an alarm bell (siren) if one is not included in the kit.