Not all trim levels of Lada Granta VAZ 2190 and Lada Kalina cars are equipped with fog lights. In this article we will touch on the question of what you need to have and how to connect fog lights on these car models.
First of all, what is needed to install fog lights in the Lada Kalina or Lada Granta. You will need fog lights, a 4 or 5 pin relay (maintaining NO mode - normally open with a current carrying capacity of 15 A), wires, a button to turn on the fog lights, or a new exterior lighting control unit (installed on the luxury model). On the Lada Kalina, there are plugs in the places where the fog lights are installed. When installing fog lights, you will also need to purchase plugs to match the shape of the fog lights.
As a rule, such plugs come complete with fog lights.
It is worth saying a little about the authorized manufacturers of PTFs for AvtoVAZ. Fog lights are produced by the city of Kirzhach and the Bosh company. After purchasing fog lights, we will consider options for attaching them to the car bumper for each model.
Mechanical installation of PTF on Lada Kalina
If you have arch protection, it must be removed in order to provide access to the bumper from the back side. The fog lights are secured with 3 screws. There is also a fourth bolt on the headlights; it is used to adjust the angle of light. You can adjust the fog lights after installation.
This is what the fog lights look like on a Lada Kalina without installed plugs.
Same with the plugs already installed. Adjustment of fog lights on both Lada Grant and Lada Kalina is done with a screwdriver through the hole at the bottom of the bumper.
Mechanical installation of PTF on Lada Granta
Lada Granta does not have plugs for fog lights. In order to install fog lights, you will need to cut holes in the places provided for them on the bumper.
Before cutting the holes for the PTF, it is better to remove the bumper; more details about this in the article “Removing the Lada Granta bumper”
It is better to cut the holes with a slightly smaller diameter, and then grind them with a file to the size of the fog lamp in place.
Electrical connection of fog lights (PTF) on Lada Granta and Kalina cars
Now let’s touch on the question of what and how the fog lights will be turned on. For Lada Kalina there are 3 options:
1. installing a button on the panel between the passenger and driver’s seats;
2. Installing a button on the instrument panel console (for equipment without air conditioning, when the air conditioner is installed, this place is occupied by the button to turn it on)
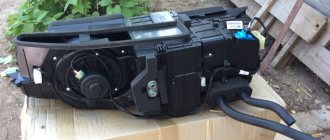
3. Purchase of a new exterior lighting control unit with a button for turning on fog lights. It will be necessary to remove the old lighting control unit without a button for turning on the fog lights and install a new one with such a button. For more information about the procedure for removing and installing this unit, see the article “Removing the external lighting control unit for Lada Kalina”
For the Lada Granta there are 2 options for installing the control element for turning on the fog lights:
1. Just like for the Lada Kalina, purchase an external lighting control unit for a luxury package with a button for fog lights; You will find more detailed information on removing the external lighting unit from a Lada Granta car in the article “Lada Granta external lighting control unit”
2. Installing the fog lamp button in the instrument panel console.
(the external lighting control unit in a Lada Granta car is installed vertically, on the left side of the steering wheel)
Advantages and disadvantages
Experts and users note the advantages and disadvantages of headlights in comparison with LED light sources:
- Long service life - up to 50 thousand hours. They are reliably protected from mechanical damage, dust, dirt and moisture entering their interior;
- Due to their low power consumption, LED headlights do not place a large load on the car's alternator;
- During operation, the color of the luminous flux of such headlights practically does not change; LED headlights emit bright white light for good illumination;
- They can be easily installed on any convenient place on the car body: bumper, roof, body kit elements.
- if at least one LED fails, the entire PTF will have to be replaced; installed on the external elements of the car body, such headlights can be easily stolen;
- high cost when compared with other types of lighting fixtures.
PTF connection diagram for Lada Kalina and Lada Granta
The connection of fog lights is carried out according to the classical scheme, when a power relay is used, controlled by a low-current circuit from the button for turning on the fog lights. The fog light switch is powered from the blue-black wire coming from the ignition switch. See the article “Connection diagram for headlights - low and high beam for Lada Kalina”. When connected to this wire, the fog lights will turn on only when the ignition is on. If you have a new lighting control unit, then take a universal measuring device. By measuring the resistance between the input leg of the blue-black wire and the other contacts, find a terminal with a resistance equal to 0 when the fog lamp button is on, and, accordingly, with a resistance equal to infinity when the button is off. Route the wire from this contact into the engine compartment to relay contact 85; this should be a normally open relay. Make the connection according to the diagram below (the button for turning on the fog lights is now built into the lighting control unit). Fog lights can be used.
Preparatory stage (selection of PTF for Lada Granta)
In order to install the PTF in the Lada Granta, special installation locations will be required. Fortunately, the standard bumper already has such standard places from the factory. Their dimensions are completely similar and identical to the PTF from Kalina and have two different types.
Bosch brand and has a flat glass headlight block, and headlights with convex glass are produced under production in Kirzhach. These two types of headlights have the same mounts, so choose for yourself which headlights to buy for yourself.
Although, according to Grantovodov, glass from Bosch is much stronger.
If you don’t want to “bother” with installing “Stock” elements, you can install standard PTFs; fortunately, you can also find a place for them in the front bumper.
First stage of installation
First of all, before installation, prepare the workplace for work, check the set of fog lights for integrity and also the set for connecting the PTF for the presence of all wires, relays and fuses. If you have never installed such lighting elements yourself before, then carefully study the car’s electrical wiring diagram and the PTF connection diagram.
Possible problems and malfunctions
The low beam of the Lada Granta does not illuminate the right side of the road well enough, so additional optics will be an excellent assistant and will provide a bright luminous flux.
During the installation process you may encounter the following problems:
- crease in the corners of the wings when removing the bumper;
- damage to electrical wiring terminals;
- incorrect connection or short circuit of the wire.
The bumper on the Grant is made in the form of one large part, so during dismantling problems may arise in the form of damage to the front fenders, so you need to remove the bumper together with an assistant on both sides at the same time.
If nothing lights up when you test turn on the optics, the plugs are most likely damaged due to incorrect connection. To fix the problem, change the connector. If the lights come on for a second and then go off, this may indicate a faulty relay.
Fog lights device
The standard fog lights are equipped with a plastic mount that holds the optics in the Granta's bumper. The reflector design allows you to effectively illuminate the road surface due to its low location in the bumper and a wide horizontal beam.
There are several types of optics:
Classic halogen lamps are installed in all standard fog lamps of most cars. Parts made from diodes are not capable of producing a beam of the correct shape and efficiently illuminating the road in the dark. These fog lights are often used as daytime running lights.
The internal structure of the Granta headlight does not require the installation of gas-discharge xenon lamps. Traffic police officers may have questions about such systems.
Self-disassembly
Removal and disassembly of Grant foglights may be required in case of cracked glass or accidental water ingress.
- Remove the bumper.
- Disable chips.
- Unscrew the fog light fasteners.
To remove the headlights without removing the bumper, you will need a lift and bending the fender liners. Disassembling the Lada Granta headlight will require the use of a cardboard box, an industrial hair dryer and a flat-head screwdriver.
To open the headlight you need:
- Place the parts in the box and close the lid.
- Cut a hole on the side and set the hair dryer for 5-7 minutes.
- Remove the headlights and carefully pry out the glass with a screwdriver.
To thoroughly wash a dirty reflector, disassemble all internal parts and wipe with an alcohol wipe.
New glass is installed using black or clear sealant, depending on the shade of the headlights.
Step-by-step preparation process
- First of all, remove the minus terminal from the battery.
- To make the PTF installation much easier, you need to remove the bumper.
- To do this, we unscrew 4 screws on the wheel arches, 2 self-tapping screws on the mount at the bottom of the bumper, as well as all the nuts that secure the engine crankcase protection or boot, which come from the manufacturer's factory. After this, unscrew the radiator grille.
- And only after completing all this work will it be possible to easily dismantle the front bumper. And this must be done very carefully so as not to damage the mounting points and the body itself: first of all, we pull off each of the corners, and then, prying the bumper from below, we take it out of the fixing points.
Installation of PTF (photo instructions)
As you may have already noticed, the Lada Granta bumper is a single molded plastic form, in the body of which there are places for fog lights, hidden by plugs. The next step is to cut out these plugs.
- It's best to mark the location for the cutout first.
- This work should be carried out with extreme care and precision. In order to cut holes, you can use either a regular stationery knife or more professional equipment - a drill.
- In any case, accuracy and complete avoidance of haste are the key to perfect completion of the task. However, no matter what you use to cut these holes, they will in any case require treatment to remove burrs, irregularities and burrs. It is also not important to carry out these works with just one thing, be it a file, sandpaper or a grinding attachment of a drill, the main thing is that the result is an evenly cut hole with clean and smooth edges.
- After carrying out these operations, you can proceed directly to the installation of fog lights.
Installation of PTF via a separate button
In order to connect fog lights on a Lada Granta, you do not need to buy the entire set of wiring, relays and additional parts from scratch.
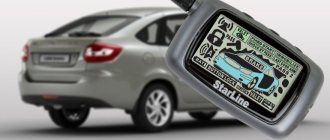
You just need to take a special kit for connecting the PTF for Lada cars of the Kalina/Priora/Grant family. This kit includes all the necessary materials, as well as detailed installation instructions. Still, as a rule, the main drawback of this wiring is the short wires for the PTF power button, but they can be extended without problems by cutting in the required length of wires.
Detailed instructions for installing fog lights
Installing fog lights on a Granta is not an easy procedure. Many of our compatriots prefer to connect and adjust the optics at a service station. In this case, you can be sure that everything will be done correctly and in accordance with the rules. However, installation of optics can also be done at home - there is nothing difficult about it if you strictly follow the instructions given below.
Installation procedure
To install, you will need standard plumbing tools, including screwdrivers and a utility knife. You will also need a drill for drilling holes and sandpaper. Of course, you should also buy an anti-fog optics kit, which should include instructions and a wiring diagram.
So, how to install anti-fog optics on Grant:
First you need to open the hood and disconnect the battery, that is, disconnect the “-” terminal from it. This is done in order to de-energize the on-board network, since all work on the headlights must be done with the power turned off. Next, the front bumper is dismantled. To do this, you will need to unscrew the bolts securing the radiator grille, as well as the bumper itself. Two bolts are located under the license plate; you also need to unscrew the lower mounting bolts. After completing these steps, unscrew the screws securing the bumper at the bottom to the fender liners and on the wheel arches
Carefully, so as not to damage, remove the bumper; to do this, its corners will need to be moved apart a little. Now the bumper can be installed on a flat surface - you need to prepare a place for installing the fog lights. To do this, you will need a drill - with its help you need to drill holes around the entire perimeter of the recess that is on the bumper
Next, using a utility knife, you will need to remove the plugs. The edges of the resulting holes will be uneven in any case, so you will also have to sand them with sandpaper or a stone, which will need to be pressed into a drill. Similar actions are carried out on the back side of the bumper. Then you will need to install the optics housing at the mounting location. It will need to be secured in the installation hole using self-tapping screws. Make sure that the headlight housing is installed firmly and securely - if it “walks” along the hole, it will be affected by strong vibrations generated when driving on uneven roads. Accordingly, this can lead to accelerated failure of the power supplies in the headlight. The next step will be the electrical installation of fog lights. The PTF package should include instructions with a connection diagram. In any case, the wiring from the optics is carried out through the engine compartment into the vehicle interior, in particular, through a special technological hole for the fuse box wires. Having completed these steps, you need to install a relay and a corresponding safety element in the fuse box, which will be responsible for the operation of the fog lights. One of the optical drives should be connected to the control button in the cabin, which should be installed on the center console. Once all these steps are done, you will need to reinstall the front bumper. In this case, you will need an assistant so that when installing the bumper, he will pull the optics control wiring into the engine compartment. When the bumper is in place, the fog light wires must be securely secured with zip ties. It would be a good idea to additionally insulate the wiring using electrical tape - this will prevent possible negative effects of moisture on the wires. Next, all you have to do is connect the battery terminal and diagnose the functionality of the optics. If necessary, the luminous flux can be adjusted to the same level as the low beam.
Price issue
The cost of anti-fog optics may vary depending on the store, as well as the region in which the purchase is made. Average prices for fog lights are given below.
conclusions
As you can see for yourself, in order to carry out a competent and correct installation of the PTF on the Grant frets, great skills and knowledge are not required. You just need to strictly follow our instructions and maintain skill and patience.
The last step will be to adjust the PTF so that driving the car is safe not only for you, but also for all other drivers traveling in the opposite direction.
It seems banal. I wouldn’t even write))
But I encountered some minor difficulties. 1) Type of lamps.
I read the Internet, there are few posts on this topic, I found one - type h11.
I came to the store, just in case, I asked exactly how “a light bulb for PTF grants.” People ask me “what base?” Gru - “like H11.” The seller is not a fact! And he says that in addition to H11 there is another one. And the bulbs are non-returnable, so I had to figure out exactly which one. As a result, I found out that I have an H11 from a photograph from my blog post
, where the fog lights are visible on the removed bumper.
2) Price
. Here I must say that the cheapest H11 lamp in that store was hella for 410 rubles for 1 piece! Not cheap! Unpleasantly surprised. There are lamps for 700-800! (regular ones, it seems). I googled it and decided to take Hella. Should be normal. China did not decide, as there may be problems with poor light, excess current (melting wiring, connectors, or even worse). I bought it in general.
3) Replacing the lamp
. Again, there is not enough information, there is a video on YouTube where they chat about this topic... I came across a recording here on the drive, how someone on a grant changed the lamp in the PTF, so he even cut out a “hatch” in the standard fender liner! This method is not acceptable to me. I also didn’t want to remove the factory fender liner - I still have “fangs” (bumper body kits), which are secured with 2 screws from the factory fender liner... As a result, at the dacha, the idea came to me - to bend the bumper out of engagement with the fender, having first unscrewed 2 screws, connecting the bumper to the fender liner. Everything should be clear in the photo. In the end it took about 5 minutes to get the job done. Everything went smoothly. PTF works. I'm happy )
By the way, from the Lada Granta owner's manual
:
“To free access to the fog lamp from under the front wheel arch, you must first REMOVE the wheel and partially release the fastening of the front fender shield by REMOVING 6 SCREWS. Bend the shield, remove the inoperative lamp..."
A car equipped with fog lights will come in handy for traveling in conditions of limited visibility, fog and other adverse weather conditions. Another important step will be the proper installation and adjustment of these external lighting elements. Despite the fact that fog lights were not installed from the factory in all trim levels of the Lada Grant, installing them yourself will not be difficult.
Read about how to correctly and safely implement fog lights on a Lada Granta into your lighting system with your own hands and get tangible results from all this, read below in our material.
Why are fog lights needed?
By installing fog lights on the Grant, you can achieve uniform illumination of the roadside and a stronger light beam near the nose of the car.
Installing PTF on Granta in the official service will require large expenses. The dealer will also impose a service for adjusting the optics, which will not be cheap. Self-installation will take about 3-5 hours, depending on the skills of the car owner.
The kit includes all the necessary wires, fuses, plugs and terminals. The set also comes with lamps, power supply wiring diagram and original on/off switch.
Step-by-step preparation process
- First of all, remove the minus terminal from the battery.
- To make the PTF installation much easier, you need to remove the bumper.
- To do this, we unscrew 4 screws on the wheel arches, 2 self-tapping screws on the mount at the bottom of the bumper, as well as all the nuts that secure the engine crankcase protection or boot, which come from the manufacturer's factory. After this, unscrew the radiator grille.
Installation of PTF (photo instructions)
As you may have already noticed, the Lada Granta bumper is a single molded plastic form, in the body of which there are places for fog lights, hidden by plugs. The next step is to cut out these plugs.
- It's best to mark the location for the cutout first.
- This work should be carried out with extreme care and precision. In order to cut holes, you can use either a regular stationery knife or more professional equipment - a drill.
We cut out the hole as carefully as possible.
We clean all edges from irregularities.
We fasten the fog lights with bolts.
Installation of PTF via a separate button
In order to connect fog lights on a Lada Granta, you do not need to buy the entire set of wiring, relays and additional parts from scratch.
You just need to take a special kit for connecting the PTF for Lada cars of the Kalina/Priora/Grant family. This kit includes all the necessary materials, as well as detailed installation instructions. Still, as a rule, the main drawback of this wiring is the short wires for the PTF power button, but they can be extended without problems by cutting in the required length of wires.
Everything you need is already included in this set.
The installation should be carried out strictly according to the instructions, leading the wires from the PTF directly to the mounting block, along the bumper and side member, laying the wiring to the button itself. It is important to secure all wires with plastic clamps and place the wires in a corrugated tube where they are subject to maximum wear.
PTF connection diagram
We make the connection strictly according to this scheme:
When connecting the PTF according to this scheme, everything is guaranteed to work.
The only disadvantage of this option for connecting the PTF will be the absence of a warning light on the instrument panel.
Replacing the dome light bulb and removing the dome light
Figure 1 shows the interior lamp (part 21700-3714010-00)
The lampshade is usually removed to replace a lamp or to replace the headliner.
Disconnect the negative terminal of the battery.
Use a screwdriver to pry up the edge of the lampshade
We remove the lampshade from the hole in the ceiling lining
Disconnect the wire block from connector 2 of the wire block
Removing the lamp from the lampshade
We install the new C10W lamp in the reverse order.