How to remove a tail light: Granta
The process is extremely simple. To work, you will need a 10 mm socket wrench or a ratchet with a corresponding long head.
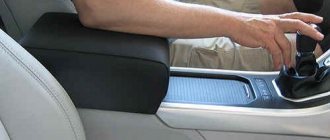
Step 1 . We remove the terminal from the battery (any one) - you will need the same key for ten.
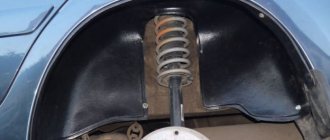
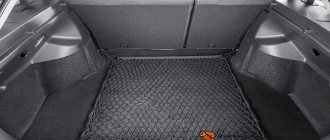
Step 2 . We open the trunk, from the inside to the left and right of the opening we find “pockets” in the felt lining. They are closed with Velcro. Let's open it.
We find a pocket that blocks access to the flashlight. Let's open it.
Step 3 . We disconnect the wiring - all the light bulbs along with the sockets connected to the optics. Turn the cartridge counterclockwise to remove it.
To disconnect the cartridge, turn it counterclockwise with force.
Step 4 . We find three screws securing the lamp. Using a ten-point socket, unscrew all three.
Access to the screws is not the most convenient. Can't fit into the trunk? Try unscrewing it blindly.
Step 5 . We pull the lantern towards ourselves. Disconnected from the wires and body, it will come out of the groove without any problems.
Pushing the lantern from the inside, we pull it towards ourselves.
Reassemble in reverse order. Don't forget to reconnect the battery terminal.
Replacing low beam lamps on Lada-Kalina
Recently I encountered a problem. When I turned on the low beam at night, I was surprised to find that it was simply not there. Before that, I traveled to Russia, where it is mandatory to turn on the lights during the daytime. Therefore, when the low beam disappeared and what caused it, I did not know.
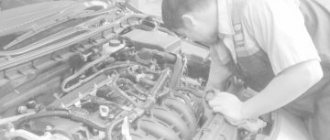
The search began with the simplest thing - checking the fuses. They turned out to be fine. After two more causes have been ruled out (the lighting unit and the headlight switch), it is time to check the low beam lamps.
IMPORTANT! Everything stated below is my personal experience. It is not a fact that the technology described is correct. Therefore, the author does not bear any responsibility for any possible damage caused as a result of the actions described below.
- Remove the terminals from the motor contacts (two motors, in the case of a station wagon or hatchback), first remembering how they are connected;
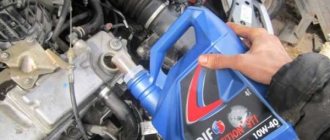
- Unscrew the front bolt securing the tank, which is located above the headlight;
- Loosen the nut that clamps the rear reservoir mount near the shock absorber strut;
- Carefully remove the tank without spilling its contents.
After this we get completely normal access to the headlight.
- Remove the rubber cover to access the headlight;
- Carefully remove the two headlight power wires, remembering their location;
- Gently press and slightly lift the iron latch;
- After the bracket is removed from the grooves, move it to the side;
- Carefully remove the low beam lamp by the contacts.
The procedure for installing the low beam lamp is reversed. Under no circumstances should you touch the glass part of the lamp with your hands , because... When turned on, it will immediately burn out. If this happens, you should thoroughly wipe the glass part of the lamp with alcohol and let it evaporate completely.
- Install the low beam lamp so that its protrusion on the base fits into the corresponding groove on the lampshade, thereby securely fixing it.
- After this, the most difficult part of replacing the lamp is performed - you need to carefully fix the lamp with a latch, falling exactly into the grooves, and you need to make sure that the lamp itself does not rotate in the lampshade. To do this, the latch is wound up a little from the top, then pressed lightly and lowered down.
- If everything went well, you should definitely check the reliability of the lamp so that it is securely held by the latch and does not rotate around its axis.
- Connect the wires, observing polarity;
- Close the hole to access the lamp with a rubber cover;
- Reinstall the windshield washer reservoir, securing it and connecting the wires.
How to replace a lamp in the rear light on a Grant
In a similar way, the lamps themselves are changed in 5 steps :
- They threw off the terminal;
- In the trunk we approached the lantern;
- We pulled out the lamp socket for replacement;
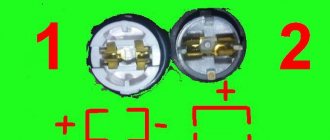
- Turn the light bulb in the socket counterclockwise;
- When replacing with a new one, simply fit the nubs on the base into the grooves of the cartridge.
We recommend checking your brake light bulbs regularly. On Grant they are double threaded - often one thread burns out, and the second one works. Thus, the lights may be on, but the brake lights are not .
The clarification may be funny, but car owners often confuse this feature of the Grant with a breakdown . Therefore, they begin to climb into the left lamp to change the reverse lamp, which, in principle, is not there.
Features of replacing the tail light of the Lada Granta liftback
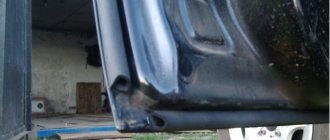
After unscrewing the three nuts, remove the Grant liftback tail light from the guide grooves. This must be done carefully, without jerking and strictly straight. Otherwise, you risk damaging the plastic latch on the case.
The design is too fragile, careless handling can lead to damage. If the guide is deformed, reuse of the flashlight is no longer possible due to the lack of a lock.
Replacing the Grant liftback fog lamp in the front part is carried out by analogy. Work is carried out from the rear of the bumper.
Elements of tuning optical devices
Recently, installation of LEDs has become popular. There are many advantages with analogues: long service life, direction of the light beam, brightness, resistance to high plus and minus temperatures.
And the main trump card is cost, availability, and a wide range of color shades.
The installation process is somewhat different from the usual, as it is necessary:
- dismantle the standard illuminator (lamp);
- depressurize the lantern, remove the rubber seal;
- cover the seat with LED strip of the required length;
- connect the contact board;
- Reassemble the structure in reverse order.
Recently, it has become popular to install fog lights on the rear bumper. This improves visibility when passing backwards and prevents accidents. Replacing the rear fog light of a Lada Granta liftback is carried out by analogy.
Reviews
| № | Positive |
| 1. | Victor: I had no problems with choosing and installing the SDL, since I initially bought Granta in the Lux configuration. Comrades advised enhancing the lighting by attaching an additional SDL cable to the body. Poe has not yet made his final decision. |
| 2. | Vasily: six months ago I bought a Lada Granta in the “Standard” configuration, SDL are not pre-installed. I bought PROSPORT RS-09943 at the market. There are no complaints, the quality of lighting is good, my advice to motorists. |
| 3. | Kirill: The “Standard” package does not have SDL, so I had to purchase and install it myself. The process did not cause any difficulties, the work was completed in ten minutes. My recommendations to motorists. |
| 4. | Vyacheslav: I have a Lada Granta top-end “Lux” configuration, SDL are pre-installed from the factory. In general, the lighting is good, even in foggy weather. |
| 5. | Sergey: I’m leaving my positive review for SDL PROSPORT RS-09944. I bought it at a local auto store. I installed it myself, nothing complicated. I've been using it for two months without any complaints. |
| 6. | Vladimir: I chose the SDL model for the Grant in the “Norma” configuration, and settled on PROSPORT RS-09944. My garage mates confirmed the correctness of my choice. |
| 7. | Ivan: I have to admit that in our time there is no way without SDL. I installed it on my Granta a month ago, I don’t know any problems with lighting. |
| Negative | |
| 1. | Victor: despite the fact that I have a “Lux” version of the Granta, I am dissatisfied with the quality of the standard SDLs. They are not as bright as products from other manufacturers. I will change it soon. |
| 2. | Alexander: I can’t recommend SDL PROSPORT RS-09944, since they broke down for me in the third month. |
| 3. | Vyacheslav: after purchasing the Lada Granta, Liftback replaced the factory SDL with SKV3092190-41-LED, since I don’t trust domestic quality. |
Conclusion LED lights on a car are an integral attribute of modern technical equipment. Unfortunately, on the Lada Grant Liftback they are installed only in the “Lux” configuration. Perhaps the manufacturer will soon review the equipment. Regarding the manufacturer, the opinion is clear: domestic and foreign samples will last the same long time, provided that original products are purchased. By purchasing cheap counterfeits, we deliberately create a negative image for commercial brands.
| Video - LED tail lights for GRANT! Installation and TEST! | Video - LADA Granta - replacing all lamps with LED ones. LED reversing light modification! |
Analysis of reviews from Lada Granta liftback owners
- Grant-Eject (https://www.drive2.ru/l/6512513/): the sedan's lamps are different from those of the liftback. In the first modification they are combined, in the liftback they are separate.
- Diyk: taillights often sweat on sedans, the problem has been eliminated in the liftback;
- Silica Gel: to quickly remove moisture, attach a moisture absorber for shoes to double-sided tape. It doesn't last long, but it's effective. Improving the sealing of the rear lights is an alternative option.
- Grant-Eject: insufficient fixation contributed to the flashlight falling out during movement.
- LADA Granta 2012 (https://www.zr.ru/content/articles/832528-lampy-primenyaemye-v-avtomobile-lada-granta/): the car is reliable, unpretentious, subject to a moderate driving style. Over a period of five years of operation, breakdowns are typical and characteristic.
Check list
- Turn off the engine, squeeze the parking brake lever;
- Open the liftback cover;
- Remove the plastic protection / sound insulation layer. The choice depends on the model year. More details are described at the beginning of the article;
- Unscrew the lamps, three nuts;
- Replacement of Grant liftback taillight lamps, carry out related preventive maintenance;
- Reassemble the structure in reverse order.
Conclusion based on the results of the replacement The design and fixation of optical devices is not at all complicated. Every car owner can do the replacement; there is no need to contact a service center. Only as a last resort, when a global breakdown is identified or surgical intervention by a specialist is required. After reading the instructions provided, the owner knows exactly how to change the Granta liftback taillight with minimal time.
Replacement algorithm
- We turn off the engine, squeeze the handbrake;
- Open the back door;
- Depending on the model year, the sequence of actions differs. In the first generation (until 2015), unfasten the casing flap and provide free access to the back of the optics. In the second generation, remove the plastic latch, remove the lamps, unscrew the three nuts.
We bend the flap of the trunk upholstery.
We replace the reflector, lamps, and assemble the structure in the reverse order.
Remove the lamp socket from the lamp body
The type of lamp is indicated on the flashlight body next to the socket of each socket.
Pressing the lamp, turn it counterclockwise all the way