Lada Priora Sedan Pribora › Logbook › Parktronic, installation.
The Chinese parking sensor arrived.
I ordered the cheapest one with an indicator in meters. Aliexpress 11.37 usd (707 rubles). I ordered silver ones based on the picture, but they received gray sensors.
The length of the sensor wire is 230cm. The length of the indicator wire is 500 cm. The length of the power cable is about 90cm.
The indicator makes too much noise with its squeaking noise. I sealed his hole with a piece of tape.
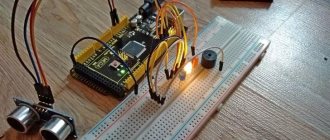
I tested the system on the table, it works fine. Be sure to install the sensors upside down!
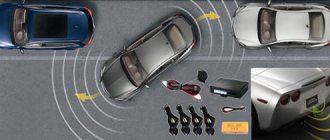
Installation diagram: 12-15cm from the car size to the side sensor, height - 50-60cm,
I measured approximately 56cm from the floor, and 14cm from the visual dimension. I put a mark on the masking tape.
The distance between the side sensors was 130cm. Divide by 3 and get an interval of 43.3 cm.
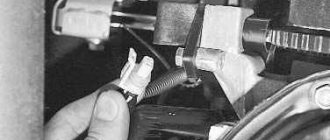
We pass the sensor wires through the rubber plug, first making a hole in it.
Next, we check all 4 wires from which sensor they come from and mark A, B, C or D. Having marked the wires, insert them as needed and test.
The block was stuck behind the lamp, between the body and the trunk trim.
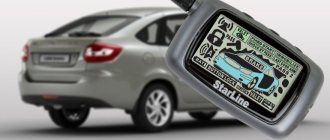
I installed the indicator on the left side of the glass. The wire runs to the left of the torpedo, underneath under the floor trim, goes behind the rear seat, then under the trunk trim and to the block.
UPD
As a result, I set the place a little high. He can only see the front bumpers of cars up close, starting from about 70 cm. It must be placed somewhere at the level of the reflectors or under them.
source
Installing parking sensors on Priora. detailed instructions
Back in the winter I bought myself a kit for installing parking sensors on everyone’s favorite Alika, but I only got around to installing it now. The kit included: - monitor - 4 sensors - cutter - power cable - central unit - instructions in English I
didn’t think much about the color, since there were only two to choose from: black and gray.
To my surprise, the Chinese guessed right with the color and sent me something very similar to my color “Snow Queen” (690)
. And so my friends and I gathered in the garage and began to think about what to put in where, since everyone was doing it for the first time. We decided to start with the interior and immediately ran the wires from the monitor to the trunk (threw it through the roof), glued it to the left of the steering wheel. When it came to drilling the bumper, we started thinking and came to the general opinion that masking tape was the answer.
We started measuring from the edges of the reflectors
.
It turned out that the total length from the left to the right reflector is 131.8 cm
.
After looking at all this, it was decided to set aside 9 cm on each side
and mark the first points.
Through simple calculations, we found that the distance from the left point to the right was 113.8 cm
.
Divided by 3 and got three sections of 37.9 cm each
.
We put it aside, marked it, it didn’t look bad. It was decided to place the drilling point in the middle of the lip. 7 cm
wide .
So I bought another nice little thing for my car) In general, I didn’t really recognize the parking sensors as such. I thought that it was always better to rely on yourself, and even now, in principle, I think the same)) But in the dark, and even with tinting, visibility is practically zero, and there are a lot of dead spots. In general, I spotted a link from Lion71 to parking sensors from ebay. The reason I decided to take it was the price, only 500 rubles! I thought it was almost a freebie, I didn’t think twice and decided to take it, for that kind of money it’s possible)
After some time, namely 2 weeks (I was shocked, before that no package from ebay had arrived so quickly), it was lying at my house.
The kit included: - monitor - 4 sensors - cutter - power cable - central unit - instructions in English
After climbing around the drive, looking at the prior drivers who set it up, I started doing everything. The instructions are in English, but everything is very clear))
Don’t pay attention that the car is dirty, I arrived home in the evening, it was already dark, I couldn’t wash it. In our city it rained all weekend - there was a lot of dirt, it was useless to wash the car - it was a 5-minute drive, and it was like I hadn’t washed it at all)) and I really wanted to install parking sensors! So I went into the garage and started installing it.
First I removed the rear bumper, which, as I understand it, unfortunately, is impossible. For those who don’t know how to do this (I didn’t know at first), here are detailed instructions.
I chose a distance of a little more than 0.5 m. I decided to install the two outermost sensors directly under the reverse light (I read somewhere that it should be at least 15 cm from the edge of the body so that it doesn’t get caught from the side). I decided to follow this advice, besides, I haven’t forgotten how to use mirrors)). It turned out that the distance between the outer and adjacent sensors is 40 cm, and between the central ones is about 36 cm.
By the way, the sensors have a top and a bottom, it’s labeled there.
I ran the wires under the bumper stiffening ribs, everything went perfectly)
Then I inserted all the sensor wires into a rubber plug, conveniently located near the rear left light.
I wrapped the wires in the bumper with electrical tape and carefully pushed them into the groove.
Some people cut this triangle, but I decided it wasn’t worth it))
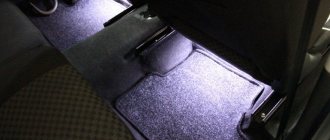
I placed the monitor on the dashboard by removing the side stand. I've laid the wire under the rugs for now; I'll hide it under the trim when I'm drawing power to the amplifier.
As for the connection, I cut into the contacts of the reverse lamp of the left lamp.
The kit included double-sided tape for the unit and monitor. For the monitor, I pasted it on (it proudly displayed “3M”), but for the block itself I decided to take my own, red, also, like, “3M”.
I put everything in its place, terribly satisfied, and went home happy to wash off and sleep.
The next day I washed the car and took a photo of the final version.
In conclusion, I would like to summarize)
Definitely worth taking for 500 rubles! It's worth the money!
From the “+”: — parking has become a little easier, you can already catch the car closer and not be afraid of hitting it, definitely for a sedan!; - in my case this is the price! ONLY 500r!; — parking at night has become much easier); — small size of the monitor, does not interfere; — a convenient sound signal, you can navigate by it and catch it with mirrors.
Life hack: standard parking sensors of a Priora car - how to remove, price, article number
I'm driving in reverse, and the car starts to squeak, more and more often, as I get closer to the pole! Wow I thought!