We lay a block with wires and connect them to the sockets. We assemble the structure.
Wiring diagram for mirrors on Grant Liftback
There are six pins in total, of which:
- No. 1 – horizontal adjustment;
No. 2 – —/— vertically;
Connection diagram by wiring color
- blue – left side;
- white – side lights;
- blue – right side;
- white – black – “plus”;
- black – “minus”;
- green – common on both sides of the mirrors;
- red – general.
Wiring diagram for Lada Granta Liftback mirrors on the control unit
- gray - black and blue - black - control unit on the driver's side;
- black - “minus”;
- white-black - “plus”;
- pin No. 7 - not used. Connect third-party contacts;
- white - dimensions;
- green, orange - control unit on the passenger side.
If you want to connect Grant Liftback mirrors to a VAZ, purchase a control unit from a Lada Kalina or a VAZ Niva. The standard unit is not intended for installation on other VAZ models. The pinout of the terminals occurs according to the following diagram:
- blue – left and right side;
- black – “minus”;
- yellow – common on both sides;
- red is a plus.
Reviews
| № | Positive |
| 1. | Vitaly: There were no problems connecting the reflector. I installed it myself, the scheme is quite simple and intuitive. |
| 2. | Kirill: in winter the mirror on the left side cracked, I replaced it myself with a new one. There were no difficulties with disassembly, the design is quite simple, the connection diagram consists of two blocks. |
| 3. |
Conclusion The process of independently replacing side-view mirrors on the Lada Grante Liftback is not at all difficult.
The design is fixed with three screws, connection to the power circuit is carried out by two blocks with wires. Following the recommendations given in this manual, replacing a new mirror will take no more than 10 minutes.
Negative reviews from some owners are unfounded and are caused by violation of the operating conditions of the technical equipment and failure to comply with maintenance schedules.
Installation and connection of heated rear view mirrors on Lada Granta
Hi all. Today at VAZ Repair we will talk about how to install and connect heated rear view mirrors on a Lada Granta at home. The article will be supported by informative photos, as well as step-by-step instructions, which will allow you, dear readers, to carry out such tuning yourself on your car.
To work you need to have:
- Heated mirror kit. In my case, these are heating elements made by Salina;
- Copper wire 0.75-1 mm long 8-10 m;
- Small female terminal (2 pcs.);
- Terminal-ring “ground for screw” (2 pcs.);
- Clamp terminal (1 pc.);
- Fuse holder (1 piece);
- Soldering iron, probe, several screwdrivers, needle file;
- Heat shrink, electrical tape.
Note: The above components may differ depending on the connection scheme you choose. In my case, the connection will be made by connecting the heated mirrors to the heated rear window. Below I will provide three alternative connection methods that can also be used.
To enlarge the image click on it!
Types of heated mirrors: what to look for
Design features of housings
The housings differ in connection and overall dimensions, as well as the shape and area of the reflective surface. They can be classified as follows:
- standard - factory equipment;
- model, intended for installation on certain models;
- universal.
The latter, in turn, differ depending on the purpose of the vehicle on which they are installed:
- passenger car;
- cargo;
- special equipment.
Heating elements
Low-cost options use heaters of simple design. Conducting tracks of small width are applied to a flexible dielectric base, usually a heat-resistant film, the reverse side of which is covered with a self-adhesive compound. They are arranged in such a way that they form a peculiar geometric pattern, reminiscent of a classic labyrinth. A snake made of nichrome wire is also used, placed between glued layers of insulating material or filled with silicone. The sticky side of the device is glued to the opaque side of the mirror element. When voltage is applied, current flows through the tracks, gradually heating them.
The advantage of such heaters is their low cost, as a result of their ease of manufacture.
Disadvantages include longer heating time to operating temperature and lower reliability compared to more “advanced” models.
The most common failure is a rupture of the track due to corrosion from moisture penetrating through cracks or peeling of the protective film.
Premium models use heated monoblock mirror elements. Layers are successively applied to the glass base:
- reflecting;
- insulating;
- conductive;
- heat insulating;
- waterproof.
The material of the conductive layer tends to change its electrical resistance depending on temperature. The colder it is, the lower its resistance and the greater the power released for heating. The glass heats up intensely, but it is saved from cracking as a result of thermal expansion by the fact that the entire area, evenly covered with a conductive layer, is heated at the same time.
Next comes the process of self-regulation. As the temperature rises, the resistance increases and the power output decreases. As a result, there is a balance between consumed and dissipated power, overheating does not threaten to melt the plastic parts of the product, and the energy consumed from the on-board network to maintain the glass in a heated state is insignificant.
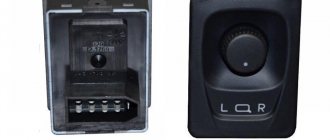
Heated mirror grant button
A special feature of the Lada Granta Liftback is a new modification of the side-view mirrors. By default, they are included as standard, unlike the Lada Granta Sedan, Priora, VAZ 2109, 2108, 21099.
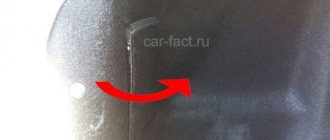
Due to various reasons, such as an accident, collision, impact, reflectors are damaged. The replacement process is not at all complicated; every car enthusiast can do it.
In order to provide methodological assistance to inexperienced owners of the Lada Granta Liftback, we recommend following the instructions below.
Sequence of actions when replacing a side view mirror yourself
- We place the car on a level platform and provide unobstructed access to the front door from the side where the replacement will be.
- We unscrew the two screws that secure the door card trim and pry the plastic clips around the perimeter.
- From the back side, disconnect the block with wires from the electric drive control unit, disconnect the speaker terminals, and remove the card.
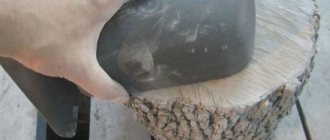
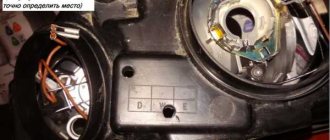
- Using a Phillips-head screwdriver, unscrew the three screws and remove the side-view mirror from its seat.
- We replace the block with a new one and screw it into place. We lay the block with wires and connect them to the sockets. We assemble the structure.
Standard side mirrors - article number and price
For the Lada Priora car, standard parts with electric drive have catalog number 2170-8201017. Price – about 3,100 rubles per set.
Heated mirrors on the Priora received a larger mirror element. Thanks to this, the driver does not have to lower them when reversing – even this difficult-to-reach area is visible. For the SE version, repeaters were added to the mirrors. Priora with electric drive, repeater and heating (catalog number 2170-8201021, price - about 3,800 rubles per set) was much more expensive than conventional versions.
Please note that kits are often sold unpainted or painted to match the body color. If necessary, paint the body of the mirror device before installation. Painting it yourself will turn out much better. Some stores offer painting only the upper parts of the body, but you can choose any painting method yourself. Speaking about the rear-view mirror of a Priora car, you can notice that it is ordinary, as simple as two rubles, attached to a holder that is secured under the trim.
Wiring diagram for mirrors on Grant Liftback
There are six pins in total, of which:
- No. 1 – horizontal adjustment;
- No. 2 – —/— vertically;
- No. 3 – weight of the control unit;
- No. 4 – heating;
- No. 5 – turn signal repeater;
- No. 6 – general “minus”.
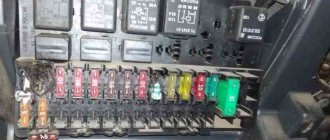
Connection diagram by wiring color
- blue – left side;
- white – side lights;
- blue – right side;
- white – black – “plus”;
- black – “minus”;
- green – common on both sides of the mirrors;
- red – general.
Wiring diagram for Lada Granta Liftback mirrors on the control unit
- gray - black and blue - black - control unit on the driver's side;
- black - “minus”;
- white-black - “plus”;
- pin No. 7 - not used. Connect third-party contacts;
- white - dimensions;
- green, orange - control unit on the passenger side.
If you want to connect Grant Liftback mirrors to a VAZ, purchase a control unit from a Lada Kalina or a VAZ Niva. The standard unit is not intended for installation on other VAZ models. The pinout of the terminals occurs according to the following diagram:
- blue – left and right side;
- black – “minus”;
- yellow – common on both sides;
- red is a plus.
Connection
Connecting the central lock
. We use a circuit of two relays so as not to go under the panel to the central locking unit:
Connecting heated mirrors
(to the wiring harness under the driver's threshold)
Connecting mirror turn signals
:
- Option 1: Pull the wire from the direction indicator on the fender.
- Option 2: To the wiring harness under the driver's threshold (blue - left turn signal; blue-white - right).
Reviews
| № | Positive |
| 1. | Vitaly: There were no problems connecting the reflector. I installed it myself, the scheme is quite simple and intuitive. |
| 2. | Kirill: in winter the mirror on the left side cracked, I replaced it myself with a new one. There were no difficulties with disassembly, the design is quite simple, the connection diagram consists of two blocks. |
| 3. | Vasily: after a side impact, the right side mirror cracked. I had plenty of free time, so I installed the new one myself. At the same time, I replaced the rubber seal; it was deformed and moisture penetrated inside. |
| 4. | Alexander: after two years of operation of the Lada Granta Liftback, the insulation in the doorway on the wiring was worn out. Replaced the entire block with wires. Now the line is completely new. |
| 5. | Konstantin: when the reflector burst, I didn’t contact the experts, I installed a new one myself. The procedure is simple, the case is held on by three screws, the block with wires is connected to the standard connector. |
| 6. | Victor: the housing on the left mirror was cracked, I bought a new one at the car market. I transferred the filling myself, it turned out to be very simple. I didn’t contact the specialists at the service station, I did everything with my own hands and I advise you. |
| 7. | Gennady: the right turn signal suddenly stopped working, so I disassembled the reflector myself. The reason was poor contact at the terminal. I pressed it with pliers and everything works fine. |
| Negative | |
| 1. | Ignat: the design of the side reflectors is not perfect; they do not fit tightly, despite the presence of a rubber seal. I decided to buy a reflector block from Renault Logan, it has an identical mount. |
| 2. | Vasily: the quality of the wire insulation is poor; after two years of use, Granta replaced it with new wiring. Insulation cannot withstand freezing temperatures. |
| 3. | Sergey: I changed the left side mirror adjustment cables for the second time in a year. Low quality components. |
Conclusion The process of independently replacing side-view mirrors on the Lada Grante Liftback is not at all difficult. The design is fixed with three screws, connection to the power circuit is carried out by two blocks with wires. Following the recommendations given in this manual, replacing a new mirror will take no more than 10 minutes. Negative reviews from some owners are unfounded and are caused by violation of the operating conditions of the technical equipment and failure to comply with maintenance schedules.
To work you need to have:
- Heated mirror kit. In my case, these are heating elements made by Salina;
- Copper wire 0.75-1 mm long 8-10 m;
- Small female terminal (2 pcs.);
- Terminal-ring “ground for screw” (2 pcs.);
- Clamp terminal (1 pc.);
- Fuse holder (1 piece);
- Soldering iron, probe, several screwdrivers, needle file;
- Heat shrink, electrical tape.
Note: The above components may differ depending on the connection scheme you choose. In my case, the connection will be made by connecting the heated mirrors to the heated rear window. Below I will provide three alternative connection methods that can also be used.
To enlarge the image click on it!
Weather
An extremely common mistake made by novice drivers is that they forget about the difference in the condition of the road surface depending on the weather. Due to such mistakes by motorists, other road users may also suffer.
It is important to understand and remember that dry and wet asphalt is perceived differently by cars, adhesion to the road surface changes, and the braking system works differently. The driver must adapt to current weather conditions by choosing his driving style
Weather influences a number of factors. Namely:
The driver must adapt to current weather conditions when choosing his driving style. Weather influences a number of factors. Namely:
- acceleration;
- braking;
- clutch operation;
- braking distances;
- slip;
- distance;
- use of headlights.
When a car moves on dry asphalt, the braking distance is one distance. But if the road gets wet, this distance will increase by 1.5 times. On winter and icy roads, braking distances can increase several times. And if the driver does not take this into account, then there is a high probability of an accident and getting into a traffic accident.
Weather conditions dictate how a driver should behave while driving. The way you drive a vehicle largely depends on the condition of the road surface, the presence of precipitation, and ambient temperature. Therefore, in summer and spring, motorists adhere to the same style, but in winter and autumn they noticeably change their driving style.
Moisture, ice and puddles are very dangerous in nature, since here you can encounter such phenomena as aquaplaning, skidding, loss of control, etc. If you even hit an icy area with one wheel, the car can lose control. Driving on such roads requires extreme concentration and competent actions from the driver.
Beginners forget about this or have simply never personally felt the difference between the behavior of a car on a summer and winter road. That’s why a large number of accidents happen, sometimes for very trivial reasons.
The procedure for independently connecting mirrors on the Lada Granta Liftback
A special feature of the Lada Granta Liftback is a new modification of the side-view mirrors. By default, they are included as standard, unlike the Lada Granta Sedan, Priora, VAZ 2109, 2108, 21099.
Due to various reasons, such as an accident, collision, impact, reflectors are damaged. The replacement process is not at all complicated; every car enthusiast can do it.
In order to provide methodological assistance to inexperienced owners of the Lada Granta Liftback, we recommend following the instructions below.
Popular on the site
Currently on the forum:
This page is searched for: Heated mirrors. How to connect?.
Currently commenting:
Jet black or grey-black
I would like to know the model of injectors, the type of internal combustion engine, the power supply system of the internal combustion engine..
Dimensions and tidy do not light up. CHY, all relays and presets are in order! New button! Backlight on p
On my smartphone it freezes every once in a while, then crashes, it says the pages could not be loaded
Thanks, I think so too
Often, when opening a page, it says that there is no such page, although a few minutes ago someone
Hello! I can’t find the lower rubber bands for the injectors, I found the upper ones, they fit from ten
Do not bother. Xenon in a headlight not intended for it is definitely already a collective farm. And St.
Mine doesn't understand. Is this the end of the update or what?
Wroom.ru
Media registration certificate No. FS 77-76203 16+
Solina. You can buy car mirrors and mirror elements from us
Sequence of actions when replacing a side view mirror yourself
- We place the car on a level platform and provide unobstructed access to the front door from the side where the replacement will be.
- We unscrew the two screws that secure the door card trim and pry the plastic clips around the perimeter.
- From the back side, disconnect the block with wires from the electric drive control unit, disconnect the speaker terminals, and remove the card.
- Using a Phillips-head screwdriver, unscrew the three screws and remove the side-view mirror from its seat.
- We replace the block with a new one and screw it into place. We lay the block with wires and connect them to the sockets. We assemble the structure.
Wiring diagram for mirrors on Grant Liftback
There are six pins in total, of which:
- No. 1 – horizontal adjustment;
- No. 2 – —/— vertically;
- No. 3 – weight of the control unit;
- No. 4 – heating;
- No. 5 – turn signal repeater;
- No. 6 – general “minus”.
Connection diagram by wiring color
- blue – left side;
- white – side lights;
- blue – right side;
- white – black – “plus”;
- black – “minus”;
- green – common on both sides of the mirrors;
- red – general.
Wiring diagram for Lada Granta Liftback mirrors on the control unit
- gray - black and blue - black - control unit on the driver's side;
- black - “minus”;
- white-black - “plus”;
- pin No. 7 - not used. Connect third-party contacts;
- white - dimensions;
- green, orange - control unit on the passenger side.
If you want to connect Grant Liftback mirrors to a VAZ, purchase a control unit from a Lada Kalina or a VAZ Niva. The standard unit is not intended for installation on other VAZ models. The pinout of the terminals occurs according to the following diagram:
- blue – left and right side;
- black – “minus”;
- yellow – common on both sides;
- red is a plus.
Other options
For some users, a more acceptable option is to use a separate toggle switch. In this case, you should make sure that the current limit through the switch, which is usually marked on the housing, exceeds the current consumed by the heating system.
For those who want to install electric adjustment at the same time as heating, the best option would be to use mirrors from the Lada Kalina. Grant's original glass is large and clear. Electric mirrors from Kalina are slightly smaller, so this method is a good option for those car enthusiasts who do not like enlarged mirrors. Other drivers should be reminded that their smaller size makes up for their much greater operating comfort.
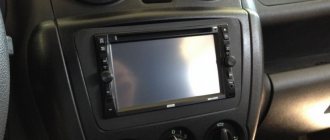
The first step is to remove the old mirrors. They are secured with 3 screws, which can be accessed after removing the decorative trim. Next, new parts are installed and wires are pulled, as described above. A wiring diagram is included with the set of new electric mirrors. The control unit should be mounted above the buttons of the power window control module.
All connections are made taking into account the algorithm described above, as well as instructions for new parts. The result is a Granta with the required option - electric drive and heated exterior mirrors.
Reviews
| № | Positive |
| 1. | Vitaly: There were no problems connecting the reflector. I installed it myself, the scheme is quite simple and intuitive. |
| 2. | Kirill: in winter the mirror on the left side cracked, I replaced it myself with a new one. There were no difficulties with disassembly, the design is quite simple, the connection diagram consists of two blocks. |
| 3. | Vasily: after a side impact, the right side mirror cracked. I had plenty of free time, so I installed the new one myself. At the same time, I replaced the rubber seal; it was deformed and moisture penetrated inside. |
| 4. | Alexander: after two years of operation of the Lada Granta Liftback, the insulation in the doorway on the wiring was worn out. Replaced the entire block with wires. Now the line is completely new. |
| 5. | Konstantin: when the reflector burst, I didn’t contact the experts, I installed a new one myself. The procedure is simple, the case is held on by three screws, the block with wires is connected to the standard connector. |
| 6. | Victor: the housing on the left mirror was cracked, I bought a new one at the car market. I transferred the filling myself, it turned out to be very simple. I didn’t contact the specialists at the service station, I did everything with my own hands and I advise you. |
| 7. | Gennady: the right turn signal suddenly stopped working, so I disassembled the reflector myself. The reason was poor contact at the terminal. I pressed it with pliers and everything works fine. |
| Negative | |
| 1. | Ignat: the design of the side reflectors is not perfect; they do not fit tightly, despite the presence of a rubber seal. I decided to buy a reflector block from Renault Logan, it has an identical mount. |
| 2. | Vasily: the quality of the wire insulation is poor; after two years of use, Granta replaced it with new wiring. Insulation cannot withstand freezing temperatures. |
| 3. | Sergey: I changed the left side mirror adjustment cables for the second time in a year. Low quality components. |
Conclusion The process of independently replacing side-view mirrors on the Lada Grante Liftback is not at all difficult. The design is fixed with three screws, connection to the power circuit is carried out by two blocks with wires. Following the recommendations given in this manual, replacing a new mirror will take no more than 10 minutes. Negative reviews from some owners are unfounded and are caused by violation of the operating conditions of the technical equipment and failure to comply with maintenance schedules.
Lada Kalina Sedan › Logbook › Installation of electric mirrors. Part 1.
For a long time I wanted to install heated mirrors, but I kept putting it off and didn’t dare... And finally I got around to it, but just installing heating was too easy, plus on the second viburnum, someone folded the mirror and in any case, in addition to heated mirrors, I would have to buy mirrors to the second car. Therefore, I decided to install luxury mirrors for myself, and transfer my manually adjusted ones to car 2. I ordered a set of old-style mirrors (I don’t like mugs) with a drive on the solina-avto website (2600 rubles + 350 delivery). The kit includes all bolts and gasket. The parcel was sent by ZhelDor for 5 days, the mirrors were packaged 5+, so there were no defects from transportation. For interest, while the parcel was in transit, I found out in the service the cost of a full connection: from 3000 to 5000 + in addition to have all the relays, wire fuses, etc. .d., in general, the prices are not adequate, to put it mildly, I decided to install everything myself. Heated mirrors through a separate button, because their operation is required less frequently than the heated rear window.
I bought everything I needed: the ESP unit 352.3769 has been with me for a long time; its cost is about 500 rubles. Rear window heating button 2115 - 82 RUR. 7-pin block for the heating button - 35 RUR. flat fuse holder - 30 RUR. fuse 15A - 5 relay 98.3777-10 - 45 RUR relay block - 25 RUR heat-shrinkable tubes - 63 RUR wires 35 m - 391 RUR. (I took 2 pieces of 10 meters and 3 pieces of 5 meters. It would be nice if they were all different colors, I found only 3 color options, you can have one color, you just have to label each wire so as not to get confused) 5-pin block assembly for mirrors 2 pcs -66r. round terminals 3 pcs. — 36 RUR. upholstery pistons 10 pcs — 30 RUR.
I have minimal experience working with electricians, so I began to study the electrical system. The search for information on installation took quite a long time, because... not on the drive, not on the Kalina forum, it’s almost not there. It’s described more less informatively by local users: Stale-VARevgen56rusStavrr
Well, then there are photos of the process and a minimum of letters, it may be useful to someone... In my case, I couldn’t find connectors for connecting mirrors in stores or at disassembly sites. so I cut it off.
Next you need to find a connector for the ESP unit, it is sold in the Kalino forum, it is not expensive, but delivery by a transport company or by mail increases the price by 200-350 rubles. Therefore, I went the proven route and disassembled the old computer. A suitable connector was in the form of dual USB connectors connecting into one connector on the motherboard. There are also the same single connectors in the area of the power supply, and 4-wire connectors in the place where the floppy disk is connected.