Lada Granta door seals provide sealing to the car, but when the part wears out, it requires replacement. The fact that air is getting into the cabin, and the gasket is leaking, is reported by fogged windows and discomfort in the winter. In stores, rubber elements are sold as a set, but you can also purchase an incomplete set for partial replacement.
Additional seal on the car door
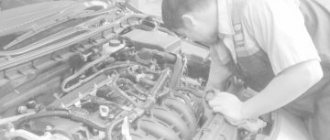
The Grant door seal is installed around the perimeter of the rear and front structures. An additional fragment is mounted in the glass. The rubber band allows the doors to close tightly, and installation in the upper part of the car guarantees silent opening of the windows. Drivers also perform installation of additional elements and preventive seasonal maintenance. It is necessary to dismantle the seal if there is a whistle while driving, the door closes with a whipping sound, or the heating system works but does not heat the interior.
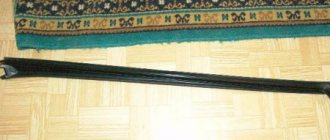
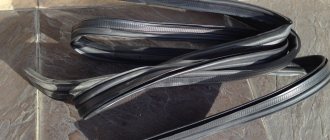
Sealing tape – internal automotive protection. The hose that provides the seal is rubberized. There is a metal tube inside. Craftsmen recommend purchasing seals with a diameter of 14*12 mm. The price of the product depends on the size of the package. Manufacturers create twisted tape on a reel. The cost of 1 m is from 120 rubles.
An alternative to the factory gasket is flex material. They can seal doors using double-sided tape.
Installation of door seals on Lada Granta
Without a doubt, it is unpleasant for each of us to get out of the car during wet weather and see street dirt on the thresholds, which, among other things, can stain outer clothing. To solve this problem, additional door seals can be installed in inexpensive Lada Granta versions. A set of door seals RGI-135 costs 500-700 rubles, a vertical seal RKI-19 costs around 300 rubles. Installation takes about 15 minutes.
How to install door seals on Granta
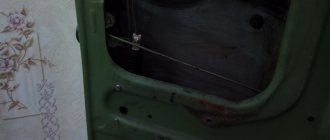
To install additional door seals, you must first remove the pistons that cover the standard holes for these same seals. Some cars no longer have them; often the dealer takes them out with additional anti-corrosive treatment. It is recommended to pull out the plugs as follows: take a self-tapping screw of sufficient length, screw it into the plug and pull it out. Thus, there is no risk of scratching the paintwork of the door using improvised means. The seals themselves are inserted into standard holes using pistons that are already placed on them. It must be installed with the wide side facing the interior, nothing else. If installed the other way around, they will not perform their function.
Video about how to install seals on Granta and their effectiveness
Other useful materials from the section on repair and tuning Grants - installing thresholds on budget versions of the car.
Repair of door seals and installation of additional rubber bands on Granta
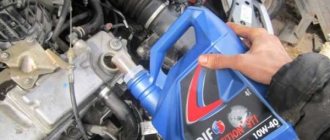
If microcracks or a small tear appear on the elastic, you can repair the hose using sealant or liquid nails. It is important to understand that this procedure will only temporarily improve the seal. The best option is to stick an additional protective fragment. For this work, the thinnest tape is purchased. Before installation, the product is heated with a regular or construction hairdryer. This action will give elasticity to the rubber. Heat for no more than 2–3 minutes. Next you should follow the instructions:
- The surface is wiped from dirt and dust, degreased and dried. The hose should fit well into the opening.
- The gluing area is treated with an anti-corrosion substance. The substance is given a few minutes to dry.
- Measurements are taken of the prepared surface, and the material is cut off with an allowance of 1 cm.
- The protective film is removed halfway along the entire length of the cut piece of tape. One end is fixed at the top, the other at the bottom.
- The entire hose is gradually, with pressure, pressed against the body part, and the film is simultaneously removed.
If everything is done correctly, there will be a reduction in aerodynamic noise in the cabin.
Grant door seals. RGI 135 and RKI 19
However, hello! Finally got around to it and I installed additional door and sill seals on my Granta Liftback. Namely: RGI-135 (horizontal door seal) and RKI-19 (vertical seal between doors). Let me note right away that the “Lux” grants already have such seals and nothing else needs to be molded. There are no seals in the lower configurations. But let’s say “thank you” for the fact that the manufacturer left us the opportunity to install them.
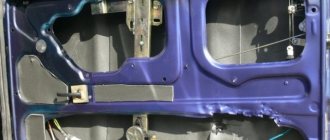
The doors have special holes for installing door seals, which are neatly covered with special plastic plugs. The plugs can be pulled out in two ways. Either by prying them off with something flat (screwdriver, plastic card, ruler), or by screwing a self-tapping screw into the plug a couple of turns and simply pulling it out. I chose the second method, because... it is the safest for the paintwork of our beloved car. And the plugs won't be needed anyway. The picture was borrowed from one good magazine and a user from the network:
Now let's look at the door seals themselves. The RGI-135 seal is designed for installation specifically on doors in special standard places. Four rubber bands for each door with fastening clips. Serves as protection for thresholds from excess dirt and dust, and eliminates wind whistling when driving. One important and most crucial point when installing the RGI-135 door seal is that the seal must be installed with its WIDE side towards the threshold. Take a closer look at the photo and make no mistake at this stage. If you install the seal the other way around, there will be absolutely no effect. There will still be dust and whistling from the wind.
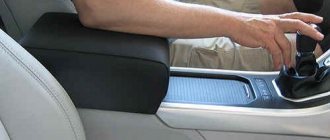
The RKI-19 seal has an adhesive base such as 3m adhesive tape and is glued to the pillar between the front and rear doors, removing the empty gap between them. Again, saving us from excess dirt and noise when driving. Installing RKI-19 will not raise any questions. Peel off the protective film of a few centimeters, apply the seal to the top of the pillar on the car and begin gluing it from top to bottom, gradually removing further the protective film. Having reached the bottom of the rack, cut the seal and move to the other side!
With seals, the doors close much more pleasantly, one on one, like on a good foreign car. They slam shut, without knocking, creating a “sense of vacuum.” At first, the doors may not close the first time, but this is a matter of time. You will get used to the new doors, and the seals will develop and become softer.
For those who have not yet installed or doubt the usefulness of installing door seals on Lada Granta, definitely install them! Well, I bet you, you won’t regret it