Tools and materials for an expedition rack
To perform work on all Niva models, the set of tools is the same:
- clamp - a clamp for fixing parts;
- welding machine;
- electrodes: 2 mm - 1 kg, 3 mm - 2.5 kg;
- electric drill;
- grinder (angle grinder);
- wrench - used to attach the roof rack system to the roof;
- grinding and cutting wheels.
To carry out the work, materials are prepared in advance - rolled metal of appropriate sizes. You will need a steel profile 2×2 - 5 meters, reinforcing mesh with a cross section of 5 mm. You will need two frames - upper and lower, each measuring 1700x1300 millimeters. Another option is to buy 4 rods to make each frame yourself.
If there are no roof rails, you need to buy three of them. Steel pipes with a round cross-section are also required:
- ¾ - 24 meters;
- 4 pieces 1.3 m each;
- 4 pieces 1.45 m each.
You can also use square pipes with a diameter of 20 mm instead of round ones. Here the choice depends on the preferences of the car owner. If it is not possible to purchase blanks with a diameter of 20 mm, 25 mm ones are also suitable.
The shapes and diameters of pipes generally depend on the preferences of the owner. The main thing is that they are not very thin
To process metal and give it a presentable appearance, you need to buy a rust converter. You will also need a primer and matte black paint. If you plan to build fasteners for a spare wheel, additionally buy a nut and a stud. To secure a shovel or jack, purchase metal hooks.
Key Features and Benefits
Let's assume that you decide to install a spacious expedition trunk on your Chevy Niva. This is a large platform with sides into which all sorts of things are loaded. It differs from a regular trunk in its reinforced design, which allows you to count on impressive loads.
An expedition trunk (EB) can be described as a basket with a frame structure and additionally several supports. They allow you to install mounts on the roof, that is, on the roof rails of your SUV. Installation of such a design will provide you with the opportunity to transport large cargo that does not fit in your domestic Niva or Chevrolet Niva, or free space is required for passengers.
Advantages and disadvantages
An expedition rack has many advantages and several disadvantages.
Advantages:
- When properly constructed, it has a large capacity.
- High strength (depending on material).
- Frees up space in the car interior.
- Serves as a good decoration for your car
Flaws:
- Deterioration of the aerodynamic qualities of transport.
- Inability to protect things from weather conditions.
Preparing for work
If you were attracted by the option of installing an expedition rack on the roof of the Niva, then you probably often transport some kind of cargo and are a fan of outdoor activities, fishing or hunting.
The Niva itself is a machine designed for such purposes. Often used as a workhorse. By installing an expedition-type trunk, the amount of horsepower will not increase, but the functionality and practicality of the car will clearly change for the better.
To start building, you will need to go through the preparation phase.
- Time and place. To make EB, you will need a place to do it and free time. It’s a shame when the desire does not coincide with the possibilities, and a person simply does not have enough time to work on his car on his own. Therefore, really weigh your options.
- Drawing. Without knowing the dimensions of the car and the parameters of the design of the trunk itself, it makes no sense to start work. There are many examples of schemes in the photo, according to which it is possible to make an electronic battery specifically for the Niva. Just make sure what kind of Niva we are talking about, so as not to start assembling a trunk for the domestic Niva, the design of which is focused on Chevrolet.
- Materials. Official manufacturers and simple craftsmen usually use aluminum and aluminum alloys. I support this option because these metals are strong, reliable, durable and at the same time lightweight. With excellent strength parameters, a heavy metal structure will not sit on the roof of your car. Plus, aluminum does not rust, which is an important argument in its favor.
Basically, expedition racks are made by welding pipes. They are also made by the sides of the required height. Pipes with a smaller diameter are laid on the bottom, and sometimes they are reinforced, that is, reinforced with a metal mesh. Here, focus on the loads that will affect your homemade electronic device.
Also interesting: How to check a car’s paintwork with a thickness gauge when buying a car second-hand
The price of consumables is much lower than that of finished products. Having a standard set of tools and a welding machine will help you.
Selecting the material from which the trunk will be made
When choosing the main material for an expedition trunk, car enthusiasts often cannot decide between aluminum and steel. Both of these metals have their own pros and cons, so before you start making a security device, it is important to know that:
- Aluminum and its alloys are lightweight, which saves fuel. In addition, this material is flexible and has high tear resistance. However, aluminum will not withstand heavy loads, which is why it will not be possible to transport heavy loads in such a trunk.
- The weight of steel is much higher than its aluminum counterpart. Among the advantages of this material, it is worth noting the strength of the structure (even in a situation where the car rolls over, such a security force will be able to protect the roof from severe damage). In addition, aluminum racks are assembled with bolts, and steel ones are welded, so you don’t have to worry that the rack will simply fall apart due to shaking or vibration.
Another option is to use profile pipes with thin walls. They will cost less, and are distinguished by good strength and low weight. Stainless steel is also popular due to its ease of processing, but its weight is also “not ideal”.
It all depends on the type of cargo you plan to transport, so before making calculations, try to decide which of the materials described above is best for you.
How to make an expedition rack for a Niva - step-by-step instructions
The expedition trunk is an open area with sides. Objects that are not afraid of precipitation are placed here. But if desired, things can be covered with a rain awning. The structure has a frame structure, most often installed on the roof of a car to the roof rails. It can be used for large cargo that does not fit in the standard luggage compartment.
An example of a homemade expedition trunk
Before you start tuning, you need to draw up a design drawing. It is important to determine the dimensions of the roof and note the location of the fastenings on it. In this case, you need to take into account which Niva this element will be manufactured for. Domestic models differ from those assembled at the Chevrolet plant. The external dimensions of the trunk of the Niva 2121 are 1700×1300 mm. Suitable part sizes for this model:
- Pipes: with square section - 2 mm 15×15; with rectangular - 2 mm 40×20.
- Reinforcing mesh: 5 mm 200×100.
- One corner 0.6 meters long. Dimensions: 25×25×3 mm.
| Dimensions of Niva trunk parts, mm | ||||||
| Frames | top | width | 1973,5 | front struts | 352,5 | Materials |
| length | 1213,5 | pipe with a round or square cross-section with a diameter of 20 or 25 mm | ||||
| lower | width | 1973,5 | ||||
| length | 1213,5 | |||||
| Crossbars | 10 pcs for both frames | length | 114,7 | corner 25×25×3 mm long. | ||
| Stiffening rib | 3 pcs for the front of the top frame | length | 199 | corner or metal profile | ||
| width | 80 | |||||
| Side racks | 12 pcs | length | 160 | metallic profile | ||
| width | 60 | |||||
| Mesh bottom | 2-3 pcs | according to frame size | reinforcing mesh: 5 mm 200×100 | |||
| Fastenings for installation on roof rails | 6 pcs | factory-made with metal crossbars 20×40 mm and rubber gaskets, or made independently | ||||
The table is made according to drawing No. 1. The step-by-step instructions below are made for other sizes. Before creating the design, the driver needs to look at the manual for the car. The trunk usually weighs from 10 to 20 kilograms. If there is 150 kg on top, the basket also presses on the roof. That is, the total weight is 170 kilograms.
Some motorists find a way out of the situation and combine the basket with the power frame of the car. But as a result, controllability deteriorates. Therefore, you should not load the expedition trunk too much.
First, cut the pipe into 8 parts and make two identical frames; to give aerodynamic properties, the corners are made rounded. Weld 3 transverse tubes to the bottom frame.
Upper frame
Bottom frame
Corner reinforcement pipes are welded onto the lower frame. In this case, it is necessary to sand all seams.
Prepare vertical tubes - 14 pieces of 110 mm each.
Now you need to place 14 vertical tubes between the upper and lower frames. These elements must be welded to form a solid structure: 3 tubes along the welded transverse pipes of the lower frame and 4 on perpendicular sides.
The 2x2 profiles are cut to produce 12 equal lengths. They will serve as stiffeners for the lower frame. They will be installed perpendicular to existing connecting pipes.
The ribs are welded perpendicular to the pipes on the lower frame.
Next, the reinforcing mesh is welded on top of the lower frame, and also welded to the tubes that connect the upper and lower frames.
The finished structure is coated with a rust converter.
The photo shows the Tsinkar rust converter. Cost: ~150 rub. for 0.5 liter
Next, you need to clean the metal surfaces using a special flat brush attachment for angle grinders.
Cover the structure with primer and paint.
After the paint has dried, the trunk can be installed on the roof rails. In the future, it is recommended to regularly update the protective coating to prevent the metal from corroding. The above sequence of work is relevant for all Niva models. The motorist only needs to observe the dimensions of the parts and follow the instructions.
The trunk is installed on the roof rails
To protect metal surfaces from rust for a long time, it is recommended to sandblast and powder coat the frame. This procedure is performed by car service professionals.
Homemade trunk for a cornfield
Independent production of an Expedition trunk for a VAZ-2121 Niva. Dimensions, diagram, details.
So, everything you need to make your own trunk:
1. Square pipe 15*15*2 - 21 m 2. Rectangular pipe 40*20*2 - 1.8 m 3. Angle 25*25*3-4 dynes 0.6 m 4. Masonry mesh 200*100*5 5 Electrodes - 2.5 kg-3 and 1 kg-2 6. Cutting wheels, grinding wheels, gloves and other various small things.
We make a frame (base) for the luggage rack on site. ATTENTION. (Sizes may not match.)
We make and weld transverse stiffeners (in Fig. 2 there are 5 ribs, in practice you can get by with three. Everything is measured, looked and adjusted on site)
Next, we make longitudinal stiffeners, as in Figure No. 3
The next stage of building the trunk involves installing (welding) the construction (masonry) mesh directly to the finished base (floor) of the power trunk. The mesh must be welded at each point of contact with the crossbars of the trunk, in order to avoid shaking and rustling when moving.
As a basis for the trunk of the Niva, you can use standard VAZ roof rails. Recommended number of rails (at least) 3 pcs.
Next comes the stage of manufacturing the upper part (frame) of the trunk. Shown in Figure No. 6. Right angles are in the front of the trunk, corners with edges are in the back.
Next, a rectangular profile 40*40*2 (40-30 cm long, the length is purely individual, according to the needs of the manufacturer/jeeper) is welded to this (Fig. 6) trunk frame. A total of 12 profile sections are welded, 6 pieces at the edges (corners) and 2 pieces on each side between them (6 pieces), except for the front part. The profile welded at the edges is marked in gray.
The next stage involves welding to obtain the integrity of the two elements. To do this, we weld the frame (Fig. 7) with profiles to the main one (Fig. 4), from the mesh side.
The next stage is the installation (welding) of the “cross member” for the eye bolts and “branch guards”, Figure No. 9. Marked in grey.
Next comes the stage of installing (welding) the trunk directly to the roof rails.
After welding work and upon completion of production and installation (assembly) of the trunk, the technological process of developing and manufacturing mounts for the spare wheel, Hi-Jack, and shovels should be carried out. As well as brackets for installing and mounting the chandelier and rear work light. At the very last stage of construction, it is recommended to install eye bolts on the crossbar (Fig. 9) for attaching slings-branches.
After all the work has been done, the trunk should be sandblasted (recommended) and then powder coated. Self-painting with a spray gun will most likely lead to the inevitable appearance of corrosion in the shortest possible time...
Source
Design measurements
When you have decided on the type of material that you will use for the trunk, then you next need to move on to making measurements and calculations. This way, you can clearly determine the weight of the future product, the approximate price and, of course, how much and what you need when building a trunk for a car.
And also interesting: Liquids used and filling volumes Niva VAZ 21213, 21214 and 2131 “
It is necessary first of all to determine such indicators as the length and width of the entire roof. Moreover, you can even create a project in the form of a plan and drawings, which will include:
- The supporting panel (the trunk itself, or rather its bottom);
- Frame;
- Jumpers (special amplifiers for the structure);
- Boards.
In addition, you can come up with various additional details at your discretion. For example, this could be a special lining on the front part of the trunk, which will prevent strong resistance to oncoming air.
How to properly weld a trunk frame
The operation will take approximately 20 hours to complete. The frame pipes are welded together to form the bottom. When working with aluminum, argon welding is used. In the same way, the sides are welded, which can, if necessary, be made from metal sheets.
Argon welding of aluminum
It is advisable to lay a reinforcing mesh or small diameter tubes at the bottom, which will serve as stiffeners. Usually three jumpers are enough, but it is better to make five. The exact quantity can be determined already at the assembly stage. The recommended distance between jumpers is 15 centimeters. The remaining tubes are welded longitudinally to further strengthen the structure.
Some drivers complain of rattling noises when traveling with an expedition rack. To avoid this effect, the mesh is welded in all places where it comes into contact with the metal crossbars. The crossbars are located at a large distance from each other. Therefore, it is necessary to weld sections of the profile in the openings between them. You can use bolts instead of welding, but this fastening is less reliable and the operation takes more time.
To prevent the mesh from rattling while driving, it needs to be soldered to the frame in as many places as possible
The arcs must be made from rolled metal with a round cross-section. They improve the aerodynamic properties of the vehicle. To attach the structure to the car, you can take ordinary corners with holes for bolts. They will be welded to the frame from below, so if necessary, you can remove the trunk at any time. To prevent scratches from forming on the roof rails when they come into contact with metal, rubber gaskets should be glued to the fastenings.
The top frame should have right angles at the front. At the back you need to make edges that will be located along the edges. It is necessary to weld 12 profile sections of arbitrary size to the frame. The height of the future trunk depends on their size. Usually they make a height of 190 millimeters. It is necessary to secure six segments in the corners, and the rest will connect them in pairs.
An upper frame is welded on top of the vertically located profile elements. The next step is the installation and welding of the diagonal element. This part is optional, but can be used to install a branch guard when traveling into the woods. If necessary, you can make fastenings for additional elements:
- Fasteners for spare tire.
- Additional lighting, spotlights.
- Hooks on which the cable will be held.
- Polymer boxes for equipment, such as tents.
- Various types of attachments for tools, such as shovels.
- A ladder that simplifies access to things lying on the trunk.
Making fasteners for a spare wheel is easy. To do this, you first need to choose a place where the spare tire will lie. At this point you need to weld the nut. Next, the stud is screwed into this nut, but not welded. Now the wheel can be put on the stud and secured with another nut. If you plan to attach headlights, they will require waterproof wires.
Any additional elements can be added later, after the basket has been installed. It is also not necessary to make the hooks or ladder yourself. Often they buy ready-made parts and attach them to a homemade trunk. But after welding the frame, it is important to sand all the seams and try on the structure to make sure it fits.
We make a supporting frame
Based on the previously created drawing, make racks that need to be welded in the shape of a rectangle. Attach ponds along the inner perimeter of the frame. To prevent deflection when loading the trunk, it is recommended to add additional stiffeners made of profile metal (2-3 pieces), which will be located at equal distances in the resulting free plane.
In order to further strengthen the structure, cut small pieces from the profile pipe. They must be cut so that square-shaped cells are formed inside.
After this, you can move on to the next stage of work - ensuring aerodynamics and fixing the sides of the trunk.
Optional equipment
You can improve the functionality of the expedition rack by installing additional equipment. The type of accessories and installation method may differ and are selected individually by each motorist. Additional equipment installed on the UAZ 469 vehicle:
- Lighting. Car owners install additional lighting lamps into the structure. This allows maximum illumination of the space in front, behind and on the sides of the car at night.
- Windshield protection. Made in the form of cables connected to the trunk and the edge of the front fender of the car. When driving in the forest, branches hit the cable without touching the windshield.
- Ladder. Used for easy access to the trunk. Can be installed both at the rear and on the side of the car. At the rear of the car, the ladder is mounted on movable hinges. This allows you to open the door if necessary.
Also interesting: Summer tire rating for Niva
The purpose of the stairs to the Niva
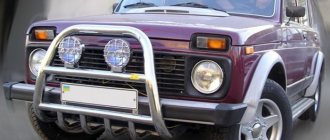
When driving through a forest, the possibility of getting hit in the ass is small, but for city traffic it becomes quite real. To do this, you can install a body kit on the car that will protect the rear bumper. Among their varieties are:
- Metal pipe
- Pipe with additional corners under the headlights.
- Just corners.
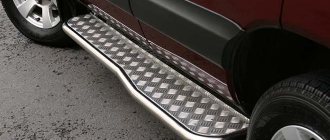
- Protection with a tread - you can stand on it to, for example, get some things from the rear trunk.
- Protection with cover in the form of a grille for the rear lights.
- Ladder.
Of course, protecting the rear bumper is not the main purpose of such a ladder. First of all, it serves for the convenience of climbing to the roof, where the expeditionary roof rack is installed . In addition, this design can be used to climb higher if the car sinks into, say, a swampy area. It’s no secret that the Niva’s popularity is due to its cross-country ability on various surfaces. And they often buy it for hunting, fishing or trophy raids - off-road racing, supplementing it with the necessary tuning.
The ladder to the roof is made of metal and installed together with expeditionary roof racks . They carry cargo and equipment that does not fit in the car itself. Such a tuning element, when properly manufactured and fastened in several places, can withstand a weight of up to one hundredweight.
- Go to page:
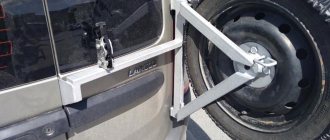
How to secure an expedition rack
Attach this element to the drain or screw it to the roof. In the second case, you have to waterproof each hole yourself so that when it rains, water does not get into the interior.
Attaching the expedition rack to the drain
The advantage of Niva cars is that you do not need to drill holes in the car. The structure is screwed to existing roof rails, which motorists often call rails. This means that the luggage compartment can be easily removed at any time.
Attaching the expeditionary rack to the roof rails
Bolts with a diameter of 8 millimeters are suitable for installation. The length of the bolt should be 70 mm. It is advisable to drill holes on the sides and place bushings inside them. Then weld on top. This will protect the metal parts from deformation while tightening the bolts.
Usually the Niva has two roof rails, and it turns out that you can secure the trunk at four points. But to transport heavy items, it is advisable to secure the basket at six points. Therefore, sometimes in a car with two roof rails, another additional one is installed. According to the rules, the trunk mounts are based on areas where the load is transferred to the body. That is, the structure should not put pressure on unsupported areas above windows or doors.
Roof rack fine: fiction or reality
I have nothing against diversifying it. To do this, use any ideas you like. Someone puts special headlights on the electric vehicle in the form of a spotlight. They will help those who love night fishing, often go hunting, or enjoy off-road driving. Powerful optics will allow you to see the situation around you under the cover of darkness.
There are also those who put an entire awning or tent on top, creating a place to spend the night in the wild. An excellent option for an unforgettable vacation. I speak from personal experience, because sleeping on the roof of a car is something new and amazing. I have never experienced anything like this before. Plus, you don't need to take extra things with you.
To achieve the result, strictly follow the diagram, weld and tighten the structural elements securely together. And if you simply don’t have the time or desire, buy a ready-made expedition rack.
Source
What are the advantages
- The ability to transport a load weighing about 110 kg, without damaging the smooth roof.
- The price range is significantly lower compared to the same trailer.
- The cargo is securely secured, so there is no need to worry about it.
- You can come up with many other devices.
- Whatever the burden, it will not interfere with looking at the road when moving.
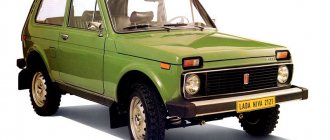
A few years ago, the choice was small; universal roof racks were produced that fit any make of car, both sedans and SUVs, and were attached using a drain. Now technology has moved forward, therefore, the choice has become more diverse and wider. You can choose a foreign manufacturer if you trust the West more, or you can try to work with domestic production.
An additional compartment for transporting things can be individual or suitable for all cars.
Comparison of the cost of purchased and homemade roof racks
The original luggage system costs from 11,000 to 13,000 rubles. The price of universal models for the Chevrolet Niva ranges from 18 to 23 thousand rubles. If you order an individual model, created taking into account the characteristics of the machine, the price will not be lower than 20,000 rubles.
If you make a trunk yourself, the cost of materials will be about 3,000-5,000 rubles. In this case, you can save about 8,000-10,000 rubles. It’s convenient that when making it yourself, you can provide only the necessary elements and design the most convenient trunk.
A smart person won't go uphill, a smart person will go around the mountain
Since it was not possible to successfully solve the problem head-on and immediately equip the trunk with my own hands, I began to look for workarounds. Came to the following conclusions:
- The shelves must be secured in such a way that they can be easily and quickly dismantled, if possible without the use of tools.
- Purchased shelves for the trunk of a VAZ need to be modified so that the space above the arches in the trunk can be used for storing essential items.
- To eliminate misunderstandings when developing the design of the shelves, you need to make a mock-up.
Read news about the new Niva
- How to install fog lights on a Chevrolet Niva
- How to make an expeditionary trunk for a field
- Do-it-yourself trunk for the field
- Do-it-yourself trunk for the field
- How to install fog lights on a Chevrolet Niva
- Do-it-yourself expedition trunk for a Chevrolet Niva
- UAZ or Niva - which is better, car characteristics and features ::
- FROST car air conditioners // Online store // Prices // Air conditioners for cars Lada VAZ, VolksWagen Polo, Daewoo Matiz