The relatively complex scheme for distributing torque from the internal combustion engine to the wheels is explained by the universal purpose of the Niva 2121 - if used correctly, it can be used comfortably in the city and along muddy country roads. Such properties are ensured by the presence of a transfer case with a center differential lock, complementing a 4- or 5-speed manual transmission, depending on the year of manufacture. The lever, located closer to the dashboard , is responsible for turning off/on the center differential, the second “small” lever controls the range multiplier and has 3 positions: high and low rows, as well as neutral.
Design and principle of operation of the Niva 2121 transfer case
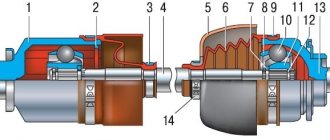
The transfer case mechanism includes more than 60 independent parts, which is confirmed by the presented drawing. Therefore, it is quite prudent to name the main elements and their purpose.
- Housing Differential housing Shafts Couplings Seals Pinions Gears Flanges Levers
A pair of gears are tightly seated on the drive shaft, one of them (large) is intended for high gear, the second (small) is responsible for low gear. They have serrations with straight and oblique profiles. The first ones are in contact with the coupling, the second ones - with the intermediate shaft. The inclusion of one or another row causes the coupling to move along the hub in the horizontal direction, after which it is connected to the gear on the transfer case drive shaft.
The intermediate position turns off the gearbox ( the gearbox is open ), and the car cannot be moved in this mode. The front helical gear on the intermediate shaft is used to control the differential. The locking is engaged, or the rigid coupling of the drive shafts of both axles, is carried out through a clutch. The design is typical for modifications 21213 and 21214, and the latter is additionally equipped with a speed sensor drive.
In the operating state (with the transfer case reduction gear connected), the gear ratio in the first stage changes from 4.4 to 7.83, the second - from 2.52 to 4.58, the third - from 1.63 to 2.9, in the fourth - from 1.2 to 2.14, fifth - from 0.98 to 1.75, which is expressed in an increase in traction on the wheels.
How to use a transfer case with a range multiplier on a Niva 2121
The normal position for the RK handles, ensuring adequate behavior on the road of good quality:
- Front - away from you Back - towards you
The special operating mode of the transmission is switched on not long before the car begins to overcome an obstacle (rut, mud, ford or rise). The transition to the lowest row must be done while stopping. Returning to top gear is allowed on the go, although it causes problems for beginners due to the lack of the usual synchronizer. It is somewhat more difficult to properly handle the forced manual locking of the center differential. On the contrary, it turns on when the car moves slightly (up to 20 km/h) due to misalignment of the grooves on the locking clutch, satellites and ring gear. To simplify turning the lever into the desired position, taking into account the Niva 2121 transfer case, pick up a small speed, then, shaking the steering wheel, pull the handle towards you.
Problems can also arise when disengaging the lockout, as the clutch teeth literally catch on the ring gear. Engage reverse and, rocking the steering wheel, push the lever away from you. This action is performed immediately after overcoming a difficult section in order to avoid overloading the gearbox. It is most effective to disable the differential together with the transition to lower stages. In this case, only diagonal suspension of the wheels can stop a Niva 4x4, since standard inter-wheel locking is not provided. When performing the above operations, you must not give free rein to physical strength. An attempt to “push” the transmission will most likely result in expensive repairs.
Features of the Nivov design
The features of the Nivov transmission include the presence of a center differential that connects the rear and front axles.
As a result, the wheels can rotate not only at different angles, but also at different angular speeds, which significantly affects controllability in impassable roads. The center differential is located in the transfer case and is similar in design to the cross-axle differential.
The key difference between the Niva’s center differential is the ability to lock when driveshafts rotate with the same characteristics. The center differential is manually locked only in difficult terrain conditions, when you need to overcome a large hole, rut or snow drift without slipping.
In practice, mechanical locking, although somewhat inconvenient, turns out to be better than the modern electromagnetic clutch used for these purposes. For example, the Renault Duster is not so easy to cope with the task in harsh off-road conditions, since the digital control unit can provide limited torque transmission. However, this effect will not be observed in a Niva with a mechanical lock.
Leaving the center differential locked will not only cause increased wear, but will also significantly reduce the vehicle's handling. The activated differential lock mode will be indicated by a lit indicator on the Niva dashboard. Please note that locking will not prevent one wheel from losing traction.
To overcome difficult areas, the transmission allows the use of a low gear with a high gear ratio (2.135); in the highest gear, the parameter is 1.2 and is intended for driving in normal conditions. The transfer case indicates different high and low gear modes. The lower one is turned on before entering a snowy area, unsteady soils, hills, and when a towed load is connected. The low gear compensates for the lack of power of the Niva’s “strong” engine and allows you to overcome difficult areas that only powerful cars can do.
Some drivers master the skill of shifting gears at speeds of 30-35 km/h. Otherwise, you will have to stop the car and perform the operation in the parking lot.
Please note that Niva requires a competent approach to the selection of tires, the quality of which can affect the degree of wear of the transmission in just one season. The tires must be the same in terms of wear and, of course, in size. Different characteristics will lead to increased load on the transmission and slipping in low gear, and during normal driving will increase wear on the differentials.
How does a Niva transmission work?
The VAZ 2121, in other words, “Niva”, entered mass production in the 70s of the last century. This car belongs to the class of off-road passenger cars. In the history of the domestic automobile industry, Niva became the first car whose design used all-wheel drive. Let's take a closer look at the transmission device. This should be done in order to understand why, given its almost 40-year history, the Niva transmission differs from many other similar vehicles equipped with all-wheel drive and the ability to shift in the classical way or using a viscous coupling.
The transmission in the Niva family (2121, 2131) is designed in such a way that all-wheel drive is supplied to 4 wheels. Also characteristic is the presence of a center differential. The transmission includes a gearbox, a transfer mechanism, a pair of cardan shafts, and both axles. A characteristic feature of the 2131 model is its elongated body. Otherwise, the main similarities with the first model can be traced throughout. Torque is transmitted from the engine through the gearbox to the transfer case, and it, in turn, transmits torque to the axles.
Then it goes through the cardan shafts to the gearboxes. The front gearbox transmits torque to the wheels through the differential and constant velocity joints. Likewise for the rear, also protruding, driving wheels. It is precisely because the torque is distributed to 4 wheels simultaneously that the drive is called full drive. The designation is as follows – 4WD. Another domestic car, designed on a similar principle to the Niva, is the UAZ.
Diagram and description of the Niva 2121 transmission
The legendary Niva is an all-wheel drive vehicle. This ensures unprecedented road holding and reliability comparable to expensive high-performance cars. With the exception of updated versions under the Chevrolet brand, the traditional Niva has always had a rather modest design, but this did not prevent it from being the undisputed leader among car owners who prefer high-end car platforms.
What distinguishes the Niva's chassis from other all-wheel drive vehicles is the transmission of torque to two axles at once without disabling the axles, which significantly affects cross-country ability while simultaneously reducing the influence of critical loads on the transmission. This same quality makes this legendary Russian SUV very uneconomical in terms of fuel consumption.
Differential
This mechanism is a kind of distributor of traction forces coming from the motor to the wheels. An important feature is that the latter have the ability to rotate at different speeds. The importance of having a differential mechanism is due to the fact that during turning maneuvers, the wheel located inside makes fewer revolutions when compared with the number of turns of the outer wheel.
In the absence of a differential mechanism, this would cause detrimental consequences, such as wear and damage, because the result would be the following: when turning, one wheel would be in a slip state, and the second would simply rub against the road surface. The design features of the Niva transmission provide for the presence of 3 differentials. They are located in each of the bridges and in the transfer mechanism.
When the car moves on a flat road and in a straight line with differentials, the traction force is divided equally between all 4 wheels. If there is insufficient adhesion of the wheels to the surface or slipping occurs, the differentials will redistribute the load on the slipping and sliding wheel so that the first receives more force, and the second, accordingly, less.
We have already mentioned UAZ. Despite many similarities, it should be understood that the VAZ’s all-wheel drive is made in the “pat-time” style. This means that when connected, the axes are firmly connected to each other, and rotation occurs at the same speeds. This device imposes some restrictions on the use of all-wheel drive - it can only be used in cases where road conditions allow slipping. In cases with hard asphalt roads and highways, it is recommended to switch the car to single-drive mode.
Differential locking
Sometimes you can come across a misconception about why a small handle is needed next to the shift lever on a Niva. Some car owners believe that it is needed to connect front-wheel drive. However, the front-wheel drive of this car is permanently connected. As is the rear one. Cars of the Niva family have permanent all-wheel drive. The handle actually serves to switch the operating modes of the differential of the transfer mechanism.
In the “forward” position, the differential operates as usual, but if you move it back, the differential is locked, and the forces from the motor are applied to the differentials of the axles, which makes the drive more rigid. It is worth noting that there are also special types of locks for front and rear axles.
In theory, when used in conditions where the car is stuck, it will be able to overcome the obstacle if there is sufficient traction on at least one wheel. In this case, it is better to lock the differential before overcoming an obstacle, but never after entering an area that is difficult to overcome. This application of locking will avoid wear and damage to the transmission.
Rules for using differential
These include:
- Switching the transfer case should only be done when the car is not moving.
- You can also engage the differential while the vehicle is moving.
- You can switch to a lower gear while the car is moving.
- To ensure long-term and uninterrupted operation of the differential, it is necessary to periodically turn it on, especially in winter. This should be done once every 7 days.
To ensure that the locking mechanism lasts for a long time, use the following rules:
- It is necessary to switch the transfer case when the Niva does not move.
- The differential can also be engaged while the vehicle is moving.
- To ensure efficient and long-term operation of the device, it is advisable for the Niva driver to turn on the lock from time to time. Once a week in winter is enough.
Where is the lever responsible for switching located? Pay attention to the area between the wings located in front, there are 2 levers there. One makes it possible to change gears at the gearbox, the other successfully controls the transfer case.
The basis of the transfer case is a gearbox, which includes 2 stages. The control lever comes directly from it, you can move it forward and backward - this is how the gear is changed on the Niva. The direction of movement of the lever to the left and right allows you to activate the differential lock and vice versa to disable it.
Read news about the new Niva
- Tires for VAZ/LADA Niva 2121/2123/2131 | Buy winter and summer tires for VAZ/LADA Niva 2121/2123/2131 | Tire sizes and prices -
- Air conditioning on a Chevrolet Niva
- Niva distribution: howling, vibration, hum » PERMANENTLY getting rid of extraneous sounds
- center lock | SUZUKI CLUB RUSSIA
- Do I need to polish my car after painting? | Article from the Autoscratch car service
- Non-adjustable front hubs Niva and Chevrolet Niva with a reinforced hub, a double-row bearing from an Iveco truck and additional oil seals with ABS
- Rearranging car wheels. How often should you rotate your tires? |
- Niva Lynx buy in Vladimir - prices for the new Lada “Bronto” (Niva Pickup)
Tips for owners
To make driving your car comfortable, read some important points:
- The usual, standard arrangement of the front and rear handles is forward and backward, respectively. Movement in this mode can and should be carried out in areas characterized by even and smooth surfaces.
- Locking the differential by switching the front handle to the rear position is best on roads characterized by increased slipperiness. This measure will give Niva stability. It is worth understanding that after overcoming the problem area, the handle will need to be returned to its original position.
- As noted earlier, downshift should be activated before a potential obstacle, but not while the car is already stuck.
- It is worth understanding that activating the lock when the vehicle is stationary is sometimes impossible, even if the clutch is depressed. This may be caused by the clutch teeth hitting the gear teeth. In this case, you can try to activate the lock by starting to drive slowly and make a slight turn. If problems arise with disabling the lock, it is recommended to perform the same procedure with the clutch depressed and the steering wheel slightly rocked.
Transfer case purpose
The key purpose of the unit is to distribute the moment of force of the internal combustion engine to the wheel axles. Simply put, the multiplier directs the required force to each axis during movement. This is expressed as follows:
- Niva 2121 transfer case simplifies movement on off-road and unstable soils;
- blocks the center differential;
- disabling one of the vehicle's axles;
- increasing the torque of the driving pair of wheels;
- installation of power take-off for additional equipment.
Gear Modes
Let's take a closer look at how to use the transfer case on a Chevrolet Niva. It serves to switch to a lower gear and also blocks the center differential; this can be done at the same time. In order to engage a lower gear, you need to shift the lever to the right and up; to lock the lever, you need to pull it to the left all the way. The handle has the following designation:
- Low(L) - decrease;
- N-neutral;
- High(H) - normal, increased.
The figure below shows a diagram of the operation of the transmission levers, gearbox and transfer case:
You can switch the transfer case from low to high while driving. To do this, you need to squeeze the clutch twice.
Low gear is engaged at a speed of no more than 5 kilometers per hour, or after a complete stop. In order to overcome a steep climb, or when driving where there is soft ground, so that the vehicle speed is minimal and at the same time stable, a lower gear must be engaged in advance. For example, if you are driving on a flat road in second or third gear, and a bad section of road appears in front of you, you need to stop and shift to a lower gear.
It is not recommended to turn on the center differential at high speed, since the car may skid strongly at the moment of switching. It is advisable to block where there is a slippery surface and the wheels begin to slip.
Elements of transfer case 2121
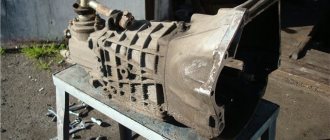
The multiplier is installed only on VAZ models with 2 drive axles. Located behind the gearbox. A driveshaft is mounted on the transfer case itself. Basic elements for the Niva transfer case, which are present in all models of Soviet-made demultiplicators:
- frame;
- intermediate and drive shafts;
- set of bearings and gears;
- satellites;
- drive shafts of the front and rear axles;
- oil seals, flanges, couplings;
- differential;
- control and control levers.
The connection between the unit and the Niva gearbox is rigid, which is carried out through a coupling and a shaft. The transfer case of the VAZ 21214 or Chevy Niva model differs from the classic one only in the presence of a speed sensor drive.
How to use a distributor in the field
The transfer case on a Chevy Niva in its normal operating position is a differential lock, the first center lever must be unlocked and is in the extreme forward position, the overdrive is in the extreme rear position.
What kind of drive does the Niva have? The transmission distributes all-wheel drive to all four wheels in all Niva models.
How to turn on all-wheel drive in a field
In the normal operating position, the transfer case controls are removed from you; in this position, all-wheel drive operates. The front handle is away from you, the back handle is opposite to you. Forward locking is low-high.
You need to engage a low gear while the car is stationary, because if you move you can break teeth or screw something up, you shouldn’t do this. When overcoming difficult sections, you need to depress the clutch and turn the gearshift lever downwards. The Niva gearbox lever works smoothly. The Niva gearbox itself should not make noise. Everything should turn on effortlessly, without jamming.
Features of the gearbox on Niva
VAZ 21213 car with an engine capacity of 1.7 liters. can develop power up to 79 horsepower. Fuel consumption averages 10 liters per 100 km. As is typical for gasoline engines, there is a central injection system. Such vehicles should be fueled with AI-95 gasoline.
The Niva gearbox (VAZ 21213) is a five-speed manual transmission. The Niva's transmission has permanent all-wheel drive. It should be noted that there is a reliable gearshift lever extension on the Niva. Thanks to it, speed modes can be changed quickly. The existing camshaft drive is chain driven. The crankshaft includes several connecting rods and main journals. The crankshaft is distinguished by its durability and is made of cast iron. The timing mechanism is covered with a cover. There is an oil filler neck here.
A transfer case is installed on the Niva 2121. Its peculiarity is that it has both high and low gears. It is important to use an increased one if you need to save on fuel consumption. In the event that movement occurs over rough terrain, a lower gear helps out. However, in this case, fuel consumption will increase.
The transfer case allows you to disable one of the drive axles if necessary. The transfer case includes shafts, a differential, and a gearshift clutch. The main failures are expressed in the fact that over time its main components wear out, as a result of which the box may overheat and problems with switching on the bridge may appear. Repair of the VAZ 21213 gearbox is required if characteristic vibration from this unit begins to be observed.
Thus, the popularity of the car is explained by the fact that it has an all-wheel drive system. The speed box diagram shows that it includes a large number of components that interact with each other, ensuring excellent performance of the car.
Main problems with the range multiplier
The main function of the range multiplier has the properties of a gearbox divider; it turns them on or off the gear speed.
Most transfer case breakdowns are purely mechanical in nature (for example, a cut shaft between the gearbox and the transfer case). This is provoked by inattention to fuel and lubricant levels, wear of rubber bands, incorrect location (alignment) of the unit, and the condition of adjacent components. The first indicator of problems with the transfer case is characteristic noise and vibration in the body.
Vibration when driving on Niva
The first reason is that at a speed of more than 70 km per hour, it’s all about the cardan shaft; only the original one must be installed. Next, replace the crosspiece on the cardan shaft, after which you must drag the shaft to a stand and balance it, otherwise the vibration will resume.
The second reason for vibration is the intermediate shaft, it must also be original, otherwise it will quickly fail. We take only the original AvtoVAZ one from the factory, otherwise vibration and breakdowns cannot be avoided.
The third reason for vibration is the breakdown of the gearbox flange bearings. To eliminate the problem, place additional support on the gearbox.
How to overcome noise when maneuvering in a transfer case
You can buy new handles for the levers. We change it ourselves, prying up the support with a screwdriver, take out the lever axis and get rid of the old handles. We remove the old lever springs and install new ones. Insert the lever axis and secure it with a corkscrew nut. Now, when driving with the new handles, there is no characteristic noise in the cabin. The handles can be easily changed without leaving the salon.
Stiff switching of the lock lever
This issue can be easily solved in the following way: when driving, just turn the steering wheel slightly and the lock will immediately turn on without any problems.
There are also: jamming of the pneumatic cylinder, sticking in the neutral position, or the rod is sitting tightly. Burnt gear and shift fork.
Transfer case for Niva, signs of breakdowns:
- problematic engagement of the front axle;
- overheating of the range multiplier;
- leakage or excessive consumption of oil during operation of the transfer case;
- self-switching of the front axle.
Repairing the transfer case in Niva 21213 with your own hands is quite possible in case of minor breakdowns. The owner of a Chevy Niva will only need the basic skills of a car mechanic. It is more difficult to correctly install and center the Niva transfer case. Here it is still recommended to contact a car service. A diagram of the unit itself is presented in the vehicle documentation.
content .. 41 42 48 ..VAZ-21213 (Niva). Disassembly and assembly of the gearbox
GENERAL INFORMATION Gear shift drive 1 – fork for selecting 3rd and 4th gears; 2 – fork rod for 1st and 2nd gears; 3 – fork rod for 3rd and 4th gears; 4 – shift fork for 1st and 2nd gears; 5 – fork rod for 5th gear and reverse gear; 6 – blocking crackers; 7 – clamp cover; 8 – clamp spring; 9 – ball of clamps; 10 – fork for 5th gear and reverse gear; 11 – head of the fork rod for 5th gear and reverse gear;
| 12 – gear block of 5th gear and reverse gear; 13 – axis of the reverse intermediate gear; 14 – reverse intermediate gear; 15 – guide plate washer; 16 – guide plate; 17 – gear shift lever housing; 18 – ball joint; 19 – spherical washer; 20 – spring; 21 – thrust washer; 22 – retaining ring |
Main shaft parts
| 1 – retaining ring; 2 – spring washer; 3 – bearing; 4 – input shaft; | 5 – synchronizer spring; 6 – synchronizer blocking ring; 7 – retaining ring; 8 – bearing |
Secondary shaft parts
| 1 – retaining ring; 2 – spring washer; 3 – synchronizer hub; 4 – synchronizer clutch; 5 – blocking ring; 6 – synchronizer spring; 7 – washer; 8 – third gear gear; 9 – secondary shaft; 10 – 2nd gear gear; 11 – 1st gear gear; 12 – gear bushing; 13 – bearing; 14 – key; | 15 – reverse gear; 16 – spring washer; 17 – fifth gear gear; 18 – oil deflector washer; 19 – spacer sleeve; 20 – rear bearing of the secondary shaft; 21 – oil seal; 22 – elastic coupling flange; 23 – lock washer; 24 – nut; 25 – seal spring; 26 – seal; 27 – centering ring |
Parts of the lever and gear selection mechanism
| 1 – gear shift lever; 2 – gasket; 3 – ball joint; 4 – spherical washer; 5 – spring; 6 – ring; 7 – retaining ring; 8 – flange; 9 – cuff; 10 – protective cover; 11 – handle; 12 – lever rod; | 13 – thrust pad; 14 – elastic bushing; 15 – spacer sleeve; 16 – locking sleeve; 17 – gear shift lever housing; 18 – sealing ring; 19 – guide plate washer; 20 – guide bar; 21 – spring; 22 – guide plate; 23 – reverse locking plate |
Gear selection mechanism
| 1 – guide plate washer; 2 – guide plate; 3 – gear shift lever housing; 4 – ball joint; 5 – spherical washer; 6 – spring; 7, 8 – retaining rings; 9 – gear shift lever; | 10 – protective cover; 11 – flange; 12 – reverse locking plate; 13 – spring; 14 – guide bar; 15 – sealing ring; A – risk |
Disassembly PERFORMANCE
1. Wash the gearbox and install it on the stand. Drain the oil and remove the bottom cover with gasket. 2. Remove the clutch release fork, and from the guide sleeve of the front cover of the gearbox, remove the clutch assembly with bearing and connecting spring.
| 3. Remove the clutch housing with the gasket and the front cover of the gearbox along with the oil seal and spring washer (red arrows indicate the nuts securing the clutch housing to the gearbox, white arrow indicates the hole in the front cover for releasing oil from the gearbox housing) to prevent oiling clutch discs. |
4. Unscrew the reverse light switch, being careful not to deform its housing. 5. Remove the bolt securing the shift fork for 3rd and 4th gears. Install clamp 41.7816.4068 on the input shaft or engage two gears at the same time. This will prevent the primary, secondary and intermediate shafts from turning and will allow subsequent disassembly operations to be performed.
| 6. Remove the snap ring from the end of the transmission output shaft. |
| 7. Having straightened the lock washer, unscrew the nut a few turns to move the centering ring of the elastic coupling, and tighten the nut again. Using a pusher A.40006/1 with a puller A.40005/4, remove the centering ring of the elastic coupling of the cardan shaft from the end of the secondary shaft. |
| 8. Remove the seal of the centering ring of the elastic coupling with the spring from the end of the secondary shaft, unscrew the nut 4 and remove the flange of the elastic coupling 1 using a puller A.40005/3/9B/9C 2 (3 – stripper bar). |
| 9. Before removing the rear cover, set the gear shift lever to the neutral position, unscrew the gear selector mounting nuts and remove the gear shift lever assembly with the selector mechanism. One of the cover fastening nuts is unscrewed from inside the gearbox housing with the bottom cover removed. When removing the rear cover, it must be moved not only backwards, but also turned to prevent it from touching the reverse and fifth gear gear block. |
10. Remove the bearing spacer 44 from the secondary shaft of the inner ring of the rear bearing 43 (see Fig. Gearbox).
| 11. Loosen the bolts securing the cover 5, unscrew the bolts 2 and 4 securing the gear block and the fifth gear and reverse fork. (1 – reverse intermediate gear, 3 – fork rod) |
12. Remove the oil deflector washer 45 (see Fig. Gearbox).
| 13. Remove bushing 1 of the fifth gear. |
| 14. Remove rod 1 from fork 2. At the same time, distance sleeve 3 is removed from the rod. Then remove gear block 4 from the intermediate shaft spline. |
| 15. At the same time remove the reverse intermediate gear 1 from the axle, gear 3 assembled with clutch 2 and fork 4 from the secondary shaft |
| 16. Using shaped mandrels (such as screwdrivers), remove hub 4 of the fifth gear synchronizer and driven gear 2 from the key (1 – intermediate shaft of the 5th gear synchronizer, 3 – axis of the reverse intermediate gear; 5 – secondary shaft, 6 – shift fork rod I and II gears, 7 – shift fork rod III and IV). |
17. Using shaped mandrels (such as screwdrivers) and rod drifts, remove the front and rear intermediate shaft bearings from the gearbox housing. On the inner rings of a double-row bearing, place marks according to which these rings should be installed in their original places in the outer ring of the bearing.
| 18. Remove the intermediate shaft from the gearbox housing by tilting it. |
19. Remove the shift fork rods of 1st, 2nd, 3rd and 4th gears from the gearbox housing one by one, having previously unscrewed the fork mounting bolts. When removing the rods, simultaneously remove three locking blocks 6 (see Fig. Gear shift drive).
| 20. Remove the secondary shaft intermediate bearing retaining plate. Unscrew the nut securing the reverse intermediate gear axis and remove it (the arrow shows the direction of the impact stroke of the screwdriver cage when struck with a hammer). |
| 21. Using mandrels (such as screwdrivers), remove the input shaft along with the bearing and synchronizer ring and remove the needle bearing from the front end of the secondary shaft. |
| 22. Knock the secondary shaft out of the intermediate bearing, remove the intermediate bearing and, tilting it, remove the secondary shaft assembly with gears, clutches and synchronizer rings from the crankcase. Remove the synchronizer clutch for 3rd and 4th gears from the shaft. |
23. Disassemble the input shaft (see Fig. Parts of the input shaft): – remove the locking ring 7, blocking ring 6 and synchronizer spring 5; – install the shaft on the press and, using a mandrel 41.7816.4069, compress the spring washer 2, remove the retaining ring 1, and then the spring washer and bearing 3. 24. Disassemble the secondary shaft (see Fig. Parts of the secondary shaft). Remove the gear from the rear side of the shaft 11 of the first gear with a sleeve 12, a hub 3 with a sliding clutch 4 for switching 1st and 2nd gears, a gear 10 of the second gear together with a synchronizer blocking ring 5.
| 25. Install the secondary shaft with a mandrel 41.7816.4069 (1) on a press, place support half-rings 3 under the 3rd gear gear and, pressing the mandrel on the spring washer, remove the locking ring 2, then the spring washer 4, the hub of the sliding clutch for shifting 3rd and 4th gears and 3rd gear gear. If necessary, disassemble the lever and gear selection mechanism. |
26. Remove the protective cover 10, locking and thrust rings 6 and 7, spring 5 and spherical washer 4 from the gear shift lever (see Fig. Parts of the lever and gear selection mechanism). 27. Visually mark the location of the parts relative to the mark (A) marked on the guide plate in order to connect the parts in the same position during assembly (see Fig. Gear selection mechanism). After unscrewing the nuts from the fastening bolts, separate the parts of the gear selection mechanism and remove the lever 9, its ball joint 4 and rubber sealing rings 15. Assembly PERFORMANCE
ORDER 1. Assemble the gearbox in the reverse order of disassembly. 2. Please note that the axis of the reverse intermediate gear is secured before installing the shafts into the gearbox housing with a torque of 78 N·m (7.8 kgf·m). 3. Before installing the fifth gear and reverse fork rod into the crankcase, install a spacer bushing on it. 4. The inner ring of the bearing is pressed onto the fifth gear and reverse gear block, and the outer ring is pressed into the socket of the rear cover. 5. The output shaft rear bearing is pressed onto the shaft to facilitate installation of the rear cover.
| 6. Install reverse intermediate gear 1, gear 3 and fork 4 at the same time (2 – 5th gear engagement clutch). When assembling the gear shift lever, coat the ball head or ball joint with LSTs-15 or Litol-24 grease. |
7. Tighten the gear block mounting bolt to a torque of 78 N·m (7.8 kgf·m).
8. When installing the clutch housing with the front cover of the gearbox, the hole in the front cover should be located as shown in Fig. from paragraph 3. 9. Before installation, coat the working surface of the oil seals with Litol-24 lubricant. 10. When installing oil seals and bearings, use the following mandrels 41.7853.4028, 41.7853.4032, 41.7853.4039. content .. 41 42 48 ..
Dismantling the Niva 2121 range multiplier
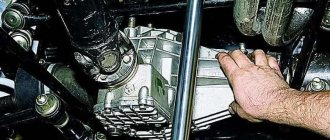
It is necessary to remove the unit not only in cases of its breakdown. Sometimes it is dismantled to gain access to other nodes. To remove the box, you will need the usual set of tools. The sequence of how to remove the transfer case on a Niva 2121 is as follows:
- Raise the car on a lift or drive it onto an overpass (inspection hole).
- In the cabin, remove the decorative tunnel between the front seats, unscrew the fasteners, lift the cover and disconnect the wires of the differential unit lamp.
- Disconnect the speedometer drive cable from the transfer case.
- Disconnect the rear and front universal joints.
- Disconnect the soft clutch from the gearbox flange (unscrew the first set of mounting bolts, turn the clutch and unscrew the remaining ones).
- Compress the coupling with a clamp and remove the bolts.
- Place the adjustable support under the transfer case and unscrew the fasteners.
- Lower the transfer case onto the support.
Possible problems
During the operation of off-road vehicles, parts and components of the transfer case gradually become unusable due to wear. Most often, the following interruptions in the operation of the mechanism occur:
- The front axle does not engage.
- The transfer case is overheating.
- Leaks and increased oil consumption of the transfer case.
- Unauthorized disabling of the front axle.
Harsh operation and insufficient attention to how to use the transfer case on the Niva 2121 lead to the appearance of:
- Vibrations in the body while moving Vibrations when starting Hum Noise when maneuvering Tight switching on modes
Also interesting: Transfer case Niva - Device - Lada master
Experience shows that the culprits are: insufficient oil level, incorrect centering of the steering wheel, loosening of the support fastenings and damage to the rubber bands. An additional influence is exerted by the condition of the cardan and the engine itself.
- Vibrations in the body while driving
- Vibrations at start
- Gula
- Noise when maneuvering
- Tight switching modes
