Thermostat from Chevrolet Niva to Niva 21213
Our thermostats have a very simple problem - stability of operation. The standard provides for a deviation from the stated figures, plus or minus two degrees. On Russian thermostats this error is within 10 degrees. The question is actually not about temperature deviations, but about engine operation. If on a carb engine, when the thermostat opens is generally not so important, then for an injection engine, this is the setting parameter. I'll try to explain it more simply. The operating temperature of the coolant is set in the firmware, which is monitored by a temperature sensor. For example: 90 degrees is specified. Let's assume that our buggy thermostat opens not at 87 degrees, but at 77. The temperature sensor tells the brain that the engine is not warmed up, and they add more fuel. Because for the brain, 77 degrees is an unheated engine. The result: black spark plugs, higher fuel consumption and a permanent loss of traction.
Collapsible thermostat for classics
look at the photo
The screw thermostat has 2 additional pipes: for the expansion tank (it is installed on the right on these machines) and for the heater return.
We don’t need a fitting for the expansion tank (but we can pull the hose there on the left to organize “bottom replenishment”), I plugged it (cut an M8 thread and tightened the bolt with the FUM).
but the stove return fitting deserves very close attention. And here's why: let's remember where the slurry drains from the stove. That's right, into the steel pipe at the end of the pump. Those. after the thermostat. And the thermostat knows nothing about the fact that cold liquid appeared after it. In reality, this means that the heater cools the engine, and its temperature drops significantly, and the thermostat cannot do anything.
Connecting the heater return hose to the thermostat makes it (the thermostat) work more meaningfully. And now he takes into account the heat taken by the stove. As a result, the engine warms up better, the fluid in the stove is also hotter, which significantly increases its (stove) efficiency.
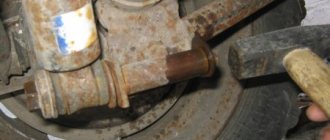
I did this a long time ago, on a stock thermostat from 1975. zero-eleven, soldered the pipe there. And here is the finished product.
in short, recommendations from the best dog breeders
the standard steel pipe into which the stove return flowed must be plugged in any convenient way
Re: thermostat from shnivy for classics
Unread message Misha » Thu Jan 29, 2015 20:11:10
Before you judge the mistakes of others, pay attention to yourself. One who throws dirt cannot have clean hands.
Re: thermostat from shnivy for classics
Re: thermostat from shnivy for classics
Unread message by VladiZlav » Thu Jan 29, 2015 20:22:08
Re: thermostat from shnivy for classics
Unread message Sabr » Thu Jan 29, 2015 20:22:56
Reliable operation of the cooling system!
Added after 1 minute 21 seconds: Well, the frying stove too
Added after 24 minutes 47 seconds: No one else will say anything about the thermostat from the shnivy?
Re: thermostat from shnivy for classics
Unread message Meart » Thu Jan 29, 2015 21:10:01
Re: thermostat from shnivy for classics
Re: thermostat from shnivy for classics
Unread message Misha » Thu Jan 29, 2015 21:30:32
Before you judge the mistakes of others, pay attention to yourself. One who throws dirt cannot have clean hands.
Re: thermostat from shnivy for classics
Re: thermostat from shnivy for classics
Unread message Violent » Fri Jan 30, 2015 5:11:34 AM
Re: thermostat from shnivy for classics
Unread message Sabr » Fri Jan 30, 2015 5:38:46 AM
Added after 3 minutes 6 seconds: Should the fan have turned on? I drove the antifreeze in a small circle. Or does it make no difference? But then why would a fan cool an already cold radiator? Unfortunately there is no BC.
Goal: to increase and quickly regulate the engine coolant temperature.
Means: we will need the Chevrolet Niva thermostat itself, M8x12 bolt - 1 pc., M5x40 bolt - 1 pc., M5 nut - 1 pc., internal roofing washer. diameter 5 mm - 1 pc., and possibly M8 nut - 1 pc. And also a drop of epoxy, pliers, duckbills, a drill, a set of drills and M5 and M8x1.25 taps. Bolts M5, M8, nuts M5, M8 made of stainless steel, galvanized washer from roofing iron screws.
Thermostats: of those that fell into my hands, the easiest ones to modernize are the original VAZ and LUZARovsky. Below is a conversion of a Metal-Incar thermostat.
Thermostats LUZAR and Lada-Image
Parts and tools(?) we need:
Original VAZ thermostat:
To begin, drill a 4 mm coaxial hole in the center of the M8x12 bolt and use a tap to cut the M5 thread. We drill and cut carefully, with lubricant - stainless steel is very malleable, the tools are easy to break.
The hole is drilled and threaded. Bolt M8x12:
Original thermoelement rod stop. We need to change it:
Using long duckbills, we move the thermoelement rod to the side:
We mark the center on the thermostat cover, core and drill a 6.5 mm hole and cut an M8 thread. Drill a 5 mm hole in the original rod stop:
Holes drilled and threaded:
Return the thermoelement rod to its place:
We drill the end of the M5 bolt (see last picture) and screw it into the M8 bolt into the resulting structure. New rod stop assembly:
We screw it into the thermostat cover and check the alignment with the rod. If the M5 bolt does not touch (or slightly touches) the wall of the original stop, everything is in order. We unscrew the M8 bolt, coat the threads and the base of the cap with epoxy and screw everything into place. Let it dry according to the glue instructions. To strengthen the structure, you can add an M8 nut from the inside. But you can do without epoxy resin. For sealing we use a washer from a roofing screw with an internal diameter of 8 mm, everything is clear in the photo:
Install the thermostat horizontally:
After warming up the engine, set the coolant temperature to 90°C according to the BC (or according to the arrow on the gearbox) and enjoy!
alexlozzh, 02/01/14. Minor changes were made on 01/18/15.
Modernization of the Metal-Incar thermostat
We see the small circuit valve:
We rest our platypuses against this valve and move the thermoelement rod to the side:
On the end part of the thermostat we drill a hole Ф7mm, and squeeze out the persistent patch of the thermoelement rod:
Since the walls of this thermostat are thin, you can use an M5 threaded rivet for the adjusting bolt:
We crimp the rivet using either a special crimp or a regular M5 bolt:
The washer from the roofing screw tightly presses both the bolt and the rivet. External view when assembled and tightened:
View from the inside when assembled and tightened:
Install horizontally, adjust to 90 o C and enjoy!
Update dated 08/30/16, by Legio:
Greetings to all, ladies and gentlemen...
Today I made another thermostat for 2123 like alexlozzh using a rivet for an M5 thread, and it turned out that the thread simply turned on the bolt at the most crucial moment. The result is sad: the rivet is not tightened, the nuts cannot be unscrewed, there is a hole in the thermostat, they have floated...
The essence of the modification is clear to everyone, the adjusting screw in the bottom of the thermostat is 2123. My essence of the modification is to use a fitting for bleeding the brake fluid VAZ or GAZ, I don’t remember, it goes M8, the outer diameter of the “meat” is 7 mm, it is quite suitable for the M4-M5 screw and reliable that it will not burst:
The main advantage of this fitting is that the center is already drilled, this is very important. We remove the edges with a hacksaw, as in the photo, and get an M8 bolt with a hole inside:
From inside the thermostat, a nut with a key of 13:
Next, use a 3.3 or 4 drill to make a hole and cut an M4 or M5 thread with a tap, that’s all...
Further refinement is shown in the photo above.
I saw an article about modernization - installing a Shniv thermostat, and decided to do it too.
I consulted with the guys, there were several ideas for implementation besides the one on the website: try to make a valve axle box, use the filling valve of a freon cylinder, etc. I decided to make it easier, from the filling valve of a freon cylinder:
We unscrew the part we need from the empty freon cylinder, the valve itself, assembled with the body, is not dismountable, you can see in the photo: I cut the fold in a circle and freed the plastic valve from the body. The valve is sealed in the body with two rubber rings; there are valves with one ring.
I took the thermostat and valve to a turner so that he could make a metal valve based on the sample, ideally from stainless steel. Next, we do everything the same as in the article: we find the center, drill, and cut a thread to screw the valve body into the end of the thermostat. The turner makes a valve based on the model with two grooves for sealing rubber bands, the stem is also 5 mm.
Chevy Niva thermostat for classic
How to warm a Niva, installing a thermostat from a Niva Chevral
Checking the VAZ NIVA thermostat without removing it. Choosing a VAZ NIVA thermostat
VAZ 2107 thermostat from 2108
Grant thermostat for VAZ classic
Installing a thermostat from a Chevrolet Niva to a Niva. 03/19/16
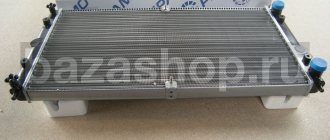
THE BIGGEST RADIATOR for Lada - radiator 2123 Chevy Niva or 2110 (Prior) for Classic 2101
How to check the thermostat.
Thermostat at 85°C on Niva from 2110, adjustable thermostat
CHECKING THE THERMOSTAT VAZ 2101 2107
look at the photo
The screw thermostat has 2 additional pipes: for the expansion tank (it is installed on the right on these machines) and for the heater return.
We don’t need a fitting for the expansion tank (but we can pull the hose there on the left to organize “bottom replenishment”), I plugged it (cut an M8 thread and tightened the bolt with the FUM).
but the stove return fitting deserves very close attention. And here's why: let's remember where the slurry drains from the stove. That's right, into the steel pipe at the end of the pump. Those. after the thermostat. And the thermostat knows nothing about the fact that cold liquid appeared after it. In reality, this means that the heater cools the engine, and its temperature drops significantly, and the thermostat cannot do anything.
Connecting the heater return hose to the thermostat makes it (the thermostat) work more meaningfully. And now he takes into account the heat taken by the stove. As a result, the engine warms up better, the fluid in the stove is also hotter, which significantly increases its (stove) efficiency.
I did this a long time ago, on a stock thermostat from 1975. zero-eleven, soldered the pipe there. And here is the finished product.
in short, recommendations from the best dog breeders
the standard steel pipe into which the stove return flowed must be plugged in any convenient way
Thermostat is a device in the engine cooling system that automatically regulates the temperature of the coolant.
The device maintains optimal thermal operating conditions of the engine; with its help, the engine warms up faster.
Structurally, it is a valve, inside of which there is a heat-sensitive element that blocks the flow of water, antifreeze, antifreeze through the radiator until the engine is completely warmed up.
Installation location: in Chevrolet Niva it is located on the left front edge of the engine, connecting the lower pipe of the stove, pipes from the radiator, engine and throttle valve.
Reviews from Chevy Niva owners
Alexey Bondarenko, Kazan
For a year now I have been driving with a WEEN thermostat, article number 181-0034. The device turns on at a temperature of 87°C. My first thermostat was also a WEEL brand. I traveled with him for less than a year. He stopped maintaining his temperature. I've had my current device for one year and a summer. There were never any problems. The temperature always stays between 85-92 degrees.
Maxim Kalashnik, Pskov
I have been operating a VAZ Chevrolet Niva for more than 10 years with a Thomson thermostat. I have no complaints about the thermostat. Its peculiarity is that thermal inserts work for about 2 years in normal mode. Then they begin to underestimate their indicator. The standard temperature for them is 81°C. In the summer they work fine, that is, 87°C, and in the winter it feels a little cool at 81°C.
Sergey Poltorak, Bologoe
Finnord installed it on the previous Shniva, it worked 100%, last year it started to freeze on the new Shevik, but I couldn’t find Finnord, I installed Luzar - not cold but not so hot either...
Lada 4×4 3D VYATSKAYA GUN › Logbook › Installing a thermostat according to the principle of the NIVA-Chevrolet scheme.
For a long time I was planning to switch to a thermostat from a Chevrolet Niva on the Niva; before that, it was this one that was installed on the 2106... Unlike the native one, a more thoughtful scheme ensures: - supply of coolant/oil directly to the cylinder block. -Air jams are quickly expelled. -Faster warming up of the engine and, as a result, the heater heats up faster in winter.
For the remodel you will need:
-2 pipes (in the figure No. 1 and No. 16) -Hose of 18 mm in internal diameter to the stove. -Hose from the expansion tank to the radiator (now it will be the return line (in figure No. 13) -Expansion tank (I took from 21214) -Chevrolet Niva thermostat. -Plug for the coolant/oil supply channel to the stove from the pump. (I made it myself) - The clamps (it is advisable to take NORMA GM) are very high quality.
We remove all the old parts of the coolant/oil system and attach the thermostat to the pump with the purchased hose.
From the old hose we cut out a new pipe from the thermostat to the head.
We adjust the purchased hose from the thermostat to the radiator in place...
Take a purchased hose with an internal diameter of 18mm
And pull it onto the upper pipe of the stove.
We connect the carburetor heating to the smallest fitting of the thermostat. I recommend using a very strong oxygen hose…
We install a pump plug made from a former pipe.
The radiator fitting, which previously served to supply coolant/fuel from the expansion tank, has a double cross-section; we attach a hose to the smaller one.
And we pull it into the new expansion tank.
Now coolant/fluid will circulate through it, expelling air pockets and constantly maintaining the required level of coolant/fluid in the radiator.
We are slightly modifying the radiator cap. We saw off the rod with a grinder and cut out 2 gaskets from the auto chamber to seal the connection as much as possible.
In addition to everything, I installed a thermocouple and an emergency coolant temperature sensor in the upper radiator pipe.
The sensors are oriented downward to avoid contact with steam and incorrect readings.
In the afterword, I will say that an electric fan with forced shutdown will be installed, and the emergency sensor will be displayed on a warning lamp. Don't switch
Installing a thermostat from a Chevy Niva to a Classic
Overall a good approach. Here the problem is solved not by raising the temperature of the coolant, but by increasing its flow. It is pleasant and safe to drive in a warm interior with transparent glass.
Only such a bath lover gets the opportunity to cool the engine. The heater is turned on bypassing the thermostat.
Grant thermostat for VAZ classic
Here everything is necessary in moderation, within reason. Otherwise, a cold engine throws a bunch of crap into the air, pulls poorly and tends to stall. Which is also not comfortable and not safe.
Here it’s up to everyone to decide for themselves whether it’s risky to include this option in the FAK. In order to plug the fitting, screw the cap onto it.
When purchasing, do not forget about the rubber sealing ring, which should be in the lid or purchased separately. The fitting on the thermostat under the heater is for a mm hose, and we have a drain fitting from the heater radiator of 16 mm.
That is, we screw the threaded parts into the coupling, not forgetting to seal them with tow or special plumbing tape, and insert the herringbone notches into the hoses under the clamps. It can be even simpler - find in a plumbing store a plastic adapter between 16 and 18 mm hoses, which ends in 16 and 18 mm herringbones. A regular 18 mm hose is still inconvenient to connect to the thermostat. It will be too close to the exhaust manifold pipes, and it will be somewhat shapeless.
This article is for those who want to thoroughly understand how the thermostat of the VAZ “classic” works and works, how to determine the malfunctions of this device, select the right spare part and perform a replacement. It is the thermostat that is to blame for the fact that in winter the cabin is cold and the engine takes a long time to warm up. It is also the most common cause of engine overheating.
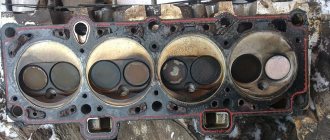
What's inside the thermostat
The classic thermostat housing was originally made of brass. Then, different factories at different times produced thermostats with housings made of aluminum alloy and steel. During assembly, a block of two assembled valves is placed inside the two halves of the housing. Then it all gets rolled up and becomes inseparable. The valve block is assembled inside the holder. The rod is fixed motionless. The main and bypass valves can move relative to it, overcoming the force of the springs. On the outside, the housing has three pipes for connection to the water pump (pump), engine and radiator.
1. Inlet pipe (from the engine). 2. Bypass valve. 3. Bypass valve spring. 4. Glass. 5. Rubber insert. 6. Outlet pipe. 7. Main valve spring. 8. Main valve seat. 9. Main valve. 10. Holder. 11. Adjusting nut. 12. Piston. 13. Inlet pipe from the radiator. 14. Filler. 15. Clip. D - fluid inlet from the engine. R - fluid inlet from the radiator. H - liquid outlet to the pump (pump).
How does the VAZ-2101-2107 thermostat work?
After starting a cold engine, antifreeze begins to be pumped through the thermostat housing from the engine to the pump, through the upper and middle pipes. The main valve is closed and does not allow fluid into the radiator, and the bypass valve is open. The engine warms up and the coolant temperature rises. Gradually, heat is transferred to a special filler, which, pushing away from a stationary piston, lifts the valves up (as shown in the picture). The filler and piston must be adjusted so that the opening of the main valve begins at a temperature of 81 degrees C with a tolerance of +4 - +5 degrees (note - only a plus!). The liquid begins to circulate through the radiator and cool, but some of it still passes directly to the pump. Next, the valve rises 6 mm and, at the end of the stroke, closes the bypass valve. If it is not closed, the antifreeze will spin in a “small circle” - pump-motor-thermostat-pump, and this will lead to overheating. The liquid pumped through the radiator quickly cools itself and cools the filler in the thermostat. It compresses, the valves move down with a spring, opening the bypass valve and closing the main valve. This process is continuously repeated, maintaining the engine temperature between 87 and 92 degrees. This is how the thermostat of a car that has recently rolled off the production line works. You don’t need any cardboard, but you will only have to insulate the “face” in frosts below 40!
Malfunctions of the VAZ-2107 thermostat, checking operation
Nothing is eternal under the Moon! And the thermostat gets tired over time. The properties of the filler change, the rubber of the valves becomes dull, and the springs lose their elasticity. We notice that the VAZ-2107 takes a long time to warm up, and in cold weather the temperature gauge needle barely reaches the edge of the green sector. This malfunction can progress and, over time, the temperature will end up in the middle of the white sector of the scale. You can check the operation of the thermostat without removing it from the engine. This is done like this: start the cold engine and feel the lower pipe near the thermostat with your hand. It should not become warm until the temperature indicator needle reaches a point 3-4 mm from the red zone of the scale. If the heat is felt earlier, the thermostat is not fully operational. The second malfunction is engine overheating due to a stuck thermostat. Here everything looks like this - the engine is hot, but the radiator and its pipes are cold. A thermostat with a stuck valve needs to be replaced urgently. If a malfunction occurs far from civilization, you can pick out the main valve and drive to the repair site. There is no need to remove both valves; the engine will overheat, because the “small circle” is not closed.
Installing a thermostat from 2123 (Chevrolet Niva) on a Classic VAZ 2107 2105
The thermostat from Shniva fits onto thick radiator pipes (aluminum radiator with electric fan) without any problems. The only thing for complete happiness was that the lower radiator hose was turned upside down (the end going to the thermostat was moved towards the radiator) and shortened
5 mm. But this must be selected live. The links above describe how fellow nivovods muffle the entrance to the pump, to which a tube is connected through which antifreeze from the stove and from the intake manifold is drained. But I’m lazy and I’m too lazy to pick out this tube from behind the starter and make a plug for the pump. And therefore, the old antifreeze drain hose from the intake manifold is cut and plugged with a suitable bolt, and the 16 mm antifreeze drain hose from the stove is removed from the brass pipe protruding into the engine compartment and plugged with a fitting for a 16 mm hose with a cap. In this context, a fitting means a plumbing adapter: on one side there is a herringbone thread for fixing the hose, on the other side there is a thread. In order to plug the fitting, screw the cap onto it. When purchasing, do not forget about the rubber sealing ring, which should be in the lid or purchased separately.
The fitting on the thermostat under the heater for the hose is 18-20 mm, and we have a drain fitting from the heater radiator of 16 mm. It would be necessary to organize a transition from one hose size to another. The transition is organized using a fitting for a hose 16 mm 1/2″ - coupling 1/2″ - 18 mm 1/2″. That is, we screw the threaded parts into the coupling, not forgetting to seal them with tow or special plumbing tape, and insert the herringbone notches into the hoses under the clamps. A 1/2″ ball valve can also be used as a coupling, especially for those who are fed up with the stove faucet and would prefer to open the hood and open or close the ball valve. It can be even simpler - find in a plumbing store a plastic adapter between 16 and 18 mm hoses, which ends in 16 and 18 mm herringbones. A regular 18 mm hose is still inconvenient to connect to the thermostat. It will be too close to the exhaust manifold pipes, and it will be somewhat shapeless. I recommend using a figure-eight, S-Yu-shaped hose. It is the longest and is similar in shape to an integral; on one side of the hose it has a widening pipe. So, how does the drain hose go from the stove drain fitting:
drain fitting 16 mm - hose 16 mm towards the wing - transition from 16 to 18 mm - the figure-eight hose continues to move towards the wing, and then goes down, then again a horizontal platform and by widening the pipe we connect to the thermostat. Photos in two planes explain the idea of laying the hose away from the exhaust manifold
At the moment, in addition to the thermostat, I also have an electric pump from Gazelle and the drain from the stove does not go to the thermostat immediately, but first to the pump. There are old-style electric pumps for a 16 mm hose and a new one for a 20 mm hose. I have the old model. The pump is screwed onto the studs of a standard ignition coil, which I don’t have, so I use an MPSZ-ZH. The pump fits perfectly onto the standard ignition coil mounting studs... True, it’s on the left wing, but I have a hose of the required length. Therefore, I lay a hose from the stove drain fitting to the pump. the hose runs between the valve cover and the thick radiator hose. After the pump, from a 16 mm hose there is a transition to an 18 mm hose, which is connected to the fitting of the thermostat heater.
Installing a thermostat from a Chevy Niva to a Classic
In fact, we tricked the thermostat and now, the more intensively the interior heater is used, the higher the engine temperature. This is not to say that the new thermostat fits like a glove, it will be “pulled” up just a little, but the authors think that this is not fraught with anything serious.
If you are sure that a more precise fit is not possible, you can put on the clamps and tighten them, or do this later to free up space for further work. Connecting hoses leading from the heater and carburetor heating unit Option 1.
For ease of operation, remove the generator ventilation hose. From the metal coolant drain pipe from the heater it passes behind the “pants” and the starter shield, remove the heater outlet hose and the coolant drain hose from the carburetor heating unit.
We unscrew the two nuts securing this tube to the pump at the right end of the pipe: We loosen the nut that secures the starter shield under the air heating pipe closer to the left end of the pipe: We remove the tube from the engine, move it to the left along the engine towards the gearbox into the tunnel and remove it from behind “pants” and starter shield.
This is the only way we could remove this tube, maybe there is a better way. We clean off the remaining paper gasket from the flange of the tube and the engine. Using a hacksaw, we saw off the flange from the tube as close to the flange as possible, and remove the burrs. We cut out a metal plate to the size of the flange with holes for fasteners; the central hole should not be made.
With this plate we will close the hole in the motor that formed after removing the tube.
Now we put the following sandwich on the pipe mounting studs in this order: Put on the nuts and tighten the “sandwich”. You should end up with something similar to this: We thread the tube behind the “pants” and the starter shield.
We managed to do it in the reverse order, that is, first push it with its curved end into the tunnel towards the gearbox, and then towards the front of the car. While we were wondering how the tube would be reinstalled, we sawed off the hinge that attached it to the engine, but perhaps this should not have been done. If you decide to leave the loop, it makes sense to put it on the stud and tighten it with a nut later, when all the hoses are put on, i.e.
So, on the tube located behind the starter shield and “pants” we put on the coolant outlet hose from the heater and the coolant outlet hose from the carb heating block, tighten them with clamps, and then proceed to selecting and cutting a suitable hose that will connect the metal tube in place of the cut flange with thermostat.
Lada 2106 1991, 69 l. With. — tuning
The picture that appeared to our eyes suggested that in order for the hose not to be pinched and the coolant to flow unhindered, a hose in the shape of the letter “S” would be most suitable.
A set of hoses for the VAZ heater was purchased, and this one was considered the most suitable: If I’m not mistaken, one end is slightly thicker than the other - this will need to be kept in mind when you decide which side and how much it should be shortened.
Since there is a thickening at the end of the thermostat pipe, but not at the end of the cut pipe, it seems advisable to connect the thicker end of the hose to the thermostat and the thinner end to the tube. We cut off the ends of the hose that are redundant, put the hose in place, tighten it with clamps, and install the thermostat. In my version, it turns out that the metal tube is supported by only three hoses.
It is quite possible that the pipe hanging on three hoses will dangle and rattle against the starter shield, but I do not hear this noise. This didn't suit me.
And one more plus, the standard heater return pipe, which goes behind the exhaust manifold, has been dismantled. And there is a plug installed on the pump.
I already changed the gasket at the tube-pump connection, put it on sealant, but there were still drops of antifreeze, in general there is one less weak point in the cooling system. Like in a pharmacy, 80 degrees is the beginning of opening. The thermostat itself had to be raised up, the throttle washer was also installed, all connections to the clamps were standard.
We put balls from a Chevrolet Niva on a classic
And therefore, the old antifreeze drain hose from the intake manifold is cut and plugged with a suitable bolt, and the 16 mm antifreeze drain hose from the stove is removed from the brass pipe protruding into the engine compartment and plugged with a fitting for a 16 mm hose with a cap. In this context, a fitting is understood as a plumbing adapter: In order to plug the fitting, screw a cap onto it.
When purchasing, do not forget about the rubber sealing ring, which should be in the lid or purchased separately. The fitting on the thermostat under the heater is for a mm hose, and we have a drain fitting from the heater radiator of 16 mm.
Installing a thermostat from Shniva on Niva 2121, VAZ 2131
Thermostat LUZAR — 340 rub. Set of pipes LUZAR VAZ 21213 - 300 rub. Clamps in assortment 200 rub. (a few left) Hose Ø16mm - 90 rub. meter (I took a meter) Sealant - 40 rubles. There was about 0.5 liters of antifreeze.
Let's start the installation: Drain the antifreeze, dismantle the thermostat along with the pipes. We are figuring out the location of the new thermostat, I decided to put it higher and in a horizontal position, as was done on Shnivy. We cut the pipes according to location. In general, nothing complicated, except for a couple of points: I plugged the outlet from the stove into the block with a stud of the GAZelle wheels, ran a hose from the outlet pipe of the stove to the VAZ 2131 thermostat (there is an electric pump in the section), to the carburetor heating nipple (on the Niva 2121 thermostat ) put on a suitable hose and plugged it with a bolt. Fill with antifreeze and remove the plugs. ALL!
Installation time - 4 hours with swearing and smoke breaks, without much stress. It feels like - I start the car, turn on the heater - warm air blows from the heater when the needle moves to o, as it warms up the heat increases. As a result, at idle the car warmed up to 80 degrees in about 7 minutes! At an outside temperature of -13°C, while driving the engine warmed up to 90°C and the needle froze. The air came out of the stove hot, and then the “Piano in the Bushes” came in, or rather the electric pump from the GAZelle! And this whole thing is blown through by a heater motor from a VAZ-2108! Can you imagine what Tashkent is like? And I felt
With the heater on, the car warmed up to operating temperature, just like with the original one WITHOUT turning on the heater! The engine operating temperature reached REAL 90°C. Due to its simplicity, cheapness and USEFULNESS, I advise you to take care of this alteration. Due to the transfer of the thermostat higher, to replace it it is enough to drain the antifreeze from the stove-thermos pipe, unscrew the 4 clamps and repeat the assembly in the reverse order. I'm happy, like an elephant! Plus, it seems to me that the plugged “nipple” for heating the VAZ 2121 carburetor can be used to bleed air from the system, so it is level with the intake manifold.
To install higher, I had to change the input and output of the small circle
The middle pipe is made from the upper pipe of the VAZ-21213 radiator
This is how we jam the exit to the block
This is what it looks like in general terms!
We plug the entrance to the pump with a plate like on Shnivy! Such a plug can be cut from a piece of metal with a grinder in 5 minutes!
Engine tuning VAZ 2121, VAZ 2131
Oil pump modification
Tuning the oil pump Niva 2121, VAZ 2131
Four-throttle intake system
Installation of a four-throttle intake Niva 2121, VAZ 2131
Engine cooling oil nozzles
Installation of oil nozzles for engine cooling Niva 2121, VAZ 2131
Muffler relocation
We transfer the muffler Niva 2121, VAZ 2131
Changing and polishing small diffusers
We polish diffusers Niva 2121, VAZ 2131
Heating the fluid in the washer reservoir
Modernization of the washer reservoir Niva 2121, VAZ 2131
Separate activation of dual fans
Separate activation of the dual fan of the cooling system Niva 2121, VAZ 2131
Thermostat from Shnivy
Installing a thermostat from Shniva on Niva 2121, VAZ 2131
Replacing the generator with a more powerful one
Installation of an 80A generator on Niva 2121, VAZ 2131
Tensioner gear shoe
Gear shoe for timing chain tensioner Niva 2121, VAZ 2131
Replacing the thermal switch
The thermostat is replaced if the engine's thermal conditions are violated. This usually happens after 60 thousand km. The replacement process is not difficult. It is not necessary to completely drain antifreeze or antifreeze from the system.
Important! When the pipes are disconnected, a certain amount of coolant spills out, so you need to buy it first to top it up.
Required materials and tools:
- screwdriver;
- new clamps;
- sealant;
- Coolant for topping up.
1.Loosen the screws on the five clamps, using a screwdriver, tightening the pipes.
2.Pull off the rubber pipes from the thermostat housing.
3.Remove the old thermostat.
4.Install the new device in reverse order. Before installation, lubricate the joint with sealant. Tighten the new clamp screws securely with a screwdriver.
Note! All thermostats used structurally for the Chevrolet Niva are unified and suitable for VAZ classics.
Installing a thermostat from a Chevy Niva to a Classic
In fact, we tricked the thermostat and now, the more intensively the interior heater is used, the higher the engine temperature. This is not to say that the new thermostat fits like a glove, it will be “pulled” up just a little, but the authors think that this is not fraught with anything serious.
If you are sure that a more precise fit is not possible, you can put on the clamps and tighten them, or do this later to free up space for further work. Connecting hoses leading from the heater and carburetor heating unit Option 1.
For ease of operation, remove the generator ventilation hose. From the metal coolant drain pipe from the heater it passes behind the “pants” and the starter shield, remove the heater outlet hose and the coolant drain hose from the carburetor heating unit.
We unscrew the two nuts securing this tube to the pump at the right end of the pipe: We loosen the nut that secures the starter shield under the air heating pipe closer to the left end of the pipe: We remove the tube from the engine, move it to the left along the engine towards the gearbox into the tunnel and remove it from behind “pants” and starter shield.
This is the only way we could remove this tube, maybe there is a better way. We clean off the remaining paper gasket from the flange of the tube and the engine. Using a hacksaw, we saw off the flange from the tube as close to the flange as possible, and remove the burrs. We cut out a metal plate to the size of the flange with holes for fasteners; the central hole should not be made.
With this plate we will close the hole in the motor that formed after removing the tube.
Now we put the following sandwich on the pipe mounting studs in this order: Put on the nuts and tighten the “sandwich”. You should end up with something similar to this: We thread the tube behind the “pants” and the starter shield.
We managed to do it in the reverse order, that is, first push it with its curved end into the tunnel towards the gearbox, and then towards the front of the car. While we were wondering how the tube would be reinstalled, we sawed off the hinge that attached it to the engine, but perhaps this should not have been done. If you decide to leave the loop, it makes sense to put it on the stud and tighten it with a nut later, when all the hoses are put on, i.e.
So, on the tube located behind the starter shield and “pants” we put on the coolant outlet hose from the heater and the coolant outlet hose from the carb heating block, tighten them with clamps, and then proceed to selecting and cutting a suitable hose that will connect the metal tube in place of the cut flange with thermostat.
Lada 2106 1991, 69 l. With. — tuning
The picture that appeared to our eyes suggested that in order for the hose not to be pinched and the coolant to flow unhindered, a hose in the shape of the letter “S” would be most suitable.
A set of hoses for the VAZ heater was purchased, and this one was considered the most suitable: If I’m not mistaken, one end is slightly thicker than the other - this will need to be kept in mind when you decide which side and how much it should be shortened.
Since there is a thickening at the end of the thermostat pipe, but not at the end of the cut pipe, it seems advisable to connect the thicker end of the hose to the thermostat and the thinner end to the tube. We cut off the ends of the hose that are redundant, put the hose in place, tighten it with clamps, and install the thermostat. In my version, it turns out that the metal tube is supported by only three hoses.
It is quite possible that the pipe hanging on three hoses will dangle and rattle against the starter shield, but I do not hear this noise. This didn't suit me.
And one more plus, the standard heater return pipe, which goes behind the exhaust manifold, has been dismantled. And there is a plug installed on the pump.
I already changed the gasket at the tube-pump connection, put it on sealant, but there were still drops of antifreeze, in general there is one less weak point in the cooling system. Like in a pharmacy, 80 degrees is the beginning of opening. The thermostat itself had to be raised up, the throttle washer was also installed, all connections to the clamps were standard.
We put balls from a Chevrolet Niva on a classic
And therefore, the old antifreeze drain hose from the intake manifold is cut and plugged with a suitable bolt, and the 16 mm antifreeze drain hose from the stove is removed from the brass pipe protruding into the engine compartment and plugged with a fitting for a 16 mm hose with a cap. In this context, a fitting is understood as a plumbing adapter: In order to plug the fitting, screw a cap onto it.
When purchasing, do not forget about the rubber sealing ring, which should be in the lid or purchased separately. The fitting on the thermostat under the heater is for a mm hose, and we have a drain fitting from the heater radiator of 16 mm.
WITHOUT cooling drain
To avoid draining antifreeze, you can do the following:
- We take two keys and two bolts with nuts 40 mm long.
- We pinch the coolant supply pipes.
- We fix them with a threaded pair.
- We pinch the hose.
The coolant will remain in place except for that in the thermostat. But before starting the procedure, you need to be sure that the hoses are in good condition.
Purpose of the device: depending on the temperature of the coolant, smoothly switch its circulation from the “small” circle, inside the “water” jacket of the engine, to the “large” one, through the cooling radiator.
The thermostat housing contains two valves, a bypass (overflow) and a working one, as well as a temperature-sensitive filler cylinder with a rod, and springs that hold the valves in their original position.
The filler used is graphite, artificial wax mixed with copper powder.
When the engine is not warmed up, the coolant pumped by the pump passes through the thermostat and returns through the open bypass valve to the water jacket of the block and the head channels. When the set temperature is reached, in our case 80-82 o C, the filler begins to melt and, increasing in volume, pushes the rod out of the cylinder. The rod acts on the working valve and, compressing its spring, moves the valve, gradually opening the movement of coolant from the pump to the radiator. In this case, the bypass valve also gradually closes the pipe leading to the engine block.
A fully operational valve will open, and the bypass valve will close, accordingly, at an operating coolant temperature of 95 o C, for engine 2123.
If the temperature of the antifreeze (antifreeze) may be exceeded, the ECU will turn on the electric fan for additional cooling of the radiator.
The valves, stem and filler cylinder are made of brass and copper, the thermostat body is cast from aluminum alloys or stamped from brass. Products in plastic casings have become very common lately.
Experienced auto mechanics consider metal cases to be more reliable.
In a Chevrolet Niva, the thermostat is located to the right of the engine - in the direction of travel. The lines of the pump, radiator, cylinder block, throttle valve and interior heater are connected to its pipes.
Technical specifications
All indicators are given for the product included in the Chevrolet Niva 2123 car and its modifications.
(Part number 2123-1306010).
| Valve opening temperature, o C | 80+/-2 |
| Temperature of full opening of the valve, o C | 95+/-2 |
| Full valve stroke, mm | 7,6 |
| Full opening time, sec | 60 |
| Maximum operating pressure, kPa | 149+/-14,9 |
The weight of the product is 0.3…0.34 kg, depending on the manufacturer and case material.
Causes and diagnosis of malfunctions
The service life of the thermostat is not indicated in the technical documentation, but during the warranty period, failures of the cooling system due to its fault are quite rare. We emphasize – term, but not mileage.
According to various sources, including Internet forums, after 60 thousand kilometers, the owner can “confidently expect” problems in the cooling system.
The main reasons for thermostat failure:
- The working valve is motionless and is constantly in the closed position, that is, the membrane separating the rod from the filler has been destroyed, and the heat-sensitive composition has come out of the cylinder. Coolant circulation in a large circle stops. The engine overheats and can “boil” in any operating mode, regardless of the ambient temperature. If the valve opens partially (the fluid has not completely flowed out), the coolant temperature does not decrease, despite the constant operation of the electric fan.
- The operating valve is jammed completely or partially open, the rod is “stuck” due to misalignment caused by thermal deformations. The engine, even when driving in summer, takes a long time to warm up. In cold weather, the coolant temperature does not rise above 60...70 degrees.
Reference. With a working cooling system and the outside air temperature near zero, the engine warms up to 80 o C in 10...12 minutes while moving, even with the heater on.
Diagnostics
We determine the symptoms by comparing the temperature of the inlet and outlet rubber pipes of the radiator. (Inlet - from the thermostat to the top of the radiator, outlet - from the bottom of the radiator to the engine block.) The heater is turned off (the air passage through it is closed). Before opening the hood, be sure to turn off the engine (turn off).
Be careful not to burn your hand on the pipes!
- Warm up the engine until the temperature gauge needle is close to the red line, but the electric fan does not turn on. If this fails even while driving, and the upper and lower radiator pipes are equally hot, the thermostat operating valve is stuck.
- If the engine quickly and “willingly” heats up, without waiting for overheating, open the hood and compare the temperature of the radiator pipes with your hand.
When the upper pipe is hot, the lower pipe remains cold - the working valve does not open, and there is no circulation in a large circle.
We will not talk about the consequences of engine overheating or prolonged operation in “cold” mode. In any case, this can lead to significant technical and financial problems. And you will have to solve them by traveling by public transport or on foot.
There are widespread recommendations to diagnose a thermostat removed from a car by immersing it in water at a temperature of 80 ° C and observing the opening of the main valve.
Wait to look for a mercury thermometer with appropriate measurement limits. Remember that the main valve and its seat may simply be worn out, leaking, and not “holding” pressure in the system. And it is there!
Repair options
In principle, anything can be repaired, but not a modern car thermostat with a solid-state filler.
During the time of the VAZ classic, there was a widely known method for “repairing” a thermostat whose main valve was stuck in the closed position. It was enough to remove the assembly and use a powerful screwdriver paired with a hammer to disfigure the valve, ensuring “normal” circulation of antifreeze. The cylinder block was cast iron, it was easy to bore it for the “first” or, there, “third” repair.
In our case, it is recommended to understand the word “repair” as replacing a defective old part with a serviceable new one.
Which thermostat should I buy as a replacement?
From the factory, the Chevrolet Niva engine cooling system is equipped with products from TZA, Tolyatti, in a cast aluminum alloy housing, the markings on which are cast on the side of the pump nozzle. It is difficult to find a “native” thermostat in stores, but it is quite possible.
How to remove the thermostat on a Niva Chevrolet for replacement
After removal, we saw that the valve in the thermostat was stuck.
Before removing the thermostat on a Chevrolet Niva, you need to let the engine cool down if it has been warmed up. After this, there are two options for the development of events: remove the thermostat with partial draining of the antifreeze, or without draining it at all. The fundamental difference is that with partial draining, we in any case lose some of the liquid.
Without draining coolant
To avoid draining the liquid, you can do this:
- We take two identical open-end wrenches, two screws 30-40 mm long and two corresponding nuts.
- Clamp the antifreeze supply hose with two wrenches.
- We fix them with a threaded pair.
- We pinch the hose.
Not a drop of antifreeze will spill, except what is in the thermostat itself. However, before starting this operation, you should make sure that the hoses are in good condition, without cracks and have not lost their elasticity .
Which thermostat is better to install on a Chevrolet Niva: photos and videos
The primary and most basic task of the Niva Chevrolet cooling system is to maintain optimal temperature conditions. Since a low temperature has a negative effect on the operation of the motor as a whole, and a high temperature is accompanied by burnout of the lubricant, an increase in gaps in parts, which can lead to their seizing and jamming.
The video below will tell you about replacing the thermostat on a Niva Chevrolet:
More information about the thermostat on a Chevrolet Niva
To ensure that the engine temperature is optimal, a thermostat is included in the system design. It is installed in the path of coolant movement. There are two types of thermostats, and on the Niva Chevrolet it is of the liquid type.
New thermostat installed.
The body is made of a brass cylinder, inside there is a rod and a double valve, and until the liquid reaches operating temperatures, it circulates in a “small circle”. But as soon as the temperature reaches a limit of 90 degrees, the rod unclenches, opening the way for movement in a “big circle”.
Reasons for replacing the thermostat
Most often, the reason to replace the thermostat is its failure.
It is very easy to diagnose it; to do this, on a warm engine, touch the upper pipe going to the cooling radiator and if it is cold, this will mean that the thermostat is not working properly, because it does not send coolant to a large circle.
Replacing the thermostat is very easy, you just need to minimize the amount of coolant in the system and unscrew all the fixing pipes. But it’s quite difficult to approach the choice of a truly high-quality thermostat, because the choice is very large and among them there are obvious outsiders and leaders.
TOP 5 thermostat manufacturers
Below we will present to you the five best thermostats that have proven themselves not only among real car owners, but also among experts.
- Thermostat "PRAMO" 2123-1306010-02.
- Thermostat "Luzar".
- Thermostat "WEEN".
- Kraft thermostat.
- Thermostat "AvtoVAZ" 2123-21230-1306010-82.
Please note that the design of these elements is completely identical, only the workmanship and appearance differ. But it is from this list that all the devices are similar, they have almost the same price of 400–450 rubles.
Poll on which thermostat to install on a Chevrolet Niva
conclusions
When choosing a thermostat in a store, you should not be fooled by low prices from unknown manufacturers, since a difference of 50–100 rubles does not bring much savings, and can add to engine malfunctions.