how to replace a repeater on a mirror
Video instructions - How to disassemble a mirror on a gazelle/sable, how to replace the turn signal on a gazelle mirror.
A short video on how to replace a turn signal yourself.
You will see how the turn signal repeater bulbs in the mirror and rear parking lights are changed.
This video shows in detail how to replace a turn signal in a mirror with your own hands without the services of a service station.
Replacing the turn signal in the driver's side mirror. The procedure is not complicated, as you can see from the video, one left.
Original turn signal numbers left 1K0949101 right 1K0949102 SOLLO lion SVG03029 right SVG03030 We invite you to visit.
Two LEDs in the right mirror burned out. It turned out that the insert into the mirror with LEDs is very rare.
https://www.youtube.com/channel/UCkmlm2WVxDy4jKqDFwaXoIQ/videos honest channel for homemade products.
part number: 34350-SNB-013 link to Chinese turn signal: .
Auto products https://goo.gl/U63dsX Refund of money from purchase: https://goo.gl/P3cvpe https://got.by/28l62i You want to watch a video about.
I change the turn signal on the mirror without removing the KIA CERATO mirror.
This video is about replacing the turn signal on the rear view mirror on a Hyundai i30. Almost complete production.
AUTO CHANNEL AUTO LOVER .=== ASSEMBLY OF MERCEDES W211 . HOW TO DISASSEMBLY AND ASSEMBLY A MIRROR AND INSTALLING A MIRROR.
Replacing the rotary indicator in the mirror.
Installation of turn signals in the side mirror panel on a Toyota Vellfire.
How to disassemble a mirror on a gazelle, sable. Replacing the turn signal.
Video instruction - How to disassemble a mirror
on
a gazelle
/sable, how
to replace
the turn signal on
a gazelle mirror
?...
Gazelle mirror repair
I'm in contact: Group in contact: Write if you have any questions or...
Video review on how to independently replace the mirror element on the outside rear view mirror of such cars.
The turn signal repeater on the left mirror has failed. I take off the mirror and figure out what’s wrong.
Replacing the turn signal in the driver's door mirror of a vw tiguan. First experience of shooting a video like this, please use your feet.
One of the ways to install the so-called American women on the Priora. -2 five-pin relays -2 five-pin chips.
In this video you will see how to replace the rear view mirror (external) on a VAZ 2109. ENJOY VIEWING!)
In this video, we replace the old lamp (in the right mirror) of the turn signal with a new one. When passed.
https://vk.com/public102793818 Subscribe to our VKontakte group - constant updates await you :)))
Consumables: Turn signal repeater lamp, right art. 87624-1M005 Indicator repeater lamp.
LADA VESTA LADA VESTA REPLACING THE SIDE MIRROR LADA VESTA HOW TO REPLACE THE MIRROR INSTRUCTIONS Repairing the Lada Vesta.
VAZ 2109 for forty thousand rubles, series 5, in this series we will change the side mirrors and headlight turn signals, and one more thing.
I apologize in advance for the bad angle in some places! Link to the store: https://autostol63.ru Turn signal article number: 2180-8201.
repair of the rear view mirror, replacement of mirror adjustment cables for Sens, Lanos and their correct placement.
AUTO CHANNEL AUTO AMATEUR. REPAIR OPEL OMEGA & MERCEDES W211. HOW TO CHANGE A SIDE MIRROR TO A NEW TAIWANese one.
Installation of dimensions in the mirror repeater SE priors.
Everything is done quite simply. You will need a T10 torx screwdriver, a small flathead screwdriver and a puller (for the mirror.
We install new lamps from Aliexpress. Where I got it, unfortunately, is no longer there. Try one of these.
In this video: you will see how to replace the side mirror on a Mercedec 210. You will find out why the turn does not work.
Replacing the mirror on the left side due to the mirror heating not working on a BMW e39, 523, 1996. The mirror is not.
DIY SE mirrors on grant.
To replace, you will need to remove the trim and the door strength element. Adjust the mirror.
Replacing the Octavia A5 turn signal
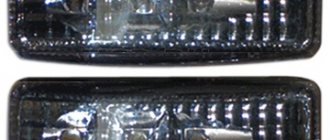
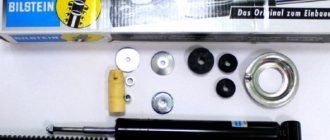
I decided on this procedure, after all, safety comes first, repeaters were purchased: left - 3T0949101 right - 3T0949102 As it turned out, they were made in China, however, they were removed (factory ones are also made in China). REMOVAL OF THE MIRROR ELEMENT: 1. Place the mirror in the service position (bend it in the opposite direction until it stops)
2. Lower the mirror element to the bottom position until it stops. (I did this carefully with my hands, because with the electronic control it does not go to the maximum bottom). At the top you can see the fastening of the glass element; there are 2 of them at the top and at the bottom. 3. Using a “flat” screwdriver, with a little force, I bent first the left ear, and then the right one. (I’ll add a little here, I held the mirror element with my finger, because the latch was trying to get into place) 4. Carefully grasping the mirror element with my hands, I started with a small Bend it downwards and towards you with force to remove the lower fasteners -> they snap off and the mirror element is in your hands! 5. Don’t forget to remove the chips (I DIDN’T DO THIS on the ADVICE OF THE AUTHOR, because you can tear off the flimsy contacts).
How to change a repeater in a gazelle mirror
The Gazelle is an industrial vehicle, so it is very often subjected to mechanical stress, which can cause minor breakdowns. An example is mirrors. To repair the Gazelle mirror, you need to disassemble it. But many car owners have problems with this procedure.
The kingpin is a hinge rod for the rotary connection of parts of a transport vehicle. To put it simply, this is the steering axis of the car's steering wheel. On the car in its original version, it was a very real axle in the form of a rod made of hardened metal, with the help of which the steering knuckle carrying the hub and wheel was attached to the suspension. For the driving parameters of the car, such a parameter as the angles of inclination of the king pin plays a very important role.
In winter, when the outside temperature can fluctuate from positive to -30 degrees and below, the lack of heating for the Gazelle’s interior is especially acute. This is due to the design features of the car, in particular the structure of the central air intakes. In winter, the discomfort from the influx of cold air from there is felt especially acutely. How to warm up the Gazelle's interior?
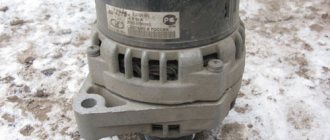
The GAZelle car is the most popular commercial vehicle in our country. In this regard, it is constantly in operation, which leads to breakdowns. One of the most common is damage to the water pump and generator drive belt. This malfunction is signaled by a special whistle coming from under the hood. Every car enthusiast can replace
To change the repeater in the gazelle mirror you may need:
Video on how to change a repeater in a gazelle mirror
Universal rear view mirror.BlueTooth, rear view camera. DVR GD-13X
3 in 1 mirror. HD1080p DVR, BlueTooth headset, rear view camera. The first review, if it arouses interest, I will continue. Comment, like. Ready for any criticism.
Repeater
Gazelle
__Turn signals in the mirrors. Where to connect?
I purchased covers with turn signals for the mirrors. Where to connect the turn signals themselves? It is clear that you can run a wire into the repeater in the wing or to the headlights.
But how can this be done competently and without a rabid collective farm? Should I run wires to the relay?
look for the relay that clicks, and look at the wires. You can view the repeater wires in the panel.
My turn relay is located somewhere in the area of the diagnostic connector. And connect to any place where it is convenient. overlays. Alexey would send a photo of how the strips with LEDs are secured. just wondering. There are mirrors from Japan at home))))
Thank you. In which panel?
Overlays of this kind. The main thing is that they were already filled in in their original color and the price is not too bad, especially since they were bought at a blitz price))
This is the only photo available so far, it's an auction one. I can take more details later, the pads are not at hand.
Sergey, yours is more serious)
round crap - is it a backlight? If possible, the inside of the linings.
We offer new technical capabilities
The ability to see the road ahead, but behind the moving car is a view from behind
. Their availability and ease of maintenance are strictly required.
With us you have the opportunity to buy a Gazelle mirror not only with a conventional manual drive, but also with a set of various add-ons that make movement more convenient
.
We offer a side mirror for the Gazelle with electric heating, which will help you inspect the road in the most difficult weather conditions. After all, in low temperatures or heavy precipitation, the rear view
difficult. Repeaters and turn signals will be equally important. It is much more convenient to control the electric mirror drive. Its presence greatly simplifies visibility settings. Each car owner, when purchasing accessories for the Gazelle, can independently choose the necessary equipment.
How to disassemble a gazelle mirror with a turn signal video
Rear View Mirror Gazelle
Mirror for gas-3302
Side rear view mirror
for Gas-3302 right ( new model
)
To view the rear and sides of the Gas-3302 vehicle, use the new rear-view side mirrors,
. located on the left and right. how to disassemble a Kia side mirror, installing repeaters in the side mirror. We offer a side mirror for a gazelle, how to disassemble a mirror, video on how to disassemble it.
Both side mirrors on Gaz-3302
have spherical optical elements and due to the asymmetrical location of the axis they are divided into right and left. The side mirrors consist of an optical element housing with a gasket (acting as anti-fragmentation protection), an axle, an axle spring, a washer and a nut.
Side mirror of a new rear view model for GAZ-3302
It is a non-repairable unit and if it is damaged, the entire product must be replaced.
To do this, you need to unscrew the screw securing it to the stand (hexagon socket screw), remove the bushing and mirror . Install in reverse order.
To correctly install the left side mirror, you need to turn the stand forward, and then, loosening the screw securing it to the stand, turn it in a horizontal plane to the required angle and secure it. However, first you need to disassemble the mirror. How is this Skoda Octavia side mirror?. In the vertical plane, the mirror is also adjustable within the required limits. For correct installation of the right side mirror of the new model on Gas-3302
it is necessary to rotate the rack backwards in relation to the support.
ATTENTION! We strongly advise you, before going to the warehouse, to call MTS: 8-916-119-99-08 and check the availability of the goods you are interested in in the warehouse, and then familiarize yourself with the directions.
We offer new technical capabilities
The ability to see the road not only in front, but also behind a moving car is provided with the help of rear-view mirrors. How to disassemble the side mirror on an Octavia Tour? Their presence and serviceability are strictly required.
https://www.youtube.com/watch?v=h3iLSr8eZIE
With us you have the opportunity to buy a Gazelle mirror not only with a regular manual drive, but also with a set of various add-ons that make driving more convenient.
Read also: Spacers to increase the ground clearance of Chevrolet Lanos
How to disassemble a mirror on a gazelle, sable. Replacing a turn signal
instructions - How to disassemble a mirror
on
a gazelle
/sable, how to replace the turn signal on a
gazelle
?
We disassemble the Mirror on GAZelle Business
Disassembled the mirror
with heating, electric drive and repeater! Channel sponsor: 1xbet channel: .
We offer side
on a Gazelle with electric heating, which will help you see the road in the most difficult weather conditions. Indeed, at low temperatures or during heavy rainfall, in the absence of electrical heating, rear view visibility becomes difficult. Turn signal repeaters will be equally important.
The electric drive makes controlling the mirrors much more convenient. How to disassemble a side mirror? Its presence greatly simplifies visibility settings. How to disassemble the side mirror of a gazelle, sable. Replacement.
Each car owner, when buying accessories for a Gazelle, can independently select the necessary equipment, on which the total price of the products depends.
Decoration for every taste
The aesthetic design of the rear view mirrors on the Gazelle is very interesting. How to disassemble the side rear view mirror on an octavia a5 fl. First you need to remove the mirror. A wide palette of colors makes it possible to choose the product that best matches the color of a specific car.
By successfully choosing the color and shape of the body, you can give a more sophisticated look to the entire car.
The shape of reflective surfaces can be flat or convex. Each driver can choose the type of device independently. Side mirror, how do you want to disassemble the mirror? Don’t be afraid, if not audio, video. It must be remembered that convex surfaces provide greater visibility, but slightly distort the true distance.
Durable and reliable
It is very important that the right and left mirrors are placed in a durable housing that protects them from mechanical damage. In case of any breakdowns, this device is often beyond repair and must be replaced. How to disassemble the side mirror? — Club of amateurs.
The need to replace the reflector and housing may arise due to wear, damage to the reflective surface, unsuccessful maneuver, careless entry into the garage or parking. How to disassemble a mirror, help remove the side mirror, opening the doors of a Skoda Octavia. Often external finishing elements are damaged by passers-by. How to disassemble the side mirror on an Octavia Tour? How to disassemble the Skoda Felicia GTZ?.
Decoration for every taste
The aesthetic design of the rear view for the Gazelle is very interesting. A wide palette of colors allows you to choose the product that best suits the color of a particular car.
By successfully matching the color and body shape, you can achieve a more sophisticated look for the entire car.
The shape of reflective surfaces can be flat or convex. Each driver can independently select the device type. It should be remembered that convex surfaces give a larger view, but slightly distort the true distance.
Durable and reliable
Read
It is very important that the right and left mirrors are placed in a durable housing, protecting them from mechanical damage. In case of any failures, this device is often not repairable and needs to be replaced. The need to replace the reflector and housing may be caused by wear, damage to the reflective surface, poor maneuvering, or imprecise garage entry or parking. External finishing elements are often damaged by passers-by. The car owner must monitor the condition of the surveillance devices, rear view
and replace them if necessary.
Activating hidden functions in the Skoda Octavia A7
To configure each additional option in the Skoda Octavia A7, you need to use the appropriate instructions. A complete set of actions and codes for the Skoda Octavia A7 is presented on official resources. Separately, it makes sense to consider some of the most popular hidden functions of the Skoda Octavia A7 and methods for enabling them.
Activation of indirect tire pressure sensor on Skoda Okatvia A7
Block 9
Adaptation and coding of hidden functions on the Skoda Octavia A7 includes going to the appropriate control unit and then setting the necessary parameters. The following functions can be configured in the on-board power supply control unit, which is designated “Block 9”:
- operation of side headlights simultaneously with the DRL system;
- tilting the mirror when starting to move backwards;
- launching fog lights in specific modes of car use;
- automatic shutdown of chemical weapons when using the handbrake;
- automatic folding of the rear-view mirrors by long pressing the door close button;
- Adjust or enable the option for adaptive headlights when cornering.
- Controlling the headlight washer function. Setting the response interval and duration.
Here you can use simple steps to enable the ability to use a remote control key fob when the car engine is running. Specific instructions for using the unit are presented on specialized resources, as well as in instructions from the car manufacturer.
Activation of the blinking DRL and turn signal of the Skoda Octavia A7 is shown in the video below:
Other options
Block 17 in the system will help you conveniently set up the test movement of the arrows when the ignition is activated, as well as turn off the sound signal indicating that the seat belt is not fastened. It also provides the ability to connect an indication of the location in the fuel tank.
To enable the display of battery charge on the computer screen, you do not have to go into any blocks. Simply press the “Set” button and hold it until the corresponding symbol appears on the screen. You can now release the button. In this case, the charge indicator will be constantly on the screen.
There are many more blocks in the electrical system of a car, each of which is responsible for its own set of functions. Before activating any specific option, it is recommended to assign it to a specific group.
Coding the Skoda Octavia A7 is not the easiest task and requires a certain set of skills to solve. If the owner has any doubts about his competence, it is better to immediately abandon the idea of independently enabling additional functions. Interfering with car electronics without the appropriate knowledge and skills can lead to unpredictable consequences.
Lifehacks and tricks of VAG cars - the topic of this video:
Entry No. 29 Turn signal repeaters in mirrors. they are still the right things
Twice already, in traffic jams, the mirrors of my Sorento were touched by their “circles” of the owners of other cars. And both times there were no consequences.
When the mirror contacts, the mirror, the mirror folds.
In addition, because the lacquer coating of the mirror is convex and protrudes in front of the painted part of the mirror.
And before that, I think that if these repeaters exist, then it’s good, but if not, then figs with them are not really needed. It turns out. we need. After minor accidents we don't have to wait for the traffic police to repaint the mirror, P.
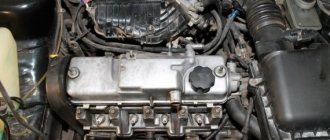
Also, the organization where I work will not have a driver until April. And in this case I am now going to GAZ-330202 with a Cummins 2.8L diesel engine, 120 hp.
Read
It's quite easy to ride and I haven't had any problems other than support. When you contract your back and try to come back. no crap clearly). Well, when overtaking, you need to remember that the GAZelle is 5.4m long.
I don't like driving more than 90-100 km/h. Eating empty 14 liters per hundred square meters, loading 17 liters. With an empty body, the wheels stop in the most harmless situations, but with 2 tons of load.
There's nothing to do in the left lane now, I'm used to being sick on the right. On the plus side. GUR, good manual transmission, heavy engine. Of the minuses. There is practically no sound insulation, the place is simply terrible.
All in all. hellish chariot) I'm changing it to Sorento. like in a spaceship) Everything is quiet, smooth, very fast)
Replacing turn signal bulbs
#1 Navstar
- Users
- 2,433 messages
- Registration 03-June 08
- Top
- Complaint
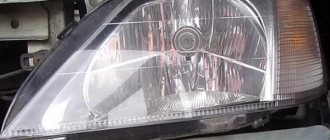
How to replace side turn signal bulbs?
Please describe the entire procedure if possible. Do I need to remove the headlight to do this?
#2 starter
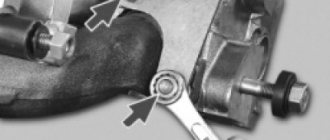
To replace the front turn signal bulbs, you must first remove the fender liner, and it is advisable to also remove the wheel, depending on where the fender liner is screwed on. After this, you can get to the inside of the repeater, from where you can remove the socket with the light bulb. The light bulb is replaced and everything is put back together.
It’s cool on triples - there the diffuser is unscrewed from the top. And on Moskvich 412 too - it’s also the same in shape.
- Top
- Complaint
#3 WAZ
You take a screwdriver, unscrew the 2 screws on the repeater glass, remove the glass and change the lamp.
if the repeater is on the wing. then you need to remove the fender liner and pull the lamp out from inside.
PS Soon it will come to the point where we will ask how to turn on the headlights.
- Top
- Complaint
#4 RussianInok
Soon it will come to the point where we will ask how to turn on the headlights.
- Top
- Complaint
#5 Alexey
- Top
- Complaint
#6 alex_lys
. The nuts (and bolts too) that secure the turns to the wing are rusty. so I had to write it off and knock it down with a chisel
- Top
- Complaint
#7 evilbeast
- Top
- Complaint
#8 HALK
- Top
- Complaint
#9 MORDA
HALK check the power supply to the antenna in the sidelight. if it exists, then there is no mass. If there is no power there, run a new wire and discard the old one.
Z.Y, WAZ I don’t understand what’s going on with you. Why so? Well, the person doesn’t know.. I don’t see the point in mocking..
- Top
- Complaint
#10 riorom
- Top
- Complaint