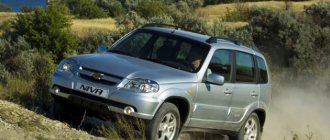
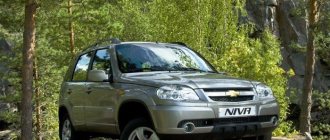
Replacing the windshield on a Chevrolet Niva
Replacing the windshield on a Chevrolet Niva
There's only a small matter left to do, I'm calling the car service... - Hello..., installing a Niva Chevrolet windshield, would you like to replace the windshield on a ShNiva, will it cost to install a Niva Chevrolet windshield? Of course, this car service on our collective farm is not cheap, but still I didn’t call others and my head was spinning with thoughts of how to glue the lobar myself! After reading the World Wide Web and watching a dozen YouTube videos, I realized that this is a trivial matter! It’s decided, I’ll glue it myself! I started looking for kits for gluing glass, went around to several stores and found nothing. I was just about to fall into despair when I decided to visit a store with auto enamels and oooh miracle, here it is, my dear, lying waiting for me, this is the avtokraska-shop kit.
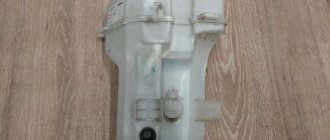
I bought it separately. If the heated rear window of a Chevrolet Niva fails due to a broken thread, then in most cases the entire glass is replaced, but you can also try to restore the heating yourself, for this there are a number of proven methods: There is a special repair kit that includes electrical wiring paste, glass cleaning items and syringe.
After drying, you can use a knife to cut off the layer of protruding sealant. All equipment is installed in its place. Before installing the glass in place, you need to glue the rear view mirror holder.
Replacing the rear window on a Chevrolet Niva Rear window of a car You can first stick a tint film onto a new Chevrolet Niva windshield installation, but when applying the film it is important to make indentations from the edges in cm. This is necessary so that the rubber sealant is applied directly to the surface of the glass, and not films.
The sequence for replacing the rear window is similar to the principle of removing the windshield. First you need to remove the spare tire and the trim around the window. Having made a hole with a knife, the fishing line is driven in and the canvas is removed. The rear glass is smaller, making it much easier to replace.
The replacement steps are carried out as in the first case. Only installation is carried out with the rear door closed.
Side windows on a Chevrolet Niva and their replacement Changing glass The installation of a Chevrolet Niva windshield on all four doors is the same, the only difference is in the dimensions themselves. I started looking for this plug in spare parts and electronics stores, I couldn’t find it for sale anywhere, the sellers couldn’t help. Then I started looking for this plug on the Internet using the 1PIN template. And in the end I found a plug that was visually very similar, judging by the shape of the latch.
Presumably, the plug we need is delphia on sale, I found it here. But suddenly my father-in-law, installing a Niva Chevrolet windshield, was in Moscow from work for a couple of weeks, and I asked him to stop by this store and buy this plug there. Despite its strength and reliability, the windshield can crack or break, so if you encounter a similar problem, you need to replace the windshield.
Instructions for replacing windshield, side and rear glass on a Chevrolet Niva
Replacing a windshield The process of replacing a Chevrolet Niva windshield in this case can be divided into the following stages: Even a whole glass was in the used garage. Over the years, the cracks have crawled almost to the edges. There was nowhere to go any further, so I decided to change it.
As it seemed to me, this is not a tricky matter. I decided to change the installation of the Niva Chevrolet windshield. My 14 year old son was chosen as an assistant. The kit already contains everything you need; you don’t need to buy anything else to glue the glass in.
The kit includes primer, polyurethane adhesive-sealant, nozzle for a tube of adhesive-sealant, degreaser cleaner, 2 pcs applicators.
Video: How to Install a Rear Window on a Niva
As you can see, all replacement processes can be performed independently without the help of specialists, but if you have doubts that the restoration procedure can be performed independently, it is better to contact a specialized service.
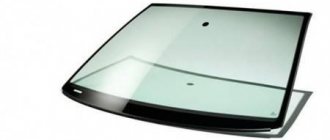
The weak point of any car is the windows. If the car body needs to be straightened, tucked, painted, the windows cannot be repaired after damage. And they often get damaged! The main and common cause is gravel that flies out from under the wheels of an oncoming car. Although the Chevrolet Niva has a high suspension, it is still not protected from window damage. Let's look at the principles of replacing all glasses with Shniv in a brief description.
Shniv windshield
Replacement
When the part has been tried on and all the necessary marks have been applied, you can begin installation:
- First of all, take a primer and apply it to where it will come into contact with the flow and groove
- We take a gun with sealant and begin to apply it along the entire perimeter of the groove
- When everything is ready, take the glass and install it in its place
- Press as tightly as possible
- Secure with tape
- We leave the car in this position for a day, after everything has dried, we remove all unnecessary elements
Work must be carried out at a positive temperature, otherwise the sealant will not dry.
Changing the rear
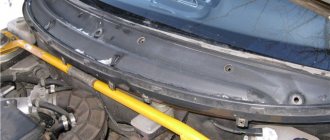
The rear window on a Chevrolet Niva may also be exposed to external influences, as a result of which it may need to be replaced; the replacement process is similar to replacing a windshield. The first thing you need to do is remove the spare tire and the rear door trim. After everything is removed, we make a hole with an awl and through it with a string along the entire perimeter we make a cut and take out the glass.
This element of the car is the weakest point, but if necessary, it can be changed without much difficulty. The most important thing is to do all the work correctly, otherwise the part will not last long.
Sequencing
The process of removing and installing glass on a Chevrolet Niva consists of 3 stages:
- dismantling the old part,
- cleaning the frame, preparing for installation,
- installation and fastening.
Front glass replacement
The operation does not require special skills or much time. To replace the windshield on a Chevrolet Niva, you need the help of a friend and a couple of hours of time.
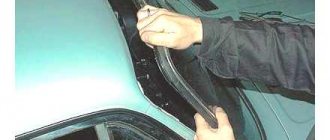
- It is better to remove the decorative upholstery and rear view mirror first, otherwise fragments will get inside. We also remove the wipers.
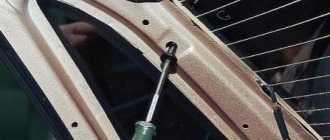
- When all the tools are ready, and your friend has agreed to help, we begin dismantling. We make a through hole in the seal. Whatever it is, it doesn't matter. We insert a fishing line or string. We draw one edge from the outside, the other from the inside, thereby cutting the rubber.
- You can use the second method: scrape off the seal with a spatula, gradually squeezing out the material. The damaged canvas will completely crumble.
- Work with fragments with gloves, observing safety precautions.
- We remove the fragments, clean the lower groove from dirt or dust. We remove the remaining rubber and rust with a sharp stationery knife.
- We try on a new part, marking the marks with a pencil or marker.
- We treat the new part and the car frame with acetone or alcohol. To replace it, we put on a new seal and insert a thick rope cord into it.
- Apply adhesive sealant to the inner edge of the glass. Place tape on the outside. To facilitate installation, apply lubricant to the seal and soap solution to the lower groove.
- We start inserting from the bottom. As you insert it, pull out the cord, pressing the shield tightly to the body.
- Align. We attach the tape to the body. Leave it overnight.
- After complete drying, cut off the excess sealant with a knife.
Sequencing
The process of removing and installing glass on a Chevrolet Niva consists of 3 stages:
- dismantling the old part;
- cleaning the frame, preparing for installation;
- installation and fastening.
Front glass replacement
The operation does not require special skills or much time. To replace the windshield on a Chevrolet Niva, you need the help of a friend and a couple of hours of time.
- It is better to remove the decorative upholstery and rear view mirror first, otherwise fragments will get inside. We also remove the wipers.
- When all the tools are ready, and your friend has agreed to help, we begin dismantling. We make a through hole in the seal. Whatever it is, it doesn't matter. We insert a fishing line or string. We draw one edge from the outside, the other from the inside, thereby cutting the rubber.
- You can use the second method: scrape off the seal with a spatula, gradually squeezing out the material. The damaged canvas will completely crumble.
- Work with fragments with gloves, observing safety precautions.
- We remove the fragments, clean the lower groove from dirt or dust. We remove the remaining rubber and rust with a sharp stationery knife.
- We try on a new part, marking the marks with a pencil or marker.
- We treat the new part and the car frame with acetone or alcohol. To replace it, we put on a new seal and insert a thick rope cord into it.
- Apply adhesive sealant to the inner edge of the glass. Place tape on the outside. To facilitate installation, apply lubricant to the seal and soap solution to the lower groove.
- We start inserting from the bottom. As you insert it, pull out the cord, pressing the shield tightly to the body.
- Align. We attach the tape to the body. Leave it overnight.
- After complete drying, cut off the excess sealant with a knife.
Rear window replacement
Before the procedure, you can apply a tint coating to the rear window. But step back a couple of centimeters from the edge so that the glue-sealant attaches the glass.
Replacing the rear window on a Chevrolet Niva is similar to the procedure with the windshield:
- First you need to remove everything unnecessary: upholstery, decoration, etc.
- A hole is made in the rubber seal and it is cut off along with the glass.
- Also, do not forget about the second method - rip off the seal with a spatula and squeeze out the material. In any case, you need to take care of the new rubber band in advance.
- We put it on as a replacement. We put a cord soaked in the solution inside.
- To make insertion easier, we apply a special lubricant to the seal and a solution to the groove. We insert the glass from the bottom, gradually pulling out the cord.
- Work is carried out with the rear doors closed.
- We apply sealant at the bayonet locations. We glue the glass to the sides and top of the car with tape. Leave it at least overnight.
Side windows
Replacing the side glass is done as follows:
- Remove the door trim and window regulator. The latter is removed after unscrewing two bolts in the maximum raised position.
- Unscrew the bolt on the outside of the guide bar and remove it.
- Pull out the rubber bands.
- We squeeze out the part from the inside.
- We push the canvas into the doorway. It is advisable to have help. You need to simultaneously lower the element and install the bar on the side.
- Carefully secure the part with soft rubber. Don't overdo it.
- We install new seals around the entire perimeter of the doorway.
- We mount the window regulator and firmly fix the material.
- We check the correct installation. Raise and lower the window regulator.
- We install the upholstery.
The only difficulty is to get the part straight into the guides.
Replacement of windshield Niva 2121, VAZ 2131, Lada 4x4
We remove the windshield to replace it or remove the roof lining. Remove the windshield wiper arms (see Removing the windshield wiper). We remove the air duct for heating the windshield of a VAZ 2121 car (see Removing the central nozzles and air ducts for heating the windows). Remove the sun visors. Carefully push the damaged windshield out of the opening, while an assistant holds the glass. If the glass needs to be removed intact, then we begin work from the upper corner of the windshield.
Using a slotted screwdriver, we press against the inner edge of the glass seal and tuck it behind the flange. We fix the seal by inserting a screwdriver into the resulting gap, but not deeply, so that the Niva 2121 glass does not crack. Using the second screwdriver, we continue to thread the seal behind the roof flange.
First we release the top part of the glass, and then the two sides. At the same time we squeeze the glass out of the opening from both sides.
. and remove it.
Remove the trim and seal from the glass. We replace the seal with hardened rubber or torn, clean and rinse if it is suitable. Place the glass on a soft cloth.
We put a seal on the glass, starting from the corners, and then along the entire perimeter. We turn the glass of the VAZ 2131 over and tuck the edging into the seal. We close the joint of the edging with a lock.
Lubricate the seal groove with soapy water or penetrating lubricant such as WD-40. Having turned the glass over, we insert a cord 4–6 mm thick and slightly longer than the perimeter of the glass into the groove of the seal.
We overlap the ends of the cord in the middle of the lower edge of the glass.
Chevrolet Niva windshield replacement
The outer side along the edge is covered with tape. The canvas is installed in place. It is leveled and pressed against the car body. After drying, you can use a knife to cut off the layer of protruding sealant. All equipment is installed in its place. Before installing the glass in place, you need to glue the rear view mirror holder.
This is necessary so that the rubber sealant is applied directly to the surface of the glass and not the film. The sequence for replacing the rear window is similar to the principle of removing the windshield. First you need to remove the spare tire and the trim around the window. Having made a hole with a knife, the fishing line is driven in and the canvas is removed.
The rear glass is smaller, making it much easier to replace. The replacement steps are carried out as in the first case. Only installation is carried out with the rear door closed. Side windows on a Chevrolet Niva and their replacement The replacement of glass on all four doors is the same, the only difference is in the dimensions themselves. Replacement is carried out in the following order: First, the decorative door trim is removed. I cut the old glass using the string that was included in the kit.
I read that some people cut glass with an ordinary stationery knife, some simply push it out with their feet.
I didn’t experiment, but cut off the old glass with a string. You can do this alone, but it’s easier to use someone else’s help. In my case, my son helped. In order to thread the string, I cut the seam of the adhesive sealant with a utility knife.
It is more convenient to do this at the bottom, closer to the door. There is better access to the seam.
I simply pierced the seam with a knife and threaded a string through the resulting cut. I didn’t film this process because my hands were full. You need to make sure that the string does not scratch the dashboard and body paint near the glass. When the entire seam was cut in a circle, the glass was removed. I carefully cut off the remaining glue from the body with a utility knife. Pay attention to the factory seam.
In some places it was about 3 mm. After removing the remaining glue, you need to thoroughly rinse and dry the glass seat on the body. In my case, all the paintwork on the opening was in good condition. If you have places with rust, you need to clean them and restore the paintwork before gluing in new glass.
I easily cut it off with a utility knife.
After carrying out all these preparatory operations, I installed the glass in the body opening and aligned it using Christmas trees and moving it from side to side. You need to achieve equal gaps on all sides and a horizontal position of the glass in the opening.
After that, I glued strips of construction paper tape onto the glass, overlapping it onto the body. 2 stripes on each side. I cut them along the edge of the glass and again took out the glass and laid it on the hood with the inner side, after laying a soft rag. Strips of construction tape will serve as markers when installing the glass. You just need to combine these tapes and you won’t have to push the glass back and forth with the adhesive-sealant already applied, creating gaps.
Not in everything, of course, but in most cases. And here the glass broke. The price of a windshield for a Chevy Niva now ranges from 2 to 5 rubles. Accordingly, replacing a Chevrolet Niva windshield at a service station will cost at least rubles. Or maybe it makes sense to do it yourself? What is needed for this? Not so much. First of all, the glass itself.
If the car is operated in cold regions, it makes sense to install a heated windshield. Run two wires, one to - and one to the heated rear window relay, not such a difficult job.
How to remove glass in Niva Niva, dismantling side glass Repair and service
Niva is an all-wheel drive vehicle produced by AvtoVAZ. It has proven itself well off-road and in difficult weather conditions. All work carried out to repair this machine can be carried out independently, occasionally resorting to the help of a second person.
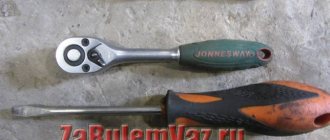
wrenches, slotted screwdriver
It is necessary to remove the windshield on a Niva to replace it or if you want to dismantle the roof lining. As a preliminary work, disconnect the windshield wiper arms. To do this, disconnect the wire from the negative terminal of the battery and unscrew the nut that secures the leash and remove it.
If the leash is difficult to remove, then pick up a 17 mm wrench and, using it as a puller, finish the job you started. In the same way, disconnect the leash on the other side. Next, remove the air duct that is responsible for heating the windshield. To do this, use a 10 mm wrench to unscrew the nut securing the right side window heating duct and remove it. Repeat the same procedure on the left side.
After this, carefully move the top edge of the air duct, making sure that the lugs come off the mounting studs on the dashboard. Remove the pipe from the radiator casing and finally remove the windshield heating duct
Ask an assistant to hold the glass from the outside to prevent it from falling out suddenly, while you carefully push it out.
If you need the glass intact, then begin the operation to remove it from the top corner. Take a slotted screwdriver in your hands and press it against the inner edge of the seal
Fix the seal by carefully inserting another screwdriver into the resulting gap. After this, continue to thread the seal behind the roof flange.
In this way, first free the top part of the glass, and then the sides. After this, press it on both sides at the same time and pull it out. Disconnect the seal and edging, and carefully place the glass itself on a soft cloth to protect it from various types of damage.
How to remove the rear door glass of a Niva Chevrolet
The sliding glass of the rear door on a Niva Chevrolet is removed to replace it with a new one in case of excessive wear or when repairing the door itself, when the presence of glass will interfere with its progress. Prepare a standard set of tools and perform the following sequence of actions:
- First of all, we dismantle the decorative door trim.
- Next, completely remove the window lift mechanism.
- Then, unscrew the fastening screw and remove the glass guide.
- Remove the upper and lower glass seals. The seals are not secured in place by any additional means and are held in place only by tension.
- Now you can remove the glass from the door niche. To do this, slightly lower its front part and turn it, removing it from its seat.
At this point, the repair work on removing the sliding glass of the rear door on a Niva Chevrolet car has been completed. Carry out the necessary repairs, then install the glass in its place in the reverse order.
| Replacing trunk glass | from 1,000 rub. |
FREE DIAGNOSTICS of Chevrolet Niva using 43 parameters. ⛔ The offer is valid only when you first contact our technical center
Replacing the trunk glass of a Chevrolet Niva is a service that can be provided separately or as part of a set of repair services. It is also convenient to carry out the work when repairing or painting the trunk of a Chevrolet Niva.
All glass damage sooner or later leads to damage to the surfaces of body parts.
Untimely replacement of Chevrolet Niva trunk glass:
- Driving safety violation
- Moisture entering through gaps and spreading corrosion
- Reduced car rating.
The original glass will be supplied with moldings, which is not always possible when installing an analogue Chevrolet Niva trunk glass. If it is possible to retain factory-made moldings, this situation may be considered.
Glass installation work includes:
- Process of checking and degreasing glass edges
- Installation of the seal around the perimeter with uniform distribution
- Installing the seal lock
- Installation of fasteners.
By replacing the trunk glass of a Chevrolet Niva, not only the appearance of the car and the driver's visibility improves. This protects the inside of the trunk and body from moisture. Professional installation of glass with a seal will ensure stable fixation. Complete shrinkage occurs after 2-3 days, so fast driving after replacement is not recommended, especially on uneven roads.
The process of replacing the glass of the trunk lid of a Chevrolet Niva can be carried out quite quickly, it will take about 2 hours. However, inserting glass with a seal is a rather complicated process. The seal runs along the perimeter of the glass and must be removed very carefully.
Replacement of Chevrolet Niva rear door glass
Work on replacing the rear door glass of a Chevrolet Niva car is carried out in a strict and specific sequence. It is impossible to replace the rear trunk window without practical experience and the necessary comprehensive equipment.
Chevrolet Niva trunk glass repair should only be done by a professional! Amateur repairs often lead to situations where wiring is disrupted during the process. After replacing the trunk glass in this case, the alarm does not work and short circuits may occur.
- Car body repair
- Body hood repair
- Body door repair
- Trunk body repair
- Restoring body geometry
- Paint chip repair
- Car body repair
- Transmission repair
- Automatic transmission repair
- Automatic transmission replacement
- Transmission repair
- Replacing the gearbox
- Replacing the transfer case
- Transmission repair
- Car chassis (suspension) repair
- Replacing the axle shaft
- Repressing the axle bearing
- Replacing shock absorbers
- Replacing the ball
- Replacing the upper arm
- Car chassis (suspension) repair
- Maintenance
- Changing the engine oil including replacing the oil filter
- Changing the gearbox oil
- Automatic transmission oil change including oil filter replacement
- Changing oil in gearboxes
- Replacing the air filter
- Maintenance
- Car diagnostics
Our manager will call you back to clarify the service time convenient for you, details of the work and cost of repairsRepairing a Dodge car is a long and complex process that requires great attention and careful approach. In other car services it was necessary to control the repair process, but in #rms there is practically no need to do this. Good service, responsive and attentive staff - all this allows you to not stress. I will recommend and contact you myself! Thanks a lot! I left a handwritten review at the car service center.
Repaired a Land Rover Freelander. I am very pleased with the work of the car service, because all the repairs were carried out efficiently and on time. The employees are polite and attentive to their customers. The entire repair process was discussed in detail in advance and all my wishes were fulfilled.
I highly recommend Running Motors on Nizhegorodskaya!
We replaced the windshield wiper trapezoid assembly, corrugation, as well as the comfort unit (VAC). Based on the results, we can say that everything works well. I was pleased with the repair work performed on Volkswagen
Moscow, Nauchny proezd st. 14a p. 7
Opening hours: from 09:00 to 21:00 Every day, seven days a week
car service "Running Motors" car repair center
How to replace a door sliding glass Shnivy
Insert the rear door glass of the Niva 3 min. Replacing the rear side glass of a VAZ NIVA
Removing and installing the rear side window of Niva #AutoFormula 4x4
Replacement of the right side mirror.Niva Chevrolet
Lada Niva. Installing side glass.
Chevrolet Niva replacement and painting of the trunk door
Replacing a mirror, Chevrolet Niva
Gluing glass to the rear door of a car.
Repair of window regulator on Niva Chevrolet
Removing the side windows of a VAZ 2121
11.13.2 Replacing the rear window
We apply sealant at the bayonet locations. We glue the glass to the sides and top of the car with tape. Leave it at least overnight.
Carry out further installation in the reverse order of removal, taking into account the following: Advertising Website design and development Upon expiration of the copyright period, in Russia this period is equal to three years, the work becomes public domain.
This circumstance allows you to freely use the work, while respecting personal non-property rights - the right of authorship, the right to a name, the right to protection from any distortion and the right to protect the author's reputation - since these rights are protected indefinitely. All information presented on this site is the property of the project or other indicated authors.
Tools:
Lower the glass down, lift its right side and pull it out of the door in an inclined position. Unscrew the fastening of the window frame at 4 points and the fastening of the gear motor. Using a 22mm wrench, unscrew the three rubber dampers with studs.
Do not lose the washers that are located between the gearmotor and the plastic housing of the mechanism.
Now you need to buy a new gear motor and install it in place. But here you have to be careful! Remove the inner lower seal 3 of the sliding glass, attached to the upper flange with four spring holders 2, and the outer window sill trim 6. To remove the seal and trim, simply pull them up by one edge and overcome the resistance of the fastening tendrils on the holders 2 and on the metal part of the trim.
Tinted rear hemisphere — Lada 4×4 5D, 1.7 l., 2009 on DRIVE2
I've been wanting to tint my rear windows for a long time. The main reasons were that I didn’t want what was in the car to be visible, and also the light from behind the cars was very noticeable - I don’t like it when they shine from behind, especially in traffic jams. I didn’t want to pay several thousand for “straight” Niva glass, so I tinted it myself, and it was interesting anyway. In order to maintain visibility in the dark, I chose a 10% tint, 5% is too dark for me. I bought two rolls of film at the market: one MTF for the side windows, and Limo for the rear window. It is written that both are Korean, and, as it later turned out, they do not differ at all in shade:
To do this you need:1) Remove the “velvet”;2) Lower the glass down and unscrew its fastening from the cable;3) Lift the glass up with your hands, loosen the tension roller and remove it;4) Move the cable to the side and remove the short guide at the rear door (press the guide pin inside the door hole and pull the guide down). 5) Remove the glass by turning 90 degrees clockwise.
The pin hole is marked in yellow, the removed cable is in green.
Source
Sequence of actions for replacing a windshield
You can replace your windshield at home without overpaying for installation. The entire replacement process consists of the following steps:
- Removing the old canvas;
- Preparing for installation;
- Installation and fastening.
Cleaning the placement surface;
The decorative upholstery in the cabin and the rear view mirror are first removed. From the outside you need to remove the windshield wipers and air intake. So, for removal you need a special fishing line or string. Having made a small through hole in the rubber mount, you need to insert the fishing line. To make the removal process easier, it is better to use the help of a friend. One edge of the line is placed inside the car, and the other outside, thereby making a cut between the glass and the rubber seal. After making an incision around the perimeter, the windshield is removed. The second stage involves cleaning the surface where the new glass will be located. To do this, you need to clean the area around the entire perimeter, remove rubber, dirt, and rust using a sharp knife. The preparatory stage involves degreasing the canvas and the surface of the body where the glass will be placed. Degreasing is carried out with acetone or alcohol. Having prepared all the equipment for installation, you can begin installation.
Installation is carried out sequentially:
- First, you need to apply a layer of special sealant along the edge of the windshield from the inside; it is better to use sealant. The outer side along the edge is covered with tape.
- The canvas is installed in place.
- It is leveled and pressed against the car body. After drying, you can use a knife to cut off the layer of protruding sealant.
- All equipment is installed in its place.
Before installing the glass in place, you need to glue the rear view mirror holder.
Replacing the rear window on a Chevrolet Niva
Car rear window
You can first stick a tint film onto the new canvas, but when applying the film, it is important to make 2-3 cm indentations from the edges. This is necessary so that the rubber sealant is applied directly to the surface of the glass and not the film.
The sequence for replacing the rear window is similar to the principle of removing the windshield. First you need to remove the spare tire and the trim around the window. Having made a hole with a knife, the fishing line is driven in and the canvas is removed. The rear glass is smaller, making it much easier to replace. The replacement steps are carried out as in the first case. Only installation is carried out with the rear door closed.
Side windows on a Chevrolet Niva and their replacement
The replacement of glass on all four doors is the same, the only difference is in the dimensions themselves. Replacement is carried out in the following order:
- First, remove the decorative door trim.
- The window regulator is removed by unscrewing two bolts.
- The guide strip is removed by unscrewing the screw on the outside of the door. The guide bar is removed.
- Then you need to remove the glass seals by pulling them out.
- The canvas is pulled out to the outside of the car.
- Now you need to install new glass; to do this, you first need to insert it into the doorway. When lowering it down, it is necessary to install the side guide in parallel.
- At the bottom, secure the canvas with a special soft clamping rubber, but it is important not to overdo it.
- Next, new rubber seals are installed around the perimeter of the door.
- The window regulator is installed and the canvas is fixed.
- After all, the operation of the window regulator is checked by raising and lowering the glass.
The window regulator is removed when fully raised.
After all, the inner door trim is installed. The only difficulty during replacement arises when the blade gets into the guides, but the main thing is to understand the installation principle.
How to change headlight glass
Often, minor damage does not lead to the destruction of the entire front optics, but only the glass. Many drivers sometimes think about whether it is possible to change it, or whether it is necessary to buy a set of headlight units? The headlight block kit costs four times more than the glass itself, but you can replace it, and it won’t take much time. The replacement process is carried out in stages:
Assembling the headlight unit is carried out in the reverse order. The functionality of all lamps is checked.
The weakest points in all cars (glass) have a not very complicated replacement procedure, which is confirmed by this article. It is worth noting that its service life depends on the correct installation of the glass. After all, if it is installed incorrectly, then over time it will become loose due to vibrations and will suddenly break against the body of the car. Therefore, carefully monitor the installation of new windows for your car.