Replacing the windshield of a VAZ 2110 with your own hands
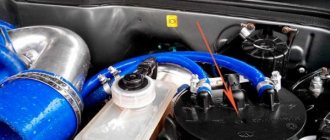
The topic raised in this article is very relevant, because many car owners are very interested in the question of how to replace a windshield with their own hands. This procedure will be considered on the VAZ 2110.
It will be difficult to do this work alone; an assistant will be needed.
How to dismantle old glass
- Remove the wipers too.
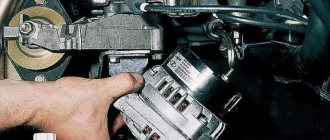
- Remove the plugs and mounting screws.
- There are 2 “10” nuts on the edges of the frill, located under the hood. Unscrew them.
- Remove the rubber seal from the engine compartment. Take out the screws that attach the sound insulation and frill.
- The frill is fixed with a latch located in the center. It needs to be pulled out along with the frill. It will be more convenient to do this by holding it with both hands near the center.
- Raise the frill. Cut off the clamp and washer hose. The place should be such that after the repair is completed, an adapter can be installed in it.
- Remove the frill.
- Remove the molding by hooking it on the edge. From below, take out 2 rubber gaskets that have a triangular shape.
2
3
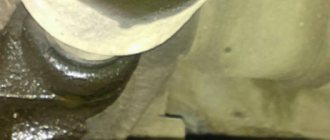
- Cut out old glass. To do this, you will need a string (a distinction is made between a round twisted one, used for cutting, and a square one, used for sawing).
You will need an assistant to complete this task. One end of the string is passed into the cabin. Both people are pulling at her from different directions.
How to install
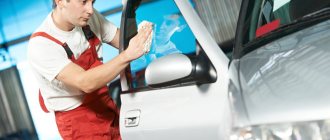
Let's look at what to glue the car door seal to and how to do the work correctly
It is important to choose the right type and thickness of the part; if you need to increase the tightness, the thickness is increased. Moreover, the thicker the rubber, the more difficult it will be to open and close the doors.
Old parts are removed. Find the ends of the tapes and pull them until they jump off the door or body. If there is no end, cut the elastic band anywhere with a knife, and the resulting end is pulled in the direction opposite to the body.
The seal must be installed carefully. Its shape is adjusted to the configuration of the doorway, other designs are unacceptable
The rubber is soft and prevents the seal from acquiring the correct shape. First, the elastic is applied to the opening, it is advisable to enlist the help of a partner, then the approximate part is carefully put on. When the part begins to fall into place, you can lay out the seal completely on the opening. Haste is inappropriate. If the ends of the product do not match, the installation must be done again.
The easiest way to glue a part is with special glue. They use BF-88, Moment, other construction adhesives, and less often liquid nails. The surface is first prepared - cleaned and degreased. After applying the glue, you need to press the gum for 20 minutes and wait until the surfaces set.
Sealant
The next option for gluing the seal to the car door is sealant. Ask your hardware or automotive store for a high-temperature heat-resistant gasket former. The product is not difficult to use; apply it to grease-free surfaces.
Also check out
- Replacing power steering fluid in a VAZ 2115 without going to a service station
- How to replace brake fluid on a VAZ 2110 yourself
- Algorithm for replacing the VAZ 2114 heater radiator
The person holding the string inside the cabin must hold it at an angle towards the cut. The person on the outside should stand on the right and pull the string along the glass, while slightly lifting the end of the string to avoid damaging the body paint. As the string approaches the right hand corner, the person working outside should bring the string in and begin cutting along the right post.
The lower part of the windshield of the VAZ 2110 should cut through under the hood. At the same time, inside the cabin you need to press the string against the glass as much as possible to prevent damage to the torpedo.
Replacing the windshield of a VAZ 2110 with your own hands
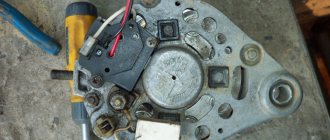
Before removing the windshield, you need to remove the antenna mount.
DIY replacement procedure
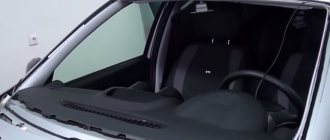
If the windshield is damaged and requires replacement, then this procedure must be carried out in accordance with the algorithm, which includes dismantling, preparatory work and installation of a new product. It is better to replace the windshield yourself with two people. In this case, one person should be outside the car, and the second should sit inside and “accept” the glass when it comes to installation, or push it out when dismantling work is required.
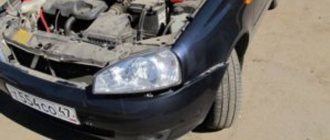
The windshield is considered one of the most unprotected elements of a car.
In this way, you can increase the accuracy of each procedure and eliminate damage to the paintwork, as well as damage to the new windshield due to negligence. Before its installation, it is mandatory to carry out preparatory work. In this case, you should adhere to the following algorithm:
- Remove old and heavily dried adhesive that was previously used to hold the old windshield in place.
- Apply a primer to the area that has been cleaned to bare metal and intended for installation of new glass. This procedure should be given special attention; moreover, experts recommend not completely removing the old glue, but leaving a thin layer. In the future, it will help the new composition to better adhere to the surface.
- Degrease the prepared surface.
- Treat the edge of the new glass, and after the white spirit has completely dried, apply the activator. This will ensure that your new windshield will adhere more effectively in the future.
If necessary, remove rust that has formed under the layer of old glue. To do this, it is better to use sandpaper or other available materials.
Before applying the adhesive composition, it must be warmed up. This procedure will make the glue softer and make it easier to handle. After the new glass has been installed, it is forbidden to move the vehicle until the glue has completely dried; moreover, for 2-3 hours it is forbidden to open or close the doors, as well as the hood and trunk.
Do not forget that the adhesive joint will reach maximum strength only 5–6 days after completion of installation work. It is noteworthy that it is recommended to perform the windshield replacement procedure at a temperature of +15 degrees and above. Otherwise, the glue will take much longer to harden.
To make the replacement process more convenient, it is recommended to open the hood slightly and also lower the front door windows. During installation, you need to place the bottom part of the glass on the frame and carefully lower it onto the surface that has been treated with adhesive.
Materials and tools
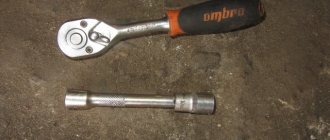
In order for the procedure for replacing a damaged windshield to be successful and as quickly as possible, you need to prepare certain tools and materials in advance. For dismantling and installation you will need:
- The adhesive composition, which must be selected depending on the characteristics of the windshield, as well as the mounting surface. The best solution would be to use two-component types of glue, since they are specialized and are characterized by an affordable cost.
- New windshield. Before installing it, you need to make sure that the glass is the perfect size. Inconsistencies are likely to result in reduced bonding effectiveness, regardless of the adhesive used.
- The string needed to cut off an old windshield. It is its use that allows you to avoid damage to the car body during dismantling work. You need to choose a string depending on the size and individual characteristics of the glass. Consulting with experts on this issue is the best solution. For ease of use, the string is equipped with special handles that allow you to tighten the cutting edge and effectively cut old glue.
- Suckers. It is almost impossible to carry out the work without special suction cups. They make it possible to reliably hold the windshield at all stages of work. Thanks to this, the risk of accidental falls and the appearance of scratches and chips due to impacts caused by negligence is almost completely eliminated.
- Activator. Its use allows you to increase the adhesive properties several times. Thanks to this, in the future it will be possible to apply a primer or adhesive composition much more efficiently to the surface treated with the activator.
- White Spirit. It plays the role of a solvent, with which you can effectively degrease the surface of the glass, as well as the places where it will be installed. The use of white spirit requires some experience, since such a solvent can cause significant harm to the health of a person who inadvertently inhaled its vapors or allowed it to come into contact with the skin or eyes.
Suction cups help keep your new windshield firmly in place.
You should not skimp on purchasing the tools, materials and devices described above, especially if you lack experience in installing windshields. The use of cheap glue or violation of technology most likely leads to the need for re-installation. Moreover, unreliable connections quickly lose their tightness.
How to remove a windshield
Replacing a damaged windshield begins with removing it. The procedure must be performed in accordance with the following algorithm:
- Remove all decorative elements and panels located inside the interior. To do this, you need to use a special spatula that allows you to remove the necessary parts without damaging the surface.
- Dismantle the windshield wipers and frill. To do this, you need to remove the fixing plugs, as well as the mounting screws.
- Remove the windshield rubber seal. To do this, you need to open the engine compartment and perform the necessary actions. To remove the molding you need to pull it by the edge. After this, it will be possible to pull out the triangular-shaped rubber pads from under the glass.
- Cut out the adhesive layer using a special string equipped with handles for more comfortable holding. To insert the string, you need to pierce the old layer of glue with a knife. This must be done carefully, since when inserting and pulling the string into the interior, the risk of damage to the surface of the body is quite high. When cutting, the principle of a two-handed saw is used. The procedure must be carried out with the participation of two people. One should be located in the cabin, and the second should be located outside. The string is carefully drawn along the edge of the glass panel. Do not forget that the person who is in the cabin must pull the string at a certain angle to the cut, and the one who is outside lifts the end of the cutting element slightly upward. This cutting principle makes it possible to maximally protect the body coating from scratches and other defects during the dismantling process. When it comes to cutting through the adhesive layer at the bottom of the glass, the string needs to be placed under the hood to cut at the optimal angle. In this case, it is necessary to take the necessary measures to prevent damage to the torpedo.
- Remove the windshield after the adhesive has been cut along the entire edge.
It is not necessary to use suction cups at this stage, since the glass is already damaged. However, in the absence of the necessary skills, using vacuum devices is the right decision.
After the glue has been cut along the edge with a string, it is necessary to dismantle the windshield
The fact is that an old windshield falling onto the hood is not uncommon, even if the dismantling work is carried out by two people. If the weight of the “windbreaker” is large, then holding and moving it is quite inconvenient, even for two people. And eliminating the consequences of such a fall (damage to the body covering) will require much more costs than buying two handles with suction cups.
After the windshield is completely dismantled, you can begin preparing the resulting opening for subsequent installation. Following the described algorithm and taking into account its features will allow you to quickly remove broken glass, regardless of its size and weight. If this is the first time a car enthusiast is performing a similar procedure on his own, then he should ask for help from a person who has experience in such matters. This will allow you to speed up the replacement and avoid a lot of difficulties.
How to install new
Installation can be done either with or without specialized vacuum suction cups. In the second case, the risk of damage to the new product increases several times, however, some car enthusiasts prefer to use alternative methods of retention.
When it comes to installing a “wind deflector”, the car enthusiast needs to remember that the fresh adhesive layer should not be disturbed when laying the panel on a pre-prepared frame. All actions must be performed in the following sequence:
- Place the windshield on the table. In this case, the front side should be on top.
- Carefully put on the rubber seal and molding. If such elements located on the old “windbreaker” are in satisfactory condition, then they can be transferred to the new product.
- Secure the seal with tape. This action is performed if the sealing element does not fit tightly.
- Turn the glass upside down, treat the edges with white spirit and wait until completely dry.
- Perform installation. The whole process needs to be controlled both from the outside and from inside the cabin. First you need to place the glass panel on the bottom edge, and then carefully lower the “windbreaker” onto the frame with the glued edges.
- After installation, fix the symmetrical position of the glass. To do this, you need to place special stops under the bottom edge.
- Check how well the wind deflector is aligned in both the vertical and horizontal planes. The side gaps should be approximately equal.
- Secure the final position of the windshield using strips of tape. If necessary, you can attach the glass panel to the roof of the car.
- Wait for the adhesive to dry completely. The glue will securely fix the glass only after 12–15 hours. After this time, you can start using the car, but it is recommended to avoid extreme driving for a week.
It will be useful: Clutch for VAZ 2114: which is better, recommendations from experts
After the white spirit has dried, an activator must be applied to the edge of the new glass.
Do not neglect the surface treatment of both the windshield and the opening in which the glass will be installed. Failure to carry out this procedure in good faith will most likely lead to a rapid loss of the tightness of the adhesive joint. As a result, moisture will penetrate into the interior, for example during rain. This will create certain inconveniences for the car owner and will force him to carry out additional sealing or re-mount the windshield (in the worst case).
Replacing a windshield, which includes dismantling the old windshield, preparing the surface and installing a new one, cannot be called a complicated procedure. It can be done in a private garage without having specialized tools at hand. However, it is not recommended to replace it alone. If a car enthusiast tries to cope with such a task alone, then with a high degree of probability he will perform the installation poorly, which will entail additional “troubles” associated with re-installation.
Algorithm for installing a new windshield
Before installation, remove traces of old glue and other unnecessary residues from the work surface.
- It is better to not completely cut off the old glue, leaving a small, even mark on the frame. This will help improve grip.
- Remove all crumbs, dust and sand from glass joints.
- Treat the frame opening with the activator.
- Remove dust from the new windshield and degrease it.
- Place the windshield with the outer part up and put on the molding. If the latter does not fit tightly, secure it with tape.
- Turn the glass over. Treat the edge where you plan to apply the activator with white spirit.
- Using a swab moistened with primer, mark the strip on which you need to apply glue along the entire length of the molding. Also process the glass frame openings. Leave the surface for 10-15 minutes.
- After this, you can install the VAZ 2110 windshield. Apply heated glue to the surface with a gun. The thickness of its layer should be about 1 centimeter.
Additional details
Door seals determine the quality of sound insulation of a car interior. You can seal the cracks with your own hands, which will improve ride comfort. The driver installs additional kits at his own discretion. The cost of parts and labor for their installation is low.
The simplest option for additional compaction is using Flex. A special tube can be purchased at an auto or air conditioning supply store. How to glue rubber seal to a car door? On glue or tape (double-sided). The fixation is reliable, but you will first need to degrease the surface.
One tube runs from the top, following from the bottom of the windshield and reaching the back door. The flex should go over the back door, then along the contour in a downward direction. Simply fixing it with glue is not the best option; the additional elastic band will quickly come off.
The effect after additional compaction is noticeable immediately. The cabin becomes comfortable, the amount of noise decreases, the wind stops blowing in the car, there is no dust and its characteristic aroma. The material is cheap, self-installation takes 30-60 minutes. If you cannot repair the car yourself, contact a service center.
Attention!
If there are no special suction cups to hold the glass, it is better to apply glue to the frame itself.
5
6
7
Recommendations for installing a windshield without suction cups
- Lower the front door windows and open the hood.
- Carefully take the glass. We pass one hand into the salon through the window opening (this will allow us to control the process from the inside). With your other hand from the outside you need to hold the glass by the lower part.
- Bring the lower corners of the glass over the hood and install it.
- In the example we considered, the glue was applied 1 centimeter thick (this depends on the brand of glue).
- After installing the windshield, install stops at the bottom that will allow you to adjust the position of the glass.
- Press the glass to the stand.
This the replacement of the VAZ 2110 windshield . All that remains is to assemble everything in reverse order.
Types of glass
Currently, there are only two types of glass installed on cars. The first is called triplex, and the second is called stalinite. The latter is made by strongly heating a single sheet, followed by rapid, but not sudden cooling. As a result, the finished product acquires increased strength. If a windshield made of stalinite is destroyed, it crumbles into many harmless cubic fragments.
Triplex is a multilayer product reinforced with a film polymer. Even strong single blows are not able to break such glass - in the worst case, it cracks and sags. However, serious collisions can produce quite large fragments.
On cars like the VAZ model in question, it is tempered glass that is used. Modern vehicles are equipped mainly with triplexes. They are held in place not by a sealant, but by glue, which improves the appearance of the car, but makes it very difficult to replace in a DIY situation.