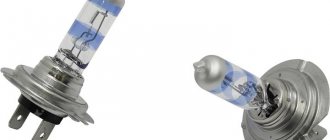
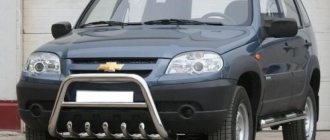
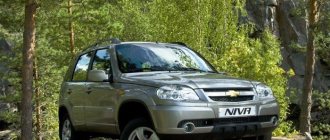
Fog lights VAZ 2123, VAZ 2170 new model, set.
Dear customers, in order to avoid errors when sending VAZ 2123 fog lights, please indicate your car model and year of manufacture in the “Comment” line.
A set of lighting devices and signaling devices located outside and inside the car form a lighting system. It performs the following functions:
— lighting of the road surface, roadsides and objects located on them in conditions of limited visibility;
— providing information to other traffic participants about the presence of a vehicle on the road, its size, the nature of the movement, the maneuvers performed, as well as its ownership;
— lighting of the car interior, as well as its other parts (luggage compartment, engine compartment, etc.) in the dark.
The vehicle lighting system includes the following main structural elements: headlights, front fog lights, rear lights, rear fog light, license plate light, interior lighting devices and control equipment.
Front standard lighting devices of cars are designed to illuminate the section of the road in front of the car, as well as part of the roadside in conditions of poor visibility. The headlights of any car, with low and high beam lamps installed, cope well with their task, but not in conditions of reduced visibility due to natural phenomena - fog, rain, snow.
Low beam and especially high beam lamps have a very voluminous beam. Their rays, hitting the fine particles of water that make up the fog, are scattered, causing an additional veil of light to form, worsening the already insufficient visibility.
To avoid such an effect when moving in fog, the light beam must have a clearly defined horizontal boundary, above which the light rays should not rise. In this case, the beam of light should be wide to provide additional illumination of the roadside. In general, to prevent the appearance of a veil of light in front of the car when driving in fog, the light should “spread” along the surface of the road, without rising high, since the fog does not fall close to the ground; there is always a layer near the ground where it is not. Therefore, it turns out that the fog is, as it were, illuminated by headlights from below. To do this, the light source is located as low as possible to the road surface.
Since conventional headlights are usually located high on a car, vehicles are additionally equipped with fog lights to ensure the required position of the light source.
Yellow and white light have the maximum intensity of light energy in their spectrum, compared to which the energy density in red, green, blue, and violet light is much less.
Even the most correctly installed fog lights provide visibility of the road in fog no further than ten meters. But this is quite enough, since in fog cars move at extremely low speeds.
The advantage of fog lights compared to conventional ones is that they also illuminate the side of the road, allowing you to see the side markings on the roads.
You can turn them on while driving along with the side lights. Some drivers install a red light at the rear, which is brighter than the brake light and side lights, and allows the driver behind the vehicle to notice the car earlier in the fog. This lamp, just like the main beam of conventional headlights, must be turned on regardless of the time of day if fog has fallen on the road.
Fog lights can be used with benefit for traffic safety not only in foggy conditions, but also under normal conditions at night.
Fog lights are extremely useful in the dark on narrow mountain serpentines and winding forest roads, when you need to constantly monitor the roadside. On such roads, it is recommended to turn on the fog lights in conjunction with the low beam of the main headlights. This improves visibility of the road and side of the road. Proper use of the lighting devices available on your car will allow you to confidently navigate in difficult weather conditions.
INSTALLATION OF FOG LIGHTS
Correct installation of headlights has a decisive influence on the effectiveness of their intended use. They are mounted on the lower part of the front bumper, at a height of at least 25 cm from the road surface. There should be two headlights - one on each side at the same distance from the edges of the car (no further than 40cm from the extension of the outer side of the lens). The optimal distance between fog lamps is 120cm.
Due to the fact that the luminous flux of fog lights is clearly limited along the upper edge, the light from them does not fall on microscopic droplets of fog located in front of the driver’s eyes and is not reflected from them, creating an impenetrable white wall of light, as is the case when the main headlights are turned on.
Currently, three types of headlights used in fog are popular among motorists:
- LED fog lights are the most popular and economical type of headlights, with low power consumption and a long service life. The advantage of LED headlights is also a wide selection of emission colors, high brightness of the luminous flux and low heating of the headlights.
- Xenon headlights are the most popular type among owners of expensive car brands. The emitted light of these headlights is as close as possible to sunlight, which ensures good penetration of fog and reduces physical strain on the driver’s eyes. Compared to conventional headlights, they have an increased service life, higher efficiency, and consume less electricity.
- Halogen fog lights are inferior to their competitors in many technical indicators, but continue to be in high demand among car enthusiasts due to their low cost compared to more fashionable types of fog lights.
Other articles of the product and its analogues in the catalogues: 2123-3743010/11-03, 0305062003/004.
VAZ 2170, VAZ 2123.
Any breakdown is not the end of the world, but a completely solvable problem!
How to independently install new fog lights on a car of the Lada Priora family, Chevrolet Niva.
With the AvtoAzbuka online store, repair costs will be minimal.
> STYLE-AUTO >Connecting additional fog lights for Niva Chevrolet. Niva Chevrolet fog light wiring diagram
What kind of lamps are in the low beam of a Chevrolet Niva
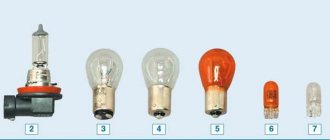
In the low beam headlights on a Chevrolet Niva, regardless of the year of manufacture, a single-filament lamp of type H7 12V/55W is installed as standard. This is a universal incandescent light bulb designed for installation in the advisory module of the block section of the head optics of the car. You can buy it at almost any specialized auto store.
Note! You should not choose lamps that are more powerful than those installed standardly (55 watts), as this will lead to overload of the generator and the car's wiring system and their rapid failure.
How to connect PTF on a Chevrolet Niva
The Chevrolet Niva SUV is equipped from the factory with standard fog lights (fog lights). Nowadays it is difficult to imagine traveling by car without additional lighting. If previously PTFs on cars were used only during fog, twilight or rain, now drivers use them as additional light at night. It is also common to use PTF in the daytime as an additional light signal for oncoming drivers. Therefore, the issue of equipping a Chevrolet Niva with such additional lighting remains relevant. Precisely the equipment, because not all Chevy Niva configurations have built-in PTF optics. Let's consider the components of such lighting, installation and restyling for a Niva Chevrolet car.
What are PTFs?
On Shniva, this optics is a rectangular shape with 35W halogen lamps mounted inside. They are placed according to a standard layout below the main headlights, which is necessary to reduce the glare of oncoming drivers and the penetration of light through fog. If the main light is intended to illuminate the road surface, then the PTFs have the main purpose of highlighting a car on the highway with reduced visibility at a long distance and illuminating the road in fog.
Power comes from a 12V DC vehicle network. The power button is located in the Shnivy's interior and looks like a headlight with arrows pointing down. Even those models that are not equipped with PTF as standard have a connector for mounting a power button. Also, according to operational safety, the network supplying this optics consists of a relay and a fuse designed to protect the wiring from overheating. If these elements are not available, then they must be purchased if the installation of PTF is being calculated.
Inside, the design is based on lens optics, which allows it to cope 100% with the function of illuminating the road surface in fog. The lighting lamp has an H4 type base, which allows the installation of xenon lighting. The outside of the optics is covered with protective glass, which prevents fogging and does not reduce the quality of lighting.
How to install fog lights on a Chevrolet Niva
So, if you need restyling or retrofitting of a Niva Chevrolet car, namely the installation of a PTF, then everything is very simple. Even if Shniva is not equipped with this type of optics, absolutely all models are equipped with training. The preparation includes ready-made wiring, places for installing relays, buttons and a place on the bumper. Therefore, you must first purchase all the listed material and get down to business:
- The car is de-energized. The instrument panel is removed to provide access to the button connection.
- Under the panel there is a free chip wrapped with electrical tape. This is exactly what we need.
- We install the button in the panel and connect the chip.
- Next we move to the control unit where the relays are located. We find a free block, which is located second on the left, and install a new relay into it.
- Now let's proceed directly to the connection. The wiring with a chip is brought out for connection through the underwing holes of the body to the front bumper.
- So, the connection diagram is laid out. Now the last thing remains - installing PTF in the front bumper.
- The Niva Chevrolet has already prepared holes for installing standard type PTFs. You just need to install them using fasteners and you're done.
- All that remains is to connect the fog lights and check that they are working properly.
Connection diagram
Most motorists have a question related to connecting PTF. Therefore, in this section we will consider the wiring connection sequence. The connection diagram is as follows, presented below.
PTF connection diagram
The diagram shows the location of the main elements for connecting the PTF. The numbers 1 indicate the fog lights themselves with the working elements inside (lamps). The black wire is ground, which is connected to the car body. The yellow and yellow-black wires are led out to the control unit through connecting chips. Position 2 shows the connection order on the mounting block via fuses F4 and F14. The relay responsible for turning on the PTF is powered from the control unit. The relay has two wires connected to the closing contacts of the power button. When pressed, power is supplied to the relay coil, which in turn closes contact 30 (on the relay), supplying power to the lamps. The entire circuit is powered by a 12V battery, which is shown by contact pairs A and B. The connection circuit is simple and primitive, which even a beginner can handle. But this same primitive circuit is the basis for the operation of an optical device. By numbering the contacts in the diagram, you can carry out repairs in case of malfunctions of the fog lights.
Scheme
Lamp for PTF
An important issue is the installation of lamps in fog lights for the Chevrolet Niva. The standard configuration of the fog lamp is equipped with a halogen incandescent lamp with a power of 35W. But such a lamp cannot produce a strong luminous flux due to the nature of low power, so many drivers seek to install other types of lamps, such as xenon or LED, in the PTF. Xenon ones are very popular, but they require the installation of an additional starting unit. The lamp produces luminous flux due to an inert gas and a special filament, which is many times superior to the good old halogens. The light from a xenon lamp pierces even thick fog due to the intensity of the flow.
Important! A high-power lamp overloads the electronics and battery, so it is not recommended to equip a car with more than four 55W lamps, especially installing cheap Chinese xenons.
The LED lamp does not have such a powerful flux, but it consumes little power compared to halogen and xenon lamps. The cost of xenon lamps remains maximum due to the additional ballast control unit and maximum performance.
PTF for Chevrolet Niva Bertone. Since 2009, Shniva has received an update from the Western brand Bertone. Now the basic package includes fog lights that are not rectangular in shape, but round. The round shape makes it more compact and individual. There was also a change in the density of glass, which is now resistant to small crushed stone and minor obstacles. The update from Bertone has significantly changed the external design of the Chevrolet Niva, which can only be recognized by its body shape and front main headlights.
Fogs in the restyled Shnivy
The presence of fog lights on a Niva Chevrolet SUV is the key to safe off-road driving and more. Even if the basic equipment of Shniva does not have PTF, it would be a good idea to give your car a little update and safety.
Do you still think that diagnosing a car is difficult?
If you are reading these lines, it means you are interested in doing something in the car yourself and really saving money, because you already know that:
- Service stations charge a lot of money for simple computer diagnostics
- To find out the error you need to go to specialists
- The services use simple impact wrenches, but you can’t find a good specialist
And of course you are tired of throwing money down the drain, and driving around the service station all the time is out of the question, then you need a simple CAR SCANNER ELM327, which connects to any car and through a regular smartphone you will always find the problem, turn off CHECK and save a lot of money! !!
We ourselves tested this scanner on different machines and it showed excellent results, now we recommend it to EVERYONE! To prevent you from falling for a Chinese counterfeit, we publish here a link to the official website of Autoscanner.
Is your Shniva reliable?Poll Options are limited because JavaScript is disabled in your browser.
- Sometimes requires attention 58%, 3512 votes
3512 votes 58%
3512 votes - 58% of all votes
- Yes, only scheduled maintenance 19%, 1132 votes
1132 votes 19%
1132 votes - 19% of all votes
- Constantly breaks down at the most inopportune moments 16%, 950 votes
950 votes 16%
950 votes - 16% of all votes
- Currently under repair 8%, 493 votes
493 votes 8%
493 votes - 8% of all votes
Total votes: 6087
×
You or from your IP have already voted. Vote
Main conclusions
On a Chevrolet Niva car, the low beam headlights use a standard H7 12V/55W lamp. It has one filament and is installed in the corresponding block. When choosing a new copy to replace a burnt-out one, you need to pay attention first of all to its type and lighting characteristics. Based on the type of light source, they are divided into the following modifications:
- Incandescent light bulbs.
- Standard halogens.
- Halogen with quartz bulb.
- Xenon.
- Light-emitting diode.
- Gas discharge on sodium.
It is better to give preference to halogen ones, since they have a minimal price, good luminosity and flux density and do not require the installation of additional equipment when replacing. In addition to the burnt-out lamp itself, the reason why the low beam on a Chevrolet Niva stopped working could be a fuse and problems with the on-board wiring.
If you have additional information about choosing and replacing low beam lamps on a Chevy or simply want to share useful knowledge, be sure to write in the comments.
Previous
Car lightFeatures and instructions for replacing low beam lamps on Renault Megane 2
Next
Car light How to select and change a low beam lamp on a Renault Logan
Where is the fog light relay on a Niva Chevrolet: photo
Car: Niva Chevrolet. Asked by: Andreev Boris. The essence of the question: I can’t find where the fog light relay is installed on the Niva Chevrolet?
Hi all! Yesterday my Shniva threw out a trick. I came home from work, parked the car, got out and saw that the fog lights were on. I came back, rushed to the toggle switch, and it was turned off. It turned out that no matter how I turned it off, the lights were still on, even with the lights turned off. To avoid draining the battery overnight, I pulled the fuse. I came home, looked around the forums, and concluded that the problem was in the switch.
Today I bought a new toggle switch, replaced it, but there is no result, the fog lights are still on. They suggested another possible reason - the contacts in the relay were stuck. Now I'm looking at the manual, but I can't find where it is installed. Guys, who knows where the switch for turning on the fog lights on a Niva Chevrolet is located?
Mounting block diagram
Since there are no markings on the fuse box cover of the Chevrolet Niva, we suggest you use the following hint.
Fuse and relay block diagram.
PTF relay
The PTF relay is indicated in red.
The PTF relay in the block is indicated by a red arrow.
Photo report on the installation of fog lights on Niva Chevrolet
Author Marat
Then ShNiva arrived to connect the PTF, I looked, and all the wiring was already there. You just need to insert and connect the headlights themselves.
Inserting headlights - unscrew the self-tapping screws of the fender liner (bottom and slightly above), pull them off, unscrew the covers, prepare the headlights. By the way, they are exactly the same as the 2170 (Prior).
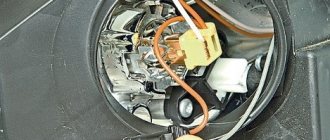
We look under the hood in the wiring area at ordinary headlights - the connectors are wrapped with adhesive tape, unwind them and pass them down through the technological holes. We connect the headlights and screw them into place of the previously removed plugs. We screw on the fender liners.
It is important not to confuse left and right. They are marked on PTF glasses.
Connection. On the fuse block there is a connector for the relay, it is empty, it comes with power wires PINK (+ always) and YELLOW-BLUE (- PTF on), and control wires BLACK (ground) and GRAY-BLACK (control +). We insert the relay.
Control button. Remove the front panel of the dashboard (screws near the dashboard and under the plugs near the emergency lights and on the right). There should be a connector not connected - this is the connector for connecting the PTF. We connect the button and voila!
However, if you want the PTFs to work in DRL mode, but turn off when the ignition is turned off, cut off the BROWN wire from the button and connect it to the YELLOW-BLUE wire that goes to the button for turning on the heated rear window.
Marat
Chevrolet Niva fog lights
From the factory, Chevrolet Niva is equipped with fog lights, since in the realities of the modern world it is difficult to imagine any trip without additional lighting. Previously, a motorist used PTF only during bad weather conditions, now they are used at night as an additional light, but in the daytime they are also used in the form of a light alarm for oncoming cars.
What are fog lights?
Chevrolet Niva cars are equipped with this optics; their fog lights are presented in the form of a triangle; halogen headlights with a power of 35W are mounted in them. They are installed below the main headlights, which reduces the glare of oncoming cars and promotes better penetration of light through fog. That is, if the main task of the main headlights is that they help illuminate the road surface, but the PTFs highlight the car on the road during bad weather conditions, and illuminate the road in fog. Electricity is supplied to them from the car's network, the voltage of which is 12V. They are turned on with a special button located in the cabin itself, where the headlights are depicted with an arrow pointing downwards. To protect the wiring, install a fuse with a relay. The basis of this design is lens optics, which 100% copes with the main function of illuminating the road during fog.
How to install fog lights correctly
If you need to restyling, or retrofit a Niva Chevrolet car with this equipment, this SUV has all the preparations for this, namely: ready-made wiring, a place on the bumper, a place where the relay is installed. When everything you need has been purchased, you can proceed to installation:
We de-energize the car, remove the instrument panel to gain access to the button
- Under the panel itself we find a free chip, which is wrapped with electrical tape
- We take the button, connect it to the chip and install it in the panel
- We install the relay in a free block, in the control unit itself
- We bring out and connect the wiring with the chip to the front bumper
- We install the PTF in the bumper using special fasteners
- We connect the fog lights and check their functionality
Diagram of how to connect correctly
If you have a question about how to connect correctly, below is a diagram of how to do it correctly.
This device is your guarantee of safe driving on roads with poor visibility. And even if for some reason they are missing from your SUV, you can always complete it, since everything is provided for this in it.
Chevrolet Niva 2013, 80 l. With. - electrical and electronics
I hung the block with the relay on the mounting block from below in a free slot, hooked up the ground to the battery, started it, checked it, and assembled everything. PTFs are turned on and off by a button regardless of the low beam and dimensions when the ignition is on.
Which of the pink wires of the standard harness could be connected to without extending a separate power plus to the battery and in what place is it better to open it?
I soldered the resistances on the back side and soldered the diodes on the front side. I advise everyone to use the dialer. It helps a lot to see if all the crystals in the diode are shining and the short ones are revealed. Later I’ll add a close-up photo of how I secured this thing to the plug for the foglights. In cloudy weather the visibility is great. There are plans to do something similar, but with 1W LED spot light.
Also interesting: Air conditioning for Niva VAZ-21214
Today, almost every car from the factory is equipped with fog lights. Chevrolet Niva is no exception. Thanks to them, in the dark, as well as during bad weather conditions, you can additionally illuminate the road. But it happens that for some reason the car is deprived of additional lighting devices, creating quite a few problems for the car owner.
This problem can be solved very simply, just purchase a set of fog lights and install them on your car. This is quite simple to do, so you can install it yourself.
Chevrolet Niva ) › Logbook › Installing PTF. It's done! Part 1
Hello, friends!
After a week-long rush to install the front PTFs, I finally did it!) The Internet is full of instructions for installing fog lights on a Shniva, there are even ones for dummies...) But I’m smarter than any dummies))) So my instructions will be mega-detailed!) With flowers wires and with designation letters))). There are a lot of connection diagrams on the internet, but it seems to me that for a person who is first encountering auto electrics, they are not entirely clear... I will try to describe everything in my post so that no questions arise at all.
This means that on 02/23/15 my other half gave me front PTFs for a ShNiva with a set of wires and a button from a VAZ 2115.
PTF with priors complete with wires, button and bulbs. All together it came out to 2100 rubles. I bought it from official Shnivy representatives in our city, the Cruise store.
After some short attempts to find a competent and inexpensive installer (who, by the way, charged at least 1,500 rubles for installation), I decided to install everything myself.
My garage is my fortress) So I arrived at the garage early on Sunday morning and it started!)) The first problem that killed two hours of my time was the fender liner screws!))) For some reason I decided that there was an ordinary hexagon there...) A set of which I always have lying in the car) But it wasn’t there! called Volokonovka... And there it is very bad with car shops and even more so those selling “stars”... Having not bought anything, I returned with the thought that the installation was completed. (And then lo and behold!
I bought it a long time ago when the store was selling everything for 37. So she saved me)
Front left
Before right
Bottom Started on the left side. I removed the wheel for convenience. At the same time, I pulled out from under the protection of the brake disc a stone that had been hanging there since the Crimea) ... I began to completely disassemble everything, unscrewed four bolts where the wheel is, one in the depths of the wheel and two from below. And it turned out to be such a hole. By the way, I initially thought my “Stars” had been licked by the previous owner... but no... they were just clogged with bitumen from the road. I took white spirit and treated everything well.
bolts being processed.
This is already with the PTF plug removed. At this stage of installation, I think no one will have any problems... it’s just that the plug is unscrewed and the PTF is attached to this place in the same holes and with the same bolts... Everyone writes that when installing the PTF with the priors, the right one must be swapped in places and the left PTF... I don’t know why this is being done, but I obeyed))).
On the spot. The set of wires includes a long red wire along with a black one, a relay with a chip, an adapter for the H11 light bulb (Since the VAZ 2115 has other connectors by default for the H3 light bulb). Then you insert this adapter into the fog and then to the red wire. There were all the chips. So there were no problems connecting.
The black wire was screwed to the protection mount. First I cleaned it with a metal brush. In short, installing fog lights and running wires into the cabin was not difficult at all...Everything is quick, the main thing is to have the tools. I found the hole for the wire right behind the battery. I took it off and the wires slipped through there like clockwork.
This is the place outside.
And this is the same place from the inside. This is where my enthusiasm and enthusiasm ended) I can twist bolts much better than wires) A very big problem was discovered. They gave me a button, but there was no block for it... Without thinking for a long time, I decided to connect my front PTFs to the button to the rear ones, as was done in our working field. Back and forth and everything worked... only the front and back were burning together... I won’t describe this process, because NEVER DO THIS! UNDER ANY CIRCUMSTANCES!.. I’ll explain. The Shnivy has an immobilizer, which is powered directly from the rear PTFs... After not burning for long, my fogs went out... Panic!.. Below, under the temperature of the coolant, a light with a key came on... The car refused to start at all! It turns, but it’s not enough!.. All my efforts and temporarily removing the stamp from the battery did not bring anything... And then I remembered that there is a person living in our city who will definitely help me! his name is anjey-osen! Thanks to him for his help!)))… The problem turned out to be a blown fuse. Andrey ordered me to urgently disconnect from the rear PTFs and buy a block for the button and do everything wisely!.. Having insulated everything, I assembled my car and drove to the city. Here I bought a block for the button, a probe, a piece of wire, locked myself in the car and began interior work.
Relay connection diagram
Button connection diagram The diagrams are quite simple. But I’ll explain anyway. That means according to the first one (relay). The gray wire (No. 87) is connected to constant +!..Where you get it is up to you to decide) You can run it directly from the battery by inserting a 15A fuse into the circuit. I took from + which goes to the on/off button for the headlights and low beam.
Using a probe, the wire was found.
docking
I connected the yellow wire (No. 85) to the button to output 1 and D (combined together).
I screwed the brown wire (No. 86) to the first negative that came across... I don’t even remember which one now)) But that doesn’t matter.
The downside was the rear PTF... Since I had already exposed it earlier)
Well, I screwed the last wire (No. 30), the color of a child’s surprise, to the red wires (behind those previously removed from the engine compartment).
Something like this.
