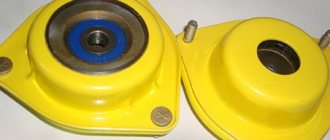
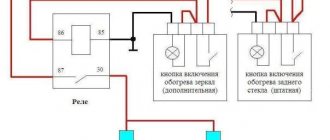
Good afternoon everyone. I decided to touch on the banal topic of installing heated and electrically controlled mirrors from Priora 2 on a VAZ 2110. I don’t see the point in describing all the delights of owning these mirrors, but I will dwell on the installation of wiring in more detail. I hope my experience will be useful.
What we buy: 1.Prior 2 mirrors, without turn signal, not painted, heated and electrically adjustable. I'm afraid to make a mistake with the manufacturer, Ulyanovsk or Nizhny Novgorod. When disassembling the mirrors for painting, Chinese electric motors were found inside. Let's hope they won't let us down. Price 1300 rubles (as of February 2021) Samara, Rakita market;
3. Mirror control joystick 12.3769. Suitable for regular place. Convenient to manage. Has a “middle” position. The control handle does not stick out, unlike the UAZ one. Price 550 rubles, (as of July 2021) Samara, Rakita market;
4. Block for wires, for 9 females. Price 30 rubles, (as of July 2021) Samara, Rakita market; Why did you buy the wiring harness 2110.8201326-41? I was hoping to save time on installation. Did not work out. Considering that the UAZ joystick was not used and it was necessary to add 15 cm to each mirror. A waste of money. In my opinion. The only positive point is the connectors already connected to ground (black wire) with a ring tip, heating (brown), joystick backlight (yellow) and power (white). We open the connectors behind the mounting block and insert our wires into the gap.
Guys, before starting any electrical work, turn off the power to the system. This will save you from a lot of trouble.
We find the power connector for the heated rear window (gray wire with a red streak), connect it to the brown wire of the harness 2110.8201326-41.
We hang the mass in the designated place. The photo shows.
We insert the white power wire into the gap in the pink wire. In my case, the previous owner inserted a fuse into the circuit for some reason. I didn't take it out. Left it.
Lada 2110 › Logbook › Priora mirrors wiring installation 2110.8201326-41
Good afternoon everyone.
I decided to touch on the banal topic of installing heated and electrically controlled mirrors from Priora 2 on a VAZ 2110. I don’t see the point in describing all the delights of owning these mirrors, but I will dwell on the installation of wiring in more detail. I hope my experience will be useful. What we buy: 1.Prior 2 mirrors, without turn signal, not painted, heated and electrically adjustable. I'm afraid to make a mistake with the manufacturer, Ulyanovsk or Nizhny Novgorod. When disassembling the mirrors for painting, Chinese electric motors were found inside. Let's hope they won't let us down. Price 1300 rubles (as of February 2021) Samara, Rakita market;
3. Mirror control joystick 12.3769. Suitable for regular place. Convenient to manage. Has a “middle” position. The control handle does not stick out, unlike the UAZ one. Price 550 rubles, (as of July 2021) Samara, Rakita market;
4. Block for wires, for 9 females. Price 30 rubles, (as of July 2021) Samara, Rakita market; Why did you buy the wiring harness 2110.8201326-41? I was hoping to save time on installation. Did not work out. Considering that the UAZ joystick was not used and it was necessary to add 15 cm to each mirror. A waste of money. In my opinion. The only positive point is the connectors already connected to ground (black wire) with a ring tip, heating (brown), joystick backlight (yellow) and power (white). We open the connectors behind the mounting block and insert our wires into the gap.
Guys, before starting any electrical work, turn off the power to the system. This will save you from a lot of trouble.
We find the power connector for the heated rear window (gray wire with a red streak), connect it to the brown wire of the harness 2110.8201326-41.
We hang the mass in the designated place. The photo shows.
We insert the white power wire into the gap in the pink wire. In my case, the previous owner inserted a fuse into the circuit for some reason. I didn't take it out. Left it.
We put the yellow one in the power supply gap for the fog lights. Gray wire. I use PTF as a DRL, so the joystick backlight will be in constant mode. It was possible to put it on the cigarette lighter, like my window regulators are made, but I was too lazy to pull additional wires, to be honest. In principle, everything worked out simply at this stage. We don’t climb anywhere, we don’t cut wires. We don’t open anything except the mounting block.
Source
Lada 2110 Badass › Logbook › Lada Priora SE mirrors on Lada 2110. Connection lasts a month.
More than a month ago I started connecting wiring to the mirrors. It is almost impossible to find a connection kit in stores, so SheremetValery and I went to the Kuzbass market. There I easily found a wiring kit, a joystick and SE plugs for the front fenders.
Mirrors from the new Priora model have the following connector:
To begin with, I dismantled the central tunnel. And so, every time I take it apart, I remember with a kind word the one who came up with the idea of making self-tapping screws on the sides of this very tunnel! Then I routed the wiring to the joystick (marked in red):
Then the wires should come out from under and separate on two sides; I put the wires on the right mirror where I marked with an arrow:
In this case, all the snot is then perfectly hidden under standard shields.
Next, I used the connection diagram, taken from the same, not entirely free spaces of the Internet:
I decided to connect the turn signals first. To do this, I dismantled the tidy and began connecting to the red block, and at the same time changed the burnt out light bulbs.
The next step was to pass the wires into the door through this f... hated corrugation, which I successfully tore. Since it was below zero outside, I dropped everything and went home to warm up. Then it turned out that the length of the wiring was not enough, 15-17 centimeters... oof, oh, this “universal kit”. This was the reason for the delayed installation... Well, and also the lack of a garage and the weather:
As soon as the weather returned to normal and I had a free minute, I installed a new corrugation on the driver's door and ran the wires:
It is much easier to remove all the wiring from the door and push everything through the straight corrugation, and then tuck everything into the door. I did the same on the right side. To extend the wires, I soldered pieces to the mirrors, along with old-style connectors. Photos, unfortunately, have not survived. Then I connected everything in the doors:
I took the mass from the left threshold, and + for the mirrors and for the joystick backlight from the cigarette lighter. All that remains is to connect the heating in the fuse block. So, now the question is: Is there a backlight on the joystick, as in the photo below? Otherwise it doesn't work for me.
READ How to connect the Internet to a second SIM card
Everything functions perfectly) I was very pleased with the work done!
Source
Lada 2112 *Dvenarik With Soul* › Logbook › Installation of Priora-2 electric mirrors on a VAZ-2112.
So, review post. Probably the most annoying thing for me in terms of comfort in Dvenash were the mirrors, through which you can see absolutely nothing. Not only are they small in size, but they also have a flat mirror element, which in terms of viewing angle is comparable to a lady’s cosmetic bag, and the absence of heated mirrors, due to which when entering in humid weather, say, from the street into an underground parking lot, the mirrors immediately fogged up and parked it was absolutely unreal. I'm not even talking about parallel parking near the curb or perpendicular parking between cars, the hoods of which were visible in the mirror, well, if it's very cunning, it gets loose in the cabin) In general, brrr, horror. So the decision about the need to install heated spherical mirrors was made within 5 minutes of the start of the trip after the purchase. Moreover, the standard mechanical mirrors do not fold, which caused even slight wear in the narrow courtyard of the cultural capital
Connection
Old style mirrors (without direction indicators) have two connectors (3 and 2 wires):
The mirrors of the new SE model have 1 block of 6 wires:
We cut off the wires from the SE mirror block and solder it according to the diagram:
The process of installing and connecting mirrors of the new SE model is also shown in the video:
Found an error? Select it and press Ctrl+Enter..
So my torment with mirrors began)))) so we have: mirrors from Priora with heating and electrical adjustment, a VAZ 2110 mirror control unit (standard) and wires 10 meters of triple and 10 meters of double wire, 20 pieces of female (small). There aren’t that many connection diagrams on the Internet, but I’ll try to break this whole topic down to its atoms! We take the mirrors and screw them into a standard place, while taking the wires out.
Next, we remove the door trim and start running and jumping around them, trying to pull the wires through the small and thin corrugation connecting the door and the car interior;)
All methods are good here)))) I would prefer to first insert a wire or a thin but strong wire, tie it with the bundle of wires that need to be pulled through and with a slight movement of the hand (you may need the help of a second hand) pull it all out from the other end)))) ) So, the most difficult part of the work is done, and all that remains is to stretch the wires to the mirror control unit. For this we need a Phillips screwdriver 1 pc. We turn this crap away near the feet of the driver and passenger
Carburetor car
When the first VAZ 2110s just started rolling off the production line, their equipment included a carburetor, which was later replaced by an injector, as a more modern and reliable system that ensures economical, stable engine operation. The wiring of an engine with a carburetor includes almost the same car life support systems as with an injector.
Moreover, if you, for example, decide to change the carburetor to an injector, you will not have any special problems; you can install all the electrical equipment quite easily. The fact is that both in older VAZ 2110 and in modern ones, the engine compartment electrics are almost the same.
Electrical circuit of a carburetor car
Moreover, the underhood wiring has identical plugs. Of course, when doing such a DIY alteration, it is best to change the entire wiring harness, since the old ones may have defects and malfunctions invisible to the eye.
The only thing you will have to add when installing the injector, and with it the necessary components, is to lay an additional wire from the fuel pump to the on-board computer.
Such a replacement will be justified, since the carburetor is already an outdated car part. It is less reliable and cannot provide such an accurate supply of the fuel mixture.
