Pinout of the Lada Priora instrument panel
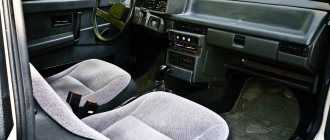
VAZ has noticeably improved the instrument panel of Lada Priora cars in comparison with earlier models that were produced at the plant. When developing the new dashboard, Soft Look plastic was used, similar to high-grade leather material. In addition, it is quite durable and difficult to scratch.
In addition to the instrument panel, such plastic was used on the upper part of the doors. The luxury Lada Priora contains several parts on the dashboard that are varnished black. In addition, Priora is equipped with a GLONASS-GPS navigator with a large color touch screen, which displays navigation-related information necessary for the driver, for example: route system configuration, connection with navigation, audio system interface, etc.
Navigation is controlled using the steering column switch on the right. During reviews of a domestic car, most experts mention that the Priora’s built-in computer is well adapted to the local population, because all information displayed on the display is displayed in the native Russian language.
GLONASS-GPS supports 83 regions of Russia and contains a complete map of their roads, on which about 300,000 objects are marked (gas stations, hotels, cafes, restaurants, shops, car services). The maps show all the routes in sufficient detail, down to the house numbers.
What does the dashboard consist of?
The Priora instrument panel contains all the necessary parts that no modern car can do without:
- regulator of external lighting and internal panel lighting;
- switch for turning, side and headlights;
- signal regulator;
- car instrument cluster;
- windshield wiper and washer regulator.
This is how the dashboard works
In addition, the panel contains an ignition switch connected to the anti-theft system. It contains 3 positions. Among the secondary mechanisms, we can note the presence of regulators for the rear window heating system, alarm and interior cooling. It is also worth mentioning the glove compartment, built-in clock and radio input jack.
Sometimes a certain panel element becomes unusable and you have to look for ways to replace it. In this case, you will need to disassemble the interior. Below is how to disassemble the instrument panel.
How to disassemble the instrument panel?
It often becomes necessary to dismantle the car interior in order to replace a part, for example, backlight bulbs. To do this, first of all, you need to understand how to disassemble the instrument panel. Removing the panel is quite simple. Select the required screwdriver and carefully unscrew the attached hardware.
Disassembling the panel begins with removing the hands on the dial, which can be disconnected with a knife. The main thing is to be careful and not damage the speedometer parts. It is advisable to use cardboard as a holder for glass elements. Replacing the backlight is done by scraping out the cover of the gasket in the speedometer. If you do not need to change the backlight of the sensors, you can simply clean them and leave them brighter.
But in most cases, the driver wants to change the color of some elements in the speedometer and make it much more useful. For example, the backlight of the instrument panel will be able to display the maximum permissible speed or extremely high engine overheating with indicators of a different color. To do this you will need a thin multi-colored cellophane bag.
Where is the speed sensor located on Lada Priora 8 and 16 valves: diagram
One of the most important elements on a Lada Priora car is the speed sensor, the operation of which requires continuous monitoring. Incorrect operation of this sensor can lead to a decrease in traction, increased fuel consumption, and its complete incapacity can create an emergency situation on the road. Experienced motorists are familiar with the situation when, at a speed of 100 km/h, the car’s speedometer slowly slides to 80, while the car continues to move at the same pace. If you have encountered such a situation, then it is advisable to know where the speed sensor is located on the Priora and possible solutions to this malfunction.
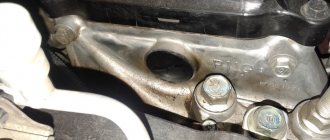
The speed sensor on the Lada Priora is located on the top of the gearbox housing. A faulty sensor transmits incorrect information, which is reflected in the form of incorrect operation of the car.
Checking the speed sensor
Finding out the functionality of this element is much easier for the owner of a Priora with an on-board computer. A message will appear on the display informing you that there is no signal being received from the speed sensor.
It is also easy to understand this without a computer by changes in idle speed, unstable traction, incorrect speedometer readings and increased fuel consumption.
Method No. 1 without removing the sensor
The Priora must be positioned so that one of the wheels does not touch the surface. Next, the contact of the speed sensor should be connected to the voltmeter and the suspended wheel should begin to rotate. The appearance of voltage on the tester will confirm the working condition of the sensor.
Method number 2
To check the sensor using this method, you will need a test lamp. Next, you need to disconnect the terminal that supplies the pulse. We hang the wheel above the surface and, after connecting the test lamp to the positive terminal of the battery on one side and to the impulse terminal on the other, we begin to manually rotate the wheel. If the lamp blinks when the wheel rotates, then you need to look for the fault in other components.
Removing and replacing the speed sensor
To get to it you need to have some tools and a little time. Tools you will need:
- Two screwdrivers: flat and Phillips.
- Socket head for 10.
- Handle with ratchet.
To get to the location of the required element, you need to unscrew the clamps and remove the injector inlet pipe, which is routed from the air filter to the throttle assembly. To do this, unscrew the coupling bolts on both sides of the pipe, unscrew the bolt of the thin hose and remove the entire structure. After completing these steps, you will be able to see the location of the speed sensor.
Once nothing interferes with the view of the speed sensor, you can dismantle it.
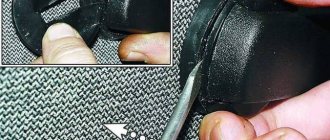
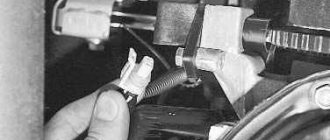
Disconnect the wiring going to the sensor from the power connector. Using a 10 mm socket and a ratchet, unscrew the nut on the stud. Carefully pull the sensor housing out of the seat
If it is difficult to dismantle, you can use a flat-head screwdriver to make it easier.
Carefully pry the housing of the element being removed from below and remove it from the gearbox
Next, we install a new speed sensor and securely fix it, having previously lubricated the sealing rubber with machine oil. We return the air duct pipe to its original position and secure it. Connect power to the battery.
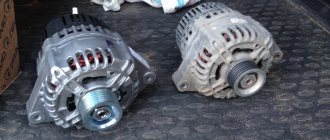
Sensor selection
You need to purchase a new speed sensor to avoid problems. Visually, the sensor intended for the Priora is almost no different from the Kalina element, and many sellers claim that one model can easily be replaced by another model. Sensors that look similar have completely different fillings, and after installing an inappropriate element, frequent malfunctions in the operation of the ECU and incorrect readings on the speedometer will occur. Therefore, before purchasing, you need to carefully study the old part, rewrite the catalog number and purchase exactly the same model.
https://youtube.com/watch?v=7drLW_Qlgj4
Priora dashboard indicators with interpretation
A separate category of indicators is mainly responsible for indicating the status of on-board systems and mechanisms. Such symbols do not indicate serious damage, they simply notify the driver.
The description and full explanation of the indicators looks like this.
| Visual Identification | Decoding |
| Fuel level indicator | Indicates the remaining gasoline in the fuel tank. When the supply is exhausted, the following sign lights up. |
| This indicator indicates that there are less than 10 liters of fuel left in the gas tank and the car needs to be refueled urgently. Initially, the red symbol of the gas station flashes, but when the fuel reaches 5-6 liters, it lights up constantly. | |
| On VAZ models, it indicates a low battery or a strong drop in voltage in the network. It usually appears after prolonged attempts to start the car in the cold. To fix it, just replace or charge the battery. | |
| The key against the background of the red car indicates that the immobilizer is turned on. This option is not available on 2008 models. Depending on the configuration, a green key may flash on the car’s dashboard. If the lamp blinks, the system is faulty. | |
| Standard turn signal activation indicators. The indicator lights light up for left or right turns respectively. If the indicator lights blink simultaneously, the hazard warning system is on (the red triangle lights up in parallel). | |
| A similar indicator lights up when the car is parked with the handbrake. It may also indicate a serious malfunction of the engine. | |
| The ABS system is not working correctly or the wheel is punctured. The system is present in cars optionally and is not directly related to the brake system. | |
| The red watering can is marked accordingly. The light indicates a critical drop in engine oil pressure. If the indicator goes out after the car warms up and the speed of the power plant is equalized, everything is in order. | |
| The green symbol indicates the activation of the side lights. | |
| The car's headlights are in long range mode. Lights up only when the mode is activated. | |
| Antifreeze temperature dial indicator | The indicator is installed on all machines without exception and displays the actual antifreeze temperature. |
How to disassemble the instrument panel?
It often becomes necessary to dismantle the car interior in order to replace a part, for example, backlight bulbs. To do this, first of all, you need to understand how to disassemble the instrument panel. Removing the panel is quite simple. Select the required screwdriver and carefully unscrew the attached hardware.
Disassembling the panel begins with removing the hands on the dial, which can be disconnected with a knife. The main thing is to be careful and not damage the speedometer parts. It is advisable to use cardboard as a holder for glass elements. Replacing the backlight is done by scraping out the cover of the gasket in the speedometer. If you do not need to change the backlight of the sensors, you can simply clean them and leave them brighter.
But in most cases, the driver wants to change the color of some elements in the speedometer and make it much more useful. For example, the backlight of the instrument panel will be able to display the maximum permissible speed or extremely high engine overheating with indicators of a different color. To do this you will need a thin multi-colored cellophane bag.
You need to use a small piece of brightly colored cellophane to cover the indicator you are interested in on the inside of the dial. Dashboard lighting is limited to more than just highlighting indicators. Many motorists try to ensure that the lighting of their devices is uniform.
To achieve brighter and more even illumination, it is necessary to cover the panel with a special LED strip, which must be connected to the stock backlight wires in accordance with all the rules of current resistance. The set of instruments on the Priora can be easily supplemented with the latest method of illuminating the needles.
You can use CMD diodes, which can be easily fused into the glass panel using a soldering iron. To do this, we disassemble the dial and begin soldering directly under the base of the hands. The contact wires must be connected from the reverse side. If the instrument panel in Priora is broken, qualified assistance may be needed to repair it.
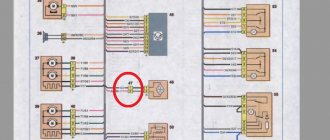
But you can easily do it yourself. To do this, you will need a panel pinout, that is, a diagram indicating the correspondence of the contacts with certain car devices. It looks like this:
- 1 — power steering;
- 4 - hand brake;
- 7 — external lighting regulator;
- 8 — right turn signal;
- 9 — left turn signal;
- 12,13 — immobilizer antenna sockets (A and B);
- 14 — mileage reset regulator;
- 15 — brake fluid regulator;
- 18 — instrument panel backlight control;
- 20 — battery terminal 30;
- 21 — battery terminal 15;
- 23,24 — forward and backward buttons on the steering column;
- 25,26 — outside temperature regulators (- / +);
- 27 — fuel tank regulator;
- 31 - panel diagnostic service.
Pinout numbers that were not specified are backup pins.
How to remove a beard on Prior 2?
We suggest you familiarize yourself with the topic: “how to remove a beard on a Prior 2?”, including the latest trends.
| If you need to install sound insulation on the floor, or paint, or reupholster the interior plastic of the Lada Priora, then you first need to remove the central tunnel (beard). The procedure is not complicated and you can easily do it without an assistant in 30 minutes. |
Tools required: 10mm socket, Phillips screwdriver, tall 10mm socket, flathead screwdriver.
Disconnect the negative terminal from the battery, and for ease of work you can remove the front seats. Then:
- Unscrew the nut securing the air duct to the feet of passengers in the rear seat using a 10mm socket.
- Remove the air duct. Remove the second air duct on the right side in the same way.
- Raise the armrest and pry off the armrest hinge pad.
- Remove the armrest of the Lada Priora.
- Unclip the latches to pry open the container for storing small items. Get him out of the tunnel.
- Unscrew the 2 bolts securing the armrest hinge using a 10mm socket and remove it.
- Unscrew the 4 screws securing the floor tunnel using a Phillips screwdriver.
- Through the opening, press the latch and remove the block with wires from the trunk lock control button.
- Unscrew the 2 tunnel fastening nuts using a high 10mm socket.
- Place the front seats in place and move them forward as far as possible. Unscrew the self-tapping screw securing the tunnel to the base on the left and similarly on the right, using a Phillips screwdriver.
- Remove the plastic plug at the bottom of the cup holder using a flathead screwdriver.
- Unscrew the tunnel fastening screw using a Phillips screwdriver.
- Unscrew the 2 screws securing the floor tunnel on the left and similarly on the right, using a Phillips screwdriver.
- Remove the plug in the handbrake housing using a slotted screwdriver.
- Unscrew the screw securing the side panel of the tunnel using a Phillips screwdriver.
- Remove the left tunnel shield, and similarly the right shield.
- Unscrew the screw securing the front part of the tunnel using a Phillips screwdriver. Unscrew the screw on the right side in the same way.
- Unclip the latches and remove the Priora gearbox cover. Leave the frame with the cover on the gearshift lever.
- Remove the 2 screws securing the tunnel to the instrument panel console using a Phillips screwdriver.
- Lift up the tunnel.
- Press the latch and disconnect the block with wires from the cigarette lighter. Remove the central tunnel of the Priora.
Installation of the tunnel lining is carried out in the reverse order.
The question of removing the center console on a Priora worries quite a few car owners, since this has to be done quite often and here’s why. The fact is that some control elements, such as a clock, a heater control unit, or the central heater deflector, cannot be replaced without removing the console.
To remove it, you will need a minimum of tools and the main one, which you simply cannot do without - a Phillips screwdriver.
Removing and installing the center console of the instrument panel on a Priora
The center console trim on cars with “standard” and “luxury” configurations may differ in the size of the cutout for the radio. Otherwise, there will be no difference in fastenings. Moreover, many owners cut a hole out of a regular one for installing a 2-din radio and everything works out quite successfully. So, let’s get closer to the point - if you have a radio installed, you must first remove it, using special removable keys that usually come with it.
After the niche is free, pressing on the button connectors from the inside, we take them out, approximately as can be seen in the photo below.
Then we disconnect the block with wires from the buttons that go to the console.
Next, you need to remove the ashtray by pulling it with a certain force from each edge in the open state, since it is attached along guides in the grooves:
After this, two fastening screws are clearly visible in the recess, which, of course, will need to be unscrewed.
In this case, we are dealing with a 2-din console that has already been cut out, so the two remaining screws are not visible, and only a little lower are the attachment points that were once there visible. In the photo above they are visible - slightly in the recess. If you have everything in factory form, then everything will look like this - a couple of screws are under the cover:
How to remove the instrument panel on a Lada Priora yourself
In comparison with earlier car models that were produced at the plant, VAZ has significantly improved the dashboard in Lada Priora car models. During the development of the new instrument panel, the manufacturer used SoftLook plastic material, which in its appearance is very reminiscent of high-quality leather. In addition, this material is highly durable and difficult to damage or scratch.
The car manufacturer decided to use plastic of this type, in addition to the dashboard, also in the door trim. The dashboard of Priora model cars contains elements that are varnished black. In addition, the cars are equipped with a GLONASS-GPS navigator, the advantage of which is a large touch screen. The color screen displays the necessary navigation information: audio system interface, navigation connection, route system configuration, and so on.
To control the navigation system, there is a steering column switch on the right side, which allows you to comfortably carry out the necessary actions. Most experts who reviewed the domestic car noted that Priora is equipped with a high-quality built-in computer
This device is ideally suited for users, and the information is displayed on the screen in Russian, which is very important for many drivers
It is also worth noting that the navigator has full support for 83 regions of the country. It has a built-in detailed road map, where there are more than 300 thousand different objects for the driver. For example, a user can easily find a gas station, car service center, hotel, cafe or restaurant nearby.
Description of the dashboard
The dashboard contains the following elements:
- Unit for controlling instrument lighting and external lighting.
- Horn switch.
- Switch for turn signals and headlights.
- Instrument cluster for Lada Priora.
- Lever for glass washer and wiper.
There is also an ignition switch on the instrument panel, which is combined with an anti-theft device. On the Lada Priora it has three positions. In addition, the instrument panel contains buttons and mechanisms such as a heated switch on the rear window, a clock, an alarm switch, a glove box lid, a tape recorder socket, an ashtray, a fan control unit, etc.
Tuning for the dashboard (dashboard) can be done with your own hands if you want to change the lighting for the instruments. In this case, the panel must be removed. The answer to the question: “How to remove the panel?” quite simple - using a screwdriver. Then we unscrew the fastening screws, disassemble the panel, remove the hands (you can use a knife, placing a piece of cardboard on the dial), and separate the cover from the plexiglass.
The process of removing the console and dashboard on a Priora
How to remove the console from the car? You need to be able to do this process and know how to do it if you are replacing an old console with a new one. You need to take into account the fact that in this case the console and instrument panel are a single element in the car, so you will have to work hard and get used to removing this part.
In order to properly tune the interior, we disassemble these devices. You will need sets of wrenches, both spanners and open-end wrenches, and also a screwdriver. We remove the console on a Priora in cases where, for example, you need to connect a DVR to a panel with navigation.
Car enthusiasts are pleased that the console trim is quite easy to remove. Removing the panel will be a fairly simple task, and it is designed to be able to quickly and easily reach the various parts and devices behind it and penetrate the dashboard.
The console is secured with 4 screws. Two of them are located below the ashtray, and two more are slightly lower than the glove compartment. The car often already has a radio installed in advance, so you need to carefully disconnect it, freeing the wiring first. Do not touch cables with the navigation panel. Then the cover is removed. You need to apply a little force, because... At the top of the lining there are special tight holders.
Because If the console and dashboard with navigation are removed together, you need to disconnect the battery. Then you should remove the steering wheel on the Priora along with the adjacent steering column switches. Now a special cover is removed from the floor tunnel. To make a replacement, you need to unscrew the screws on the side from the center and pull out the instrument panel.
Then the nozzles intended for blowing glass are removed. This will allow you to unscrew the nuts for securing the front panel on the Priora. The next step is to remove the cover from the safety block (here you need to unscrew all the latches). Then the amplifier is removed. You need to be careful not to touch the dashboard lights.
It will be necessary to unscrew all the fastening screws that are located near the instrument panel and on both sides of the steering column. Then the pads themselves are disconnected. To do this, the clamps near the dashboard are moved. The cables from the ignition switch and the steering wheel are removed.
Additional nuts near the instrument panel wires also need to be unscrewed. Next, the harness is removed, and it is gradually disconnected one by one from all elements near the instrument panel. The instrument cluster itself is removed along with the console. It’s better to do this not alone, but with an assistant, because... the number of all devices here is not small, and they are quite heavy all together.
All these manipulations to remove the devices will not take 10 minutes. It is best to take the advice of experienced professionals and study the instructions in advance, because... the instrument combination with its various cables and screws will be described there, this will make the work not so difficult.
Dashboard
To display the technical health of the vehicle and monitor its condition, there are visual indicators that are located on the dashboard. If any breakdown occurs in the car, a certain sensor will notify the driver.
The Priora dashboard has maximum information content and contains the required number of indicators. Each sensor on the panel is illuminated from the inside in a different color; alarm signals are usually colored red.
The lighting is provided by a set of light bulbs mounted on the other side of the dashboard.
Indicator interpretation
In order to easily navigate this particular state of the car, it is necessary to understand the purpose of all indicators. This will also help to understand the breakdown of the device and its cause. The following signal indicators are located on the Priora dashboard:
- speedometer – informs about the speed at which the vehicle is moving;
- tachometer - shows the crankshaft revolutions per minute, the red zone reports a critical excess of the indicator;
- battery condition – the normal state of the sensor is off; if it lights up, then there is a problem with the battery itself or the power supply (except for the moment the ignition is turned on);
- oil pressure – lights up when the lubricating fluid pressure in the engine is critically low; further operation of the vehicle is highly discouraged;
- parking brake sensor – yellow indicates that it is on;
- coolant temperature – normal needle position is 80-90 ℃, above 100 ℃ the cooling system overheats, engine operation is prohibited;
- presence of fuel in the gas tank – informs about the amount of gasoline.
Additional sensors
A few more important information indicators on the Priora dashboard:
- button for controlling the car’s daily mileage and navigation between modes;
- alarm - the normal position is characterized by a pressed button without light indication;
- a malfunction in the power steering - if this device breaks down, the sensor will signal when the ignition is on;
- high beam headlight indicator – lights up blue when activated;
- side lights – notifies that the side lights of the vehicle are on;
- faulty airbags - when the ignition is turned on, an indicator lights up on the Priora dashboard, the system scans the integrity of the airbags and if the result is satisfactory, the indicator goes out;
- belt sensor – signals a violation of driving safety, the driver is not fastened with an appropriate belt;
- brake system malfunction - vehicle operation is prohibited;
- breakdowns in the ABS system - you can move, the braking system is normal, but it is better to eliminate the problem of the braking assistance mode;
- internal combustion engine malfunction (Check Engine) - an extensive list of malfunctions that affect the operation of the engine; prompt diagnosis and immediate repair are required.
To illuminate the instruments in this vehicle, two types of light bulbs are installed: conventional and with a VDO category socket.
Sometimes they burn out, the reason may be overvoltage in the car's electrical network, strong vibration of the body, the end of their service life or poor quality of workmanship (which is most often).
To determine the type of light bulb being mounted, you need to remove the instrument panel and unscrew the burnt element on its back side. The light components themselves are the same. However, their contacts, in the form of very thin wires, are soldered to the cartridge contacts.
Replacing light bulbs
Replacing the Priora dashboard light bulbs can be done in two ways. The first is the easiest: just buy a light bulb along with a socket and easily replace it. In the second case, you will have to arm yourself with a soldering iron and patience, since the wire contacts of the light element are soldered to the socket.
It is necessary to unsolder the old contacts, free the socket from the burnt out lamp and solder a new one
It is important to pay attention to polarity during assembly. If connected incorrectly, the light bulb will burn out and you will have to start all over again, including purchasing a new light element
Disassembly and assembly of the instrument panel of the VAZ 2170 Priora
- Repair manuals
- Repair manual for VAZ 2170 (Priora) 2004+.
- Disassembly and assembly of the instrument panel
You will need flat and Phillips blade screwdrivers.
| 1. Remove the three screws securing the windshield defroster... | 2. ...and remove the deflector. |
| 3. Remove two screws... | 4. ...and remove the left nozzle of the ventilation and heating system. |
5. Remove the right nozzle in the same way.
| 6. Use a screwdriver to pry the rear window heating switch out of the console trim. | 7. Disconnect the wiring harness connector from the heated rear window switch. |
| 8. Remove the ashtray. | 9. Remove the pins of the glove compartment cover from the holes in the console trim and remove the cover. |
| 10. Remove the four screws securing the console trim. | 11. Use a screwdriver to pry... |
| 12. ...and remove the container from the instrument panel (or remove the radio, if installed). | 13. Disconnect the audio system harness connectors. |
| 14. Remove the two screws securing the console trim located on the sides of the window under the radio. | 15. Remove the console trim, overcoming the resistance of the spring holders in its upper part. |
| 16. Squeeze out from the back side... | 17. ...and remove the hazard warning switch. |
| 18. Press the clamp of the wiring harness block... | 19. ...and disconnect the block from the switch. |
| 20. Disconnect the wiring harness connectors from the clock... | 21. ...from the heater motor switch... |
| 22. ...and from the heater control unit. | 23. Press the latch... |
| 24. ...and remove the clock from the console trim. | 25. Remove the four screws securing the heater control unit to the console trim... |
| 26. ...and remove the block. | 27. Remove the two screws securing the central nozzle of the ventilation system to the console trim. |
| 28. Press the four latches on top... | 29. ...and four clamps below the nozzle... |
| 30. ...and then remove the nozzle. | 31. Remove the screw securing the fuse and relay box... |
| 32. ...and remove the block. | 33. Disconnect the wiring harness connector from the glove compartment light switch. |
| 34. Remove the screw securing the switch... | 35. ...and remove the switch. |
| 36. Use a screwdriver to pry up the glove compartment light and remove it from the instrument panel. | 37. Press the latch and disconnect the wiring harness block from the lampshade. |
| 38. Remove the two screws securing the left air duct of the ventilation system... | 39. ...and remove the air duct. |
40. Remove the right air duct in the same way.
| 41. Unscrew the two screws securing the air flow distribution damper gearmotor, remove the gearmotor... | 42. ...and disconnect the wiring harness block. |
| 43. Remove the two screws securing the foot heating air duct... | 44. ...and remove the air line. |
| 45. Remove the two screws securing the air heating distributor... | 46. ...and remove the distributor. |
47. Assemble the instrument panel in the reverse order of disassembly.
↓ Comments ↓
1. Car structure
1.0 Car structure 1.1 General information about the car 1.2 Passport data 1.3 Car keys 1.4. Controls 1.5. Heating and ventilation of the cabin 1.6 Ensuring a comfortable air temperature in the cabin 1.7. Doors 1.8. Passive safety equipment on the car 1.9. Seats
2. Recommendations for use
2.0 Recommendations for use 2.1. Safety rules and recommendations 2.2 Running in the car 2.3 Operating the car during the warranty period 2.4. Preparing the car for departure
3. Problems along the way
3.0 Malfunctions along the way 3.1. The engine does not start 3.2 Malfunctions of the fuel injection system 3.3 Idle speed has disappeared 3.4. Interruptions in the operation of the 3.5 engine. The car moves jerkily 3.6 The car accelerates poorly 3.7 The engine stalled while driving 3.8. Oil pressure dropped to 3.9. Engine overheating 3.10. The battery does not recharge 3.13. Knocks in the engine 3.16. Wheel puncture
4. Maintenance
4.0 Maintenance 4.1. General provisions 4.2. Inspection work 4.3. Lubrication and filling works 4.4. Diagnostic work 4.5. Repair and adjustment work
5. Engine
5.0 Engine 5.1 Design features 5.2 Possible engine malfunctions, their causes and solutions 5.3 Useful tips 5.4 Checking compression in the cylinders 5.5 Removing and installing the decorative engine casing 5.6 Removing and installing the engine splash guard 5.7 Installing the piston of the first cylinder to the TDC position of the compression stroke 5.8 Replacing the drive belt gas distribution mechanism and tension roller 5.9 Replacing the power unit supports 5.11. Replacing engine seals 5.13. Engine cylinder head 5.15. Engine repair 5.16. Lubrication system 5.17. Cooling system 5.18. Power supply system 5.19. Design Features
6. Transmission
6.0 Transmission 6.1. Clutch 6.2. Gearbox 6.3. Front wheel drives
7. Chassis
7.0 Chassis 7.1. Front suspension 7.2. Rear suspension
8. Steering
8.0 Steering 8.1 Design features 8.2 Possible steering malfunctions, their causes and solutions 8.3. Steering column 8.4. Steering linkage 8.5. Steering gear
9. Brake system
9.0 Brake system 9.1 Design features 9.2 Possible malfunctions of the brake system, their causes and solutions 9.3 Bleeding the brake system hydraulic drive 9.4 Removing and installing the vacuum brake booster 9.5 Replacing the brake pedal axle bushings 9.6. Main brake cylinder 9.7. Front wheel brakes 9.8. Braking mechanisms of the rear wheels 9.9. Pressure regulator 9.10. Brake hoses and tubes 9.11. Parking brake
10. Electrical equipment
10.0 Electrical equipment 10.1 Design features 10.2. Battery 10.3. Mounting block (relays and fuses) 10.4. Generator 10.5. Starter 10.6. Ignition switch (lock) 10.7. Electronic engine control system (ECM) 10.8. Ignition system 10.9. Lighting, light and sound signaling 10.10. Windshield cleaner 10.11. Washer reservoir 10.12. Electric fan of the engine cooling system 10.13. Electric motor of the heating and ventilation system fan 10.15. Cigarette lighter 10.16. Instrument cluster 10.18. Electronic anti-theft remote control system 10.19. Immobilizer 10.21. Replacing sensors and switches
11. Body
11.0 Body 11.1 Design features 11.2 Possible body malfunctions, their causes and solutions 11.3 Removing and installing windshield frame lining 11.4 Removing and installing soundproofing upholstery in the engine compartment 11.5. Removing and installing bumpers 11.6 Removing and installing the fender liner and protective wing cover 11.7 Removing and installing the front fender 11.8 Removing and installing decorative sill trims 11.9. Hood 11.10. Trunk lid 11.11. Doors 11.12. Seats 11.13. Seat belts 11.14. Rear view mirrors 11.15. Interior fittings 11.16. Instrument panel 11.17. Heater 11.20. Body care
12. Applications
12.0 Appendix 12.1 Appendix 1. Tightening torques of threaded connections, Nm 12.2 Appendix 2. Fuels, lubricants and operating fluids 12.3 Appendix 3. Nominal filling volumes 12.4 Appendix 4. Basic data for adjustments and monitoring 12.5 Appendix 5. Spark plugs used on vehicles 12.6 Appendix 6. Lamps used on a car 12.7 Appendix 7. What you need to have in a car 12.8 Appendix 8. Tools used when repairing a car
13. Electrical diagrams
13.0 Electrical Diagrams 13.1 Diagram 1. Instrument Panel Harness Connections 13.2 Diagram 2. Vehicle Front Wire Harness Connections 13.3 Diagram 3. Engine Electronic Control System (ECM) Harness Connections 13.4 Diagram 4. Vehicle Rear Wire Harness Connections 13.5 Diagram 5. Light Harness Connections license plate light 13.6 Diagram 6. Left front door wiring harness connections 13.7 Diagram 7. Right front door wiring harness connections 13.8 Diagram 8. Rear door wiring harness connections
Torpedo for VAZ 2110 from Priors for VAZ
result!
Today my story is about installing a “torpedo” panel from a Lada Priora. All of you (who drive VAZ 2110,2111,2112)
Do you know what advantages this panel has, how convenient, practical and technologically sophisticated it is (possibly), someone just wants to install it, someone installs it and is happy, someone modifies it, and someone immediately installs the panel from “ Priors No. 2.”
But due to the pricing of our valiant “showdowns” as well as Avito users and the not particularly high availability of purchasing the panel
Priora 2,
it was decided to purchase a panel from
Priora 1.
04/26/2018 After searching, I found the right option and made an appointment. The path was not easy, I had to go to another city “Perm - Kungur” 115 km. from my location to the city. Well, okay, on the road - the road! As always happens on the road, strange things happen that you don’t even expect. More precisely, on the road, my engine temperature gauge began to jump spontaneously, up and down! ! ! I’m alone, I’ve already driven more than half the way, I don’t know what to do. I stopped to look under the hood, opened it - everything is in order, there is fluid in the barrel, there are no fluid leaks, the connector on the sensor is in place, in order to make sure that everything is in order, I removed the connector - put it in place, checked the instrument panel
— everything is in order, the arrow is at 90* degrees.
We close the hood, get into the car and drive on, BUT! The arrow starts jumping again!
We “forget” this and move on, but we don’t put the problem off for a long time, we will look into it, most likely the “sensor” of the engine coolant temperature has failed - we need to replace it.
An hour's journey and we are there. Meeting, we look at the product, we discuss the terms and price, handshakes and I become the owner of the “Prior 1” panel
, Hurray, comrades, Hurray.
The kit consisted of - the panel itself, the tidy, a tunnel, a harness under the panel, fastening screws and bolts, a ceiling lamp + a pocket for glasses, a ceiling harness, a central (passenger) lamp, rear windows (left-right), door trims (front-rear) ) + accessories for them.
We pack everything into the car and hit the road to work.
I went to work, laid everything out and went home. 04/27/2018 The next day I collected the material I needed, tools, installation instructions, as well as electrical diagrams. I set myself up to collect it day and night, or rather, I’ll start on Friday, continue on Saturday, and most likely on Sunday I’ll try to go home by car! And so the end of the shift is 17:00.
I decided to wash the whole thing since everything was covered in dust and a little dirt. Let's put it in order
While everything dries after washing, we go to disassemble the car.
Let's begin!
What chaos and a lot of dirt!
It’s so dirty, you’ll need to vacuum everything!
After tidying up the cabin, I began to remove the panel. This turned out to be not particularly quick and pleasant; a lot of bad and unkind words were said, BUT!
Things went as they should, time flew
sooooo
fast!
I didn’t take much pictures of how I took off the panel, it wasn’t that convenient and I most likely forgot. After I took it off I started fiddling with the wires and circuits.
This miracle without a panel)
We cut, implement, merge. We are waiting for a miracle!
At some point I decided to take a break with coffee and a snack, collect some information from the Internet and hit the road again.
Om nom nom
Let's sketch out the panel from the Priora.
fitting.
replacement
replacement
wire layout.
At some point I started to get bored with everything, since this whole process is still long and tedious, laughter-wire-scheme-wire and so on. I no longer took pictures of what I did and how I did it, how I connected the devices, the stove control, the alarm system and everything else. I was very exhausted, my head was hard to think, there were problems with starting, but I quickly solved them because I thought that I had mixed up the wires, but no, I just forgot to connect one contact from the alarm system, because of this contact I got blocked, but everything worked out and after a while At that time, I threw on the seat, screwed what was needed, went home and only on the way I remembered that I had to at least somehow show that the panel was standing, the instruments were working, I took a photo on the way.
Left the workshop.
All that remains is to install various types of plastic, put the interior back together and resolve the issue of some light bulbs on the dashboard.
And so, of course, it’s good that everything worked out, but without experience, everything took a very long time to assemble and install, there were difficulties and all sorts of nuances,
BUT! everything is decided - everything is established.
What do the icons on the Priora dashboard mean?
There is a separate group of icons indicating the presence of breakdowns and malfunctions within the vehicle’s on-board systems. The emblems are displayed in the space surrounding the main instruments. The following is a transcript of the signs with photo accompaniment.
| Icon | Decoding |
| If the car with the key is flashing, this indicates a malfunction or lack of response from the immobilizer. To fix the problem you need to check the block. | |
| An exclamation mark surrounded by brackets blinks on the dashboard, indicating a malfunction in the brake system or ABS. A similar indicator located slightly higher may indicate an incorrectly pumped brake system. | |
| The electric power steering is faulty or defects have been detected in the operation of the mechanism. Mostly installed on cars after 2011 model year. | |
| Failure in the wiring or units responsible for controlling the airbags. If the icon lights up after starting the engine, the specified element may not work under shock load. | |
| Seat belts are not fastened. Can also be red. At the same time, it is accompanied by a sound signal. | |
| The passenger airbag is not activated or is faulty. Usually lights up when the engine starts. | |
| If the indicator blinks constantly, this indicates a battery failure or critical discharge. | |
| An urgent check of all engine systems is necessary - a critical malfunction has been detected. |
The reasons why these icons may light up always require driver intervention. Ignoring machine signals can cause serious damage.
Depending on the year of manufacture and configuration, the interpretation of the instrument panel indicators may differ. The exact definition can be found in the vehicle's service manual.
What lamps are installed in the Priora dashboard
Depending on the year of manufacture, Lada Priora can be equipped with both lamps with a conventional socket and with a VDO socket. To accurately determine the lamps, you must first remove the shield and determine the type of socket. The lamps in the sockets are the same, however, from the factory, the lamp mustaches are soldered to the socket and to replace the lamp, you need to unsolder or pull out the old one and install a new lamp in its place, while soldering the mustaches.
However, you can take a simpler route by purchasing ready-made lamps with sockets. Note that the lamps are installed in them without soldering the mustaches. That is, if the lamps burn out further, you simply change the lamp and that’s it.
A regular lamp socket looks like this
This is what a lamp with a VDO socket
Possible faults
What instrument panel malfunctions may Lad Prior car owners encounter:
- The speedometer or tachometer needle does not work; when the speed increases, the needles continue to lie in place. In this case, first of all, it is necessary to check the signal that comes from the speedometer regulator; perhaps there is a break somewhere in the circuit or the sensor itself has failed. There is a possibility that the sensor will have to be replaced.
- The daily mileage or fuel level sensor does not work. Yes, these components are different, but they are both closely related to the speedometer, so follow all the instructions above. Checking the signal from the sensor will be relevant if power is supplied to the panel. It would also be a good idea to check fuses F10 and F20; they may need to be replaced.
- The device generally does not work correctly, the sensors show incorrect data. The problem may be with the processor itself or with a short in the circuit; this needs to be checked by an electrician. There is a possibility that the cause of the problem is a bad mass.
- Coolant temperature sensor. Check your contacts.
Panel malfunctions: signs and causes
What malfunctions can occur in the operation of the control panel:
- The backlight does not light up. There may be several reasons - damage to the device’s power supply circuit, a short circuit in the system, failure of the control panel. But one of the most common reasons in this case is the burnout of the safety device. The marking fuse F10 is located in the mounting block; it must be checked first.
- The sensors do not work - the arrows on the speedometer and tachometer do not rise. The reason may be a bad signal coming from the speed sensor or crankshaft sensor to the dashboard. It is necessary to check the electrical circuit for breaks. Much less often the problem lies in a failed sensor.
- The controller for the volume of gasoline in the tank and the engine temperature do not work. As in the previous case, the cause of the malfunction may lie directly in the sensors themselves. The fuel volume controller is located in the tank with the fuel pump, and the coolant sensor is located in the cylinder head. Before replacing, we recommend checking the quality of the connection and contacts - perhaps they are simply damaged or oxidized, as a result of which the sensors do not work. The reason may also be a damaged electrical circuit; in this case, you will need to check the wiring.
- It happens that the dashboard as a whole works correctly, but the controllers transmit incorrect information. The reason may lie in the performance of the processor or a short circuit in the wiring. Sometimes the problem lies in bad mass.
- The backlight is partially not working. Most likely, the reason lies in the burnout of the lighting sources; they will need to be replaced.
Instructions for dismantling and repair
Dismantling the tidy may be required to perform tuning, replacing backlight bulbs or repair work.
You can find out how to remove the instrument panel on a Lada Kalina from the car's operating instructions. LED instrument lighting
Before disassembling the Kalina 2 instrument panel, you need to prepare the following materials and tools:
- a set of keys;
- Phillips and flat screwdriver;
- replacement parts and bulbs.
Removing the Kalina torpedo
Algorithm of actions
The disassembly procedure consists of the following steps:
- Using a Phillips screwdriver, you need to unscrew two self-tapping screws.
- Next, you need to remove the trim from the instrument panel.
- At the next stage, the spring clips are removed from the clutch.
- After unscrewing two screws, you need to slide the panel towards you.
- The latch holding the block must be pryed up using a flat-head screwdriver and turned.
- Next, you need to disconnect the connectors with the wires and you can safely remove the tidy.
- To remove the glass from the instrument panel, unclip the plastic clips.
Thus, knowing how to disassemble the panel on Kalina, you can repair it yourself if the backlight or signal lights do not light up.
Installation
Replacing the old instrument panel without CAN with a dashboard with navigation without CAN (2170-3801010-50) is carried out without modifications. We remove the old panel and install a new one in its place, insert the connector with wires, connect the antenna (we fix it on the roof) and, if necessary, change the right steering column switch.
If the old instrument cluster without navigation, but with CAN, and instead of it it is planned to install a new dashboard with navigation with CAN (2170-3801010-60), then you need to rearrange contacts 10-11 to 28-29 (if after connecting it still does not work, change 28 and 29 places). See instrument cluster pinout.
After installing the new instrument panel, the mileage will be reset to zero.
Navigation in the instrument panel runs on Windows CE 6.0 along with Navitel software. It is possible to update the software and download navigation maps from a USB card via a special USB input. Operating the car will become much more pleasant, the only drawback is the high price.
Have you ever had to install a new type of instrument panel with navigation on a Priora or Kalina? What difficulties did you encounter during this revision? Let us remind you that on the Lada.online website you can find other instructions on tuning and modifying Lada Priora or Kalina cars, for example, how to adjust the electronic gas pedal or improve the brakes without modifications.
Keywords: instrument panel Lada Priora | dashboard of Lada Kalina | torpedo Lada Priora | Lada Kalina torpedo
+13
Found an error? Select it and press Ctrl+Enter..
Is it possible to install LED lamps?
Instead of conventional dashboard lamps, some owners install LED ones. The advantage of them is that they provide brighter light and you can choose lamps of different colors. However, some LED lamps are longer than conventional lamps, so when installed in the instrument panel, they fit closer to the light filter and create a bright spot. But at the same time, the panel itself and the indicators become brighter.
Advantages of LEDs in the shield
- brighter light, allowing better illumination of devices
- Possibility of choosing lamps of different colors at will
- longer lifespan of quality LEDs
- Too bright LED lamps create glare on the panel, which does not look very good
- sometimes the panel looks too bright and distracts from movement
- The bright light of the panel can cause eye fatigue
When installing LED lamps in the instrument panel on a Priora. Brightness adjustment does not work very well due to the fact that diodes consume very little energy and therefore, unlike conventional lamps, do not lose brightness when the current supply is reduced.
How to remove a torpedo on a Priora? Practical method and sequence of actions"
Knowing how to remove a torpedo on a Priora, you no longer have to worry about calling a specialist. As a rule, this procedure is carried out before soundproofing the engine compartment or due to the constriction of the torpedo and. After carefully studying the instructions that we provide below, you can safely get to work. Everything will work out – the main thing is desire and a little patience. How to remove a torpedo on a Priora?
. Some suggest that special tools are needed. We hasten to calm you down. Nothing like this. It is enough to have a minimum set on hand: a screwdriver with two ends (curly/flat), a 10-point socket and pliers.
On the other hand, this operation can be called painstaking. It will require maximum patience and care. Under no circumstances should you rush.
Algorithm for dismantling a torpedo
- The battery needs to be de-energized;
- Turn the three locks of the mounting block cover 90 degrees;
- We snap off the latches that hold the fuse box cover;
- If the Priora has a radio installed, then first of all you will need to remove it. This is easy to do: using special pullers that fit into the sides of the device. After this, all that remains is to separate the ends of the pullers and pull them towards you;
- After dismantling the radio, do not forget to disconnect all existing connectors;
- The time has come to remove the metal frame where the radio was fixed;
- We see two self-tapping screws on the sides of the lining of the Priora’s center console. We turn them inside out;
- In the normal place where the radio was, we find two more screws. We also unscrew them;
- We remove the ashtray. To dismantle it easily, you need to press one side forward and pull the other side towards you;
- In the place where the ashtray stood, we see two more screws, which we also unscrew;
- We remove the instrument scales;
- We remove the part of the torpedo that will connect to the central tunnel and the floor;
- The current sources will also need to be disconnected from the power steering ();
- Clamps made of plastic hold the upholstery on the left front side. We snap them off and do the same on the right side;
- Find the driver's door window blower nozzle and pry it off with a screwdriver. Here it is highly recommended to use a method that will help not damage or scratch anything. You need to place some soft material under the screwdriver;
- The car panel has a top mount, which is located in the cavity under the nozzle (for this we removed it). Here you need to use a 10mm head. We do the same on the right side;
- With the same tool you will need to unscrew the ground wire bolt.
- It is worth noting that most of the operation has already been done. You can have a smoke and relax a bit.
How to easily and quickly remove the dashboard on a VAZ 2110 with your own hands?
How to remove a dashboard on a VAZ-2110: step-by-step instructions
Without a doubt, the dashboard is the most noticeable interior detail in a car, because it is located right in front of the eyes of passengers and drivers. The need to remove the dashboard on a VAZ 2110 may arise for car owners for a variety of reasons.
So, by removing this part, you can get full access to all the electrical components of your vehicle, replace the burnt-out wiring with a new one, connect additional devices or lighting, install a Euro trim or sound insulation.
Options for replacing the standard VAZ 2110 panel:
Old-style panel trim for VAZ 2110 Panel trim for VAZ 2110 Euro-2 Panel trim for VAZ 2110 Euro-1 Panel trim for VAZ 2110 Euro-3 Panel chestnut trim for VAZ 2110 (instrument panel in the center) Panel chestnut trim for VAZ 2110 (instrument panel in the center) Trim panels VAZ 2110 Kashtan Panel trim VAZ 2110 Kashtan Panel trim VAZ 2110 Kashtan
If desired, you can cover the dashboard with various materials of your choice, thereby making the desired changes to the interior of the cabin.
Subtleties
I would like to say right away that removing and replacing a torpedo on a VAZ 2110 will require a lot of time and patience from you
In addition, all repair work must be carried out extremely carefully and carefully so as not to accidentally break the fastening, since the dashboard will not fit back as it should and will creak when driving
To work you will need the following tools:
- marker;
- self-adhesive labels;
- set of screwdrivers and wrenches.
Removal instructions
It is recommended to remove the VAZ 2110 torpedo in the following sequence:
- Interior details. Before starting work directly, it is necessary to prepare the interior, since disassembling the front panel of the VAZ 2110 is best done with room for maneuvers. Therefore, the first thing we do is remove the front seats and steering wheel of the car. It is advisable to carry out dismantling in exactly the same sequence as indicated above, since otherwise it will be extremely difficult to remove the driver’s seat. In order not to break anything, consider your strength when pulling the wheel out of the column splines; to do this, loosen the steering wheel nut a little, and then pull it towards you while loosening it from side to side;
- Transmission tunnel. After the salon is prepared and there is a place to work, we are faced with the next task - dismantling the floor tunnel in the salon. Simply unscrew the screws and push the top of the part being disassembled back. Then do the same with the bottom of the tunnel;
- Steering wheel and steering column. Unscrew the screws on the steering column casing of the VAZ 2110, and then remove the steering column switches. Mark all the wires and connectors released during disassembly with a marker or labels; this will later work to your advantage when, when assembling the torpedo, you end up with a large number of wires of different colors. It is recommended to use the marking especially for owners of cars that are already equipped with an audio system and alarm system;
- Glovebox. The next stage of work will be to dismantle the glove compartment, after which it is necessary to remove the relay and mounting block. Don’t forget to mark the wires as you work and take special care with the fragile speedometer and other dashboard elements that also require special treatment;
- Torpedo. And now we can move on to the immediate purpose of the repair - we have to remove the dashboard. To do this, it is necessary to unscrew the screws in the resulting void behind the glove compartment and unscrew the fastenings. After that, use a screwdriver to hook the air duct on the left side and remove it. Then all that remains is to unscrew the nut, holding the torpedo with your hand, the torpedo and pull it out from the studs, at the same time do not forget to mark the wires with a marker so as not to get confused.