Advantages
As mentioned above, on the VAZ 2110 rear brake discs have advantages over drum brakes. In particular, these are such advantages as:
Note. Improved heat dissipation is a very important factor, especially during active driving. In addition, this is relevant when driving at high speeds and on mountain roads.
- significant improvement in brake cooling;
- ease of installation and dismantling in case of replacement;
- brake discs eliminate the need to tighten the parking brake each time;
- reliability of these brakes;
- disc brakes, unlike drum brakes, do not freeze in winter after washing;
- ease of monitoring brake wear;
- an appearance that makes the car look like a sports car (you definitely can’t say the same about the VAZ 2110 with rear drum brakes).
Design features and reasons for tuning
It is worth saying that law enforcement agencies rarely find fault with this type of tuning, but there is still a chance of getting a fine during a technical inspection. If in standard rear mechanisms the “drums” do all the work, then disc brakes have pads, a disc and a caliper. The main advantage of this unit is the absence of overheating of the disc at high speeds; disc brakes also feel better on wet road surfaces.
Installation of non-standard rear mechanisms is performed for the following reasons:
- Dismantling and disassembly are easier to carry out when compared with drum analogues.
- The braking distance is noticeably reduced, regardless of whether the car is driving on dry or wet surfaces.
- It is not necessary to adjust the parking brake after each service of the rear mechanisms - this should only be done after installation.
- In cold weather, disc brakes do not freeze, unlike drum brakes.
VAZ 2110 owners who plan to install disk mechanisms need to know that before starting to operate the car, the sorcerer needs to be modified. Otherwise, the rear wheelset will brake much more than the front. This defect will especially manifest itself on wet asphalt. If the installation can be carried out independently, then the adjustment or modification of the sorcerer should be carried out by professionals from the service station.
Disc brake design
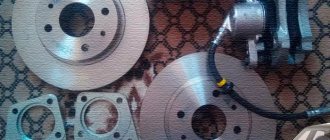
VAZ 2110 rear disc brake kit
On a front-wheel drive VAZ 2110, as you know, the hub is attached to the rear beam of the car on each side. And it is on it that the brake disc is installed. The hydraulic brake caliper with pads is also attached to the beam using a special washer. The caliper can be with or without a built-in mechanical parking brake. It also happens that a hydraulic hand brake is installed on a car. As a rule, in order to avoid over-braking when installing brake discs, they are mounted 1-2 inches smaller than the front brakes. The VAZ 2110 rear brake kit includes components such as a 13-14-inch brake disc, which can be ventilated or non-ventilated. In addition, the kit includes a caliper, which can also be of three types. A specific type of caliper is installed depending on the disc used. The caliper is usually sold with brake pads and a hose. Finally, the part that serves to secure the caliper to the rear beam is called a faceplate. This adapter has special holes for secure attachment to the vehicle beam. The faceplate is universal and suitable for almost all types of disks.
All about disc brakes
VAZ 2110 installation of rear disc brakes
As you know, on old VAZ 2110 models, drum brakes were installed. But today, given the fact that absolutely all foreign cars, except perhaps budget models, have disc brakes, replacing them is a pressing matter.
Problems that replacement may cause
Rear disc brake set for VAZ 2110
It is noteworthy that after replacing drum brakes with disc brakes, they can cause some problems, of course, if they are not changed according to the instructions. The fact is that disc brakes are not officially installed on VAZ cars, and replacing and installing them is tantamount to tuning, which implies a certain change in the main design. It goes without saying that brakes symbolize the safety of the vehicle. Installing them is not just an ordinary matter; they are not installed just so that they slow down. In the language of a designer, brakes are clearly balanced mechanisms that have been developed by engineers for many years.
Note. Purchasing disc brakes and simply installing them, without following clear rules, is a dangerous undertaking and not recommended.
It’s interesting, but it is at the service station, where most drivers install, or rather replace, rear drum brakes with disc brakes that they do not monitor their correct adjustment. Of course, this does not apply to all service stations, but a certain part of them do not burden themselves with concerns about the safety of the driver who entrusted them with the vehicle. There is only one thing left to do - take the instructions and replace the rear brakes yourself, and at the end check the work as it should be. No one will do better than the driver himself, who will naturally be concerned about his safety. The main problem that can cause concern after replacement is uneven braking and skidding during a sudden stop of the vehicle. In addition, if the installation is not done correctly, the rear brakes may fail at the most inopportune moment or the discs may overheat. In addition, symptoms of improper installation of rear brake discs are squeaking of these parts.
Rear disc brake kit for VAZ 2110
Some experts believe that installing rear brake discs on the VAZ 2110 and other models is not entirely practical. The money allegedly spent on purchasing the kit and installing it may not produce the expected results. But again, if everything is not done correctly. But problems with passing maintenance are already a pressing problem. So far, the installation of rear disc brakes on the VAZ 2110 is considered by law as a design change not confirmed by law enforcement authorities. Therefore, you need to take into account the penalty factor when undergoing a technical inspection. A mandatory component when replacing brakes is the handbrake, which will also need additional care. In particular, you will need to either change the cable parking brake, or make your own hydraulic handbrake, which will allow you to brake at any speed.
Note. But it is worth noting that the hydraulic handbrake is not intended as a parking brake, as it weakens over time.
- A problem with a VAZ 2110 car that has rear brake discs can arise in the event of an accident. Traffic police officers no longer look at who is really to blame, but focus on illegal changes in the design of the vehicle.
- In addition, after installing disc brakes, it will be necessary to adjust the sorcerer. If this is not done, then on a front-wheel drive car the rear wheels will begin to brake more than the front wheels, which will inevitably lead to skidding, especially on slippery or wet roads.
Note. In some cases, an unregulated sorcerer causes not only skidding, but also rapid overheating of the brakes, squeaking, etc.
When the problem cannot be solved using conventional methods, craftsmen recommend grinding off about 25-50% of the pads, thereby reducing the contact area.
Design of a domestic braking system
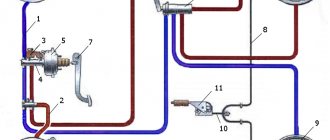
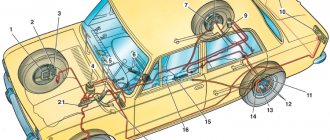
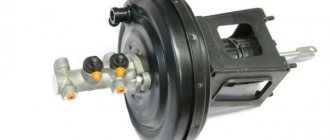
The brake system on the VAZ 2110 has a main element - a dual-circuit regulator with a mandatory vacuum booster. The regulator is responsible for the pressure in the brakes on the rear axle, and to be more precise, it creates this pressure.
Mandatory brake hoses and basic elements equip the brake drive and divide it into two complete circuits. Thanks to this, braking occurs in both the front and rear wheels, which is optimal and safe.
In general, there is nothing unusual in the technical component.
The location of the brake pedal in the VAZ 2110 is classic - in the middle, like most cars with a manual transmission. It is this pedal that activates the braking system. Some may call it a priori heavy or tight, but most drivers are happy with everything and with any changes in the squeeze they begin to think about whether the brake system on the VAZ 2110 is in danger of being repaired.
System hydraulic drive elements
- Pressure regulator drive, which transports brake fluid to the rear brake mechanism. The presence of brake fluid is mandatory, as in all cars.
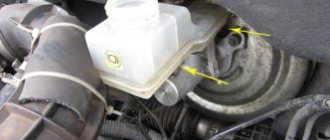
- Main (main) cylinder with pistons and reservoir. It is equipped with a fairly accurate sensor that shows the brake fluid level. You need to pay attention to it, mainly to prevent an emergency level, which can lead not only to a breakdown of the entire system, but also to an accident.
- A vacuum booster that creates pressure that is directed into the master cylinder piston. Which is what creates the inhibition. Problems with the vacuum booster can cause quite a lot of trouble.
- Pressure regulator in the brake system, responsible for the pressure force. It can reduce and increase the indicator, focusing on the load of the rear axle of the “tens”. And in a correct, not broken condition, the loads on the axles should be the same, but without a pressure regulator, using the brake system will be difficult.
- The rear wheel mechanism, in which the brake system is drum by default from the factory, the 2110 does not have modifications with rear disc brakes. There is an opinion that drums are not very reliable, so some owners change the rear brakes to disc ones.
- The front wheel mechanism consists of pads, disc and cylinders. The “Ten” is equipped with a front brake wear sensor. The front brakes can be either ventilated or not.
The role of the pressure regulator in the brake system
People call the regulator quite original - the sorcerer. But all VAZ 2110 owners know or consider it necessary to change the pressure regulator and monitor its technical condition.
Diagram of the brake pressure regulator VAZ 2110: 1 - pressure regulator housing; 2 - piston; 3-protective cap; 4.8- retaining rings; 5 — piston sleeve; 6 — piston spring; 7 — body bushing; 9, 22 — support washers; 10 — sealing rings of the pusher; 11 — support plate; 12 — pusher bushing spring; 13 - sealing ring of the valve seat; 14 — valve seat; 15 - sealing gasket; 16 - plug; 17 - valve spring; 18 - valve; 19 — pusher bushing; 20 — pusher; 21 - piston head seal; 23 - piston rod seal; 24 - plug; A, D - chambers connected to the main cylinder; B, C - chambers connected to the wheel cylinders of the rear brakes; K, M, N - gaps.
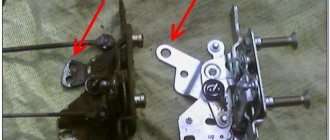
The regulator itself is located on the rear axle of the car. The regulator lever has a movable position that changes in proportion to changes in the load on the spring.
Reference . If the brake system of the VAZ 2110 works properly, then the load is distributed evenly. There is no redistribution; both axes work properly and equally.
If deviations are detected, it is important to adjust the brake pressure regulator. If this is not done, the wheels may not be locked in a timely manner, which can lead to an accident, since the system will operate with significant deviations from the norm.
Modernization of the brake system of VAZ 2110
Most car enthusiasts give a poor assessment of the quality of the VAZ brake system and believe that it needs improvement. To achieve the proper level of braking and reliability, owners are making technical changes.
The most popular upgrade is the replacement of rear drum brakes with disc brakes; I found high-quality disc brakes from a foreign car here https://autorazbor.net/. When replacing it yourself, it should be taken into account that the rear wheels should be braked later than the front wheels and more gently, since otherwise the car will skid. It is not recommended to make changes to the brake system without special knowledge - this can be dangerous.
Other owners completely remove the factory master cylinder and vacuum booster. A good replacement could be the system from Lada Priora. In this case, the brake pedal will operate without additional effort.
Important! After any technical changes, it is necessary to bleed the brakes and test them at minimum speeds.
Installation
Set of rear disc brakes for VAZ 2110
As mentioned above, installing rear disc brakes is a delicate matter, but quite doable on your own. This way you can save a lot of money and achieve normal functioning of the brakes. This is relevant, especially since car services, as mentioned, do not often pay attention to adjustments and the price for services of this kind costs about 10 thousand rubles.
Examination
Having carried out all the above operations - first on one wheel, and then on the second, you also need to check the system for leaks. The first phase is to simply press the pedal.
The fact that everything is done normally is indicated by the fact that the pedal is pressed with force, quite tightly.
But this is not enough. Have someone else press the brake pedal while you try to rotate the parts that make up your new rear disc brakes.
If nothing moves, it means that your VAZ 2110 now has new rear disc brake systems - better and more reliable than the previous ones.
To minimize the braking distance, it is recommended to install a vacuum booster. Details: https://vazweb.ru/desyatka/tormoza/vakuumnyi-usilitel-tormozov.html
Finalization
As mentioned above, after installing the rear discs, the car will brake much more efficiently. But if you don’t modify a few things, the rear brakes will work before the front ones. As mentioned above, to reduce the braking force, some of the friction material of the pads is ground off. That's all. As you can see, we managed to carry out a difficult operation with our own hands, which makes the car’s brakes more effective. The instructions given above include all the important operations and should be followed carefully. According to the latest data, the price for a set of rear brake discs is not that high, and if the replacement is carried out independently, then a lot of money will not go out of the family budget.
Lada 2110 tiger ))) › Logbook › Installing rear disc brakes on a VAZ 2110
Roman ****, 25 years old I drive Lada 2110 Tiger ))) Novomoskovsk, Russia
So let's begin)))) As it is written on all forums, that they are so easy to install is complete nonsense... When installing, we have two faceplates: a screw. VAZ 2112 front discs 14 radius, calipers 2112. We remove the drums, throw out all the garbage (pads, springs, working brake cylinder), then we see 4 bolts that hold the hub, I had them with a hexagon, unscrew them, throw out the casing and the housing of the working cylinder. This casing is difficult to unscrew, take a grinder, clean off the bolts to zero, remove 1-2 mm on the hub, since the disk does not seat, put a faceplate between the hub and the beam (we measure the bolts immediately, they should be 30 mm, although on all forums it is written that they are 25, you have to buy 30, it's all a complete mess, I had all 30, we screw it all into place - stock with bolts, then install the brake disc. It's better to try to center it with bolts for cast cats, then tighten the guides (lubricate them with graphite), then we we try to install the caliper, and then it turns out to be such a mess that we need to put 10 washers of size m10; the lower bolt of the caliper will need a hexagon thread m10-1.25-30; the upper one can be turnkey, we put 5 washers at the top and bottom, for a total of 10; we try to tighten it: after tighten the brake disc (should not catch); screw the hoses to the brake line, then install a tee instead of the standard sorcerer and see the tube from the hydraulic handbrake; to the hydraulic handbrake we pull the tube from the cylinder head, after the cylinder head there should be a brake force regulator! The rest is all according to the diagram! Questions in PM)) )))I’ll tell you and show you, there are too many problems, I struggled with this installation for 3 days)))))
Price tag: 8,000 ₽
FakeHeader
Comments 10
Only registered users can participate in discussions.
listen, please tell me, I installed hydraulic handbrake disc brakes, but without an adjuster right now, first of all, there is over-braking, like the sorcerer adjusted it, now the ass almost doesn’t take at all and the pedal is very soft
send a diagram or photo
then another tube to the tee and from the tee along the wheels)))
and from it goes a tube to the hydraulic handbrake
the sorcerer stands after the GTZ
everything works great for me!
and also without the sorcerer)))
there will be no re-brakes and the brake cable with the cable is rubbish! front gas 3110 rear with regulator
Maybe I should have just installed normal DZTs? Don't you feel bad for over-braking?
Self-installation of rear disc brakes on a VAZ 2110
Let's look at why disc brakes are better than drum brakes:
- Braking becomes more reliable, braking distance is reduced;
- Braking forces are distributed more evenly, given that the VAZ 2110 is a front-wheel drive car;
- There is an effect of faster response after pressing the pedal;
- Unsprung masses are reduced;
- Heat dissipation occurs better, which is especially important when driving on a mountain road or during active acceleration/braking. For this reason, the brake system is cooled better;
- Disk ones are much easier to dismantle and replace;
- There is no need to adjust the handbrake after each repair of the rear brakes, although this will have to be done the first time;
- They do not freeze in winter after washing, like drum ones;
- Rear disc brakes installed on the VAZ 2110 are much more convenient to control and promptly notice pad wear.
Brake system problems and their elimination
Like any other car, the Chervonets has its especially sore spots.
The 2110 brake system often encounters problems such as:
Complete lack of response of the brake system to pressing the gas pedal, failure of the brake. Eliminated after diagnosing the entire brake system and the serviceability of the brake pedal itself. Strong vibrations when braking, which are transmitted to the steering column.
The causes of vibration may be the following:
- if the brake discs are not ventilated, then the vibration may be caused by wet weather, rain, or simply running into water;
- malfunction of drum brakes, which is characterized by spots on the surface;
- deformation of brake discs.
The brake pedal is hard to press. This may be due to:
- clogging of the vacuum booster air filter;
- malfunction of the vacuum booster, damage to the diaphragm, valve, connecting hose and other components;
- wear of the linings.
Hissing when pressing the brake pedal. For correct diagnosis, it is important to understand at what point the hissing begins.
- if at the very beginning of braking, then it is necessary to check the vacuum booster;
- if the hissing starts when the pedal is released, then this is not a pathological process, if the level of the hissing sound is not significant.
The tens' braking system is not ideal, but its design is quite reliable. A huge advantage is that most situations can be resolved independently, without going to a service station.
Design Features
It is better to purchase rear disc brakes as a complete set. The VAZ 2110 fits 13 or 14 inch brake discs (ventilated or non-ventilated). Try to purchase certified discs so that they do not have to be modified.
Rear disc brake kit with necessary components
You also need a caliper, which comes in three types, so you need to select it to match the disc. The caliper comes with a hose and brake pads. The kit includes a universal clamp suitable for all calipers - a faceplate.
Before installing disc brakes, you need to dismantle the old rear brake mechanisms of the VAZ 2110.
This is done like this:
- Remove the wheel;
- Remove the brake drum;
- Remove the pads;
- Remove the hub from the wheel, having first unscrewed the brake pipe.
You should prepare for the fact that dismantling will not be easy. Not only do the brakes have the unpleasant tendency to stick during operation, but the bolts are also “welded” by corrosion. Therefore, it is advisable to treat the nuts and bolts themselves with a special agent (for example WD 40) so as not to tear off their edges.
It is important to plug the removed pipe with something so that brake fluid does not leak out and air is not sucked into the system. After that, knock down the hub. This works best if you attach a board or lath to the back of the support disk and hit it with a hammer, moving the blows: one from below, the other from above. This will prevent you from causing serious damage to the disk.
It's time to install disc brakes instead of the removed rear drum brakes.
Having knocked off the hub, we will put it back, but in a different way:
- It should be installed through the plate into which the caliper is already mounted. Carefully ensure that all holes line up. Particular attention to alignment;
- Next, use a hammer to straighten the corner of the beam so that the caliper does not rest against it;
- Now you can put the brake disc on the hub, placing spacers between these parts, and secure the disc with a bracket;
- We install brake pads from VAZ 2110;
- First, carefully and securely attach the brake hose to the caliper, and then to the tube;
- To reduce the braking force of the rear brakes compared to the front, you need to partially grind off the friction material of the pads.
Rear beam Grinding protrusion on the hub Grinding protrusion on the hub Grinding protrusion on the hub Grinding protrusion on the hub Grinding protrusion on the hub Axle with a blunt Adjustment plate on the axle with a hub Installing the hub We grind the corner of the beam that prevents the caliper from getting into place Installing the brake disc through 2 washers Attaching the caliper to special plate mounted rear disc brakes
Having carried out all the above operations - first on one wheel, and then on the second, you also need to check the system for leaks. The first phase is to simply press the pedal.
The fact that everything is done normally is indicated by the fact that the pedal is pressed with force, quite tightly.
But this is not enough. Have someone else press the brake pedal while you try to rotate the parts that make up your new rear disc brakes.
If nothing moves, it means that your VAZ 2110 now has new rear disc brake systems - better and more reliable than the previous ones.
Dismantling
Before installing disc brakes, you need to dismantle the old rear brake mechanisms of the VAZ 2110.
This is done like this:
- Remove the wheel;
- Remove the brake drum;
- Remove the pads;
- Remove the hub from the wheel, having first unscrewed the brake pipe.
You should prepare for the fact that dismantling will not be easy. Not only do the brakes have the unpleasant tendency to stick during operation, but the bolts are also “welded” by corrosion. Therefore, it is advisable to treat the nuts and bolts themselves with a special agent (for example WD 40) so as not to tear off their edges.
Bleeding and adjustment
After any manipulations with the brake system (it doesn’t matter whether you repaired the rear, front or parking), on a VAZ 2110 it is vitally important to bleed the brakes so that an air plug does not form anywhere in them, which can negate the ability to brake at the right moment.
It is convenient to do this together, but you can do it yourself, although this requires some additional equipment. Many people know how to bleed the brakes on a VAZ 2110. The main thing is not to forget to do this diagonally, always starting with the front wheels, and pump the right one first.
After bleeding, you still need to check the braking forces. This requires an outside observer. You accelerate and brake sharply, and he watches as the brakes apply. The front ones should work first, then (with a small gap) the rear ones, and the braking force should be greater for the front ones.
Everyone knows that the rear brakes of the VAZ 2110 are drum brakes . I don’t think it’s worth talking about the fact that these are brakes from the 40s.
