Tightening torque for main and connecting rod bearings
Engine repair is considered the most difficult thing in a car, because no other part contains such a huge number of interconnected elements. On the one hand, this is very convenient, because if one of them breaks down, there is no need to change the entire assembly; it is enough to simply replace the failed part; on the other hand, the more component elements, the more complex the device and the more difficult it is for those who I'm not very experienced in car repairs. However, with a strong desire, anything is possible, especially if your zeal is supported by theoretical knowledge, for example, in determining the tightening torque of the main and connecting rod bearings. If for now this phrase is a set of incomprehensible words for you, be sure to read this article before getting into the engine.
Sliding bearings, their types and role in the operation of internal combustion engines.
Main and connecting rod bearings are two types of plain bearings. They are produced using the same technology and differ from each other only in the inner diameter (for connecting rod liners this diameter is smaller).
The main task of the liners is to convert translational movements (up and down) into rotational ones and ensure uninterrupted operation of the crankshaft so that it does not wear out prematurely. It is for these purposes that the liners are installed under a strictly defined gap, in which a strictly specified oil pressure is maintained.
If this gap increases, the engine oil pressure in it becomes less, which means that the journals of the gas distribution mechanism, crankshaft, and other important components wear out much faster. Needless to say, too much pressure (reduced clearance) also does not bring anything positive, since it creates additional obstacles in the operation of the crankshaft, it can begin to jam
That is why it is so important to control this gap, which is impossible without using a torque wrench in repair work, knowledge of the necessary parameters that are prescribed by the manufacturer in the technical literature on engine repair, as well as observing the tightening torque of the main and connecting rod bearings. By the way, the tightening force (torque) of the connecting rod and main bearing cap bolts is different
Please note that the given standards are relevant only when using new sets of parts, since the assembly/disassembly of a previously used unit due to its wear and tear cannot guarantee compliance with the required clearances. Alternatively, in this situation, when tightening the bolts, you can focus on the upper limit of the recommended torque, or you can use special repair bushings with four different sizes, differing from each other by 0.25 mm, provided that the crankshaft is ground until the minimum gap between rubbing elements will not be 0.025/0.05/0.075/0.1/0.125 (depending on the existing gap and the repair product used)
Examples of specific tightening torques for connecting rod and main bearing cap bolts for some VAZ family vehicles.
| Automobile model | Bed cover tightening torque, N*m (kgf.m.) | Tightening torque of connecting rod bearings, N*m (kgf.m.) |
| VAZ 2108 | 69,0–84,0 (6,9–8,4) | 44,0–54,0 (4,4–5,4) |
| VAZ 2106 | 68,31–84,38 (6,97–8,61) | 43,32–53,51 (4,42–5,4) |
| Lada Priora | 68,31-84,38 (6,97-8,61) | 43,3-53,5 (4,42-5,46) |
Clutch tightening torques for VAZ 2114, 2113, 2115
VAZ clutch basket tightening torque
- Bolt for attaching the clutch basket to the M8 flywheel with a force of 19.1-30.9 N.m
| List of devices and parts of the propulsion device | Thread | Tightening torque of clutch parts VAZ 2114, kgf/m |
| Lamb attaching the clutch cable to the bracket | M12 | 1,5-2 |
| Bolt attaching the clutch housing to the engine cylinder block | М12Х1.25 | 5,4-8,8 |
| Locknut securing the clutch housing to the engine cylinder block | M 12×1.25 | 5,4-8,8 |
| Nut attaching the gearbox to the clutch housing | M8 | 1,6-2,6 |
| Hardware connecting the release bearing bushing | MB | 0,4-0,6 |
| Dowel for fastening the lower tire to the clutch housing | MB | 0,4-0,6 |
In what cases is it necessary to tighten fasteners?
Maintaining the correct tightening torque of the bolts on the VAZ-2106 engine is necessary when:
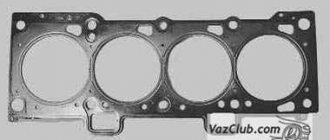
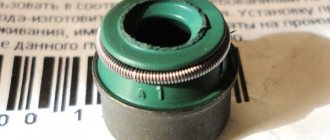
- problems with the engine, in this case it may be necessary to replace the cylinder block gasket, valve stem seals or valve liners, after which you need to return the cylinder head fasteners to their place;
- problems with the car that require head diagnostics;
- every 2-3 thousand kilometers for preventive purposes.
Few people tighten fasteners with the required force for prevention. Meanwhile, the engine constantly vibrates during operation. Because of this, the bolts weaken and over time may even leave their places. This is fraught with serious engine damage.
Tightening torques for threaded connections of the exhaust gas system
| List of devices and engine parts | Thread | Tightening torque of VAZ 2114 parts, kgf/m |
| Locknuts for attaching the intake manifold and exhaust manifold | M8 | 2,1-2,6 |
| Wing fastening the intake pipe of the silencer to the exhaust manifold* | M8x1.25 | 2,1-2,6 |
| Nut of clamp bolts, attaching the flanges of the main and auxiliary plugs | M8x1.25 | 1,6-2,3 |
| Pins of the neutralizer flange and the receiving tube of the silencer | M8x1.25 | 1,6-2,3 |
Self tightening
As mentioned earlier, tightening the cylinder head bolts is not that difficult. However, so that this process does not turn out to be difficult for drivers, it is necessary to take into account the importance of this procedure and carry it out strictly according to the scheme, which can be found on the Internet resource.
To get started, you will need to prepare only one, but very important tool (a torque wrench), without which it will simply not be possible to tighten the bolts. Of course, such a tool cannot be in the arsenal of every car owner, so you will have to buy it or rent it at a service station. The bolts are tightened in the following sequence:
- First of all, you need to inspect the external condition of the fasteners. If their condition does not satisfy the car owner, then experts do not recommend tightening them, but using a new set of pins, which can be purchased both on the automotive market and in a specialized store. You need to choose bolts from a reliable manufacturer; when purchasing, be sure to pay attention to the quality of the thread. Before starting the procedure, the threads of the pins are lubricated with automotive lubricant, regardless of which element will be used: new or used.
- The tensioning process itself for the VAZ-2106 is similar to other VAZ models, but if you are considering a Niva, then experts recommend carrying out such work in two stages, after first familiarizing yourself with the diagram, which can be downloaded on the Internet. The diagram shows the exact sequence of tightening the bolts; all pins have their own individual number, so that car owners independently and strictly in order tighten the required elements.
- Using a torque wrench, you need to tighten all the bolts strictly according to the diagram. When performing this action, you should monitor the pulling torque, the indicator of which can vary from 3.4 to 4.0 kgf*m:
- The first to be tightened are the two elements located in the center of the head;
- then tighten the two upper bolts and two lower ones, which are located on the side of the middle clamp;
- The left outer bolts are tightened, and then the two right ones. You should not tighten only the element that is marked No. 11.
- After the first stage of tightening, according to the diagram, is completed, experts recommend repeating the entire operation again in exactly the same sequence. Making sure that when tightening the bolts, the tightening torque does not exceed 11.5 kgf*m.
- At the end of the tensioning process, you need to tighten the pin at No. 11, using the same torque wrench, making sure that the tension of this element does not exceed 4.0 kgf*m.
At this point the tightening process is considered complete. It’s quite simple to do this work yourself, but if during tightening some element is overtightened, a crack may form on the surface of the cylinder head, which, in turn, will cause a new breakdown, so the entire repair process will have to be repeated again. To avoid such a situation, you need to monitor the moment and perform the work strictly according to the scheme. And the video tutorial, which you can watch at a time convenient for you, will help you find the answer to any question on this topic and will further simplify the process of tightening the VAZ-2106 cylinder head pins.
Related posts:
- How to connect a triad car antenna
- Who is cooler than Nissan Laurel or Toyota Chaser
- Steering shaft VAZ 2106 price
- The price of a thermostat for viburnum 8 valves
|
|
|
|
|
|
We do everything with our own hands
Sometimes inexperienced motorists perform actions that require certain knowledge and skills. And very often such repair work turns out badly for car owners. We strongly advise that you only tighten the cylinder block pins if you have already performed this procedure. Let's consider the process for a VAZ 2106 car. But keep in mind that each individual engine has its own specific operation.
What to prepare?
In general, you won't need anything other than a torque wrench. When tightening, this special key will be simply necessary, since only with the help of this tool can the torque be determined. You are unlikely to find this key in home tools, so you should purchase it at an auto store or borrow it from a service station. Of course, it’s unlikely that anyone will give it to you for free, since its cost varies from 1,200 rubles (350 hryvnia) and more.
Special torque tool
It is also worth noting that very often “garage specialists” recommend using a regular wrench. Like, “Well, what’s going to happen with this, after all, Petrovich, a neighbor in the garage, actually tightened the bolts on his “cop” by eye, without any of these modern gadgets.” To avoid negative consequences, it is better not to listen to such people, since not everyone understands the importance of this procedure.
Tightening the cylinder head on a VAZ 2106 with your own hands
If you want your car to always work in excellent condition, you need to periodically pay attention to its repair and diagnostics. In particular, this refers to the operation of the cylinder head. What is the procedure for tightening the cylinder head of a VAZ 2106? How does the process happen and what is needed for this? We invite you to learn more about this here.
Removing and installing the camshaft
The camshaft on VAZ 2106 cars is removed in exceptional cases. Usually, either during repair and disassembly of the engine, or to replace it. It is not so difficult to remove and for this you will need a tool such as:
- Head for 17 and 13
- Ratchet handle
- Vorotok
- Extension
- Open-end or socket wrench 13
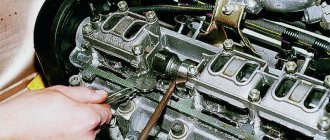
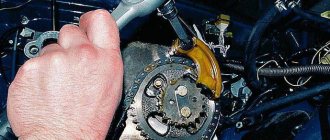
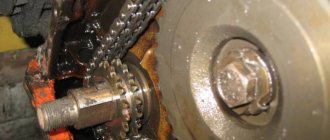
The first step is to completely remove the valve cover from the cylinder head. Then unscrew the timing chain tensioner, which is located on the right side in the front of the engine (in the direction of travel):
After this, we turn off the camshaft gear with a 17 key. To avoid turning, you need to put the car at speed and put stops under the wheels so that it does not roll.
After which we take it to the side, you can slightly pry it with something:
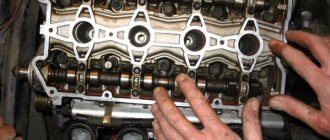
Next, you can begin to unscrew all the nuts securing the housing (case) of the VAZ 2106 camshaft. First, you can slightly loosen them with a wrench, and then quickly unscrew them with a ratchet:
After all the nuts are completely unscrewed, you can grab the shaft cover and pull it up with the necessary force, rocking it a little to the side to make it easier to do all this:
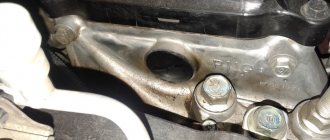
To remove the camshaft from the cover, you need to unscrew two nuts with a 10mm wrench, which are located in the front of the part; in the photo below they are shown with marks in numbers:
Now you can lightly hit the back of the camshaft with at least the handle of a hammer (wooden), and it will move forward:
By carefully pulling it forward, it is finally removed, the result of which is shown in the photo below:
The installation process occurs in reverse order. If the shaft needs to be replaced due to severe wear, then replace the rockers at the same time. They can be removed very simply; you just need to lift each of them up, overcoming the resistance of the spring clamp, and the rocker can be removed freely:
If the shaft will not be changed, and the rockers are still quite suitable for further work, then you need to install them in the same sequence in which they were removed (if you remove them at all):
If you decide to buy a new shaft, then for a VAZ 2106 and similar “classic” models it will cost about 1,000 rubles, which is not that expensive.
Payment via Yandex Cashier
After selecting payment via Yandex, the Yandex Cashier payment system will launch, where you need to select a convenient payment method (bank card, QIWI, Yandex Money account, etc.)
After specifying payment details and confirming payment, payment for the goods will occur.
If you have a bank card in a currency other than the ruble, then the money will be debited from the card at the rate of the Central Bank of Russia at the time of the purchase.
This payment method is optimal for residents of Russia, Kazakhstan and Belarus.
Official website of the Yandex Kassa payment system https://kassa.yandex.ru
Replacing the camshaft in a VAZ 2106 car
Scheduled camshaft replacement is not carried out very often if it is subjected to proper use. The scope of dismantling work is small and does not present much difficulty. Sequence of work:
- We remove the over-valve casing and unscrew the chain tensioner of the gas distribution mechanism drive system.
- We unscrew the camshaft gear; to avoid cases of unauthorized rotation of the shaft, it is necessary to fix the position of the vehicle in the gear position and secure it by installing chocks under the wheels of the car.
- We move the dismantled system to the side in order to continue technological operations.
- We dismantle all the fasteners of the body part (bed) of the camshaft in any order, in contrast to their subsequent installation.
- We dismantle the body part of the product, rocking it somewhat for a more successful descent from the studs.
- To remove the camshaft, unscrew the 2nd nut securing the product to the bed, located in the front part.
- By tapping with the handle of a plumber's hammer, we achieve translational movement of the shaft from the seat.
- We remove the shaft from the housing part.
The technological operation for installing the VAZ 2106 camshaft is carried out according to the opposite scenario. If there is a need to replace the camshaft due to high production, this is carried out together with the rockers. Removing them from their seats is not difficult; you just need to unfasten the spring-type fastener.
Otherwise, when assembling the product, it is necessary to use a torque wrench to tighten the camshaft to correctly determine the tightening torque of the camshaft, i.e. what force needs to be applied for this. As for the repair of the VAZ 2106 camshaft, metal spraying on the cams is rarely used to achieve the required dimensions for the correct operation of the product. Some car enthusiasts install a camshaft from the Niva on a VAZ 2106 to increase power. This, in principle, is an element of car tuning, and gives an increase in power both at the lower and upper speeds of the engine.
The modern sports camshaft on the VAZ 2106 is installed on tuned six engines to achieve different, improved power characteristics. Car enthusiasts should know that engine dynamics are directly related to the performance characteristics of the vehicle’s camshaft. These products, which transmit the moment of movement from the crankshaft of the power plant to the valve group, are produced in one piece with cams.
There is a special adjustable camshaft star (another name for the Vernier pulley), which allows you to set the camshaft “advanced” in such a way that at TDC the lifting point of the intake type valve will be higher than the similar parameter of the exhaust type valve. At the same time, installing the camshaft on the so-called. the moment of “lag” will change the indicator of the intake product. This proportion between the valve lift coefficient at TDC shows the degree of efficiency when operating a camshaft of one type or another.
The theoretical rule can be formulated as follows: the amount of advance of the shaft will shift the power indicator down the rpm range, and the amount of lag will have the opposite effect. Only adjusting the camshaft of the VAZ 2106 will make it possible to increase the power parameters of the vehicle.
When Bolts Need Replacement
Before you begin tightening the bolts, you should inspect them. A visual assessment of the condition is not enough; it is necessary to check the fastener parameters. He must:
- have dimensions 12/120 mm;
- be with intact thread;
- have no curvature along the entire length.
Some mechanics recommend regularly screwing new bolts into the cylinder head. Others adhere to the rule that replacement should only be carried out if the fastener is screwed into the socket tightly. It is best not to skimp on bolts, since using a component that is obviously stretched increases the risk of its metal breaking. The consequences of this are almost unpredictable; in most cases, it will be possible to restore the operation of the power plant only with the help of specialists.
VAZ 2106 | Removing and installing the camshaft/adjusting the valve timing
Removing and installing the camshaft/adjusting the valve timing
Engines E1, EZ, E5
In principle, the cylinder head of E engines has the same design as other gasoline engines. The following text will only point out the differences.
Removal
Installation
- Install and screw the chain tensioner with a new gasket.
- After installing the tensioner, the bracket is loosened by rotation of the crankshaft. The clutch moves automatically and sets the chain play.
- Check the drive chain adjustment. To do this, rotate the crankshaft so that the mark on the belt pulley coincides with the “T” mark. At the same time, the rocker arms of the 1st cylinder should have a slight play, and the rocker arms of the 4th cylinder should be in the valve overlap position, i.e. both valves should be pressed down with the rocker arms. If this is not the case, the drive chain must be adjusted again.
|
- Connect the battery ground cable.
- If available, set the time on the clock and set the security code for the radio.
- Check the valve clearance, see Section Checking/adjusting valve clearance.
Adjusting the Drive Chain
|
- To block the crankshaft, engage 5th or 4th gear and ask an assistant to depress the brake pedal.
- Remove the chain tensioner.
- Remove the V-belt, see Section Removing and installing/tensioning the V-belt.
- Raise the car.
- Block the crankshaft and unscrew the crankshaft belt pulley bolt.
- Remove all oil pan bolts that are screwed into the drive chain cover.
- Unscrew the chain cover.
|
- If the chain is adjusted correctly, install the camshaft sprocket, timing chain housing, cylinder head cover, crankshaft belt pulley and oil pan mounting bolts.
Tightening torques for engine repairs
Tightening torques for threaded connections
Engine disassembly
There is nothing to do in engine repair without a torque wrench! Tightening torques when repairing a Honda Civic are very important. Honda engineers calculated the torque for each bolt and nut in the car. There is no need to tighten it by hand until you get a characteristic crunch. Firstly, you can break some bolt, and it will be extremely difficult to get it out. Secondly, a skewed cylinder head will clearly leak oil and coolant. The Honda Civic, like any other car, uses different tightening torques, from 10 Nm to 182 Nm and even more, for the crankshaft pulley bolt. I advise you to purchase a powerful torque wrench, powerful and good, with a click when the torque is reached, do not take a pointer one. And lastly, all connections that are part of one element (disc, cylinder head, cover) are tightened in several stages from the center outward and in a zigzag. So, in order, I describe everything in Nm (Nm). Be sure to lightly coat the threads with oil or copper grease.
Example of a torque wrench, price 50-100$
These points are suitable for all D Series D14,D15,D16. I haven’t tested the D17 and D15 7th generation.
| Cylinder head cover bolts | 10 Nm |
| Cylinder head bed bolts 8mm | 20 Nm |
| Cylinder head bed bolts 6mm | 12 Nm |
| Connecting rod cover nuts | 32 Nm |
| Camshaft pulley bolt | 37 Nm |
| Crankshaft pulley bolt | 182 Nm |
| Crankshaft cover bolts D16 | 51 Nm |
| Crankshaft cover bolts D14, D15 | 44 Nm |
| Oil intake mounting bolts and nuts | 11 Nm |
| Oil pump mounting bolts | 11 Nm |
| Drive board mounting bolt (AT) | 74 Nm |
| Flywheel Bolt (MT) | 118 Nm |
| Oil pan mounting bolts | 12 Nm |
| Crankshaft rear oil seal cover bolts | 11 Nm |
| Coolant pump mounting sensor | 12 Nm |
| Alternator bracket mounting bolt (from pump to gen) | 44 Nm |
| Timing tensioner pulley bolt | 44 Nm |
| CKF sensor bolt | 12 Nm |
| Bolts for fastening plastic timing cases | 10 Nm |
| Attaching the VTEC sensor to the cylinder head | 12 Nm |
| Oil pan bolt (wide gasket), plug | 44 Nm |
Tightening torques for cylinder head bolts
In earlier versions there were only two stages, later there were 4
Important It is advisable to tighten bolts and generally work with threaded connections at a temperature of at least 20 degrees Celsius. Do not forget that you need to clean the threaded connections from any liquid and dirt. It is also advisable to wait 20 minutes after each stage to relieve the “stress” of the metal
PS Different sources give different numbers, for example 64, 65, 66 NM. Even in the original directories for different regions, I write here the average or most familiar ones.
The procedure for tightening the cylinder head bolts, crankshaft bed, camshaft bed
- D14A3, D14A4, D14Z1, D14Z2, D14A7 - 20 Nm, 49 Nm, 67 Nm. Control 67
- D15Z1 - 30 Nm, 76 Nm Control 76
- D15Z4, D15Z5, D15Z6, D15Z7, D15B (3Stage) - 20 Nm, 49 Nm, 67 Nm. Control 67
- D16Y7, D16y5, D16Y8, D16B6 - 20 Nm, 49 Nm, 67 Nm. Control 67
- D16Z6 - 30 Nm, 76 Nm Control 76
- Lock nut for adjusting valve clearances d16y5, d16y8 - 20
- Valve clearance adjustment locknut D16y7 - 18
- Banjo bolt fuel hose d16y5, d16y8 - 33
- Banjo bolt fuel hose D16y7 - 37
Other tightening torques
- Nuts on disks 4x100 - 104 Nm
- Spark plugs 25
- Hub nut - 181 Nm
This article is relevant for Honda cars manufactured 1992-2000, such as Civic EJ9, Civic EK3, CIVIC EK2, CIVIC EK4 (partially). The information will be relevant for owners of Honda Integra in DB6, DC1 bodies, with ZC, D15B, D16A engines.
The VKontakte community can help you with most questions. It's really more convenient than writing comments below.
VAZ 2114 gearbox tightening torques
| List of devices and parts of the motor | Thread | Tightening torque of VAZ 2114 gearbox parts, Nm |
| Screw plug for drain hole | M22x1.5 | 2,9-4,6 |
| Rear light switch | M14x1.5 | 2,9-4,5 |
| Clutch attaching the speed sensor drive housing | MB | 0,5-0,7 |
| Gearbox fastening wing to clutch housing | M8 | 1,6-2,6 |
| Bolt with a conical part of the speed deactivation drive rod joint | M8 | 1,6-2 |
| Dowel for attaching the gear handle housing | M8 | 1,6-2,6 |
| Hardware attaching the gear deactivation mechanism | M6 | 0,6-1 |
| Nut for speed drive rod clamps | M8 | 1,6-2,6 |
| Bolt connecting the gear shift lever axis | M6 | 1,2-1,9 |
What signs will indicate that the cylinder head bolts need tightening?
Not all VAZ-2106 car owners, unfortunately, pay due attention to this process, believing that this point is not so important. Of course, this judgment cannot be correct, because if tightening is delayed for a long time, an important automotive component called the cylinder head will soon fail. And in order to fix problems in this unit, you will not only have to spend a lot more free time, but also allocate a lot of financial savings for repairs.
As mentioned earlier, car owners can solve this problem without the help of service station workers if they know what the procedure is for performing this procedure and use a special scheme.
Drivers will be able to understand that they need to tighten the bolts on the cylinder head by the following signs:
- If a car oil leak is noticed at the junction of the block and the head. This sign of malfunction can appear both from loosening of the clamps and from worn-out sealing gasket. Therefore, during repairs, you need to pay attention to the condition of the bolts and sealing gasket.
- Troubleshooting and replacing a failed element will only be possible after disassembling the engine. And when tightening the bolts, you need to take into account the significance of this moment and be sure to follow the rules for performing the work in order to avoid numerous problems that may threaten the passenger car in the future.
- According to drivers with considerable experience, car owners should tighten the bolts after 3 thousand miles, explaining this by the fact that the clamps are constantly weakening, since the VAZ-2106 engine is constantly functioning.
Having disassembled the head yourself and seen an oily stain at the junction of the block, the fasteners need to be tightened, and as quickly as possible, in order to prevent a more serious breakdown.