What is the diameter of the cylinder block plug of the VAZ 2109. Installing the cylinder head
The cylinder block itself did not burst.
The fact is that the transformation of the coolant, which is located in the cooling jacket, into ice, leads to the fact that the icy liquid expands. This causes overstressing of the block and can lead to cracks. The engine plugs are actually plugs that fit tightly into the technological holes in the block and, under normal conditions, provide the cooling system with proper tightness. However, if the coolant or water inside the BC freezes, then the increased pressure squeezes the plugs out of the cylinder block, keeping the block itself intact after defrosting.
Also, during vehicle operation, a situation often arises when coolant flows through the plugs. You can often find that the block plugs are rusty, that is, they are destroyed due to corrosion. In one case or another, these elements need to be replaced. Next we will look at how to change the engine block plugs.
What you will need
To carry out the replacement procedure you will need:
- chisel;
- hammer;
- screwdriver;
- pliers;
- sandpaper;
- sealing agent;
- stub.
Unscrew and remove the negative terminal from the battery. Drain the coolant from the cylinder head and radiator.
- Like
- I do not like
smurf 04 Feb 2014
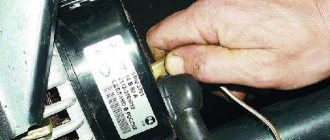
I want to change the plug on the generator side near the oil pipe, I read your responses, is there anything newer? or is this the only way to remove the plug as well as install it? thanks for the help!
How to change the plug on the VAZ 2109 block
Replacing VAZ forks: how to do it correctly
Plugs in the VAZ cylinder block
Plugs in the cylinder block are an integral part of the assembly. If fluid begins to leak from the cooling system, the first cause may be plugs that have become unusable. Holes created by vehicle use contribute to the formation of holes. Replacing spark plugs on a VAZ engine often eliminates such problems, and installing new ones yourself takes less time compared to engine repair.
How to fix a coolant leak in a VAZ engine
If the engine is leaking through faulty plugs, you just need to replace them with new ones. For earlier production of VAZ cars, the set of engine caps includes: one small diameter plug. 20 and 5 mm, huge diameter. 40 mm. There is an abstract on replacing the VAZ block plug.
Materials and tools for work
- Set of forks.
- Hammer.
- Pliers.
- Chisel.
- Screwdriver.
- Sealant.
- Sandpaper.
The hole in front of it must be perfectly cleaned and degreased.
Preparatory work for replacing spark plugs on a VAZ car
First, you need to free up access to the stubs, remove elements and nodes that are in the way:
- The battery is disconnected. the negative terminal has been removed.
- The coolant is connected to the radiator and cylinder block.
- It is determined whether it is possible to replace the fork in the VAZ block without further removing the engine head.
If you need to raise your head, do the following:
- The muffler pipe is disconnected from the exhaust manifold.
- The coolant pump tube mounting bracket has been removed.
- The hoses through which the system is ventilated are disconnected from the cylinder head and the carburetor cover, which is secured with a special casing.
Disconnect the ventilation hoses from the air filter
- The air filter has been removed.
- Disconnect the wires from the ignition timing sensor, carburetor, spark plugs.
- The ignition timing sensor has been removed.
- Hoses are disconnected from:
- fuel pump through which gas is supplied;
- carburetor used to drain fuel;
- the outlet is installed on the engine cooling jacket;
- brake booster.
- The cables connecting the throttle and carburetor choke have been removed.
- The timing belt is removed from the timing belt. The nut securing the tension roller is unscrewed and then immediately removed by the axle and spacer ring.
- The belt is removed from the camshaft pulley.
- Unscrew the bolt and remove the pulley with the key.
- This is unmounted and the engine head is removed.
Tip: Replacing a small plug or a large one on the cylinder block with a flywheel should be done on a disassembled car engine.
Replacing caps on a VAZ car
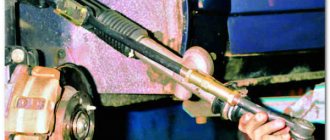
- Using a beard or chisel in one hand and a hammer in the other, gently tapping the edge of the tube, the workpiece is returned to the cylinder block.
Pan Head Screwdriver
- It is then pulled out with pliers and removed from the socket. In a very curved plug, when it cannot rotate, a hole is opened and a handle is inserted and removed.
Drilled hole in a very worn plug
Tip: Once the part gets inside the engine, it can be pulled out of the hole using the magnetic pointer and removed using pliers.
- They are sand cleaned to remove any rusty hole edges. To ensure reliability, the edges of the rear forks are lubricated with sealant before installation in the exhaust hole.
The difference between the old and latest plugs is clearly visible in the photo.
New and old plug for VAZ
- The stopper is put in place.
- Using a hammer and a mandrel, the plug is carefully pressed into the marked hole in the engine block.
Pressing the fork against the engine body
- The block head has been replaced. If necessary, before installation, the plugs are replaced on the heads of the VAZ block. The operating procedure is similar to that for the cylinder block.
Be careful how to change forks on a VAZ 2108, you can see in the video.
Installing the block head
After replacing the VAZ cylinder block plugs, its head is attached to the cylinder block. So:
- It is necessary to clean the head of deposits and dirt. You can use diesel or kerosene for this purpose.
- Residual cooling water and oil are removed from the threaded holes.
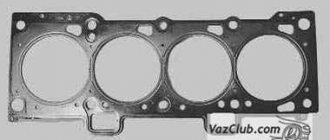
- The gaskets are cleaned of old gaskets, after which the connecting surfaces of the head and cylinder block are degreased with a solvent.
Advice. When installing the cylinder head, a completely new gasket is used. Care must be taken to ensure that no oil gets into it.
- The cylinder head is installed on the cylinder block.
- The supports are lowered into engine oil, run for about 30 minutes and installed on the head.
- Put on your belt. To do this, they place it on the crankshaft pulley. The belt is tensioned counterclockwise.
- The belt drive is secured without fully tightening the bolts. The crankshaft rotates smoothly in two revolutions, this entire belt must be in constant tension, and when the rotation stops, do not loosen.
- Check the alignment of the marks on the middle cover and the crankshaft pulley, as well as on the cylinder head cover and the camshaft pulley. If they match, all bolts holding the idler pulley are tightened. At first. right, then. left.
- The carburetor throttle and choke cables have been laid.
- The previously removed hoses are reconnected.
- The ignition distribution sensor is connected.
- The ignition timing is set correctly; Otherwise, the engine may fail, fuel consumption will increase and the engine will overheat.
- The top dead center is set in accordance with the markings on the crankcase and the flywheel scale. To do this, remove the rubber plug from the crankcase. The crankshaft rotates in the direction of rotation until the marks on the flywheel align with the middle mark on the hatch body. In this case, the pistons of the first and fourth cylinders will be in the TDC zone.
- The wire is connected to the carburetor and sensors.
- The air filter is installed.
- Refilling the vehicle cooling system with water, preferably antifreeze.
- The battery is connected.
- Engine performance has been checked.
Ignition
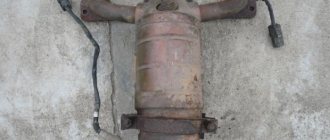
This is how forks are replaced with VAZ engines. A water engine block leak or a roadside cooling system failure causes enormous mechanical damage to the vehicle. The high temperature that occurs in the cooling system leads to the formation of scale, which contaminates the internal walls of the engine housing. In addition, scale clogs the passages of the radiator and cylinder block, causing the engine to overheat, which can lead to malfunction.
All this suggests that the VAZ engine plug must be replaced on time.
VAZ 2109 | Removing and installing the cylinder block | Lada Samara
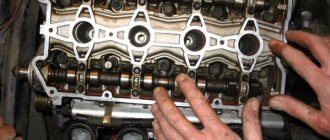
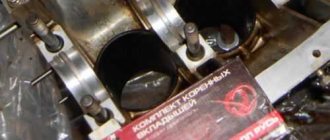
Rice. 67. Front part of the cylinder block: 1. spring tension pin; 2. stabilizer chain support pin; 3. metal ball with a diameter of 17 mm; 4. oil spray nozzle; 5. cylinder block plug; 6. block chain tensioner support pin; 7. oil pump drive chain tensioner support pin.
Rice. 66. Rear part of the cylinder block with the arrangement of the iron ball (1) covering the main line and plugs (2) of the cylinder block
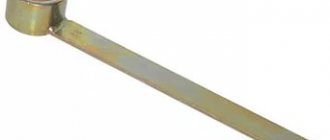
Rice. 69. Installing a screwdriver or chisel to remove cylinder block plugs
Rice. 70. Removing the plug from the block
Spare fork for VAZ 2109 cylinder block from the manifold
Already on the website, at your request, replace the VAZ 2109 manifold block from the manifold side. enter. Advice for experienced car enthusiasts and repairmen, features and aspects that arise when repairing and servicing cars with your own hands. How to repair a car with your own hands at home. We can help you with your own car repairs and repairs. We know how to return a car with the least investment. I'm adding a video annotation.
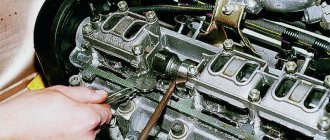
Preparing for replacement - removing the cylinder head
As you guessed from the title, the first stage of repair will be removing the cylinder head. This is not very difficult to do. Detailed instructions for removal/installation are in the article about cylinder head repair. In this article I will give only a brief description of the process for those who know how to do it and you just need to remind them of the procedure. But it won’t hurt anyone to refresh their memory, so I still advise you to read the article about head repair. First, drain the coolant. How to do this correctly is written in the article about replacing antifreeze. Next, remove the air filter, its housing, all wires and hoses. Then unscrew the valve cover, align the marks, loosen the tensioner, unscrew the sprocket and remove it. After this, unscrew the camshaft nuts and pull them out. Next, remove the rockers (it is important not to confuse and put everything in its place during assembly). Don’t forget to unscrew the “pants” of the exhaust system, the pipes to the stove and everything that prevents you from removing the head. Next, unscrew the hex bolts and remove the cylinder head, clean it from dirt and carbon deposits. Now the fun begins.
How to replace the plug in the engine block of a VAZ 2109 from the passenger compartment
Category: Car repair video
Vehicle characteristics: The vehicle dimensions are as follows: body length - 3834, width - 1690, height - 1820 mm. The wheelbase is 2247 mm. Ground clearance 135 mm. The car is equipped with a hybrid power unit. The four-cylinder engine is equipped with a system that provides engine power output. There are sixteen valves per engine. The diameter of one cylinder is 83 mm, the piston stroke is 20 mm. The engine crankshaft accelerates to 7000 rpm. Maximum torque is maintained up to 8000 rpm.
Original title: Degen ty?ynyn blockta ?oz?alt?ish VAZ 2109 tarapynan salons
Release date: December 29, 2021
Posted by admin: at the request of Giovannia
Review from a car owner named Kadir: Despite the 1.2 engine, this is a very dynamic car that allows you to move effortlessly in traffic both in the city and beyond. I was especially pleased with the 6th gearbox, which allows you to accelerate even after 120 km/h (there is no need to switch to a lower gear). Over the year, the price for my equipment has increased by 50,000 p. , not a bad investment. Consumption on the highway is 6l./100 km. , city 8 l. The cost of service is borderline tolerable.
Laughter in the subject: If we take the “major repairs” column from the receipt and multiply the amount from it by the number of apartments in our entrance, then a logical question arises: - And where, in fact, are the oak parquet floors, stained glass windows and a doorman in livery, welcomingly opening the front door ?
Video: how to replace the plug in the engine block of a VAZ 2109 from the passenger compartment
Necessary tools: 1. Hammer; 2. Open-end wrench 16; 3. Socket wrench 22; 4. circle on a grinder; 5. Phillips screwdriver;
How to remove the plug
The cup-shaped plug can be pulled out with two pairs of pliers.
Plugs of any type are removed using a thin screwdriver. Use a blade to pierce the center of the plug and pull it out.
Remember that the movement must be uniform. Otherwise, the plug will become skewed and get stuck.
Use a screwdriver to pierce the old plug and pull it out.
In some cases, the edges of the cup-shaped plug stick out quite a bit and can be grabbed with two pairs of pliers. When pulling out the plug, apply equal force on both sides. Do not try to use the screwdriver as a lever and rest it on the block, so as not to damage the groove itself.
Remove any remaining old caulk with a wooden tool.
Antifreeze or antifreeze flows through the plug: replacing the plug in the engine block with your own hands
Let's start with the fact that the problem of coolant leaking through plugs is most common on older domestic cars. However, this malfunction does not bypass various foreign cars. To restore tightness to the cooling system if it leaks through a plug in the block, the specified plug must be replaced. Let's look at such a replacement using the example of a VAZ car.
So, the plug (cup plug of the engine block) is installed in six places. The five larger plugs are 40mm in diameter, and the slightly smaller one is 25mm in diameter. The plugs must be changed in a certain sequence.
Before replacing, in addition to the new plugs themselves, you need to prepare:
- hammer;
- chisel;
- screwdriver;
- pliers;
- sandpaper;
- sealant;
Experts, regardless of engine type and time of year, recommend using only high-quality antifreeze or antifreeze diluted with distilled water in the required proportions, but not running or even distilled water.
You also need to remember that any antifreeze has a limited service life (maximum 4 years), and mixing different types of coolant with each other is also prohibited. Also used to flush the engine cooling system.
Antifreeze or antifreeze in the cylinder block: what to do and how to solve the problem. . As a result, the passage of the channels deteriorates, oil circulation is disrupted, and filters quickly become unusable.
As a rule, the color of antifreeze or antifreeze in this case changes to. If you remove the oil filter, you may also notice sticky deposits inside it. . How to eliminate an antifreeze leak: causes and possible ones.
The plugs in the cylinder block are integral elements of the unit. If liquid begins to leak from the cooling system, the root cause may be plugs that have become unusable. The appearance of holes is caused by rust that forms during the operation of the car. Replacing plugs on a VAZ engine can often eliminate such problems, and installing new ones yourself does not take as much time as compared to engine repair.
Let's sum it up
It is well known that overheating is one of the most common reasons why an internal combustion engine can be seriously damaged or fail completely. At the same time, repair and restoration of an overheated internal combustion engine turn out to be very costly operations in practice; sometimes it is necessary to replace the engine with a contract engine, etc.
At the same time, the efficiency of the cooling system directly depends on the quality and condition of the coolant, its level, as well as the cleanliness of the channels of this system themselves. In order to avoid problems with corrosion, get rid of the formation of scale and deposits, and also eliminate the risk that the liquid in the cooling system will freeze in winter, you need to use special coolants. Otherwise, the thermostat may quickly begin to work incorrectly, the pump impeller will be damaged, etc.
You also need to remember that any antifreeze has a limited service life (maximum 4 years), and mixing different types of coolant with each other is also prohibited. Even before replacing antifreeze or antifreeze, the engine cooling system must be flushed using special or household products for flushing the engine cooling system.
Why does engine oil get into antifreeze: the main causes of this malfunction. What will happen to the engine if oil is found in antifreeze or antifreeze?
Reasons why coolant starts to leak. How to find the location of an antifreeze or antifreeze leak yourself. Useful tips and tricks.
Why do antifreeze or antifreeze enter the engine cylinders and what to do in such a situation. How to determine the presence of antifreeze in the cylinders yourself, repair methods.
Replacing the coolant working fluid of the engine cooling system. Features of the draining procedure. Removing antifreeze residues from the cylinder block.
How to unscrew a broken pin or broken bolt from an engine block and other components. Methods for unscrewing a broken bolt, useful tips.
Causes of oil leaks in the oil filter area: oil flows from under the filter, through the housing, in the area of the fitting, etc. Available diagnostic and repair methods.
What to do after replacement
So, the plug has been replaced and is no longer leaking, all that remains is to return the cylinder head to its place. To do this, follow these steps:
- Cleaning the cylinder head from contaminants and formations using diesel or kerosene.
- Removing remaining coolant from threaded holes.
- Cleaning the cylinder head mating surfaces from the old gasket, degreasing them with a solvent.
- Installation of the head on the BC.
- Head fixation. The fastening bolts are immersed with threads in motor oil. When the lubricant drains (about half an hour), the head is fixed.
- Putting the belt on the crankshaft pulley.
- Tension the belt counterclockwise.
- Installation of the belt drive protective cover (the mounting bolts are not tightened). Turn the crankshaft 2 turns (the belt should be tight even when the crankshaft is stopped). Checking the alignment of the mounting marks on the camshaft pulley and the cylinder head cover. Tightening the bolts securing the tension pulley bracket.
- Installation of drive cables for carburetor flaps.
- Connecting the removed hoses.
- Installation of the ignition distribution sensor.
Now you need to set the ignition timing. To do this, do the following:
- Connecting wires to the carburetor, ignition distribution sensor.
- Installing an air filter.
- Filling the cooling complex with antifreeze/water.
- Connecting the negative cable to the battery.
- Checking the functioning of the internal combustion engine.
Replacement procedure
First of all, you need to make the area in which the stub is located accessible. To do this, follow these steps (in this order):
- Disconnecting the exhaust pipes of the muffler from the exhaust manifold.
- Removing the bracket on which the pump pipe for supplying coolant is fixed.
- Disconnecting the hoses that provide ventilation to the unit from the carburetor and cylinder head cover. Closing the carburetor with a special cover.
- Removing the air filter.
- Disconnecting the wires from the carburetor, ignition distribution sensor, spark plugs.
- Removing the sensor that distributes the ignition.
- Disconnecting hoses from the fuel pump, outlet pipe, vacuum brake booster.
- Disconnecting the air and throttle valve drive cables.
- Removing the toothed belt protective cover.
- Removing the pulley with key.
- Removing the cylinder head.
Direct replacement of the plug includes the following:
- Rotating the plug into the cylinder head using a chisel and hammer.
- Pry the plug with pliers and remove it. If the part is very rusty and does not turn, you need to make a hole, screw a knob into it and pull out the plug.
- Cleaning the edges of the cylinder head hole from corrosion using sandpaper. Lubricating the edges of the new part with a sealing agent.
- Pressing the part into the cylinder head hole using a mandrel and a hammer.
Video: How to Change the Plug on a VAZ 2106 Block
- The block head is put in place. If necessary, before installation, the plugs are replaced with VAZ block heads. The procedure is similar to that for the cylinder block.
You can see details on how to change the fork on a VAZ 2108 in the video.
Installing the block head
After replacing the forks of the VAZ engine block, its head is attached to the cylinder block. So back:
- You need to clean your head of sediment and dirt. You can use diesel fuel or kerosene.
- Residual coolant and oil are removed from the threaded holes.
- The connecting strips of the head and cylinder block are cleaned of old gaskets and then degreased with a solvent.
Tip: When installing the cylinder head, a new gasket is acceptable. You need to make sure that no oil gets on it.
- The cylinder head is installed on the cylinder block.
- Fasteners are driven into engine oil, run for about 30 minutes and installed on the head.
- Put on your belt. To do this, they put it on a pulley located on the crankshaft. The belt is tightened counterclockwise.
- Without final tightening of the bolts, the guard belt drive is attached. The crankshaft rotates smoothly through two turns, while the belt must be kept under constant tension and should not weaken when the shaft stops turning.
- Check the alignment of the marks on the middle cover and the crankshaft pulley, as well as on the cylinder head cover and the camshaft pulley. If they match, all tension roller bolts are tightened. First to the right, then to the left.
- The carburetor throttle and air damping cables are laid.
- The previously removed hoses are reconnected.
- The ignition dispersion sensor is connected.
- The ignition timing is set correctly, otherwise the engine may malfunction, fuel consumption will increase and the engine will overheat.
- The top dead center is set according to the marks located on the scale of the crankcase hatch and flywheel. To do this, the rubber plug is removed from the crankcase hatch. The crankshaft rotates in the direction of rotation until the marks on the flywheel and the middle mark on the hatch coincide. In this case, the pistons of the first and fourth cylinders will be located in the TDC area.
- The wire is connected to the carburetor and sensors.
- The air filter is installed.
- Refilling with water, preferably antifreeze, car cooling system.
- The battery is connected.
- Tested motor performance.
How to install the ignition
- There are marks on the flywheel and the scale of the crankcase hatch, which are used to set the top dead center. The rubber plug installed on the crankcase hatch is removed. As it rotates, the crankshaft rotates until the marks on the flywheel coincide with the middle mark on the hatch body. In this case, the pistons of the fourth and first cylinders are in the top dead center position.
- Wires are connected to the carburetor, ignition distributor, spark plugs and other sensors.
- An air filter is installed.
- The cooling system is filled with antifreeze or water.
- The negative wire is connected to the battery.
- The operation of the car engine is checked.