Why has the clutch pedal become stiff?
If the car is completely new, then the so-called drive wedge may have occurred.
This is the easiest fault that you can adjust yourself. But if we are talking about an older car, then perhaps the problems are more serious and affect the entire unit. Most often, such problems occur due to poor performance of the diaphragm spring. It is possible that the fork is jamming or the bearing being pressed out is jammed. Cable scuffing often occurs. The driven disk itself may also become jammed.
If the car is in use for a long time, then cracks may appear on the drive fork. You also need to understand that over many years of driving a car, a large amount of dirt could simply accumulate in this unit.
Sequence of actions when removing and replacing the Lada Granta clutch with cable drive
- After removing the manual transmission (the process is described above), we mark the location of the basket and flywheel with marks. In the event that we do not plan to replace the basket or pressure plate. The decision is made by the repairman based on the diagnostic results.
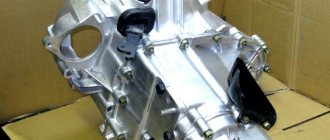
Removed manual transmission
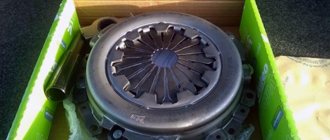
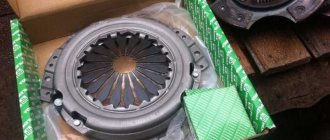
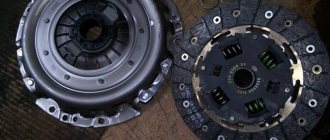
- Unscrew the bolts and remove the basket with the pressure driven disk.
Cart with disc
Note to the driver!!! We loosen the tightening of the bolts evenly, according to the diagonal principle, one turn of the key.
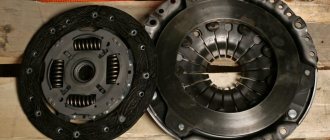
- Remove the discs from the clutch basket.
Removing a disc from the bin
- We carry out troubleshooting of parts, adjacent mechanisms and elements.
What to pay attention to when troubleshooting:
- cracks, breaks in parts;
- depressions of more than 0.2 mm;
- check for cracks on the diaphragm spring;
- We inspect the support rings; there should be no signs of wear, visible or obvious defects on them;
We replace worn elements with new ones as necessary.
How to replace a release bearing - step-by-step instructions
The entire bearing replacement process is outlined below, supported by photographs for greater clarity. To replace you will need: a new release valve (suitable from Priora, but you will have to trim the “ears”); pit or lift; set of tools.
1. Work is performed on an inspection pit or on a lift. We unscrew everything that may interfere with hanging the box (protection, hanging cables, etc.).
2. Unscrew the bolts securing the box and disconnect it from the motor.
3. We hang the box on ropes without removing it completely and without disconnecting the CV joints.
4. Remove the retaining spring, then remove the faulty bearing from the guide bushing.
Reassembly is performed in reverse order; during assembly, do not forget to lubricate the shaft on which the release bearing sits. If the replacement process is not described in sufficient detail for you, you can read a more detailed report
AMT clutch actuator repair
Clean the inner surface with solvent. Let's examine the insides. In this example, wear on the ball stops and a crack on the plastic part of the actuator were detected. The problem is that there are no repair kits. That is, AMT clutch actuator parts are not sold separately. If you cannot restore the old ones, all that remains is to lubricate the mechanism.
LIQUI MOLY Thermoflex Spezialfett was used as actuator lubricant. It is very similar to the one that was in the actuator from the factory. Read more about actuator lubrication here.
We perform reassembly and installation of the AMT actuator on the car (see above).
Let us remind you that if other malfunctions occur in the operation of the AMT (howling, crackling, the car jerks, jerking, rattling, etc.), you can determine the cause using these instructions.
Share on social networks:
Found an error? Select it and press Ctrl+Enter..
Source
How is the clutch adjusted?
So, how to properly adjust the clutch? The clutch of the modern VAZ model family has a clutch cable, along with which there are ratchet mechanisms in the structural unit. These cables do not provide for any clearance, which in theory does not imply the need for adjustment. However, the manufacturer insistently recommends performing periodic adjustment procedures on this mechanism.
To perform the adjustment on these cars, including the Lada Granta, you should stock up on a ruler (a caliper is also suitable) and a screwdriver.
The sequence of manipulations looks like this.
- Open the hood of the Lada Grant and install the clutch cable in its original position. To do this, move its lower edge forward until it stops. By moving the cable, you can feel the force created by the return spring. We do not pay due attention to this aspect and continue this manipulation.
- Taking a ruler or the same caliper, we measure the distance. The photo clearly shows the segment to be measured: between the beginning of the fork and the cable lead. For correct measurements, you will need to keep the cable in a stationary and certain position. The ideal measurement result would be 27 mm. When clutch adjustment is required, the actual parameter will differ from the stated standard. To achieve the required value (27 mm), rotate the cable lead.
- Having completed this action, insert the cable end into the groove of the fork, and then release the retained element. Please note that there is no gap.
- This completes the procedure. Now we move on to pressing the pedal multiple times to make sure the unit is functioning correctly. After completing a set of presses, we once again measure the distance along the cable and, if discrepancies appear, perform repeated adjustments.
The need to adjust the cable on Lada Granta, Kalina or Priora occurs regardless of its condition (new or has already spent a certain amount of service life).
When does the need for adjustment occur?
In such cases:
- when there are jerks from the start that are permanent;
- when an attempt to engage a gear is accompanied by a blow;
- if the pedal is stuck.
These are the most striking symptoms indicating the need for adjustment. Ideally, the level of the pedal should coincide with the brake. In this case, the full pedal travel is 125 - 135 mm. Practice shows that the stroke can be exceeded by up to 160 mm.
To properly adjust the pedal assembly, you will need to stock up on two wrenches with suitable parameters.
- Loosen the locknut holding the cable. It is located on the engine compartment side.
- Now use a wrench to rotate the second locknut to achieve the correct clearance.
- Upon completion of the process, be sure to tighten the first nut to the required torque.
Attention! If the pedal is adjusted with its position below the brake, then the moment the clutch engages will occur when the pedal itself “lifts” from the floor. When the level is above the brake pedal, seizure will occur at the end of the stroke.
We remind you that efforts should be made to achieve a uniform level in the pedal assembly (the author of the video is Time R).
How to check the clutch?
The clutch is checked using already proven and reliable folk methods, and only by them. Naturally, in addition to disassembling the clutch. We are talking about how you can check the clutch of your car yourself, and then decide whether you need a more in-depth diagnostic with dismantling the clutch mechanism.
So, let's start checking the clutch on the main points.
Clutch slippage. Those. again we are talking about wear on the driven disk when it is not fully pressed against the flywheel, which means there is no full clutch.
- We put the car on the handbrake and start the engine;
- engage a higher gear: 3rd or 4th;
- slowly depress the clutch and “give” the gas;
- When the handbrake is adjusted, the car engine should stall. If this does not happen, then it is time to think about replacing the clutch disc.
The clutch “drives” , i.e. it doesn't turn off completely. This malfunction is accompanied by difficult gear shifting, or extraneous noises and sounds when changing gears. And the gearbox is hardly to blame here. Checking the clutch.
- the engine is idling;
- Depress the clutch pedal completely and engage first or reverse gear;
- If the gear is engaged with uncharacteristic effort, and at the same time you hear extraneous sounds, then the driven disk does not completely move away from the flywheel, i.e. the clutch “drives”;
- you need to pump the hydraulics and adjust the free play of the clutch pedal;
- check again, if nothing has changed, then it’s time to go to a car service for a more in-depth diagnosis of the clutch.
Using these simple methods, you can independently check the clutch before it fails at the most inopportune moment. Timely diagnostics, and even better - correct operation, will increase the life of the clutch, or take timely measures to eliminate malfunctions.
How to change the clutch on a robot
The replacement is the same for all manual transmissions (2180, 2190 and 2181) after removing the box.
Equipment and tools
The clutch is replaced after removing the box, which requires the following:
- inspection pit or lift;
- wheel chocks (when working on a pit or overpass);
- a set of wrenches (open-end wrenches, socket wrenches, socket wrenches, balloon wrenches, as well as special bits), a mounting blade or long chisel, a hammer, pliers;
- jack;
- safety stands for securing a car with removed wheels and telescopic stands for supporting a dismantled gearbox and engine with partially removed mounts when working on a pit, overpass or lift;
- container for used oil.
Before dismantling the box, it is necessary to remove both actuators, which is carried out according to the same principle.
How to disable and remove the clutch actuator
To remove the clutch actuator, you will need to unscrew the mounting screws holding it to the gearbox using a Torx30 L-shaped wrench (asterisk) or an appropriate bit. To do this you need:
- De-energize the car's electrical system by opening the ground.
- Remove the air filter, remove the mudguards and the engine crankcase protection from below to provide access to the mounting screws.
- Pressing the connector latches with your fingers, disconnect it from the actuator.
- Unscrew the 3 mounting screws and pull out the actuator.
If necessary, lubrication will need to additionally unscrew the 9 screws securing the cover.
How to remove the gearbox
After removing the actuator, work continues under the bottom of the car:
- The front wheels are removed and the hub nuts are unscrewed.
- The U-shaped arm extension bracket is unscrewed from the front beam.
- The nut is twisted off the steering tip pin and, using a puller, it is pressed out of the socket, disconnecting from the stabilizer link.
- The ball joint and the wheel knuckle assembly are separated, the entire structure is pulled off the splines of the outer CV joint and moved to the side.
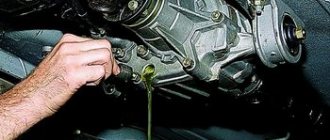
- The oil is drained from the gearbox.
- A chisel or mounting blade is inserted into the recess between the housings of the inner CV joint and the box, then several taps are made with a hammer to shift and remove the CV joint from the splined engagement in the box.
- After dismantling the CV joint, a plug or a piece of plastic pipe with a diameter of 30-35 mm is inserted into the hole. If this is not done, then after dismantling the second CV joint, the axle gears will turn and fall into the gearbox housing.
- The second CV joint is removed.
- The protective boot is unscrewed.
- Separate safety stops are placed under the engine and gearbox to prevent movement during removal.
- The starter bolts are unscrewed and it is removed.
- The 2 upper gearbox mounting bolts are loosened, then the lower bolts are unscrewed.
- The box is undocked from the cylinder block by moving it backwards and carefully removed.
Removing the gearbox on a Lada Grant
In this case, it is necessary to exclude the impact of the driven shaft on the clutch basket springs if it does not change.
How to replace and align the clutch
To do this, you will need a special mandrel, which is a section of the input shaft, or a specially machined part that exactly copies the shape and dimensions of the input shaft end. By inserting the mandrel into the hole in the center of the basket, achieve alignment between the disc and the spring and attach the clutch basket to the flywheel, gradually tightening the bolts on it with a star. After tightening is completed, the mandrel is removed.
Clutch box design "Lada-Grants"
On this car, this unit is no different from the one installed in the Lada-Kalina. This is a mechanism consisting of a flywheel on which a special basket is attached. It must constantly press the disc with the friction linings. Thanks to this, torque begins to be transmitted to the transmission.
When we talk about a cable-type clutch on a Lada Grant, in this case it means that when the car owner presses the pedal, the cable that is connected to the clutch fork is tensioned, and special petals stop pressing the disc. Accordingly, the torque from the power unit is no longer transmitted to the gearbox.
There is only one clutch disc on the Lada Grant. This unit itself is a friction unit, equipped with a diaphragm-shaped spring. The clutch is combined with the gearbox in one housing.
Robot Lada AMT maintenance and adaptation
So it arrived in our regiment, automated manual transmissions with a light hand from Renault appeared on domestic cars Lada Vesta, Lada Granta and some other models, moreover, these transmissions began to be installed on some Renault models that are assembled in our country.
For a long time now we have been quite successfully repairing, servicing and diagnosing AMTs from other manufacturers for many brands such as Peugeot-Citroen, Toyota, Fiat, Opel and suddenly Lada. Well, let's see what kind of animal it is. The transmission (gearbox) in these systems is usually practically no different from the mechanics, sometimes there are design features of the housing for attaching the drives, while the filling (gears, synchronizers, bearings) is an ordinary mechanical box, but... This box is controlled by electronics, and the switching mechanism clutches and gear shifts are driven, sometimes hydraulic, sometimes electromechanical. Our AMT has European drives manufactured by ZF, which is a partner of several European brands.
Preparation for repair
To remove and subsequently replace the clutch, prepare a set of tools consisting of:
- center punch;
- extension cord;
- funnels;
- heads (8, 10, 15, 17, 19 and 30 mm);
- high head (13 mm);
- heads Torx E12 and Torx E14;
- Phillips and flat screwdrivers;
- pliers;
- curved spanners (8 and 13 mm);
- straight spanners (17 and 19 mm);
- two adjustable stops;
- metal brush;
- ratchet wrench;
- caliper;
- stands;
- hammer;
- jack;
- balloon wrench;
- torque wrench;
- centering mandrel.
In addition, you will need to apply certain parts and consumables. So, you will need CV joint-4 lubricant, a guide pin M12×1.25 mm, transmission oil, wood blocks, a technical container, a hose, rags and the clutch itself.
Preparatory stage before replacing the clutch on the Lada Grant
Necessary tools, materials:
- set of car keys, sockets, ratchet;
- extension;
- calipers;
- additional lighting;
- screwdrivers with a set of bits;
- mounting blade;
- pliers;
- hammer;
- metal brush;
- hydraulic (mechanical) jack;
- cylinder and torque wrench;
- graphite-based lubricant “CV joint-4”;
- container for draining waste;
- 6 liters of gear oil;
- clutch assembly;
- wooden spacers;
- rags.
Replacing the AMT clutch actuator
How to remove the actuator
:
- Disconnect the negative terminal of the battery.
- The engine air filter has been removed.
- Remove the screw securing the wiring harness.
- Remove the three screws securing the AMT actuator unit.
All that remains is to disconnect the connector (press the fasteners, the direction is indicated by the arrow) and pull the actuator out through the top.
Install actuator 1, Figure 8-6, clutch release on bracket 3 and tighten three self-tapping screws 2. Screw tightening torque 7. 12 N.m (0.7. 1.2 kgf.m) (replaceable attachment Torx T30, knob, torque wrench).
Attach block 4, Figure 8-5, of the additional wiring harness to connector 2 of actuator 1 of the clutch release mechanism and secure the harness to bracket 3 with two fastening brackets 6.
Install actuator 3, Figure 8-4, clutch release assembly with bracket and additional wiring harness on the gearbox, install the outlet hose bracket on the actuator bracket and tighten, without tightening, two bolts 2 and nut 4 of the fastening (replaceable head 13, knob).
Adjust the extension of rod 6, Figure 8-7, of the actuator, for which you need to:
- move the actuator 5 in the direction of the arrow until the rod 6 touches the clutch release fork 7 and mark the position of the bracket 4 relative to the gearbox using a non-stress method.
- using the mark, additionally move the actuator in the direction of the arrow by an amount of 6±2 mm and finally tighten two bolts 1 and 2 and fastening nut 3. The tightening torque of the bolts and nuts is 16...25 N.m (1.6...2.5 kgf.m) (replaceable head 13, wrench, torque wrench, ruler or caliper).
Figure 8-7 — Installation of the clutch release mechanism actuator: 1,2 — bolts securing the actuator to the gearbox; 3 — nut securing the actuator to the gearbox; 4 — actuator mounting bracket: 5 — clutch release actuator; 6 — actuator rod; 7 — clutch release fork
Connect the additional wiring harness connectors to the gear shift actuator connectors, the control controller connector, and the input shaft speed sensor.
Secure the additional wiring harness with brackets built into the harness to the radiator outlet hose, to the left engine mount bracket and to the fan housing.
Also, the process of removing and installing the clutch release mechanism actuator is described in TI 3100.25100.20583 (download).
How to replace the cable in the clutch mechanism?
How to properly replace a clutch cable? Below are detailed aspects of the instructions to successfully replace the cable.
- First, we begin to unscrew the cable nut from the bracket, which is located under the dashboard. We perform this action using the key set to “8”, after which access to dismantling the bracket stop appears.
- We disconnect the locking bracket, which is located on the “finger”.
- Next, remove the body of the compensation device (use a screwdriver).
- We remove the fluoroplastic bushing from the pedal pin.
- We visually monitor the assembly element for wear. If such “artifacts” are present on the surface of the bushing, then we definitely replace it by pre-treating it with grease.
- We dismantle the cable seal, which is mounted in the technological hole of the frontal shield of the body (in the photo it can be seen from the engine compartment).
- Pull the cable end as you move until it is removed from the fork groove.
- Using the key “17” we “defeat” the nut by means of which the cable tip is held on the corresponding bracket of the transmission unit. To prevent the tip from turning, we use an additional key.
- Now we proceed to dismantling the cable end, after which we remove this element from the hole. The cable itself can also be removed.
- Having completed the indicated manipulations, we begin the installation of a new unit.
- First, we pass the cable into the previously designated hole in the front shield.
- We treat the bushing with a special compound and fix the wear compensation element on the corresponding pin.
- Now we attach the cable directly to the pedal and return the previously removed seal to its place.
- We move on to installing the tip on the LADA Granta transmission bracket. Screw the retaining nut with the required torque (do not overdo it).
- We remember the need to tighten the leash.
- We continue the installation procedure by moving the lower tip in the forward direction until a feeling of stop occurs.
- We hold the tip in the designated position and at the same time measure the distance that was illuminated by us earlier (more specifically: in the “leash-fork” section). If the parameter is incorrect, rotate the leash until the optimal value appears.
- We remember the need to lubricate the body of the leash before installing it in the knot. The surface in contact with the fork must be lubricated.
- The final action is to press the pedal to its full value multiple times. Then we again make a control measurement in the “fork – leash” sector and, if it deviates from the regulations (27 mm), we make a re-regulation. This completes the clutch cable replacement.
Do-it-yourself clutch installation on a Lada Granta
- Using a mandrel, we install the driven disk, basket, and centering pins.
- We fix the basket to the flywheel with three bolts. We tighten the bolts evenly according to the diagonal principle with a force of 37 N.m. We use a torque wrench.
- We remove the frame and install the manual transmission.
- We fix the clutch drive on the manual transmission.
- We adjust the distance from the plastic bushing to the drive fork. It should be equal to 27 mm. We adjust the key value to “10”.
We measure 10 mm
Replacing the Grant clutch cable: step-by-step instructions
So, the process of replacing a necessary part on a Lada Granta includes the following manipulations:
- Remove the nut securing the cable sheath holder to the pedal assembly holder, located under the instrument panel. An 8mm wrench is used here.
- Remove the spring clip from the clutch pedal pin groove by carefully prying it up with a Phillips screwdriver.
- Remove the eye of the cable length adjustment mechanism housing (automatic) from the clutch pedal pin. Pull the cable with its upper part out of the pedal assembly bracket.
- Remove the cable guide from the groove of the clutch fork lever, which is located inside the engine compartment. To do this, you will need to carefully pull the cable forward.
- Unscrew the leash from the thread of the cable end.
- Release the cable end from the protective cover. It is rubber, so this will not be difficult to do.
- The end of the cable sheath is installed inside the bracket on the gearbox. You need to get it.
- Remove the cable sealing cover located inside the front panel in the passenger compartment. Pull the cable slowly into the interior. At this stage, experts strongly recommend checking the plastic bushing on the pedal pin. If a part is worn out, it would be better to replace it. If it is in perfect order, just lubricate it with a plastic product.
- When replacing the Grant clutch cable, perform the following steps:
- insert the cable from the passenger compartment into the engine compartment, doing this through the hole in the front panel;
- close the shield hole with a special cover for sealing;
- attach a mechanism to the pedal pin that allows you to adjust the length of the cable automatically and secure it properly;
- screw the plastic leash onto the end of the cable so that the end of the cable end is located flush with the end of the leash;
- hide the protruding guide inside the groove of the clutch fork rod;
- Adjust the clutch drive as required.
- Remove the cable, holding it by the threaded end, until it stops. Here the clutch pedal will interfere with this process, so force must be applied. After removing the cable, you must hold it in this position.
- Determine the distance between the end of the plastic guide and the clutch release fork lever using a caliper. The distance should not exceed 27 mm.
- Remove the load or release the cable so that the leash takes its place near the fork lever. There should be no gap if installed correctly.
Having completed all the manipulations, press the clutch three times so that the cable length adjustment mechanism is automatically activated. Install the air filter housing.
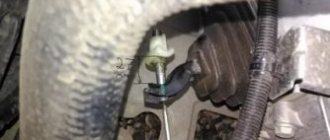
Release bearing Gearbox 2181, Clutch release clutch Gearbox 2181 - replacement in Lada Granta
Well, I was struck by the death of the release bearing with a mileage of 23 thousand km, also known as the clutch release clutch of the gearbox 2181. Judging by people's reviews, this bearing does not last more than 30 thousand km. In the evening everything was fine. The next day in the morning, while squeezing the clutch, I noticed that it was somehow not being pressed correctly, I thought, maybe it seemed, and after 20 - 30 km the clutch disappeared altogether.
With the car running, I could not turn on the first and rear, 3,4,5 turned on with difficulty, and after a while they did not turn on. But with the car turned off, all transmissions were switched on. Having opened the hood, I pulled the clutch fork, it dangled as desired in different directions, i.e. was not fixed. Having reached the garage under my own power (25 km), I began to find out the reason. I disassembled and removed everything unnecessary that interfered with removing the box. We unscrewed and separated the box from the engine and supports, hung it by the CV joints (in this position it is problematic to install it later, it is better to read a repair book). The problem became immediately clear - the release bearing had died. Among other release bearings, I chose a roughly similar one - the Priorov one, but it still needed to be installed somehow, and for it to still work. In the 2181 gearbox there is a release fork similar to a fork from a cornfield, based on this I decided to also buy a release bearing spring from a cornfield (or from a VAZ 2101) that secures the bearing to the fork.
on the left - Grantovsky, on the right - Priorovsky bearing
action plan
+spring
hanging the box
modified Priorov bearing sits on the shaft
The spring is installed in the bearing groove and fixes the fork on the other side, i.e. the fork is clamped by a spring, if something is not clear, then read the manual for replacing the release bearing in the field.
Well, that’s all, actually. I put the box back, assembled everything, and connected it. Works great. Don’t forget to lubricate the shaft where the bearing sits and the splines with a lubricant like lithol, but not too much because if you overdo it, then when the shaft rotates, lubricant can splash onto the clutch disc, and it will slip. After these procedures, the clutch pedal became a little softer, and the gears shifted better. I drove more than 100 km, everything is fine, time will tell how long it will last. Well, everyone decides for themselves to change the original 2181 release bearing every 30tkm or less, or install another one with modifications. The release bearing should last for the entire service life of the clutch, i.e. operating time to failure is at least 800 thousand “off-on” cycles of the clutch, which is equivalent to a car mileage of 100,000 km, and a bearing that falls apart up to 30 thousand km.
Replacement and repair of the AMT clutch actuator on LADA
The main distinguishing feature of an automated transmission (AMT or “robot”) from a mechanical one is the electric actuators produced by ZF, which change gears at the command of the electronic “brains”. The manufacturer claims that the actuator unit is maintenance-free and cannot be repaired, but craftsmen have found a way to repair it with their own hands.
If the car’s warranty has already expired, then replacing the clutch release mechanism actuator yourself will cost tens of thousands of rubles (article numbers: 21820160901200 and 21820170501200). In an attempt to save money, you can try to repair it.
Clutch installation
Before you begin assembling the clutch, you must wash each removed element in kerosene. Then apply a thin layer of CV joint-4 lubricant to the guide sleeve of the release bearing and to the spline of the input shaft. The installation of parts begins with the release bearing, after which the clutch fork, spring and bushing are installed.
Next, the clutch is centered using a special frame inserted into the hole in the crankshaft end, while the driven disc is placed on the frame so that the protrusion located on the hub faces the gearbox. After this, the clutch basket is installed, and the centering frame is removed. Then you will need to install the gearbox in its proper place.
After installation, check and monitor the gear shifting process; they should turn on clearly, without clearly audible extraneous crunching sounds. In addition, ideally the car will move away without jerking.
How to check the release bearing on Kalina and how malfunctions manifest themselves (noisy or buzzing)
To understand whether your Kalina needs to replace the clutch, you must first react in time to signs of failure and diagnose the unit. Signs of a faulty Kalina release bearing:
- Noise or hum when pressing the pedal (damaged, insufficient lubrication or jammed);
- Difficulty pressing the pedal occurs when the coupling ear is broken, as well as the spring is deformed;
- These videos clearly show when the Kalina release bearing is faulty (noise, buzzing, knocking, creaking), as well as how to check the release bearing.
How to remove the release bearing from a Lada Kalina - location of the part and gearbox mounting diagram
As mentioned at the beginning of the article, to correctly replace the VP and dismantle it, you will need to remove the gearbox. Below is a photo of the transmission from below. To dismantle the manual transmission, you will need to disconnect all the components under the hood that are attached to it. Next, the wheel drives and front suspension elements are removed. Then the manual transmission is unscrewed from the “engine” and removed. Inside the “head” of the clutch housing is the release bearing itself.
What to pay attention to
There are certain signs that the clutch on the Lada Grant has failed and measures need to be taken. It is worth paying attention that if the car has just been purchased, the pedal will be pressed quite easily. If this requires great effort, then this is the first evidence that the clutch needs to be adjusted or replaced.
It is also worth paying attention to the appearance of extraneous squeaks at the moment when the driver presses the pedal. In addition, it should not twitch when the car owner does not touch it.
Most often, car enthusiasts are faced with the fact that the pedal travel becomes too tight. It is worth considering in more detail the reasons for this problem.
Replacing the clutch on a Lada Grant (robot)
The process of prevention and replacement is similar to that described above. Provided the recommendations are followed, the repairman will not have any problems with the installation.
The main task is not to damage the upper actuator when dismantling/installing the automatic transmission. To make disassembling the automatic transmission easier, first remove the subframe cross member. We lower the two engine mounts, remove the automatic transmission, and replace the clutch. When finished, assemble the structure in reverse order.
Differences between a robotic gearbox
In March 2015, the AvtoVAZ plant began production of Lada Granta cars with a robotic gearbox. The same type of gearbox is installed on the Kalina, Vesta, Priora, and XRAY models.
Robot AMT Lada Granta
The design of the VAZ AMT is based on the VAZ-2180 manual gearbox (it was equipped with electromechanical actuators from the ZF concern). There are few fundamental differences:
- in AMT, an electric drive is responsible for pressing the clutch; there is no foot pedal;
- The clutch and gear shifting are controlled by an electronic unit.
The “robot” body is slightly different from the manual transmission due to the mounting of the drives. The internal mechanism (bearings, gears, synchronizers) is almost the same for both types of boxes. Thanks to the adaptive system, the robotic gearbox “remembers” the owner’s driving style and adapts to it.
Design Features
The robot on the Lada Granta has a clutch rod drive, electromechanical gear selection drives and an actuator. The parts are produced by ZF, which supplies drives to several European automobile concerns (Peugeot, Citroen, etc.).
The operation of the system is controlled by an electronic control unit (ECU). It is connected to the mode selection lever and the display system.
Selection of components
The clutch life on Grants depends on the operating conditions in which the car is located, and therefore can have significant differences. When using the car sparingly, the clutch is changed after 100,000 km. One of the most common types of clutch installed by the Volzhsky Automobile Plant is LUK clutches.
As a rule, clutches are sold in the form of kits, which include a clutch disc and basket, as well as a release bearing. The approximate cost of clutches for Granta starts at 2,000 rubles and can vary significantly in a particular region.
To purchase an original kit and not a counterfeit, buy parts only in specialized retail outlets, based on real customer reviews, or order the kit directly from the manufacturer (for example, using the Internet). Sometimes clutches are assembled from components made by different manufacturers.
Review of Manufacturer Prices
| Manufacturer article number | Price, rub.) | Resource (Thousand km) |
| Set of wheels LADA 2190-316010001 | From 3100 | 85 — 105 |
| —/— 2190-31601000 | —/— | —/— |
| —/— 302050901 | —/— | —/— |
| —/— 302052223 | —/— | —/— |
| —/— 302052307 | —/— | —/— |
| LADA 21810160118001 clutch | From 650 | 80 |
| LADA 21090160119000 input shaft guide | From 750 | 75 — 80 |
| LADA 21010160121500 fork support | From 150 | 75 – 95 |
| LADA 21810160120001 plug | From 800 | 85 – 95 |
| Connecting spring fork and clutch 21010160118800 | From 350 | 85 — 95 |
*prices are current as of October 30, 2018.
Features of correct adjustment of the unit
Quite often, clutch-related problems are solved by standard adjustments. However, such measures must be carried out based on the recommendations of specialists and experienced car owners. First of all, you need to turn off the engine. After this, just press the pedal several times and listen to the sounds. If no grinding or creaking is heard, then the adjustment continues.
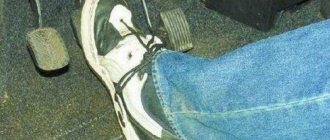
If the Lada-Grant clutch pedal gets stuck or it moves jerkily, then its position needs to be adjusted. First of all, you need to completely squeeze it out with your hand. It is better not to use your foot, as in this case it will be much more difficult to feel minor jamming or, conversely, jerking at the moment when the lever returns to its original position.
If you manage to find out that the pedal twitches a little, then you need to arm yourself with a ruler and determine the distance from the floor to the pedal, or rather, the part that protrudes outward. After this, while continuing to hold the measuring device, the car owner must press the lever and wait until it returns to the same position. If the values on the ruler diverge or the distance is more than 14.5 cm, then in this case you need to make adjustments. It is worth noting that the full pedal travel should not be more than 146 mm. The cable guide cannot move in relation to the fork lever by more than 2.7 cm.
Why the ECM detects error “P0830”, video explanation
Praise to the author! I am also a terrible car enthusiast, albeit with little experience... I also had right-hand drive ones, but unfortunately, they are not convenient with our traffic. I now have probably the most boring Toyota model. For almost 2 years of owning this car, I had no problems at all, it burned out once a light bulb in the foot, and I changed the brakes and oil according to plan, despite the fact that the car is 8 years old, the mileage is about 150 thousand. It accelerates quickly, drives smoothly, and is maneuverable. spacious trunk and for its size a very comfortable and spacious interior, dad feels completely comfortable in the back seat, and he is a large man. After a night in a windswept parking lot at minus 35, it started up and didn’t even sneeze once. The stove heats perfectly, the air conditioner cools quickly, the consumption is 6-7 liters of 92 in the city. engine 1.5. 106 horses, + with its size it will fit into any hole in the parking lot. In short, the car is just great. )))
I've been meaning to adjust the clutch on my Grant for a long time. I made a printout of your article. Tomorrow I’ll arm myself with the necessary tools and go to the garage to do everything with my own hands step by step, as described in the article.
Open the hood, under the air filter there is a clutch foot. It is equipped with a cable with a plastic screw. Lightly pressing the foot, remove the cable to the side. We adjust the cable screw and put it back on the foot.
When accelerating, the engine roars slightly when the leveler revs up
Clutch needs replacement! It's slipping!
When starting off there is jerking, what could be the problem?
Signs of clutch wear
| Sign | Cause and remedy |
| Incomplete engagement of the clutch (slips) | Replacing discs, cleaning clutches |
| Incomplete shutdown (leading) | Prevention of the clutch mechanism |
| Periodic jerks | Clutch cable wear, clutch replacement |
| Vibration, beating when shifting to higher gears | The flywheel is bent, the gripper teeth are worn out. Replacing the flywheel and related consumables |
| Noise, creaking, grinding noise when activated | Damper spring wear, replacement with a new one, drive lubrication |
| Pedal free play is increased, exceeding 2 -3 mm | Tensioning the cable, replacing with a new one |
| You can hear the smell of burnt friction linings | Dismantling the clutch block, replacing worn elements |
| Increased fuel consumption | Flywheel worn, teeth damaged |
| Reduced acceleration dynamics | Replacing clutches |
How do I replace the clutch assembly or its components?
Many are also interested in the question of how the clutch is replaced. Next, we will consider the features of replacing a disc or other elements in the clutch units of Lada Granta, Prior and Kalin. Choosing a clutch is not difficult, since the market is represented by many offers. This aspect is influenced not only by individual preference, but also by the price factor.
The disc replacement process is identical, regardless of the modification of the designated VAZ models, including the Lada Granta. Having decided on the choice of element, we proceed to the direct replacement procedure.
- The initial action will be to dismantle the LADA Granta transmission unit.
- If you plan to reinstall the pressure plate (basket), you will need to first mark the location of the flywheel and housing. This manipulation allows you to save balancing and install the disk in a position identical to the element previously located here.
- Next, we mount a special bushing (mandrel) into the central hole of the pressure element. If such a mandrel is not observed, then it is possible to dismantle the assembly without it, but you will need to hold the driven disk during removal in order to prevent it from falling out.
- To eliminate the risk of the flywheel turning, we arm ourselves with a locking component (screwdriver or mounting blade).
- We unscrew the 6 bolts that hold the basket on the flywheel. The action should be characterized by uniformity and without completely removing first one screw, then the second, etc.
- Now we remove the casing together with the driven disk.
- Having detected the presence of damage on the surface of the assembly elements, the next step is a complete replacement of the clutch.
- We focus special attention on the degree of wear of the friction linings on the disk in LADA Granta. When it is discovered that they are oiled or the rivets are deepening, we urgently replace such an element. We check the rigidity of the damper springs. If they are found to be damaged, the disk must also be recycled. We inspect the disc for runout. If its value exceeds 1 mm, then this fact means the part is unsuitable for use.
- We inspect the pressure element and the flywheel, especially the plane of their contact. Areas with scuff marks, signs of overheating and wear are strictly unacceptable.
- We study in detail the condition of the disc spring, on the surface of which traces of the indicated defects are also unacceptable. The contact points of the petals of this part to the bearing device (“release”), which carries out the process of disengaging the clutch of the disc with the flywheel, must be in a single plane. No defects are appropriate in this case, and the discrepancy should not exceed 0.8 mm. If this parameter is not maintained, then a complete replacement of the clutch is necessary.
- Don't forget to inspect the spring support rings. It also excludes the presence of any defects.
- When, based on the completed set of testing manipulations, the fact of the need to replace certain elements of the clutch assembly or the entire assembly structure has been identified, then before starting work it will be necessary to monitor the characteristics of the movement of the driven disk along the corresponding section of the transmission unit shaft. If, during movement, the fact of jamming, jamming, or other aspects that do not allow free movement of the disk emerges, then these negative factors must be eliminated without fail. When achieving such a result is not possible, you should resort to replacing the entire list of defective parts.
- When carrying out the installation procedure, it is imperative to take into account the issue related to the correct installation of the driven disk in relation to the pressure component of the basket.
- First, we center the disk, using the mandrel we previously designated for these purposes. This will require careful consideration to ensure the element is positioned correctly in relation to the flywheel.
- Now we fix the basket directly to the flywheel using the bolts indicated here. We proceed by analogy with the dismantling procedure in terms of ensuring reliable retention of the flywheel from the risk of turning.
- Do not forget about the correct tightening of the basket fixing bolts. The procedure involves an algorithm of actions with uniform screwing of each of the fasteners. It is impossible to fully tighten one particular bolt, since such an action may cause the basket to skew, thereby causing incorrect operation and uneven wear of the clutch elements.
- The next step involves removing the previously installed mandrel from the corresponding recess in the center of the flywheel.
- After this, you can attach the transmission unit to the engine block.
- Now we mount the lower end of such a part as the clutch cable to the corresponding bracket on the gearbox housing, after which we carry out the previously indicated adjustment. Do not forget to install the compensation device in its original position, which will allow you to return the clutch cable to its original position. This procedure is necessary so that the compensation device, shifted to its lowest position, can signal to the owner that the disc is worn out. Replacement of the clutch cable in the LADA Granta has been completed.
Tips, tricks and useful repair videos
1. Follow general recommendations for transmission operation to increase service life.2. Service life is 80-100 thousand pedal cycles, do not press or hold the clutch unnecessarily.3. Before installation, generously lubricate the new VP.4. Removing a manual transmission is a time-consuming operation (2 hours), so it is recommended to immediately troubleshoot the disk, fork, flywheel, and also replace the cable if necessary. 5. Do not purchase spare parts at the car market or other dubious retail outlets.6. Watch useful videos on repairing, replacing clutches and more!
1. Clutch Lada Granta and its possible malfunctions
2. Adjusting and replacing the clutch cable on a Lada Granta
3. Operations for adjusting the clutch cable Lada Granta
4. How to eliminate squeaks and clicks in the Granta clutch pedal
Lada Granta clutch and its possible malfunctions
The car has a clutch from the Lada Kalina model. The clutch is a flywheel on which a basket is attached. The basket constantly presses the clutch disc, and it is due to this that torque is transmitted to the gearbox from the engine. When you press the clutch pedal, a metal cable connected to the clutch fork is stretched. The petals of the basket are wrung out and stop pressing the disk towards the flywheel, while no torque is transmitted from the engine.
Here is a drawing for reference only, with the design of the Lada Granta clutch.
Clutch and its drive: 1 - metal clutch drive cable; 2 — cable sheath; 3 — lower tip of the cable sheath; 4 — protective cover; 5 - leash; b - fork lever; 7 — bearing guide sleeve; 8 — clutch release bearing; 9 — clutch casing; 10 — pressure spring; 11 — pressure (drive) clutch disc; 12 - flywheel; 13 — friction linings of the driven disk; 14 — driven disk; 15 — damper spring; 16 — torsional vibration damper; 17 — driven disk hub; 18 — spring; 19 — toothed cable tip; 20 — housing of the automatic cable length adjustment mechanism; 21 — spacer sleeve; 22 — cable sheath bracket; 23 — clutch housing; 24— gearbox input shaft
The clutch does not need adjustment throughout its entire service life.
Clutch malfunctions of Lada Granta
The table below shows possible clutch malfunctions of a Lada Granta car and methods for eliminating them. For more detailed information about the operations carried out to repair the machine’s clutch, see the individual articles in the category.
Adjusting and replacing the clutch cable on a Lada Granta
On a Lada Granta car, the clutch is disengaged and engaged by changing the position of the clutch paddles. The petals are pressed out using the clutch bearing, which is moved by the clutch fork. The clutch fork, which is actually a lever on an axle, is driven by a metal clutch cable. This article provides information on replacing and adjusting the clutch cable on a car.
Clutch adjustment methods
There are two methods for adjusting the clutch. When regulating it in the first way, you must:
- pick up the tip, after which it is pulled forward to the maximum possible value;
- Use a caliper to measure the distance between the leash and the fork, normally it is 27 mm;
- If you find any problems, adjust the length of the cable by tightening the thread;
- Next, you should press the clutch three times and make sure that it functions normally.
If problems arise, take new measurements with a caliper (the distance from one extreme point to the other cannot exceed 146 mm). If this indicator is exceeded, a new cable must be installed.
The second adjustment method is an alternative, thanks to which you can adjust the clutch without a caliper. The beginning of alternative adjustment is no different from adjusting the clutch in the first way. When the leash is snug against the fork, you depress the clutch three times, then open the hood to make sure that the leash is pressed to the metal as before? One of the mandatory conditions for adjustment is the complete absence of movement of the fork or its minimal mobility (not exceeding 2 mm).
Each car owner can use both the first and second methods, since the automatic adjustment system still will not relieve him of the obligation to periodically carry out the work described above. Remember - even with a properly functioning cable, you still need to open the hood of your car at least from time to time.
Don’t forget one more recommendation from experienced car owners: to make adjustments, don’t wait for obvious problems to appear in the clutch. It is best to carry it out regularly (once every 10,000 km), because adjustment will help you protect yourself from clutch problems. And when carrying out this procedure again, do not forget to also evaluate the condition of the cable. If cracks or thinning are found on it, it is recommended to replace the part immediately.
Sources
- https://FB.ru/article/465967/stseplenie-ladyi-granta-obzor-vozmojnyie-neispravnosti-i-otzyivyi
- https://evrasia-today.ru/skolko-hodit-stseplenie-na-grante/
- https://vaz-remont.ru/kak-zamenit-vyzhimnoj-podshipnik-na-lada-granta-svoimi-silami/
- https://Vaz-Lada-Granta.com/dvigatel-korobka/zamenit-tros-stsepleniya.html
- https://cartore.ru/153-kogda-menyat-sceplenie-srok-sluzhby-i-kak-proverit.html
- https://new-granta.ru/sceplenie/
- https://remont-avtovaz.ru/instrukciya-po-zamene-scepleniya-na-lade-grante/
- https://www.spike.su/index.php/%D0%92%D1%8B%D0%B6%D0%B8%D0%BC%D0%BD%D0%BE%D0%B9-%D0% BF%D0%BE%D0%B4%D1%88%D0%B8%D0%BF%D0%BD%D0%B8%D0%BA-%D0%9B%D0%B0%D0%B4%D0%B0 -%D0%93%D1%80%D0%B0%D0%BD%D1%82%D0%B0.html
Manual transmission diagnostics and repair services
The car transmission needs professional diagnostics: our auto center is equipped with the most modern equipment to detect and fix any problems. Computer testing makes it possible to accurately localize faults and determine ways to eliminate them. The employee will determine the cause of the breakdown and list the spare parts needed to restore the operation of the gearbox.
Gearbox repair is carried out in several stages:
- Diagnostics and removal from the car. After this, a complete disassembly and troubleshooting is carried out: a specialist determines the degree of damage to the parts and compiles a list of components that will have to be replaced. The owner can be present during disassembly and troubleshooting: the technician will tell you in detail about the identified damage and the cost of eliminating it.
- Installation of new components to replace worn ones. The employee will list the parts that urgently need replacement, and which it is desirable to replace in the near future.
- Assembling a manual transmission after repair and installing it on a car. After this, testing and running-in are carried out: the specialist will make sure that there are no more problems with gear shifting.
- Manual transmission repairs are completed by issuing a warranty card valid for up to 2 years. The service center bears full responsibility for the results of the employees’ work; the guarantee gives the right to eliminate repeated problems free of charge.
Replacing a manual transmission
A complete gearbox replacement is one of the most difficult types of car repair: this operation requires special equipment and tools, as well as the experience of specialists. It is necessary to change the gearbox in case of serious damage, when it is impossible to limit yourself to reinstalling only one part. To solve the problem at minimal cost, use the services of our service center specialists: you have dozens of completed orders on your account.
Replacing the gearbox is carried out with a careful selection of suitable spare parts: our technicians will install high-quality parts and carry out all the necessary settings. In many situations, a complete replacement is cheaper than a major overhaul; a specialist will suggest the most economical solution.
In order for the gearbox to last longer, it is necessary to carry out timely maintenance: this includes a professional inspection, replacing the transmission fluid, and eliminating minor problems. Replacing a manual transmission most often becomes the result of untimely and unprofessional maintenance: if the driver does not follow the manufacturer’s recommendations, the parts wear out much faster. Our employees will solve the problem in the shortest possible time. and troubleshooting will require very little cost.
Why should you contact us?
The Premium Color workshop specializes specifically in transmission repair: our auto center is equipped with all the necessary equipment to identify and eliminate problems with manual and automatic transmissions. It is beneficial to use our services for several reasons:
- Favorable prices for the installation of components, as well as for complete replacement of the gearbox. Fix any problems without extra costs, the technician will choose the most economical repair option.
- Highly qualified personnel. Our service center employs only experienced specialists who are well versed in typical malfunctions of domestic automotive products.
- Minimum lead times for orders. In order not to waste time waiting, you can call in advance and agree on a repair time with the technician. We are always ready to help you: call today and choose a convenient day.
Do not delay until later contacting a service center and troubleshooting transmission problems. Problems with gear shifting impair vehicle handling and can lead to accidents on the road. To avoid accidents and breakdowns with expensive repairs, call us and arrange a time to fix the problem. Check out our auto repair shop price list to make sure we offer affordable repairs.
Sources
- https://www.autosecret.net/lada-granta-vaz2190/transmissija-lada-granta/1356-snjatie-korobki-perekljuchenija-peredach
- https://avtozam.com/vaz/lada-granta/zamena-masla-v-korobke/
- https://remont-korobok-peredah.ru/uslugi/remont-korobki-peredach-lada-kalina-lada-granta/