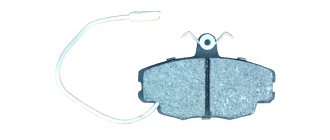
Front ventilated discs VAZ 2114, VAZ 2115, VAZ 2113, Lada Samara 2
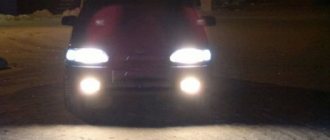
With frequent and intense braking from speeds above 100 km/h, the brakes may overheat, accompanied by an unpleasant effect: the brake pedal “failed”! This is most often due to the boiling of the brake fluid, which heats up when the pads rub against the discs. Indeed, the temperature of brake parts during braking can reach 600 °C, which can sometimes be checked visually: in the dark, the discs can emit a dark red glow. And if the liquid has not been changed for a long time and has become “saturated” with water over its long service life.
Tuning enthusiasts can protect themselves from this by installing ventilated front brake discs from the VAZ-2110 (catalog number - 2110-3501017). Experts note that the ventilated brakes of the VAZ-2110 have approximately twice the cooling ability of the VAZ-2108. A good reason for tuning, moreover, using available parts and at a low price. No modifications to the chassis are required. But some parts of the brake mechanisms will be needed.
Please note that the design of the new VAZ 2113 shoe guide (unlike the part to be replaced, it is a closed loop) allows it to be made more rigid.
Brake wheel cylinders and pads will not require replacement.
For installation on our car, we took ventilated brake discs with additional perforations for better cooling from the well-known company Zimmermann (Germany).
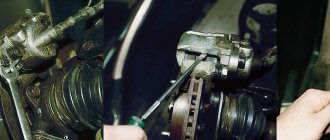
Caliper 2108-3501017 (pictured on the right) will have to be replaced with a caliper 2110-3501017 (pictured on the left) designed for increased disk thickness.
Instead of the pad guide 2108-3501155 (pictured below), you will need part 2110-3501155 (pictured above)
We carry out the work on an overpass or a flat area with a hard surface.
We hang and remove the front wheel.
Using a chisel, bend the edge of the locking plate of the lower bolt securing the brake cylinder of fret 2115 to the guide pin.
Holding the guide pin with an open-end wrench “17”, use a wrench “13” to unscrew the lower bolt.
Unscrew the top bolt in the same way.
Remove the brake cylinder assembly with the caliper and remove the brake pads from the guide.
Using a screwdriver, pry up the protective cover and remove the guide pin.
Similarly, remove the second finger.
We install the caliper on the guide of the VAZ 2114 pads...
...and, holding the caliper with a mounting blade, use a 10-point hexagon to unscrew the two screws securing the brake cylinder to the caliper.
We remove the caliper and, without disconnecting the brake hose of the VAZ 2115, tie the cylinder to the guide spring strut.
Using a 17mm wrench, unscrew the two bolts securing the shoe guide to the steering knuckle.
Remove the pad guide.
Use a 12mm wrench to unscrew the guide pins...
...and remove the standard brake disc of Lada 2113.
Installing a ventilated brake disc...
...and tighten the guide pins.
We attach the brake cylinder to the new (wider) caliper with screws.
Holding the caliper with a mounting blade, tighten the screws (tightening torque 115–150 Nm).
We move the caliper with the cylinder to the side.
We fill the pin holes in the new brake pad guide with graphite grease...
...and install the guide pins.
We install the pad guide and attach it with bolts to the steering knuckle (tightening torque 30–36 N.m).
We install the brake cylinder with the Lada 2114 caliper on the pad guide and tighten the bolt of the upper guide pin.
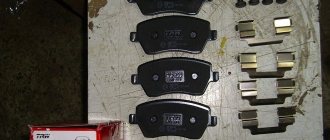
We install brake pads.
We tighten the bolt of the lower guide pin and tighten both bolts (tightening torque 31–38 N.m).
Use a chisel to bend the edges of the bolt locking plates.
This is what a unit assembled from new parts looks like.
Examination of brake discs for VAZ-2110. Disco for "ten"
Approximate price – 1240 rubles. “Tolyatti”, fortunately, did not disgrace itself - only deviations in the beating of the working surface can be called a fly in the ointment, but the balancing is the most accurate. The “water procedures” of the discs also went well and were effective.
I’m leaving the entrance, and in the parking lot my neighbor is warming up his car. And straight to the point: “I changed the brake discs over the weekend - installed ventilated ones!” - boasts. - “Which ones?” -“Ventilated! Previously they were standard, but now they have holes and grooves. Here!"
Approximate price – 1600 rubles. “German” took an intermediate position between good and bad... Before the tests - no complaints, but after the heated disk was lowered into water, impressive cracks appeared on the metal, and the parallelism norm turned out to be
The neighbor is mistaken, of course. On front-wheel drive VAZs, ventilated discs are installed initially on the conveyor. After all, the speeds, and therefore the loads on the braking system of modern cars, have increased, and non-ventilated brake discs can no longer cope with the increased temperature of the rubbing surfaces. Here come the brake discs, cast with voids and stiffening ribs that improve cooling. But on standard VAZ parts there are no perforations or grooves - these are, so to speak, additional design features that allow the disks to withstand even greater temperature loads. Like, for example, sports cars.
Since the VAZ 2110 has long become a sports car for many of our compatriots, perforated wheels for these cars also shine with polished metal on the shelves of auto parts stores.
Approximate price – 1450 rubles. Cons: initially the norm for static imbalance was exceeded three times. After cooling with water, the parallelism and runout standards were exceeded by 2.5 and two times, respectively. Cracks have formed near the perforations
Be an expert! We bought a set of LGR perforated wheels and, of course, couldn’t resist comparing them with the standard ones manufactured in Togliatti, and also, to complete the picture, with imported German ones from Lucas. The tests were carried out, as expected, at NAMI. In addition to the usual parameters - geometric dimensions, static imbalance and hardness of the working surfaces, it was decided to determine the tendency to warp when a heated disk is cooled with water. It happens that in rainy weather, after prolonged braking, willy-nilly you have to swim across a deep puddle. After such a “Camel Trophy”, the steering wheel often shakes when braking - the discs swerved... So, when cooling with water, cracks appeared on the Lucas and LGR discs. The Togliatti fighter did not give up!
As a result of the examination, it turned out that the Togliatti brake disc has deviations in the runout of the working surface, but, oddly enough, the best balancing. The worst for balancing is the perforated disc, which, according to experts, is most likely due to careless drilling of the perforations.
The wear resistance of all types of discs is approximately the same, as well as the wear resistance of the pads themselves when working with domestic and imported discs. But on a perforated disc, pad wear is significantly lower.
The braking efficiency (braking distance) of the domestic disc is slightly better than that of the others, but the perforated ones have an advantage when working in high-temperature zones. So, on the 25th braking, the temperature for non-perforated discs rose to 350–360°C, for perforated discs – to 280°C.
In the end, everything is like with people: each brake disc has its own advantages and disadvantages. But let’s answer the main question of the examination: is it worth installing perforated disks on the “ten”? Experts believe that perforation in the inherent range of temperatures, pressures and speeds of the VAZ 2110 not only does not provide significant advantages, but also worsens a number of characteristics, while increasing the cost of the product. Is it worth bragging?
Signs and causes of the problem
You can feel that the brake discs are already at the limit of their professional suitability by the beating of the pedal. She will, as they say, be naughty. This is easy to determine at high speeds when braking.
Don't think that "tired" disks will be able to work for some time. Such frivolity often leads to a hospital bed. And that's the best case scenario. We don’t want to scare anyone, but brakes are still an incredibly important safety system.
There may be several reasons why the pedal does not behave naturally.
- The brake disc is deformed. This can happen due to temperature changes, sudden braking and normal wear and tear. If only one disk is damaged, the second one is replaced at the same time as the first. This is a rule that should be followed always and everywhere.
- Broken front pads. It is impossible to restore their functionality, therefore they must be replaced.
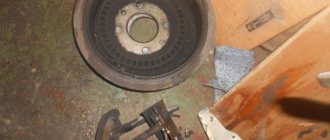
- The rear drums have failed. The VAZ 2114 has drums at the rear, although some install disc brakes. Think for yourself how justified such a decision is.
Absolutely do not do this!
Some home-grown “Kulibins”, trying to save money on buying new brake discs, perform sometimes mind-boggling procedures in order to compensate for the minimum thickness of the brake discs.
For example, two brake pads are installed. To prevent the brake cylinder pistons from falling out. This ultimately leads to the fact that at speed the brake pads simply fly off to... nowhere. At the same time, the path of the car is known - into a ditch, and it’s good if there are no casualties.
Replacing worn brake discs at the wrong time can also lead to failure of the pistons of the working brake cylinders, CV joints, ball joints, etc. That is, by trying to save money and procrastinate, you can then lose more money. Remember the stingy...
Monitor the condition and thickness of the brake discs, and take measures to eliminate any defects noticed - there is too much at stake to neglect this.
Good luck determining the thickness of your brake rotors and replacing them.
Checking for wear
This table will allow you to figure out below what wear marks the operation of brake system elements should not be allowed.
| Unit | Maximum permissible dimensions |
| Brake disc thickness | Not less than 10.8 millimeters |
| Axial runout on surface | Not less than 0.15 millimeters |
| Overlay on the block | Not less than 1.5 millimeters |
| Drum brake diameter | Not less than 201.5 millimeters |
It is not possible to determine the dimensions visually, so the car will have to be jacked up, the brakes cleaned, the wheels removed and the appropriate manipulations performed to determine the dimensions using a caliper.
When to Replace Discs
It is necessary to replace the front brake discs on a VAZ 2114 if the following symptoms occur:
- The thickness turned out to be less than the permissible level. The discs were simply erased;
- The linings are oily;
- A gap has formed between the base and the overlay;
- When braking there is a squeaking noise;
- There is beating in the brake pedal;
- As for the rear drums, they sometimes stick to the pads, which leads to serious repair work and financial losses;
- The brake cylinders are stuck. This can be temporarily fixed by treating them with WD40. The measure is temporary and will allow you to get to the garage or the nearest service station.
Features of replacing standard disks with ventilated ones
If you decide to install ventilated discs, you should know that all their modifications are wider than the standard ones. Therefore, in addition to them, you will need to buy appropriate calipers, front pad guides, as well as protective covers. Purchasing all these elements separately is quite problematic. It's better to buy a set. The standard kit for two wheels includes: discs, calipers, pad guides and faceplates (casings). The price for such a set starts from 9,000 rubles.
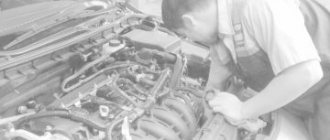
The algorithm for replacing standard disks with ventilated ones is a little more complicated and will take 5-6 hours. Here you need to disconnect the brake hoses and remove the brake cylinders. And after the work is completed, you will also have to bleed the brakes.
Replacement
Today, many people prefer to install ventilated brake discs on the VAZ 2114. This is a largely justified decision, since a special system allows them to be additionally cooled by air flows. Relevant for fans of fast driving and sharp braking. These systems are effective and durable, so it won’t hurt to spend money on them.
The brake discs on each wheel are removed in the same way. Therefore, follow the instructions.
- Place the car on as level a surface as possible, turn on the handbrake, and place supports under the wheels. This way you minimize the risk of the machine moving and causing injury to you.
- Raise one of the wheels using a jack and begin removing it. We think you know perfectly well how wheels are removed on a VAZ 2114.
- Next, loosen the brake cylinder a little.
- Using a screwdriver, pry the boot off the upper guide of the brake pad.
- Now you need to remove the caliper and pads. To remove the caliper, use a 17 mm wrench. Before unscrewing the caliper itself, be sure to remove the brake hose fastener.
- Removal of the pads is carried out in a special way. We have prepared a separate special material for you about this.
- To prevent brake fluid from leaking out of the system, place a container under the hose. Anything that leaks out can be poured back in after replacing the disks.
- Proceed with a thorough cleaning of the work site. You will have to clean off all traces of dirt and remove rust on the brake surfaces. Just don't pick anything there. Use special highly effective washes.
- When using chemicals, be sure to think about your own protection. Wear gloves and avoid contact with skin and eyes.
- Treat all brake system components with the almighty WD40. Take special care under the hub bearings.
- The wheel pins are removed using a 8mm wrench. Just make sure that during this operation the disk does not move from its current position.
- Before removing the brake disc, lightly tap the surface of the unit. Just don't ram on the work surface.
- Remove the disc.
- Insert the new unit and proceed in the reverse order of dismantling.
- All elements must be thoroughly lubricated beforehand, especially the hubs. Treat the working surface of the new brake disc with a special product. This will degrease the unit.
- If the brake cylinders were replaced at the same time, bleeding the brake pedal will become a mandatory measure, without which it is strictly not recommended to operate the car.
- In a similar way, change the second front brake disc on your VAZ 2114.
This procedure has its own difficulties. Therefore, get ready for the fact that you, as a beginner, will have to spend not 5, but 6-8 hours.
Tuning VAZ 2114 with your own hands (video)
Tuning is a visual or technical improvement of a car, by replacing parts with new, better ones, or upgrading old ones.
Almost every car owner dreams of improving it, first of all, for personal comfort, and for overall aesthetic beauty.
But not everyone has the funds for new, tuned parts, expensive workshops, etc. Therefore, many car owners do this work with their own hands.
Salon
Tuning a VAZ 2114 with your own hands is easiest to do inside the car. The first thing that lends itself easily to this procedure is the steering wheel. The standard steering wheel looks rather crude, and not everyone will like it. Therefore, many car owners change it to another, universal steering wheel.
Tuning the dashboard and interior
The next thing that can be installed on the VAZ 2114 as tuning is an on-board computer. This thing is quite expensive, but it will not only add modernity to your iron friend, but will also help you in some road situations.
A very common option for tuning is installing speakers. Usually, four pieces are installed: two on the door, and two on the rear shelf. Together with a good radio, the quality of the acoustics will be at a fairly high level.
A more painstaking interior tuning is replacing the dashboard. Today, there are special panels on sale that are suitable for the standard mounting of the VAZ 2114. The appearance, compared to the factory one, has more modern outlines, as well as smooth transitions and bends. For comparison, these types of dashboards are installed on the VAZ 2110 “Bogdan”, produced in 2012 – 2014.
Well, the last thing that can be changed inside the car is the trim. It is advisable to buy such a thing in a set so that all the parts fit together. The list of trim elements includes: door cards, seat covers, plastic covers for supporting pillars, headliner, mats, and floor covering. If all the elements are completely replaced, you simply won’t recognize your VAZ 2114.
Visual tuning
Visual tuning includes external changes to the car. For example, replacing bumpers, thresholds, mirrors, etc. The entire replacement process can easily be done with your own hands. All tuned parts have a standard fastening, and in order to install them, you just need to remove the old ones.
Nowadays, film is considered a very fashionable visual enhancement. It can have different coatings: carbon or mirror, as well as absolutely any color. The film replaces the main color of the car. To cover a car with such an element, there are special workshops, but this can also be done at home
Chip tuning
For many car owners, such a concept as: chip tuning can raise many questions: “what is it?”, “what is it done for?”, “what is the cost of such an improvement?” etc. Let's try to find the answer to all the above questions together.
Chip tuning was originally invented in order to improve the technical characteristics of a car without changing its performance. Today, this type of engine modification is very popular, especially among young people.
Since chip tuning mainly affects the electrical system of the car, installation work should be carried out very carefully and carefully. An incorrect sequence of connecting devices can cause malfunctions of some mechanisms, as well as breakdowns and additional costs.
On a VAZ 2114 car, the system is not always configured correctly, even though the car has just left the factory. Therefore, the chip not only improves settings, but also corrects basic errors. This process is somewhat reminiscent of flashing.
Before starting chip tuning, the car must be carefully prepared. This is done as follows:
- The fuel mixture in the carburetor must be such that the engine will perform best. This can be achieved by replacing the air filter;
- Since chip tuning, to some extent, makes the processes in the engine more active, it needs to be helped in this as much as possible. This is done by installing new fuel system filters. Then, gasoline will be cleaner and burn much better;
- Also, it wouldn’t hurt to change the oil and oil filter to improve its pressure.
After the preparation is completed, you can begin installing special devices. Remember that connecting them is a very precise and delicate thing. Any mistake can cause serious damage.
Therefore, if you do not have experience in working with electrical equipment, then it is better to entrust such work to specialists.
Is it financially profitable?
When the owner of the car imagines how much work he has to do, willy-nilly he begins to calculate whether it makes sense to change the brake discs himself, or whether it is easier to take the car to a service station.
Now we invite you to familiarize yourself with the cost of services of professional service centers for the repair and replacement of various components of the brake system.
| Service | average price |
| Remove and install brake drum | from 300 rubles |
| Remove and install rear brake disc | from 800 rubles |
| Remove and install front brake disc | from 1000 rubles (they change more often, hence the markup) |
| Replacing drum pads | from 800 rubles |
| Replacing disc pads | from 500 rubles |
From this it becomes obvious that from a financial point of view, replacing it yourself allows you to save a decent amount of money. Plus, do not forget that not all service stations really perform their duties efficiently. Well, it’s up to you to decide for yourself.
The cost of this repair at a car service
If you want to have your car serviced at a car service center, then in addition to the budget spent on purchasing new parts, you will also have to spend money on paying for the work of the technician. On average, technicians charge 1,000 rubles for replacing a brake disc, and 500 rubles for replacing brake pads.
This means that when a car is serviced, the cost of repairs increases by about a third. Of course, an experienced technician will be able to check all components of the brake system in the car and point out additional faults - this is definitely a plus of contacting a car service center.
When buying spare parts, you should definitely look at the reviews and check the quality of workmanship in the store. This will help detect a defect. After repairs, be sure to check that the brake system is working properly without immediately driving onto the roadway. The first presses on the pedal may be ineffective, and in any case, a little grinding in of the mechanism is required.
We change brake discs on a VAZ 2114 ourselves: check wear
Any part that is in constant use will wear out over time. The brake system is no exception. Since good brakes are one of the main conditions for safe driving, they must be checked and replaced in a timely manner with all responsibility.
From this article you will learn how to determine how worn out the brake discs are on a VAZ and how to replace them yourself. The technology for replacing pads will also be discussed and the cost of performing this work in a car service will be given.
Replacing brake discs is easy!
CHECKING BRAKE DISCS AND PADS FOR WEAR
In the VAZ 2114 brake system, the parts most susceptible to wear are the pads; as a rule, for 1 replacement of discs there are 2-3 replacements of pads. The rate at which they wear out is influenced by three factors:
- Friction lining material;
- Correct functioning of the brake system - if the brake cylinders are not working properly, or the discs are damaged, the pads will wear unevenly;
- Driving style - the more intensely the system elements are loaded, the faster they wear out.
WE CHANGE BRAKE DISCS (TD) AND PADS WITH YOUR OWN HANDS
Replacing brake discs on a VAZ 2114 is a fairly simple process that, if you have the necessary equipment and 2-3 hours of free time, you can easily do it yourself.
To replace the disks yourself, you will need the following tools:
- Jack;
- Screwdriver;
- Keys at 17, 8 and 13;
- Balloon key.
- Rubber hammer.
Rubber hammer in action
We replace discs in the following sequence:
- We place the fourteenth on a flat surface, preferably asphalt. We install wheel chocks under the wheels;
- If the car wheels have not been removed for a long time, it makes sense to treat all threaded connections with WD-40 and wait 10-15 minutes - this will greatly facilitate the removal process;
- We tear off the nuts securing the wheel from a dead point using a wheel wrench. Since this can cause the car to sway violently, this should be done before lifting the car on a jack;
- After the fastenings are loosened, install the jack in the place of the special stop and raise the car;
- We twist all the fixing nuts with a wheel wrench and remove the wheel;
- We remove the block; to do this, you need to unscrew the caliper that secures it. This is done with a 17 key. You must first remove the brake hose fasteners (with a 13 key) and drain the leaking fluid into a prepared container;
- Remove the brake cylinder. It is secured with two bolts that can be unscrewed with a 13mm wrench;
- Now we have free access to the disk. It is secured with two guide pins (pins), which we need to unscrew with an 8 key;
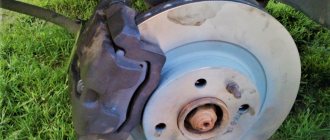
- After removing the clamps, use a rubber hammer to tap the back side of the disc so that it comes off the hub. To do this, you can use a regular hammer and a block of wood as a backing, but everything must be done extremely carefully;
- Once the dismantling is complete, the disk is installed. Installation of a new part is carried out according to the same algorithm as the removal of a VAZ brake disc, only in the reverse order. Before installation, the connection point with the hub must be lubricated with a special high-temperature lubricant; the so-called “copper” lubricant is well suited.
Often, along with replacing the discs, it is also necessary to replace the front brake pads on the VAZ 2114.
This is done as follows:
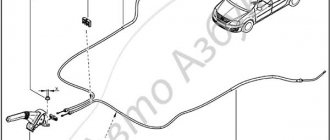
- After removing the wheel and cleaning the parts from dirt, remove the brake fluid supply hose from the bracket;
- Using a 17mm wrench, unscrew the upper caliper mounting bolt. To unscrew this bolt, you need to bend the counter curtain, which prevents the bolt from turning when driving; this can be done with a regular flat-head screwdriver;
- Similarly, loosen (no need to unscrew completely) the lower caliper mounting bolt;
- Move the bracket covering the brake pads up (it will be held on by the loosened bolt);
- We remove the worn out pads and install new ones in their place;
- We screw the caliper back, attach the fluid supply hose back to the bracket and install the wheel.
Knowing how to replace front brake discs and pads, you can complete all the work in 2-2.5 hours - there is nothing difficult about it. However, if you have never done this before, then it makes sense to contact a car service and carefully monitor how everything is done, and the next time you take on the work yourself.
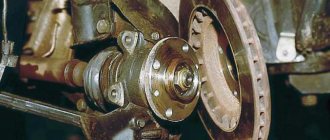
How to remove a brake disc
In order to replace a failed TD, you need to perform a series of actions sequentially.
- Press out the piston of the brake working cylinder.
- Disconnect the caliper. To do this, two mounting bolts are unscrewed from the inside of the hub.
- Without disconnecting the brake hoses, move the caliper, thereby freeing the disc. Release the brake pads and secure them with a clamp.
- Secure the caliper using the prepared wire.
- On some car models, the caliper frame interferes with disc removal. In these cases, you need to unscrew the frame fastening and remove it.
- Before removing the TD from the hub, you need to unscrew the stuck fastening bolt, having previously lubricated the mounting location with WD fluid or brake fluid, if it is not available. There may be one or two such bolts securing the disc to the hub. It depends on the car model.
- Once the mounting bolts have been removed, you can begin to remove the TD. Often, it is stuck to the surface of the hub. To facilitate its dismantling, you need to lightly tap it with a hammer to separate it from the wall of the adjacent part.
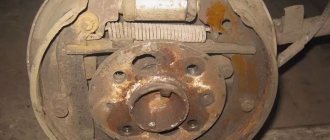
- After removing the old brake disc, be sure to remove rust, scale and dirt from the surface of the hub. If this is not done, then after installing a new spare part, the hub will run out more than the permissible value.
- Install a new disk in the free space. During its installation, a torque wrench is used to tighten the mounting bolts. Torque force - 100-120 Nm. If you overtighten the fasteners, this can lead to radial runout of the hub.
- Assembling the brake mechanism on a new disc is carried out in the reverse order.
- After the brake mechanism with the new disc is assembled, the runout of the hub and disc is checked. To do this, a special meter is installed with a needle at a distance of 5 mm from the surface of the new disk, which must be rotated. The runout should not exceed the value permitted for a specific vehicle model.
- In the same way, the brake disc on the opposite wheel is changed, and the rear brake discs are also replaced.
TD COST
The cost of brake discs on a VAZ 2114 depends on the manufacturer: standard Avto-VAZ units have proven themselves well, they are inexpensive, about 1 thousand rubles per piece, and at the same time they are durable and reliable - an excellent option for a quiet ride.
Owners of the fourteenth, preferring more aggressive driving, praise the ventilated front brake discs on the VAZ 2114 “MasterSport 14” and “BremboMax 14”, their prices are 2200 and 1600 rubles, respectively.
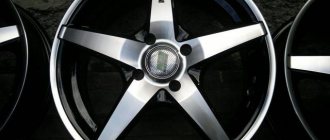
Disk parameters 2114
Bolt pattern (also known as disk drilling, also known as pitch circle diameter) is a value that shows the number of mounting holes in the disk, as well as the linear distance between them. It is indicated, respectively, by two numbers. The standard wheel bolt pattern for the VAZ 2114 is 4*98. This means that the disk has 4 mounting holes for bolts, and the distance between the centers of these holes is 98 mm.
It is worth noting that such drilling is standard not only for the 14th model, but also for all other cars produced by AvtoVAZ, with the exception of the Oka and Niva.
In addition to the bolt pattern, there are a number of other important parameters of the disk that can be useful when choosing non-original spare parts. These include: the width, which is designated as 5.0J, the offset of the disc, marked as ET45, and the diameter of the hub centering hole, equal to 58.5 mm. The mounting bolts have an M12 thread with a pitch of 1.25 mm.
Selection and replacement of wheel rims
Many car enthusiasts, especially those keen on tuning their cars, install wheels from various foreign cars instead of original wheels. This is due to the fact that the bolt pattern of the VAZ 2114, as already mentioned, is 4*98, and the wheel bolt pattern of the vast majority of serial foreign cars is 4*100.
This seemingly insignificant difference in the distances between the mounting holes is in fact extremely significant, because the tolerance in the manufacture of disks does not exceed 0.7 mm. As a result of this, a disk with center-to-center distances of 100 mm, even if desired, will not fit tightly on a hub with a distance between bolts of 98 mm.
Such a loose fit can lead to such unpleasant consequences as:
- disc beating while driving;
- spontaneous unwinding of fasteners;
- rapid wear of the wheel bearing.
But it is still possible to solve this problem, and there are three options. The first is to use bolts with offset heads, the second is to replace the bolts with studs, the third is to install a metal spacer between the disc and the hub. The first two options, although less expensive, are quite unreliable, since they do not provide the necessary fixation, and the studs, in addition, are not resistant to large torsional loads. That is why it is best to give preference to the last option.
However, in this case, several important points should be taken into account:
- The thickness of the spacers used (which can be purchased at car dealerships) must be at least 20 mm.
- It is advisable to replace all the disks at once so that there are no differences in their removal.
- If only one disk is being replaced, then it should be selected with the minimum possible offset in order to compensate for the thickness of the spacer and reduce the load on the hub.
When deciding to install spacers, you should remember that a large difference in the offset of the discs on different wheels can lead to a significant deterioration in the car's handling, especially at high speeds.
Replacement of ball joint VAZ 2109, 2114
Good day. This article will discuss how to understand that the ball joint on a VAZ 2109 - 2114 is faulty, and how to replace the ball joint on a VAZ 2109 - 2114.
Signs of a faulty ball joint VAZ 2114, 2109
If, while driving over bumps or small irregularities, you hear a knocking sound in the front suspension of a VAZ 2109, 2114, then this is a reason to start looking for a fault! There are two ways to check the ball joint of a VAZ 2109 - 2114 for a malfunction.
The first method does not require an inspection hole, but a jack is required. We hang the front wheel on a jack and sharply pull it toward and away from us. If the ball joint is faulty, it will make a sound and the wheel will have play.
If you have a garage with an inspection hole or overpass, then inspect the ball joint boots for damage. If the boot is torn, this is a sign of wear on the ball joint of the VAZ 2114 and it is better to replace such a ball joint even if it does not knock yet.
Place a crowbar or pry bar between the ball and lever. Place one end on the lever and the other on the bolt or ball housing and try to move them apart. For convenience, you can turn the steering wheel towards the wheel being tested.
If there is play, the ball must be replaced.
Many people wonder: can a ball joint fly out on a VAZ 2109? Answer: Yes! Maybe! Therefore, if there are signs of a malfunction of this part, do not delay repairs. Moreover, it is not difficult. Next, I will tell you how to replace the VAZ 2109 - 2114 ball joint with your own hands.
How to replace a ball joint on a VAZ 2109, 2114
To replace the ball joint of a VAZ 2109, 2114, place the car on a jack and remove the wheel. Now unscrew one nut securing the ball joint to the lever and two bolts securing the ball joint to the hub.
If you have a puller, place it as shown in the photo and remove the ball.
How to remove a ball joint without a puller on a VAZ 2109 - 2114
If there is no puller, you will have to remove the lever completely. To do this, unscrew the bolt securing the stabilizer bar (egg), the nut securing the “saber” to the lever and the bolt securing the lever to the body. We remove the lever, take a heavier hammer and knock out the ball.
There are situations when the bolts stick to the silent blocks or you are simply too lazy to remove the lever. In such cases, you can use a backup option, but it may not always work.
In this option, the ball should not be unscrewed from the hub. Unscrew only the nut securing the ball to the lever. Use a gas torch to heat the lever where the ball pin fits into it. It should be heated for about 3 minutes.
Next, just as in the method of checking the ball for malfunction, insert a crowbar between the ball and the lever and press on the crowbar.
The longer the crowbar, the easier it is to remove the ball this way - this is important!!!
You learned how to change ball joints on a VAZ 2109 - 2114. If you have any questions, write them in the comments and I will definitely answer you!
Types of rims
Having figured out what the bolt pattern of VAZ 2114 discs is and how to compensate for it when using discs with a different type of drilling, let’s now talk about the discs themselves.
Currently, you can find 3 main varieties of them on sale, namely:
- steel wheels;
- alloy wheels;
- forged wheels.
Steel wheels come as a standard factory option on all VAZ cars. They are characterized by low cost and, at the same time, good reliability and durability. In addition, in the event of an accident they are deformed without destruction, which in most cases allows them to be straightened and used again.
Cast wheels are made from aluminum alloys and due to this, as well as the overall complexity of their production, cost significantly more. At the same time, they are distinguished by a variety of shapes and options, due to which they are in high demand among those who like to tune their car (another important advantage is their low weight compared to stamped steel wheels).
True, they also have their disadvantages, the main one of which is their non-repairability. Due to its great hardness, in the event of an accident the cast disk does not collapse, but simply bursts, sometimes splitting into several parts. This is not only economically unprofitable, but also dangerous (for example, if a disc spontaneously breaks when driving on an uneven road).
Forged wheels combine all the advantages of steel and cast wheels, but without their disadvantages. They are made from aluminum alloys that undergo forging and pressing with further machine processing. This production scheme makes it possible to increase the strength of forged wheels up to 3.5 times compared to cast ones.
Concluding the conversation, it is worth saying once again that safety is a much more important thing than the attractive appearance of the car. That is why the installation of wheel rims should be approached extremely carefully and taking into account all the above recommendations.
Replacing the speaker system
Another way to significantly change the interior of a vehicle is to install new acoustics. Good sound in a car is the dream of many car owners. The standard acoustics in the VAZ are, to put it mildly, of low quality. Also, don’t forget about the radio that plays tracks.
It must also be of high quality, since otherwise installing expensive acoustics will not lead to improved sound. Replacing the speaker system should be carried out taking into account the information below:
1. In order for the sound in the car to be surround, you should install several additional speakers at once. At the same time, you can choose high-quality tweeters that do not have high power. It is better to install several low-power tweeters than one powerful one. When using a high-quality radio, the sound will be distributed across channels, creating a truly unusual effect.
2. It is best to install the acoustics at the time of reupholstering or insulating the interior. This is due to the fact that new tweeters will need seats. They can be made in doors and other finishing elements.
3. No acoustic system is complete without a subwoofer. It is responsible for the bass that tweeters do not reproduce. This acoustic element has quite large overall dimensions, which makes it difficult to choose a place to install it.
4. Do not forget about the correct placement of the wiring and its fixation.
Sidebar: Important: Complex speaker systems require the installation of an amplifier, which is also supplied with power. Therefore, as in the case of interior upholstery, the work of installing acoustics should be entrusted to professionals in the field of activity in question.